


|
Getting your Trinity Audio player ready...
|
Discover the best hikes near Boulder, CO with expert Timo Holmquist. Get trail recommendations, parking and gear tips, and more from his years of experience in the area.
Overview
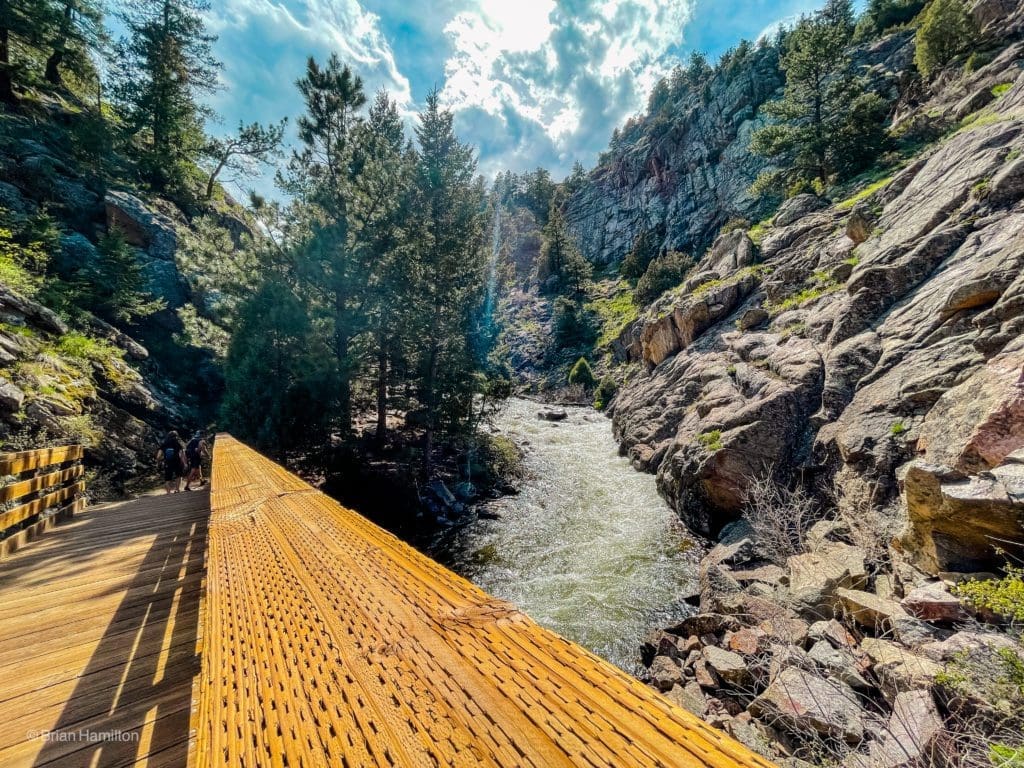
Nestled in the heart of Colorado, Boulder is a hiker’s dream destination. The city is situated at the junction where the Great Plains meet the majestic Rocky Mountains. From town, numerous hiking trails lead to breathtaking summits over 8,000 feet high. For those seeking a gentler hike, there are also paths that wind through peaceful meadows and ancient mesas on the eastern side of the city. The lush forests are home to a diverse array of wildlife, while mountain streams rush through stunning canyons and into picturesque farmlands. With its diverse landscapes and year-round access, Boulder is renowned as one of the top hiking spots in America.
The list below strives to highlight the best hiking options within an hour of Boulder, Colorado. There will be many trails that are not listed, and this is intentional. The hope is that armed with this resource, an active outdoor-oriented person would then continue their research and discover new and exciting trails tucked into the folds of the Front Range (there are hundreds). Think of this as an area introduction. What you conquer after visiting the options below is entirely up to you.
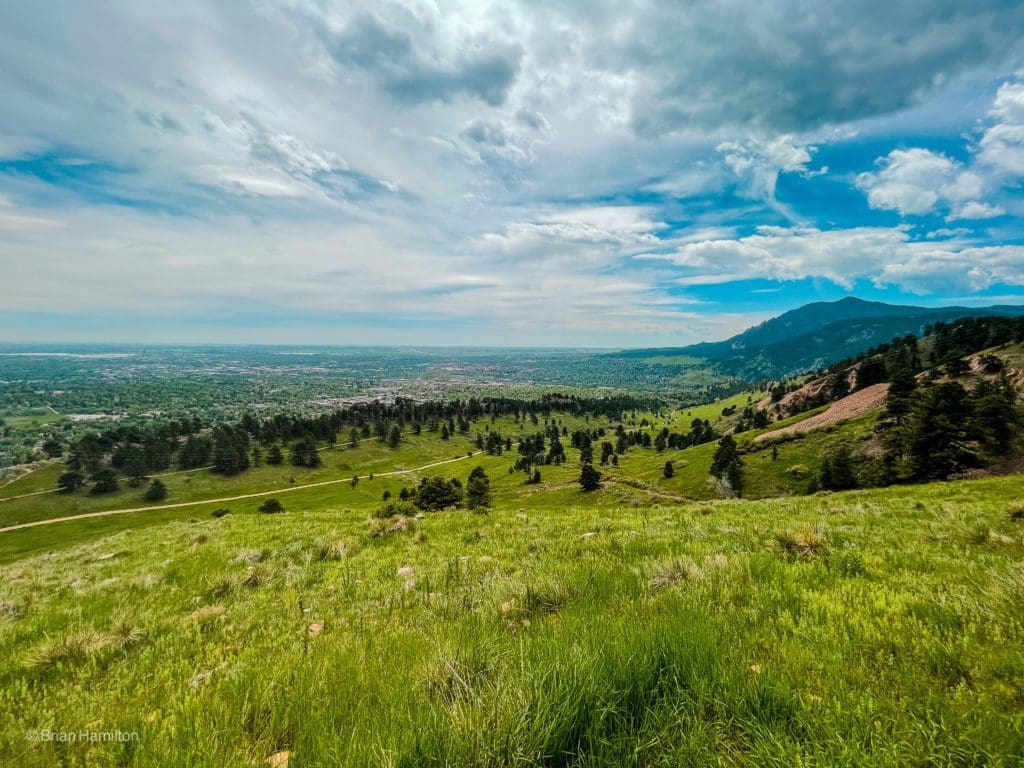
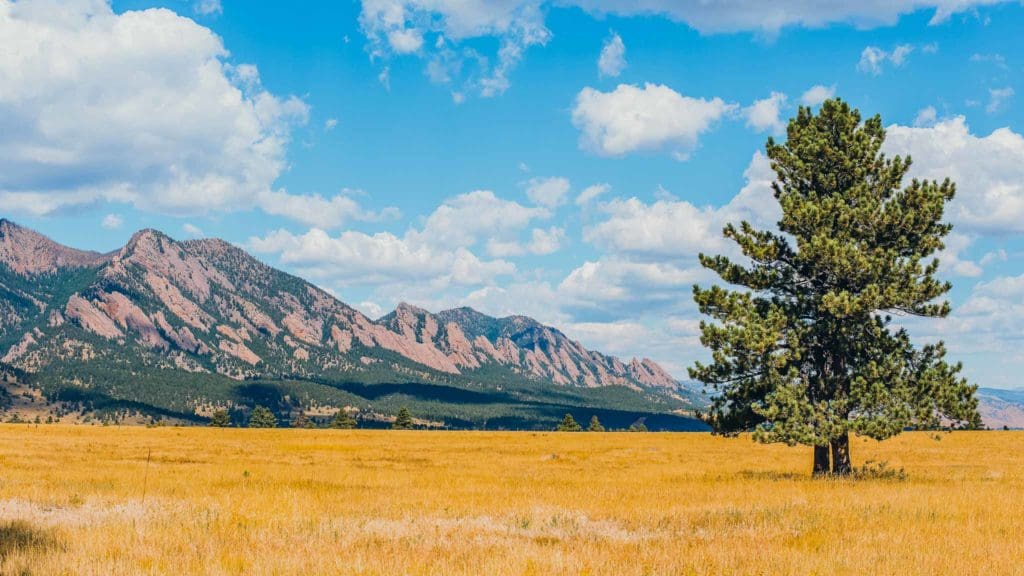
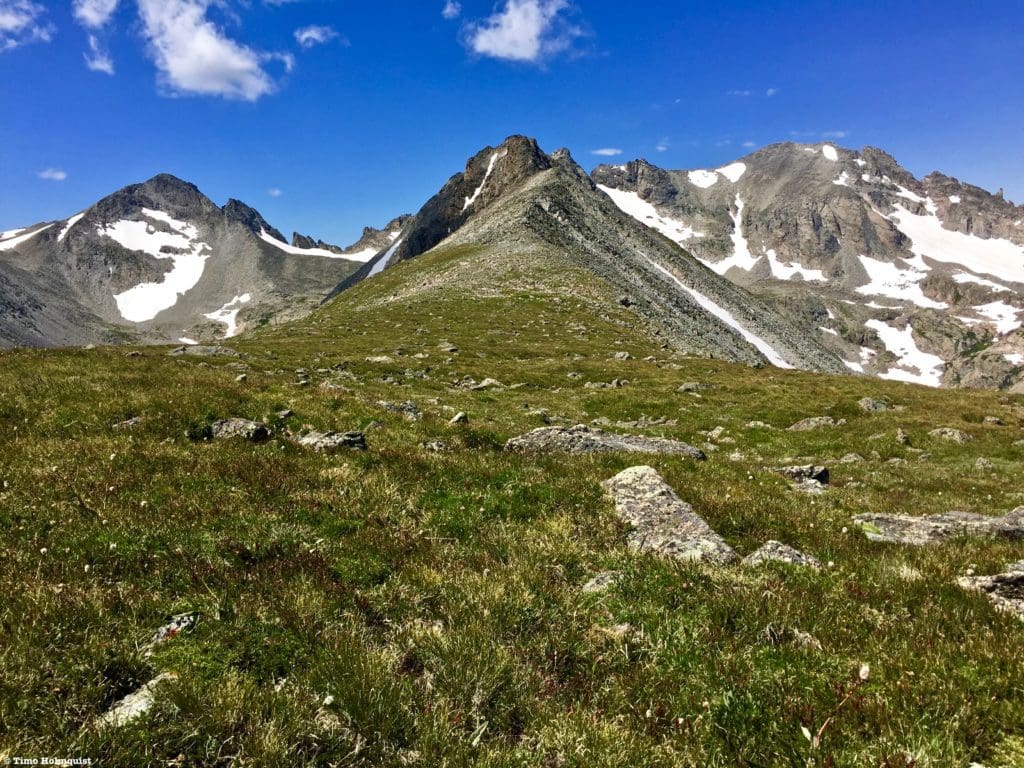
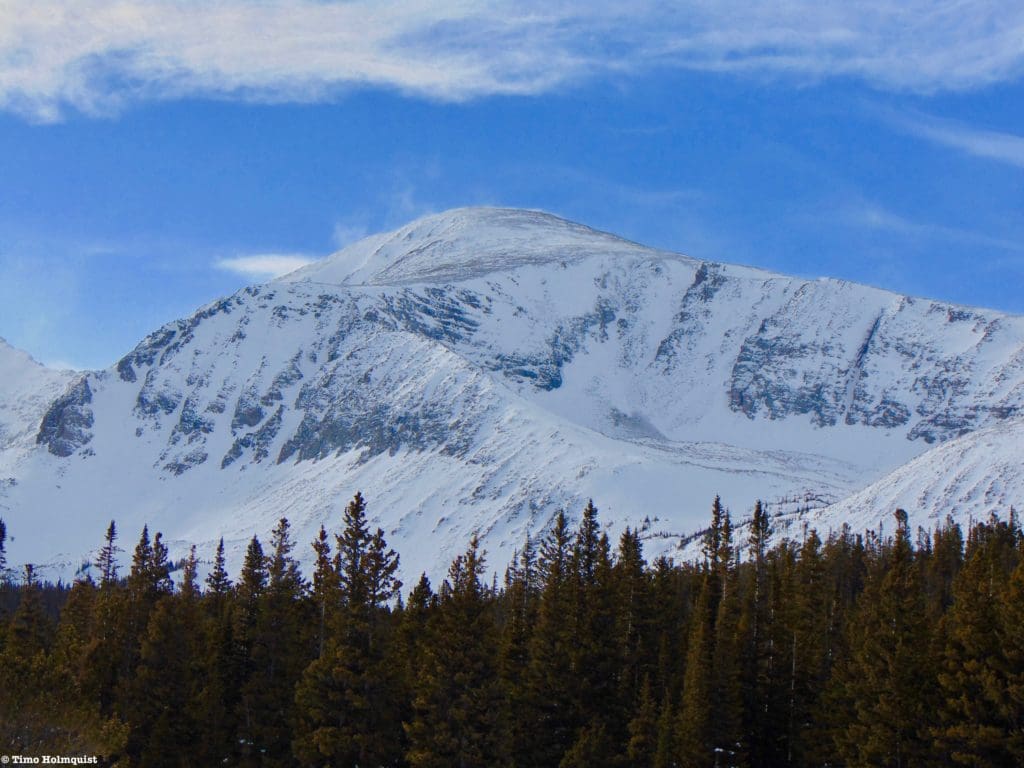
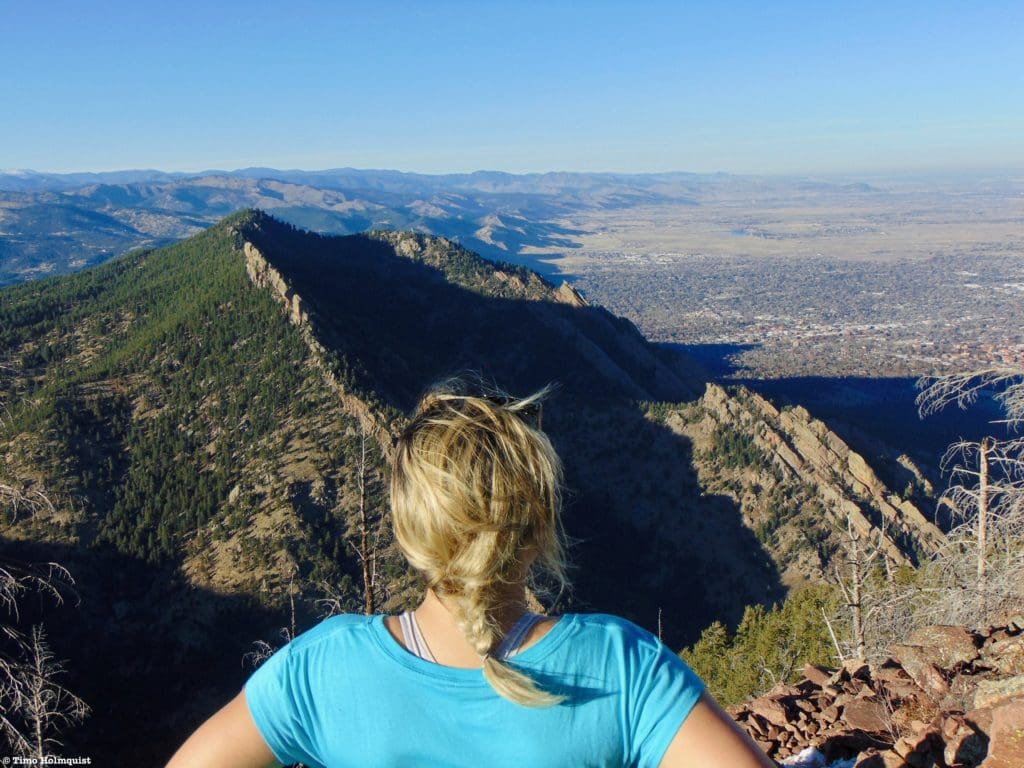
Boulder is nestled up against the foothills of the mighty Rocky Mountains.
Table of Contents:
Article Navigation: Click on any of the listed items in the table of contents below to jump to that section of the article. Similarly, clicking on any large, white section header will jump you back to the Table of Contents.
- Overview
- Criteria
- Field Notes and Tips
- Category 1: Boulder Foothills
- Flatirons Vista
- Royal Arch
- Mount Sanitas
- Walker Ranch
- Bear Peak
- Category 2: Eldora Access
- Diamond Lakes
- Arapahoe Pass/Lake Dorothy
- Category 3: Brainard Recreation Area
- Niwot Mt. & connecting ridges
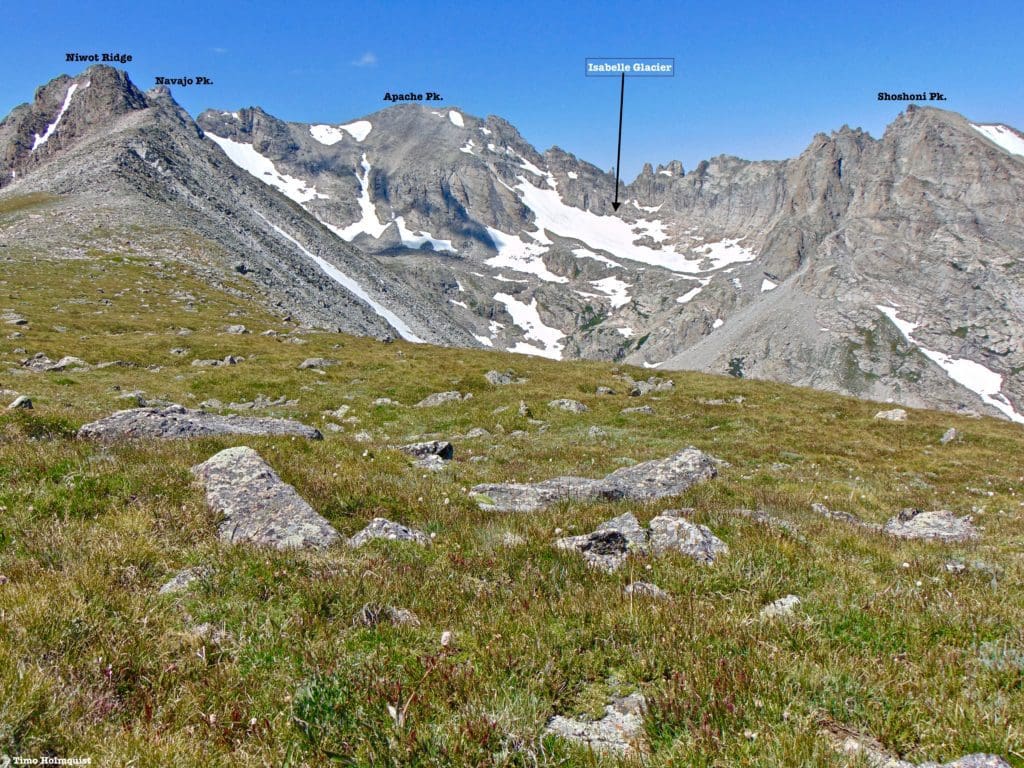
- Lake Isabelle/Isabelle Glacier
- Mount Audubon
- Bonus Challenges
- Five Peaks Challenge
- High Lonesome Loop
- Pawnee/Buchannan Pass Loop
- Final Thoughts
If you love the outdoors, Boulder, Colorado, is a place you want to be. The four-season mountain mecca has something for everyone. Despite its proximity to Denver, the city is completely separate, both physically and mentally. It is also, on average, one of the cities with the highest quality of life index in the lower 48, and the outdoor component is baked right into the city’s identity.
A lot of people decry the outdoor attitude because it can get (really) competitive, and the barriers to entry for outdoor sports are notoriously high. But if you find yourself motivated by beautiful scenery and don’t mind getting out to explore, there’s plenty of space to stretch your legs and soak in some truly spectacular mountain environments.
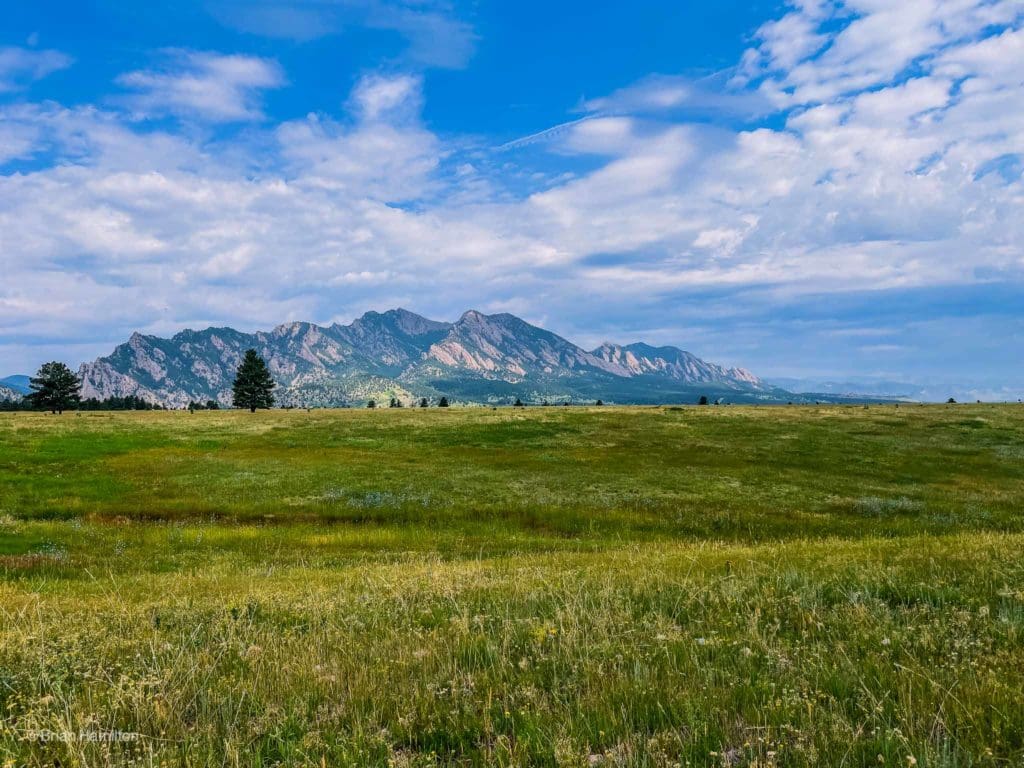
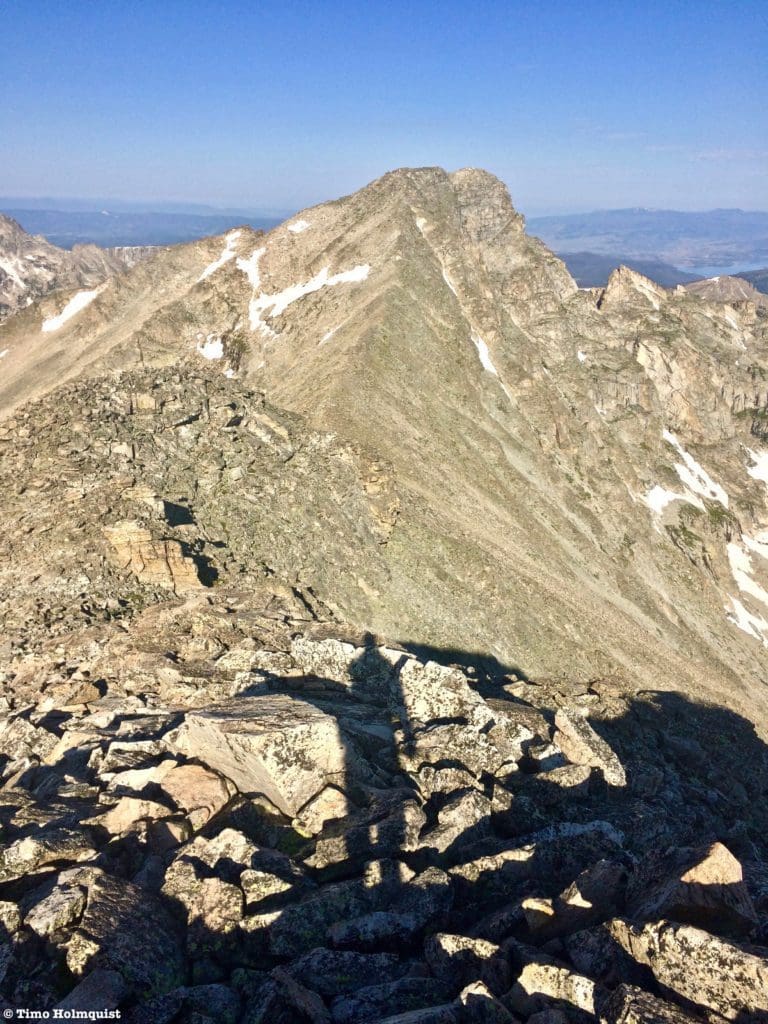
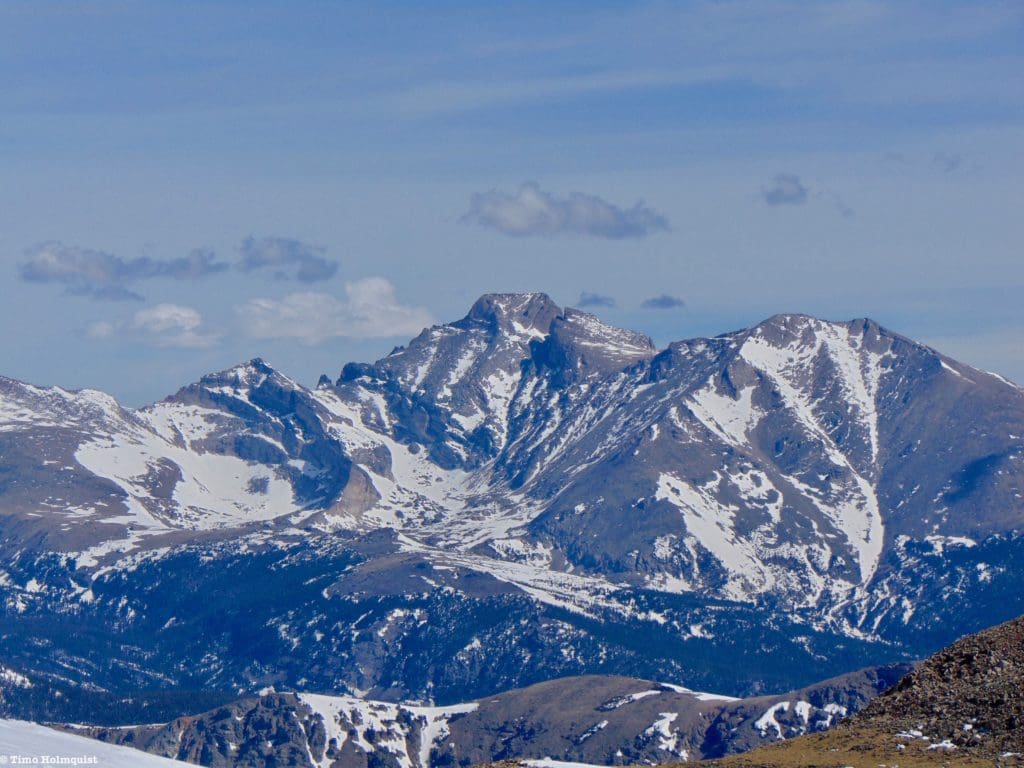
Wide spaces and great views await.
Criteria
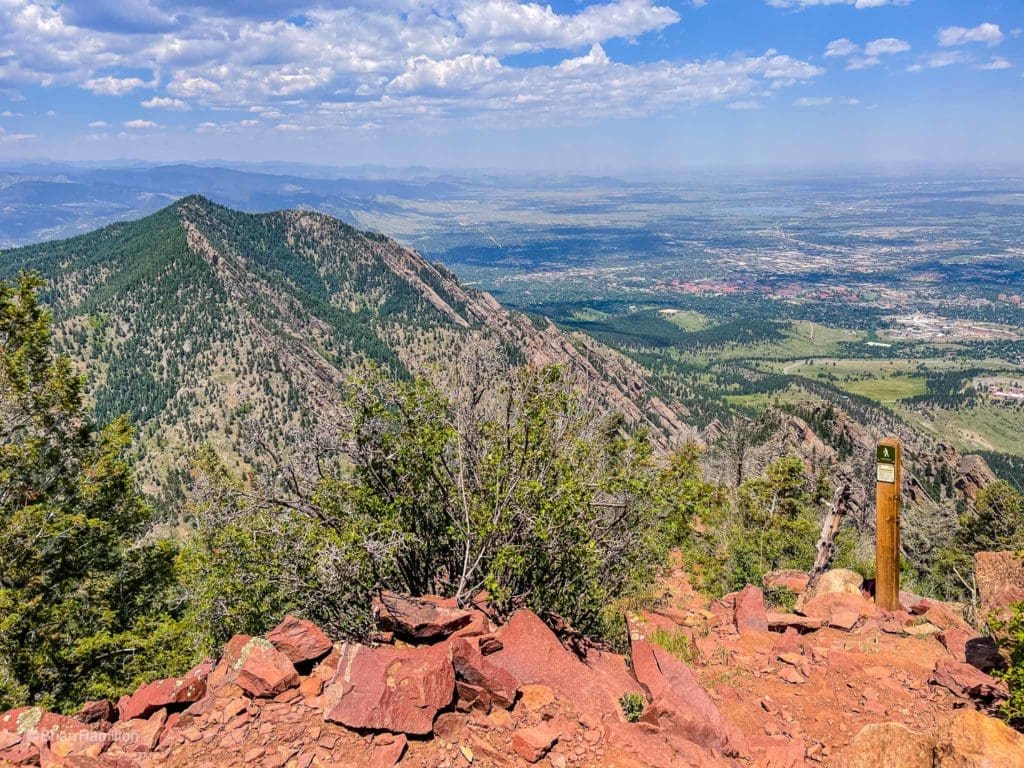
Boulder is known as a home for extreme athletes. Whether they are world-class rock-climbers, ultra-marathoners, or endurance mountain bikers, the city has no shortage of elite outdoor people within its limits. That doesn’t mean you have to be one of them to enjoy what the area has to offer. If all you have is a backpack and the ability to walk, you’ll find tons of opportunities to get into areas of supreme natural beauty.
Unlike more focused outdoor disciplines, this guide will focus on the hiking generalist. The most challenging hikes listed below have more to do with length and elevation gain than climbing, exposure, or snow travel. However, as this is the Rocky Mountains, some rock hopping and scrambling will be mentioned. Generally speaking, as long as you are in shape, motivated, and carrying the ten essentials (appropriate footwear, map and compass/gps, water, food, rain gear and layers, safety items and stocked first aid kit, knife or multi-tool, sun protection and shelter), you should be able to enjoy the list below. Having said that, for people new to the area, it’s always best to start with the smaller and shorter hikes. Elevation is a key concern for outdoor recreationists in Colorado, the base elevation of Boulder is already 5,300 feet above sea level. If you stay hydrated, understand what to do when confronted with the signs of altitude sickness, and know when to bail if the weather is threatening, you’re already well on your way to completing the hikes within this list.
Popularity Ratings
- Low: Large sections of trail all to yourself
- Moderate: Sizeable trail sections to yourself, crowding possible on busy summer weekends
- High: You’ll be seeing people, still a chance for solitude in spring/fall/winter.
- Very High: Almost always busy.
Difficulty Ratings:
- Easy: less than 5 miles, less than 500 ft. of elevation gain
- Moderate: 0-10 miles, 500-2,000 ft of elevation gain
- Hard: 5-15 miles, more than 2,000 ft. of elevation gain
- Very Hard: 10+ miles, more than 3,500 ft. of elevation gain
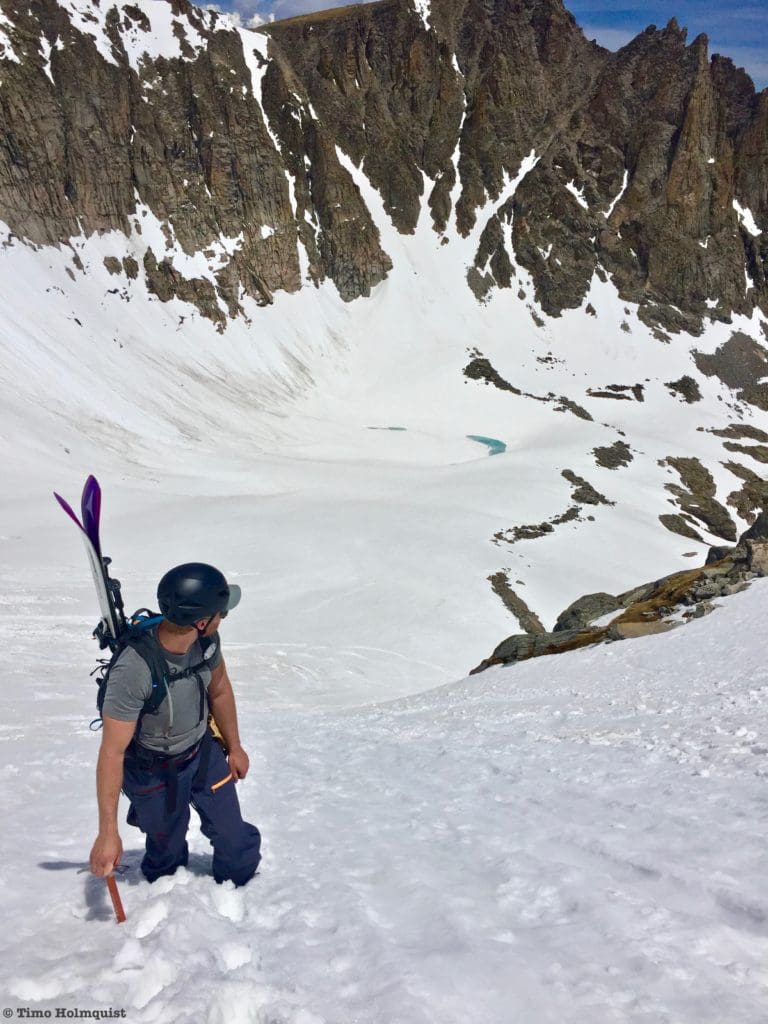
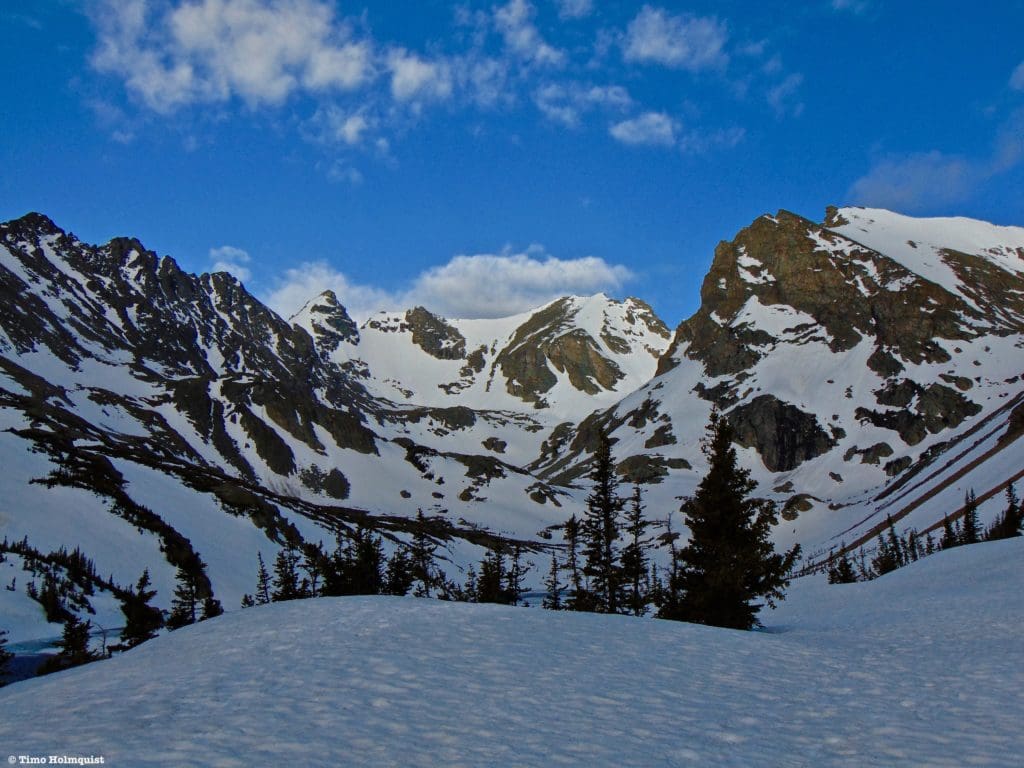
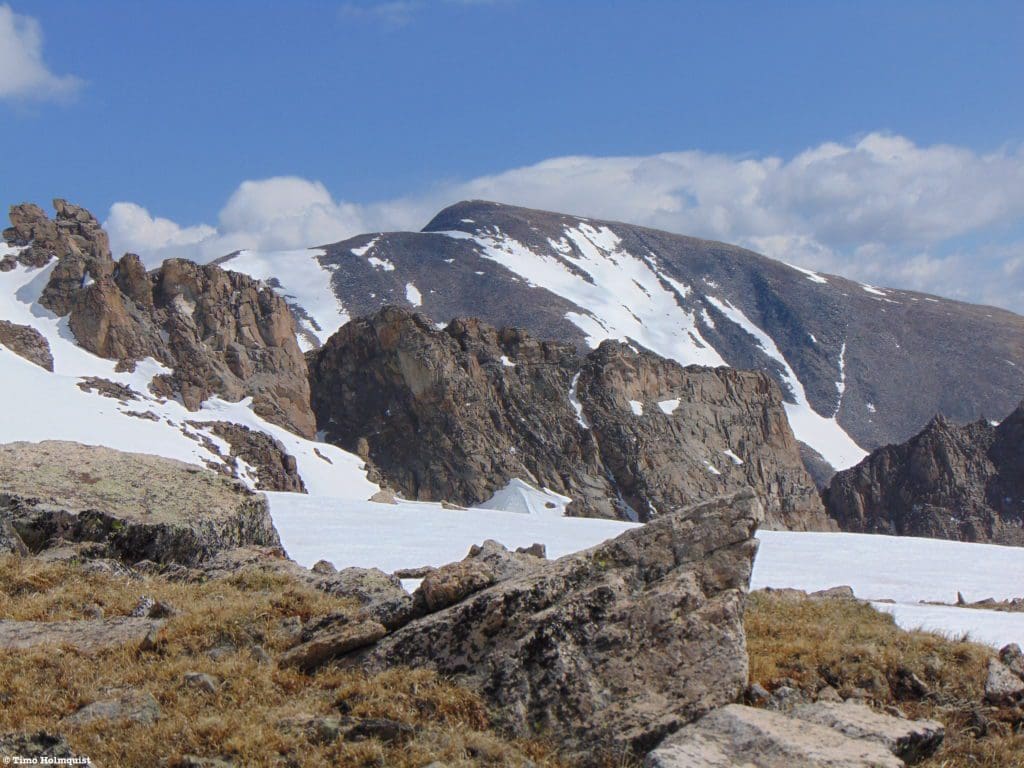
Four-season fun above Isabelle Glacier. While numerous mountaineering opportunities exist here, you can get onto the glacier with little more than normal hiking gear and snowshoes or microspikes.
Field Notes and Tips
Weather is another key component in your hiking research and should always precipitate any adventure into the outdoors. Summer thunderstorms are no joke, especially in the alpine where cover from lightning is nonexistent. Each hike below will come with a few weather-related links to help in planning. Remember, mountain weather changes often; the most accurate forecast is usually the last one you check before leaving for the trailhead, and even then, expect the unexpected. I use the National Weather Service because most other weather stations use data borrowed from them, so you might as well get the forecast for free. I’ve also had good luck with mountain-forecast.com and Opensummit for alpine forecasts.
The hikes included in this review are divided into three sections. Each section has different trail access and different components to consider. What’s nice is that without traffic, each region is less than an hour from Boulder. Trails in Rocky Mountain National Park (especially Wild Basin and the Longs Peak trailhead) could fit into this category but don’t make the list in favor of grouping them with other National Park trail reviews we’ve compiled. To get started with the National Park, please visit our Guide to the Best Hiking Trails in Rocky Mountain National Park.
Quick tips to keep in mind when recreating around Boulder:
- Some trails listed below ascend into the alpine and often feature snow patches until mid-July. Similarly, storms can start dropping accumulating snow by early October if you’re up high enough.
- Because Boulder is less than an hour from a large international airport, it helps to get to trailheads early and avoid holiday weekends. A little planning goes a long way; if you arrive at a trailhead on a busy weekend with no plan and a sour attitude, you’re gonna have a bad time.
- Colorado is in a semi-arid climate; bring more water than you think you’ll need, slather sunscreen on and wear a hat.
- If your car is registered in Boulder County, none of the first five hikes listed require payment at trailheads. If you’re coming from out of county, click here to figure out which trailheads are free and which ones cost money. It’s usually only five bucks or so.
- Know where you’ll be hiking and what to do in an emergency. Either hike with a buddy or, at a minimum, tell people where you’re going and when you expect to be back. Search and rescue services are top-notch in the area, but they won’t be as effective if they don’t know where you’ve gone.
- In an emergency, dial 9-1-1; if there’s no reception, you can usually send an emergency text to 9-1-1, include important locational information and the extent of any injuries.
- Be realistic about your physical abilities; you know yourself best. Knees hurt? Bring trekking poles and/or a knee brace. Sore muscles? Stretch. Always hungry? Bring extra food. Little things like that can make a big difference.
- Leave no trace, be aware of what you bring in and bring it all out. Your actions matter. If numbers help drive the point, know that plastic water bottles take roughly 450 years to decompose. Many trailheads have well marked trash and recycling receptacles.
- Bringing a dog? Follow all rules and regulations and clean up after it.
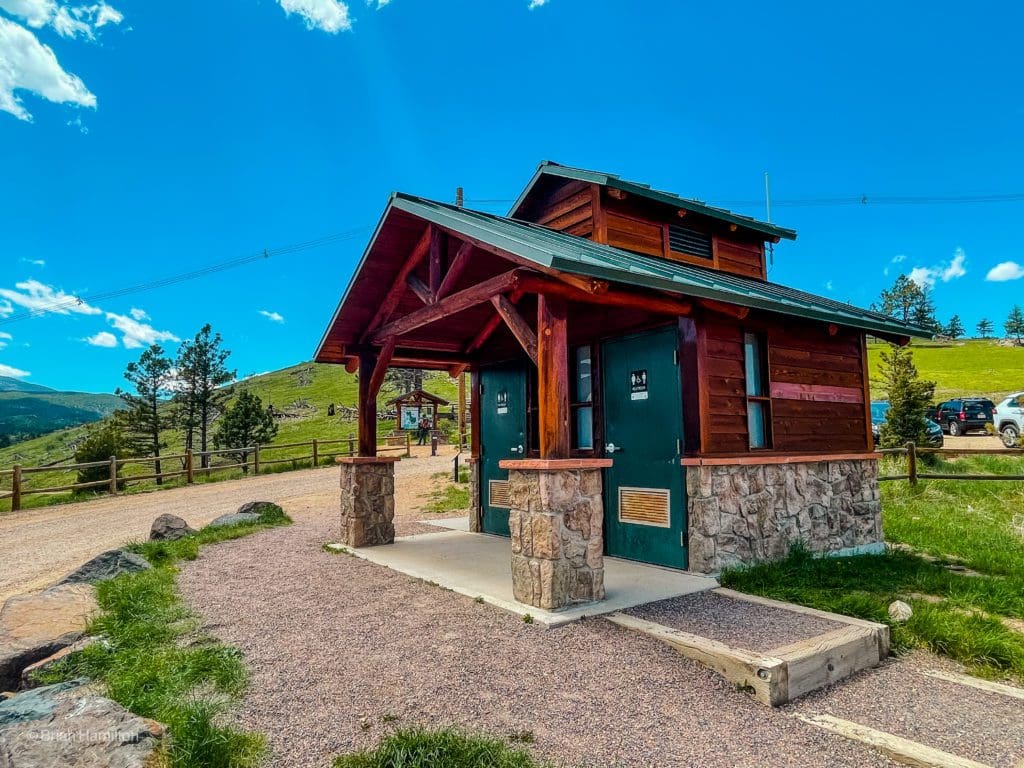
Facilities exist at many local trailheads, including trash/recycling cans, dog stations, and pit-toilet restrooms.
Category 1: Boulder Foothills
The hikes belonging to this category are within thirty minutes of downtown Boulder and provide a great overview of what the area has to offer. As a bonus, many of these trails can be hiked outside of peak summer times and even as winter hikes. They are listed 1-5 from least to most difficult.
- Flatirons Vista Loop
- Total Distance: 3.5 miles (multiple options for increasing the mileage)
- High Point: ~6,190 ft.
- Difficulty: Easy
- Total Ascent: ~300 ft.
- Route Type: Loop
- Trail Status: Open (seasonal closures occur)
- Popularity: High
- Weather Resources: Boulder weather, Eldorado Springs Weather
The transition between the Great Plains and the mountains makes for some dramatic scenery.
While not exactly challenging, the Flatirons Vista Loop is the perfect, easy going introduction to the unique environments around Boulder. The trailhead is south of town along CO93 and belongs to Boulder County Open Spaces. Mountain Bikers also frequent the area, so jamming earbuds into your ears may not be the best move here; always be courteous of other recreationists.
Starting and ending on a plateau, the Flatirons Vista Loop provides stunning views of the eastern ramparts of the Rocky Mountains as they butt heads with the Great Plains. The views are expansive, and the sweeping, rocky ridges west of the trail provide an exemplary backdrop. Good for a quick run, hike, or bike, the trail is predictably popular, but there are few trails that provide this level of elite scenery for as little effort. In the heat of the summer, the mostly shade-less trail gets very hot; it’s best enjoyed as a sunrise stroll or later in the day when the sun has dipped behind the mountains. Hitting the margins (early or late) will also help you find parking, which can fill up by mid-morning and stay full until the late afternoon.
For inspired recreationists, there are also many opportunities to extend the loop. You can connect to Dowdy Draw, Goshawk Ridge, or cross CO93 and link up with the Marshall Mesa loop. For a few extra points of a mile, you can take the Community Ditch Trail to Marshall Mesa, which uses an Underpass to avoid crossing the busy CO93. These variations can get you up to 20 miles of trail. If your time in Boulder is limited, give this easy hike some attention, and you will be rewarded.
- Royal Arch
- Total Distance: ~4 miles (plenty of options to increase)
- High Point: 6,963 ft.
- Difficulty: Moderate
- Total Ascent: 1,492 ft.
- Route Type: Out and Back
- Popularity: High
- Weather Resources: Boulder Weather, Chautauqua Park (Remember, Royal Arch is higher than Boulder, subtract 1-3 degrees to get a better temperature reading).
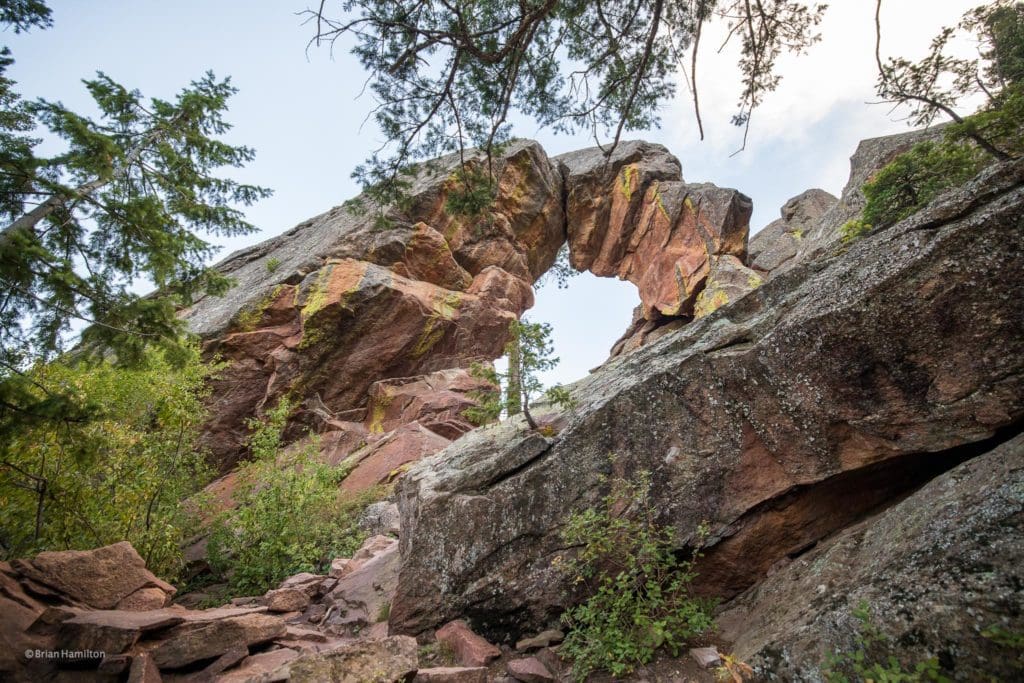
The Royal Arch at the top of the hike.
This hike combines a lot of the elements that make Boulder’s position along the Front Range so iconic. For a full review, please visit our Royal Arch page here. There are multiple ways to get to Royal Arch, but the best option is to utilize Chautauqua Park. If you’re up for it, adding a quick additional loop between the Baseline and Meadow Trails (~1.1. miles) will give you fantastic perspectives of the rocks.
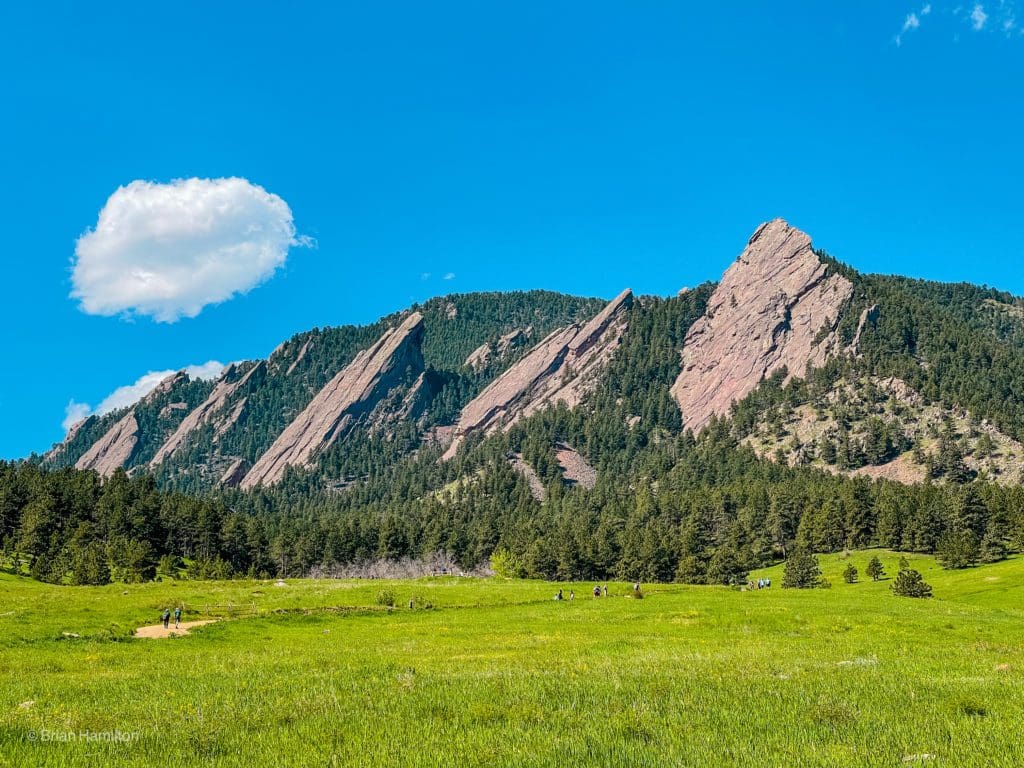
The Flatirons from Chautauqua Park.
Chautauqua Park provides easy access to a large trail network, and the parking lot is often full by 7-8 AM on summer weekends. Despite its short length, the trail to Royal Arch gains nearly 1,500 feet; pace yourself and be prepared to share the trail with others. With views of the Flatirons, Boulder, and the unique Royal Arch itself, this is a perfect hike to test your legs on while remaining close enough to Boulder to limit any difficult navigation.
- Mount Sanitas
- Total Distance: 3-4 miles depending on your trail of choice
- High Point: 6,807 ft.
- Difficulty: Moderate
- Total Ascent: ~1,345 ft.
- Route Type: Out and back, loop options available
- Trail Status: Open
- Popularity: High
- Weather Resources: Boulder weather, Sanitas
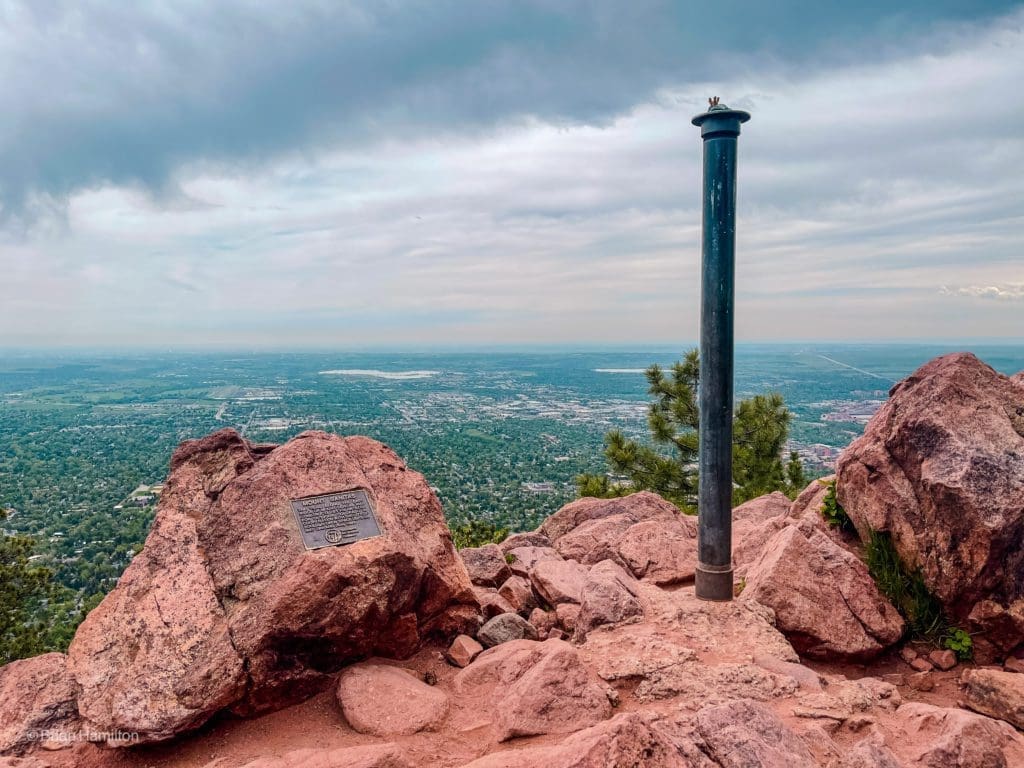
The summit plaque on Mt. Sanitas with Boulder below.
Mt. Sanitas, is a fun, rocky, and repeatable hike. There are various ways to climb the peak, but all of them require more than a thousand feet of climbing. The payoff is a great summit perch with outstanding views of Boulder and the foothills. Bring sunscreen and watch for afternoon t-storms in the summer. The best access is via Centennial Trailhead near Sunshine Canyon. Options to the top include the most popular Mt. Sanitas Summit Trail up the north ridge, Lions Lair trail up the western side, and the East Ridge trail. One of the benefits of this hike is its four-season allure: good for spring, fall, and summer attempts or testing out your winter hiking skills. For a full review of our favorite loop hike on Mt. Sanitas, click here.
- Walker Ranch
- Total Distance: 7.9 miles for basic loop, 10-16 miles with extensions
- High Point: ~7,340 ft.
- Difficulty: Moderate/Hard depending on where you park
- Total Ascent: ~1,800-~3,000 ft.
- Route Type: Loop
- Trail Status: Open
- Popularity: High
- Weather Resources: Boulder Weather, Walker Ranch
One of two South Boulder Creek crossings on the Walker Ranch Loop.
For a full review of Walker Ranch, click here. This one is all about the parking game if you want to keep the mileage and elevation gain at their lowest. However, there are many ways to increase the mileage and really make this a full-on training hike. The basic package from the main parking area near Gross Reservoir will net you 8 miles and 1800 feet of elevation gain; since it’s a loop, you’ll also be descending the same amount. If you park at Ethel Harrod, it’s more like 9 miles and ~1960 ft. of gain. When both lots are full, you can use the parking lot for Meyers Homestead and walk the Josie Heath extension to connect to the loop; that’ll give you 10 miles and ~2,000 ft of gain. If you’re using this area to train up for more ambitious hiking targets, you can park at Eldorado Canyon Trail (state park fees apply) and connect with the Walker Ranch Loop for a grand total of 16 miles and 3,000 feet of elevation gain.
The loop hike is a fantastic way to stretch the legs and grind out some miles. The area is popular with hikers, mountain bikers, college kids, and fisher people as there are two sizable creek crossings. While relatively low in elevation, the loop sits behind the front line of mountains, giving unique perspectives east to the plains and west to the often-snow-capped peaks along the Continental Divide.
- Bear Peak/South Boulder Peak
- Total Distance: ~5 miles
- High Point: ~8,460 ft.
- Difficulty: Hard
- Total Ascent: ~2,600 ft. (more when utilizing loop options)
- Route Type: Out and back (loop options available)
- Trail Status: Open
- Popularity: High
- Weather Resources: Boulder Weather, Bear Peak, NCAR, South Boulder Peak
Looking down to Boulder from just below the summit of Bear Peak.
For a full review of Bear Lake via Fern Canyon, click here. Bear Peak is the crown jewel of Boulder area peaks. Although shorter than its neighbor South Boulder Peak (a short ridge connects the two), Bear Peak is more dramatic. All trails that reach its summit require 2600 feet of gain, and with all the ups and downs involved, often have you climbing more than 3,000 ft. The most direct route is up Fern Canyon (either from the Table Mesa neighborhood or NCAR). It is a leg-grinding ascent and knee-knocking descent if you utilize the out and back option. When open, a Fern Canyon/Bear Canyon loop combo is nice. You can also attack Bear Peak from South Mesa Trailhead for a quieter approach. Check local trail closures here.
There are a few components that make Bear Peak special. The first component is the overall effort, which will have you wheezing from exertion if you aren’t used to this kind of ascent. Second is the vertical relief; from the summit, you are more than 3,000 feet higher than the plains to the east, and it is a commanding position to be in. The third component is the summit itself, attainable via a short Class 3 ascent up a rock rib to a 360-degree view at the top. If you’re nervous about the scramble, you do not have to climb it to get stellar views, but it is worth the extra effort and really makes Bear Peak stand apart. On clear days you can see the 14er Longs Peak to the north, and more than 100 miles to the south, you may be able to see another 14er, Pikes Peak. For eagle-eyed observers, Mt. Evans (the closest 14er to Denver) is also visible. Bear Peak should not be the first thing you try unless you have previous experience climbing larger mountains. It’s much better to work your way up to it.
A quick note about scrambling: A Class 1 route is a trailed hike. A Class 2 route often utilizes trail-less navigation and some rock hopping. A Class 3 route (like the short Bear Peak scramble) necessitates using all four appendages to reach the top. Your arms will be used interchangeably as extra support for your legs. As briefly mentioned above, you DO NOT have to scramble up the rocks on Bear Peak to enjoy the stellar views. If you’d rather keep it a hike, ascend to where the scramble begins and call it good. You can also briefly wrap around the west side of the peak on a good trail to get some views toward the high peaks. Alternatively, South Boulder Peak is only 0.6 miles south of Bear Peak and has a trail that ends right below the summit rocks, which you can ascend easily. If South Boulder Peak sounds more agreeable, the best trailhead to use is the South Mesa trailhead and the Shadow Canyon Trail. Click here for a review of that trail. The “Class” ranking is based on the Yosemite Decimal System.
The view west from the summit of South Boulder Peak.
Category 2: Eldora Access
The two hikes included in the Eldora area are easier than Bear Peak but are much higher in elevation. The Arapaho Pass trail rises above the treeline, so additional precautions need to come into play, especially in inclement weather. Both of the hikes from this area enter into the Indian Peaks Wilderness; please follow all rules and regulations. Despite having a few campsites in the area, they are not first-come, first-served. You have to book these sites in advance using this site. They usually release the campsites for booking in March of every year. Please note that unless you are traveling west beyond the Caribou Lake backcountry zone, NO FIRES at backcountry sites are permitted. The only exceptions are at established campgrounds as long as local and county restrictions are not in place. As mentioned before, the proximity to large urban areas makes this trailhead ridiculously popular; get there on weekdays if you can and always before 7 am during peak summer months (July-Labor Day).
- Diamond Lakes
- Total Distance: ~5.5 miles (~ 8 miles if tagging Upper Diamond Lake)
- High Point: ~10,980 ft. at Diamond Lake (~11,730 ft. at Upper Diamond Lake)
- Difficulty: Moderate
- Total Ascent: ~1,170 ft. to Diamond Lake
- Route Type: Out and Back (backcountry loop options available)
- Trail Status: Open
- Popularity: High
- Weather Resources: Nederland Forecast, South Arapaho Peak, Mount Jasper, Eldora Ski Resort Weather
On the shores of Lower Diamond lake, South Arapaho is the large peak in the background.
The Diamond Lakes, or more specifically, lower Diamond Lake, is an excellent hike near Nederland that offers views, lakes, and backcountry sites. This is one of the best effort/reward hikes in the area (comparable to the Arapaho Pass/Lake Dorothy hike below). You’ll park at the end of the 4th of July Trailhead and take the trail from the uppermost parking area. Follow the Arapaho Pass Trail on a steady incline until coming to a trail junction with the Diamond Lakes access. Take a left, cross the big drainage you’ve been following and loop around to the shelf containing the lake. This can be quite a popular place on the weekends.
Once you get around Diamond Lake on its western side, stellar views of South Arapaho paint the northern horizon. There is an unofficial trail leading up the basin from the western end of Diamond Lake. It continues for another ~1.2 miles until reaching Upper Diamond Lake. If you’re set on exploring the Upper Lake, please note that you will pass an unnamed tarn along the way, but that is not the Upper Lake. From the rocky shores of the Upper Lake, you have multiple options for climbing Mt. Jasper, which cradles the area. Bring your bathing suit!
A quick note: The 4th of July trailhead is only usable when the dirt road to it opens up in the summer. Snow can linger here through the beginning of July. The prime season for visiting is late July through mid-September.
- Arapaho Pass/Lake Dorothy
- Total Distance: 3.1 miles to the Pass (3.5 to Lake Dorothy)
- High Point: 11,910 ft. at Arapaho Pass (12,070 ft. near Lake Dorothy)
- Difficulty: Moderate
- Total Ascent: ~1,810 ft. (~1,970 ft. to Lake Dorothy)
- Route Type: Out and Back
- Trail Status: Open
- Popularity: High
- Weather Resources: Nederland Forecast, North Arapaho Peak Weather, Brainard Lake
Lake Dorothy.
Arapaho Pass Trail is at the center of a large network of official and unofficial trails spindling off into the Indian Peaks Wilderness. Both Arapaho Peaks (and the Class 4 traverse between them) are accessible from it, along with options for Mt. Neva (Class 4 or Class 2), Mt. Satanta (Class 2), and Mt. Jasper (Class 2 or Class 3). You can visit a slew of lakes from the trail (and via trails that connect to it), including Upper and Lower Diamond Lakes, Lake Dorothy, Caribou Lake, Columbine Lake, and the two unnamed lakes between Neva and Jasper.
Approaching lake Dorothy at the foot of Mt. Neva
From the 4th of July Trailhead, it only takes 3.1 miles to reach the pass and the Continental Divide, making it a convenient way to get into the alpine. Lake Dorothy is a bit to the south and west of the actual pass but only requires an extra 5-10 minutes of effort to get to. Dorothy is the highest alpine lake in the Indian Peaks at over 12,000 feet and has at least some snow wrapped around it through much of the summer. It’s a great place to lounge and take in the serrated edges of Mt. Neva to the south and the Arapaho Peaks to the north.
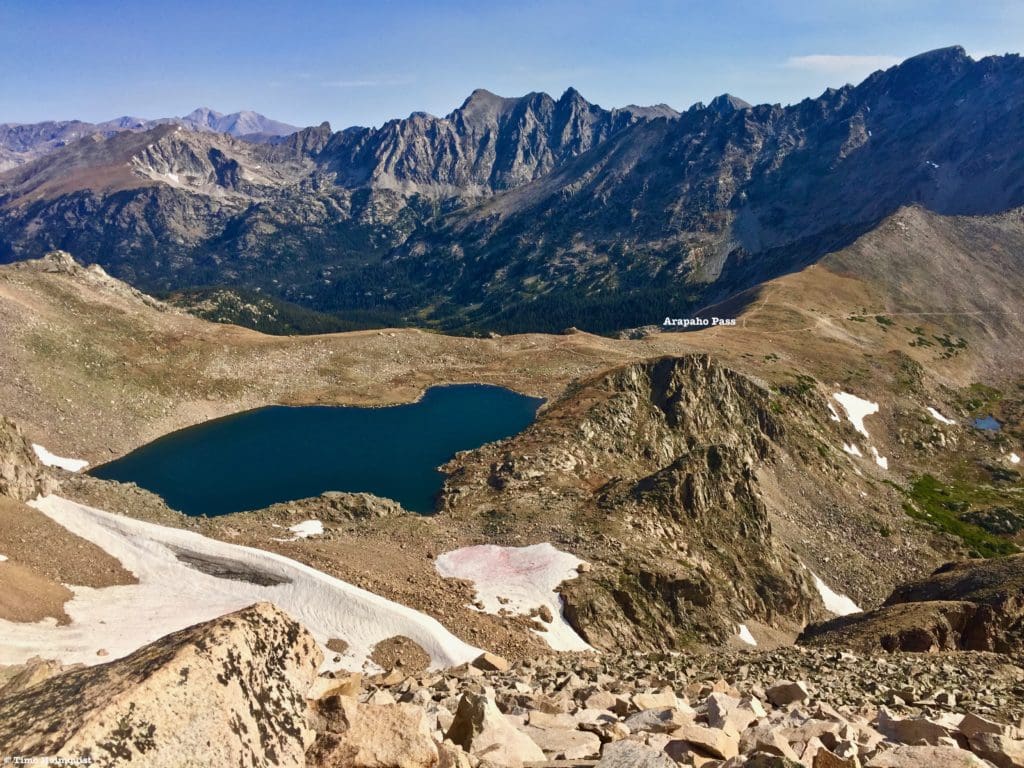
Lake Dorothy from Neva’s summit with Arapaho Pass marked.
If you get to Arapaho Pass and are feeling ambitious, Caribou Lake is accessible to the west, and Satanta Peak is easy to reach via Caribou Pass and a short off-trail scramble to the highest point. Due to a serious wind event last fall, portions of the trails in this area are currently impassable; please click here to get more information.
Category 3: Brainard Lake Recreation Area
Brainard Lake Recreation Area is probably the most popular access point for the Indian Peaks because a paved road leads to the edge of the wilderness. In the summer, if you pass the entrance gate, parking is $12.00. It’s a self-serve paying area when the booth isn’t staffed, but don’t try your luck; many people get tickets here. When the gate is closed (approx. October-June), you can park at the Brainard Gateway Trailhead for free. Generally speaking, the Indian Peaks are a scramble haven, with few trailed summits and Class 3-5 routes in abundance. A little poking around, however, and you can get big views for a relatively short amount of effort. Pay special attention to wind forecasts; the gusts can be brutal up here.
- Niwot Mt. & connecting ridges
- Total Distance: ~5 miles (6.6 miles if going to SW Niwot)
- High Point: ~11,465 ft. (~11,528 ft. for SW Niwot)
- Difficulty: Moderate
- Total Ascent: ~1,408 ft. (~1,570 ft. for SW Niwot)
- Route Type: Out and Back (numerous other options available)
- Trail Status: Open
- Popularity: Moderate
Niwot Mt. from SW Niwot, looking east.
Niwot Mt. is a big, grassy lump on the end of a long, picturesque ridge extending eastward from the main cluster of Indian Peaks. A fun, view-ridden traverse of the ridgetops makes it stand out. CU (Colorado University) operates a Tundra Lab along the ridge, so if your ascent takes you beyond this station, make sure to avoid any of the project sites up there.
There are a couple of different ways to do this hike, I’m always amenable to saving $12.00, and if you park at the Brainard Gateway Trailhead, it’s free all year. The trade-off is hiking up the Left Hand Reservoir dirt road, which does have the occasional bit of reservoir traffic. If you pay the fee and park at Left-Hand Reservoir, you have to backtrack a bit on the dirt road to get to the start of the trail, but you can make a large loop using the Niwot Ridge Trail (or further west if inspiration is calling), Niwot Cut-Off Trail, and Raven Trail back to the Left Hand Reservoir road. This variation will net you roughly 8 miles and 1555 ft of gain. If you get up there and decide to continue westward along the ridgetops until the Class 3 Niwot Ridge scramble takes off, expect to add another 1000 ft of climbing and ~5.8 miles.
Where Niwot ridge turns from a mellow grassy slope to a Class 3 scramble.
My preferred method is to start early, park at Brainard Gateway Trailhead and tackle the dirt road portion before encountering any reservoir traffic. Once you exit the parking lot, take a right towards the entrance booth and then a quick left onto the Left Hand Reservoir road before actually reaching the entrance booth. About 0.9 miles up the dirt road, the terrain will flatten out. If you look to your right, you should be able to see the Raven Trail intersecting the road (there’s an obvious trail sign there). Turn left when you sight the trail sign and look across the road. Behind a few thin lines of trees, you should see an open area that was once a mine. There will be a thin sign to the left.
Turn off the road here and follow the right margin of the open area.
Leave the dirt road and follow the right portion of this open area, gaining elevation. An unofficial (but fairly easy to spot) trail follows the path of least resistance through some dense brush before hitting the ridge crest, which at this point is still below treeline. If you start losing elevation, stop and return to the height of land. Turn to your right (or SW) and follow the height of land as the shrubs break and the alpine takes over. Prance to the top, where a large rock windscreen will signify the summit.
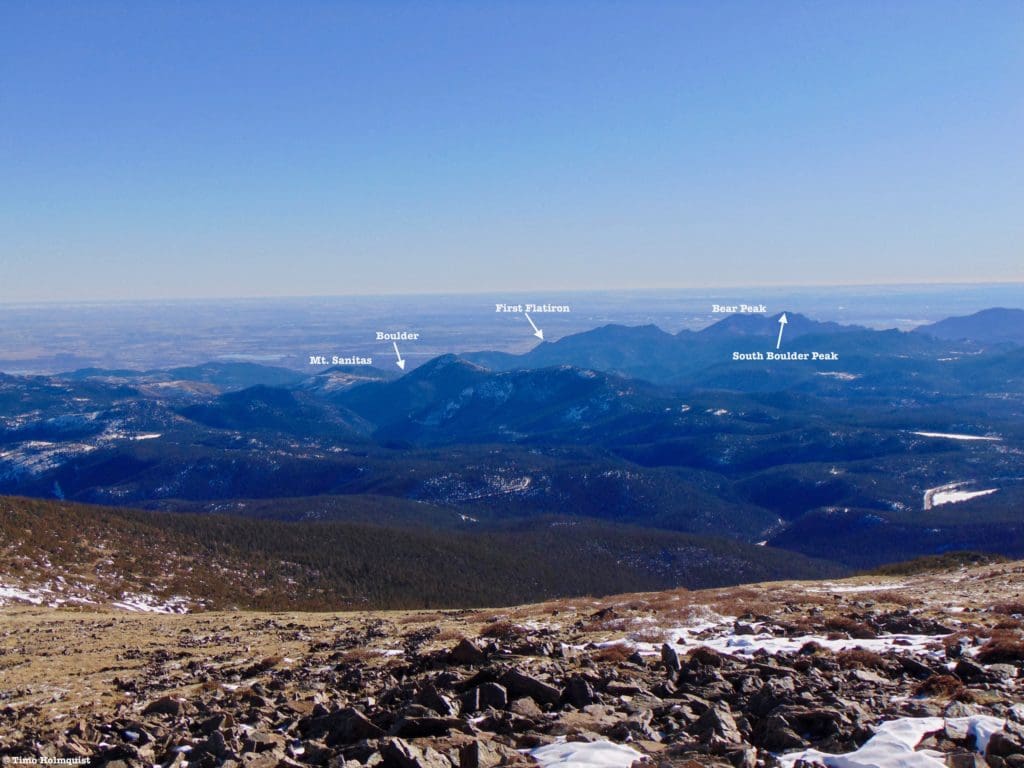
Looking SE to the Boulder area, with notable features marked.
The ridge between here and the Niwot Ridge Trail is all alpine. Since the first summit is closest, this is the most likely spot to see other people. If you have the energy, continue southwest to the second-high point (SW Niwot), which is slightly taller than Niwot Mt. and the views even better. In good weather, this place is nice for a picnic, with the imposing form of the Indian Peaks taking up the entire western skyline. Retrace your route for the most expedient method of returning to Brainard Gateway Trailhead. This hike is a nice bonus once the summer gate closes and can be completed throughout the winter as long as you have the proper gear.

Zoomed in view of the majestic Arapaho Peaks from SW Niwot.
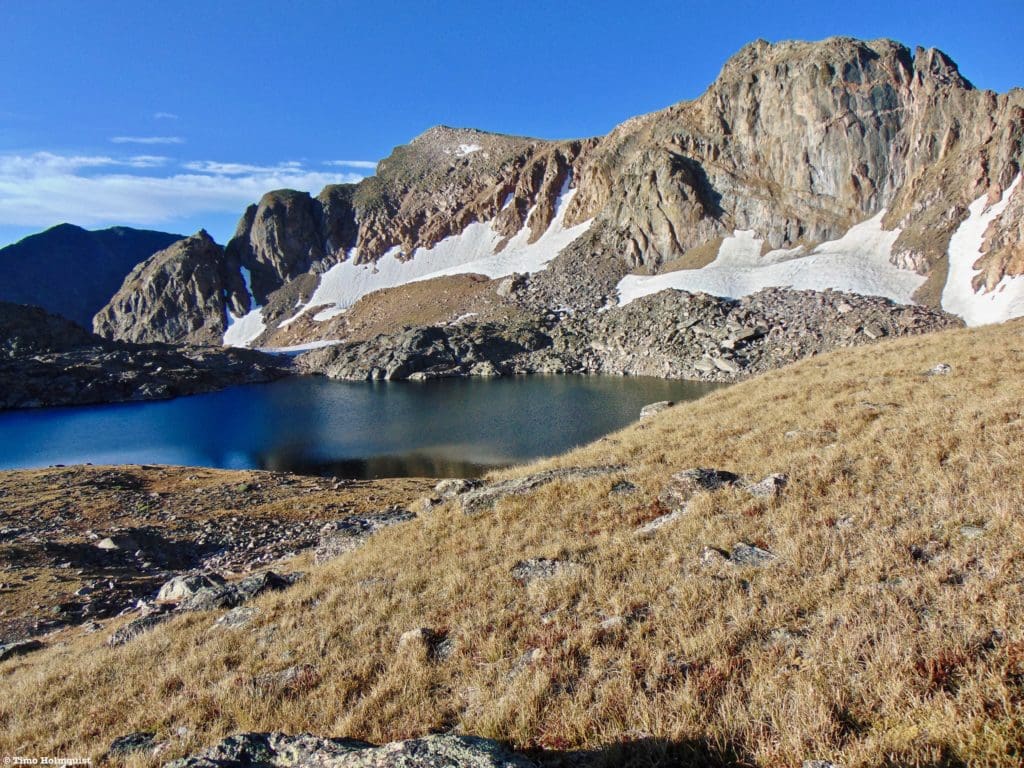
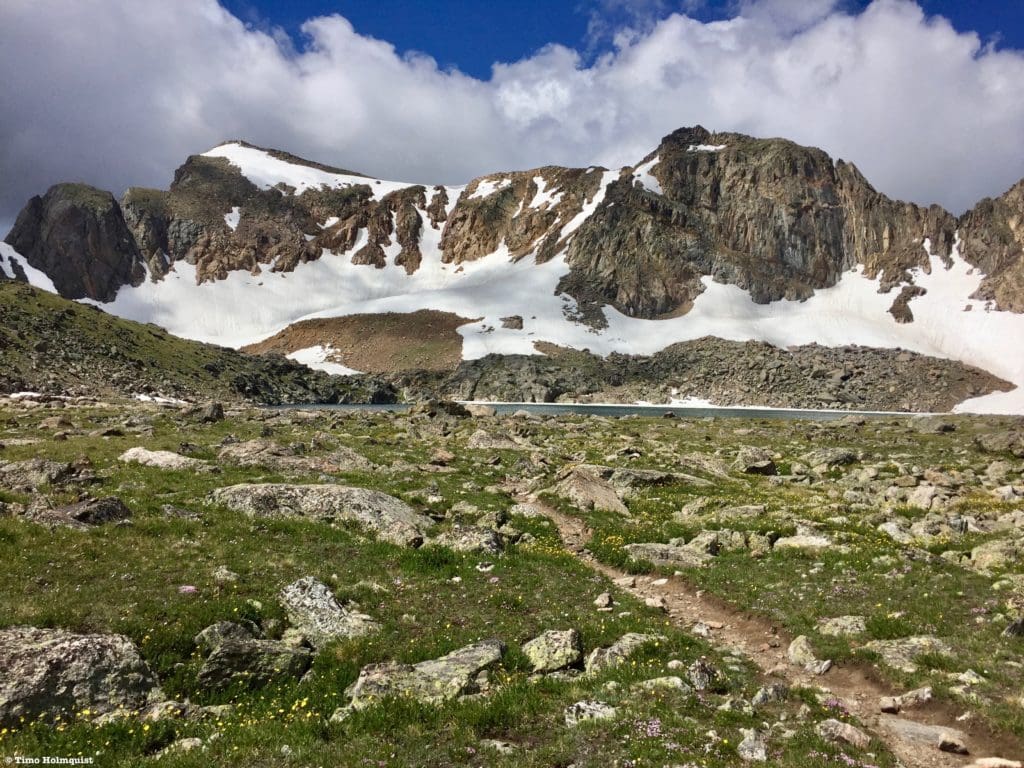
- Lake Isabelle/Isabelle Glacier
- Total Distance: 4 miles for Lake Isabelle (8 miles for the Isabelle Glacier)
- Highest Point: 10,940 ft. (11,970 ft. at the Glacier)
- Difficulty: Moderate
- Total Ascent: 455 ft. to Lake Isabelle (1,765 ft. to Isabelle Glacier)
- Route Type: Out and Back
- Trail Status: Open
- Popularity: High to Lake Isabelle (Moderate to Isabelle Glacier)

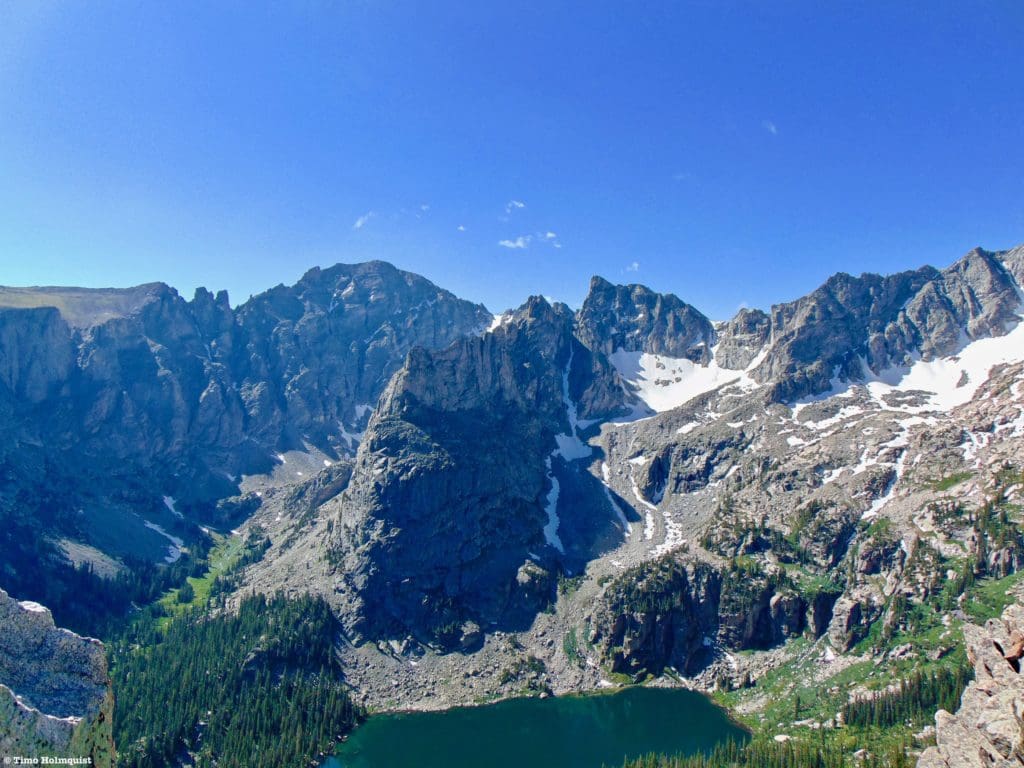
Lake Isabelle and the approximate route to the Glacier from above. The mountain in the upper left corner is Longs Peak in Rocky Mountain National Park.
This is a unique and beautiful hike. Unlike Niwot Mountain, there isn’t an easy way to hike to Isabelle without parking at the Long Lake Trailhead, which will cost you $12.00. The price, however, is entirely worth the experience. If you arrive before the entrance booth is staffed, there is a self-serve tube where you can drop the $12.00. A lot of people think they’re super slick by blowing by the station, but this is not a hidden area; rangers will patrol parking lots. If you’re there for more than a couple hours without paying, chances are you’re going to get a ticket. Click here for a map of the entrance areas and various trailheads.
Starting from Long Lake Trailhead (or Brainard Lake if Long Lake is full), you’ll take the Pawnee Pass Trail west. The trail can sport snowy spots until July, and in early June, you may catch backcountry skiers tackling some popular routes here. There’s only one major trail junction around Long Lake, and it is clearly signed. Take a right, staying on the Pawnee Pass Trail, and rise up to Lake Isabelle. Most of your elevation gain happens in the last bit of the hike. At the following trail junction, take a left toward the lake instead of continuing up to Pawnee Pass. The lake is breathtakingly beautiful in all seasons and provides fantastic views of serrated ridgelines.
Looking west from a bench near Lake Isabelle.
If you’re ready for the glacier, continue westward, paralleling the north shore of the lake. At its western edge, the trail will begin to ascend into an alpine basin. There is no tree cover once you pass Lake Isabelle.
The trail will rise in a southwest direction with the stout cliffs of Shoshoni Peak framing the right-hand side of the basin. Along the way, you’ll get increasingly dramatic looks at Navajo Peak, one of the most identifiable summits in the Indian Peaks Wilderness. The peak itself holds a handful of fantastic scrambles and snow climbs, so it’s a regular mountaineering target.
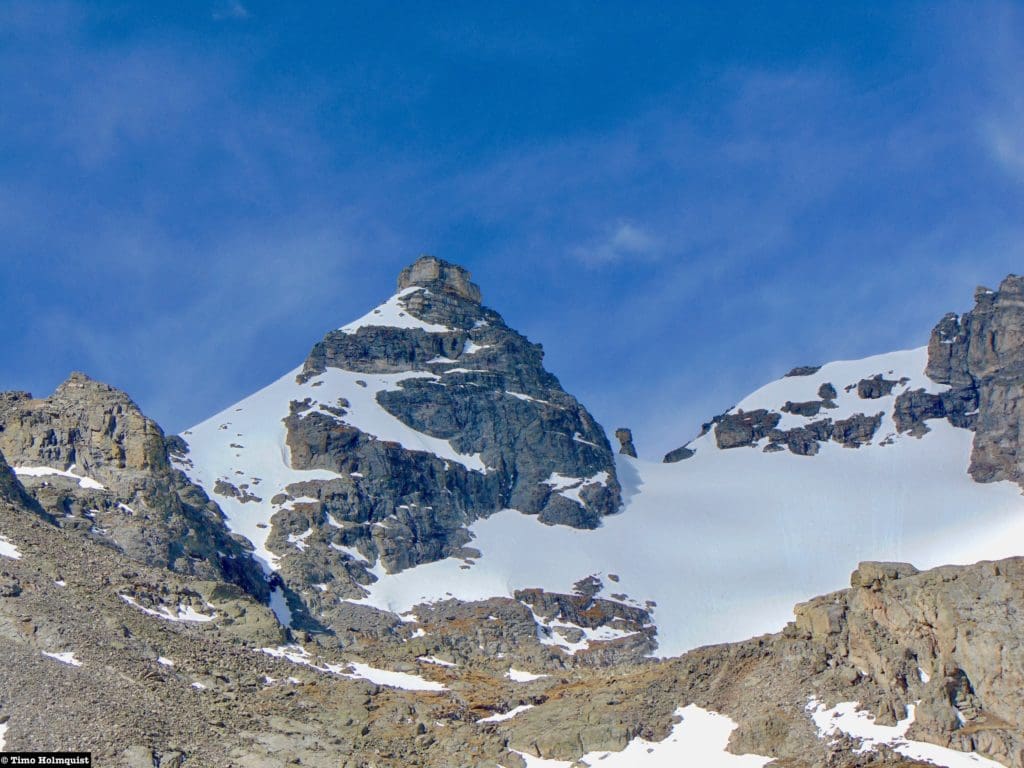
Navajo Peak.
The Glacier is located on a bench between Apache Pk. and Shoshoni Peak. After arriving at an unnamed tarn, the route takes a turn to the right (north) and climbs the glacial bench. This final section is short but steep with some switchbacks thrown in to ease the ascent. Once you top out on the glacial bench, you’ll have excellent views of Isabelle Glacier and the Queensway Couloir to the west.
Isabelle Glacier is best visited from late July-September. If you arrive earlier than that, the basin it’s located in will have additional, large snowfields that may obscure the true size of the glacier. By September, Isabelle Glacier and the Navajo “glacier” (a permanent snowfield just to the right of Navajo’s summit cone) should be the only large patches of snow left. Later in the summer, Isabelle Glacier also develops a beautiful little tarn at its lowest point. The water is stunningly clear and stunningly cold.
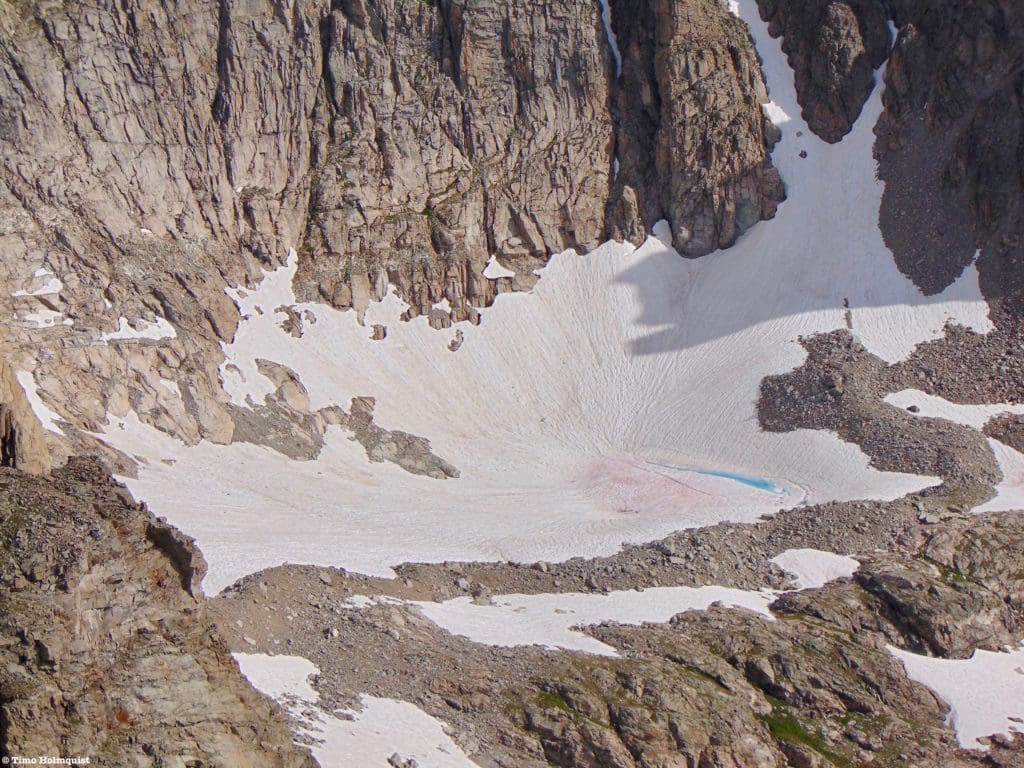
Zoomed in on the glacier with the tarn visible at its lower end.
If you plan on hiking onto the glacier, make sure you have microspikes, snowshoes, or some type of comparable traction device. Slipping and sliding into the glacial tarn would certainly be an unpleasant experience; unless getting into a glacial tarn is the goal. You won’t need mountaineering equipment unless you’re climbing any of the three couloirs on Shoshoni Pk. or Queensway Couloir.
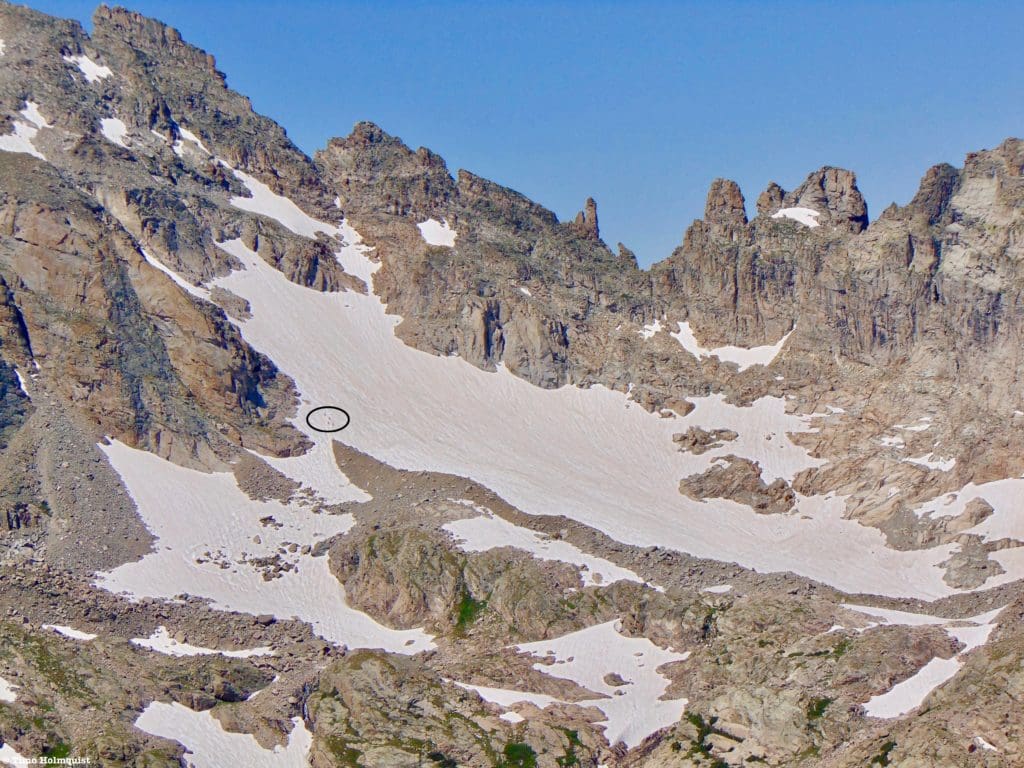
Isabelle Glacier from Niwot Ridge. There are four climbers in the circle for scale.
Despite its manageable 8-mile distance, you’re going to want to spend some time up here if you have the weather, so budget most of the day for this one. Now, obviously, this is no Columbia or Southern Patagonia Icefield, but the handful of glacial remnants left in Colorado harken back to the last ice age, providing a brief window into thousands of years of mountain history and evolution. There’s also no telling how long these little pieces of alpine ice will continue to hang out in Colorado, with nearly all of the documented glaciers in retreat. Get out there while you can.
A better view of the bench where Isabelle sits.
- Mount Audubon
- Total Distance: 7.6 miles
- Highest Point: ~13,225 ft.
- Difficulty: Hard
- Total Ascent: 2,706 ft. from Mitchell Lake (~2,900 ft. from Brainard Lake)
- Trail Status: Open
- Popularity: High
Audubon in the winter from Brainard Lake.
Mt. Audubon is a large, lumpy mountain just east of the main north-south running Continental Divide. Unlike its neighbors, Audubon has a trail almost to the top, making it much more appealing to the hiking generalist. The elevation gain is substantial, and the trailhead is over 10,000 feet, but the mountain is a good introduction to what the Indian Peaks high country is like.
From the Mitchell Lake Parking area (accessible after you pay the $12.00 at the entrance booth), head south on the Mt. Audubon Trail as it climbs a steep shoulder. When there is snow on the trail, it can be easy to lose. Eventually, the switchbacking trail arrives in the alpine. There’s a well-marked trail junction up here with the Beaver Creek trail. Take a left and continue to ascend, with wide-open views to the east. The trail takes you up to the ridge in between two high points. The larger high point is to the south. From the mellow saddle, turn south and pick a way through the talus and rocks to claim the highest spot. There are numerous cairns available for navigation aid once you hit the saddle.
Mt. Audubon from near Pawnee Pass. Unlike the multiple scrambly peaks around it, Audubon only requires a bit of talus hopping near the top to reach the summit.
Audubon is fairly popular because of its no-nonsense approach and the presence of an easily discernable trail. If you have experience scrambling off-trail on exposed ridges, the connecting ridge to Paiute Peak is Class 3 and offers an extra challenge. Audubon is also a great introductory winter climb (if you’ve already taken out Niwot Mt.), though the gate to Brainard will be closed, so you have to add 2.5 miles of road walking each way. Audubon’s gentle eastern profile makes it a good place to experience a winter ascent with generally low avalanche risk.
Paiute Peak from the summit of Audubon, some brief Class 3 scrambling and decent exposure are factors to consider before forging ahead.
Because of its location, sticking out from the main ridges, Audubon gets its fair share of nasty winds. The Front Range is notorious for blustery alpine conditions, so make sure to check windspeed before you go. A clear and sunny day doesn’t mean much if powerful and cold winds are beating down on you.
The view north to Longs Peak from Audubon is particularly striking.
Bonus Challenges
The listed hikes above should get your legs pumping and give you a better appreciation for the varied terrain the Boulder area provides. There are, of course, ways to make existing hikes harder, and if you get deeper into the Indian Peaks, a lot of the mountains require true alpine scrambling or mountaineering. The wide range of hiking difficulties, technical challenges, and backcountry skiing potential make the area around Boulder a perfect place to grind out some excellent mountain experiences.
If you’re ready to tackle some longer adventures, take a look at three additional challenges waiting for you in the hills west of Boulder.
-5 Peaks Challenge (also known as the Boulder Skyline Traverse)
- Total Distance: ~16.6 miles
- Highest Point: ~8,549 ft. on South Boulder Peak
- Difficulty: Very Hard
- Total Ascent: ~6,270 ft
- Trail Status: Open
- Popularity: High
Near Bear Peak’s summit on a beautiful November day with 100-mile views.
This deviant car positioning hike is a Boulder classic. You either start north to south or south to north and tag all five of the mountains guarding the cities western flank. Going south to north is considered easier because you take care of the toughest stretches first, but going north to south is a brilliant challenge that could grant you beautiful afternoon solitude on South Boulder Peak and in Shadow Canyon. Remember that the elevation gain listed is only half the battle, you have to be able to descend roughly the same amount as well. Trekking poles are useful. For out-of-state or out-of-county visitors, it’s five dollars to park a car at the South Mesa Trailhead. The five mountains you’ll be climbing are Mt. Sanitas, Flagstaff Mt., Green Mt., Bear Peak, and South Boulder Peak.
-High Lonesome Loop
- Total Distance: 15.3 miles (17.2 miles if adding Bob & Betty Lake)
- Highest Point: ~12,100 feet along the Divide
- Difficulty: Very Hard
- Total Ascent: ~3,725 ft.
- Trail Status: Open
- Popularity: High

The High Lonesome Loop from near Rollins Pass. The long patch of snow on the far ridgeline is Skyscraper Glacier, Bob Lake is underneath it.
This is a great loop hike that can be completed as a demanding one-day adventure or broken up into component pieces. Like the Brainard area, this part of Indian Peaks doesn’t allow open campfires, and the campsites go on sale early in March, click here for more information. There are often impassable areas in the alpine until July due to snow.
The High Lonesome Loop provides a fantastic tour of the alpine that passes multiple iconic locations like Jasper Lake, Devil’s Thumb Lake, the Devil’s Thumb rock formation, a long stretch of the Continental Divide with unbroken views, King Lake, and a quick side trail to Bob and Betty Lakes. Hessie Trailhead is perennially busy; if you can’t find parking at the trailhead, take the shuttle, click here for more up-to-date information.
If you can manage to get here without parking issues, it’s a wonderful, well-traveled loop hike and doesn’t require any scrambling or off-trail travel. Snow is an impactful factor until well into the summer. If you want an additional challenge, tackle Skyscraper Peak via a short off-trail scramble from the Continental Divide section of the loop. Touching the summit would make the highest elevation point ~12,383 ft. This is entirely optional and will require off-trail travel and some brief scrambling. Due to a significant wind even last fall, parts of the loop are impassable, click here for more details.
-Pawnee/Buchanan Backpacking Loop
- Total Distance: 28 miles (numerous additions could bring it closer to 37)
- Highest Point: 12,541 ft. at Pawnee Pass (optional ascent of Pawnee Pk. would increase that)
- Difficulty: Very Hard
- Total Ascent: ~7800 ft. (9,355 ft. with Gourd Lake addition)
- Trail Status: Open
- Popularity: Moderate
Looking at Crater Lake and the surrounding peaks. Camping at the lake is one of the best options along the Loop.
The Pawnee/Buchanan Backpacking Loop is the ultimate Boulder backpacking trip. Because it starts and ends in such a high-traffic area, getting backcountry permits early is key. Netting a spot at Crater Lake and Fox Park ratchets up the dramatic scenery component. You can also increase the distance and effort by including camps at Gourd Lake and tagging optional summits near the two passes like Pawnee Peak and Sawtooth. The best bet for multi-day parking, if you’re coming from Boulder, is at the overnight lot near Brainard Lake. Visit recreation.gov and search for Indian Peaks Overnight Permits. Read through the permit section to find out what you need to do to park there. A parking permit is necessary in addition to an overnight backcountry permit.
As far as tours of the Indian Peaks go, it’s hard to beat this one. Over multiple days you can summit two high, alpine passes, tag numerous mountains and stay in some of the prettiest campsites in the northern Colorado mountains. Even if Crater Lake is full, it’s 100% worth taking a detour to the area and seeing Lone Eagle Peak reflected in Mirror Lake.
Unless detouring to touch high points, the entire loop is trailed and has good signage. The campsites are also in good shape. Make sure you have permits for campsites; rangers are very active in the Indian Peaks, and tickets are common. The high presence of rangers makes sense as the popularity of the area continues to skyrocket. Campfires are not allowed east of the divide, at Crater Lake, or at Gourd Lake. Do your part, camp only in legal sites, and pack out what you packed in.
Final Thoughts
Boulder has a reputation: it’s either a refreshing, health-conscious oasis where people take care of their bodies and the environment, or it’s an expensive, cumbersome bubble full of uppity hippies. It is what it is. The good thing about mountains is that they don’t care about your socio-political affiliation. As long as you’re picking up after yourself so future generations can enjoy this excellent geographic slice of America, Boulder’s got a lot to offer. If you’ve ever wondered about the Rocky Mountains and how to start exploring them, launching from the Boulder area will give you an excellent introduction. Remember, you don’t have to rock climb, trail run, backcountry ski, or mountain bike to still enjoy mountains. I love Boulder because the access to adventure is outrageous. As long as you have the motivation to get up early and commit to a hike, chances are, you’re going to like what you find.
Popular Articles:
Guide to the Best Hiking Trails in Rocky Mountain National Park, Colorado
The Dyrt: The 10 Best Campgrounds In Colorado
Top Adventure Sports Towns 2021: Boulder, Colorado
Epic Adventures with the Best Guides In Colorado
Sky Pond via Glacier Gorge Trail, Rocky Mountain National Park, Colorado
Scrambling Hallett Peak’s East Ridge, Rocky Mountain National Park, Colorado
Scrambling Mt. Alice via the Hourglass Ridge, Rocky Mountain National Park, Colorado
Gorge Lakes Rim Scramble, Rocky Mountain National Park, Colorado
Black Lake Via Glacier Gorge Trail, Rocky Mountain National Park, Colorado
Scrambling To The Lake Of The Clouds, Rocky Mountain National Park, Colorado
Skyblue Overland Strongly Recommends That You Enroll With Global Rescue Prior To Embarking On Your Next Adventure.
With more people outside now more than ever, Global Rescue expanded services to include field rescue within 100 miles of home. With Local Field Rescue — automatically included in any travel protection services membership — Global Rescue is there whether you’re hiking, kayaking, snowmobiling, fishing or simply enjoying the outdoors and get ill or injured and you’re unable to get to safety on your own. Purchase a Global Rescue membership for your next adventure and travel with peace of mind. Single trip, annual and family options are available.
Terms of Use:
As with each guide published on SKYBLUEOVERLAND.com, should you choose to this route, do so at your own risk. Prior to setting out check current local weather, conditions, and land/road closures. While taking a trail, obey all public and private land use restrictions and rules, carry proper safety and navigational equipment, and of course, follow the #leavenotrace guidelines. The information found herein is simply a planning resource to be used as a point of inspiration in conjunction with your own due-diligence. In spite of the fact that this route, associated GPS track (GPX and maps), and all route guidelines were prepared under diligent research by the specified contributor and/or contributors, the accuracy of such and judgement of the author is not guaranteed. SKYBLUE OVERLAND LLC, its partners, associates, and contributors are in no way liable for personal injury, damage to personal property, or any other such situation that might happen to individuals following this route.


