


High Point:
13,310 feet

Total Ascent:
4,810 feet

Difficulty:
Very Hard

Distance:
17 miles

Waypoints:
40.20793, -105.56656

Route Type:
Lollipop Loop
Nestled deep in Wild Basin, within the boundaries of Rocky Mountain National Park, stands Mt. Alice at the Continental Divide. Unexpectedly, it isn’t hiked as much as other Colorado mountains. The long approach required makes it a challenge to climb. A 17 mile return journey with 4,810 feet of elevation gain awaits anyone who accepts the challenge.
Overview:
Mt. Alice via the Hourglass Ridge is a long and committing day, but it’s the complete package; I have yet to find another hike in Rocky Mountain National Park that showcases as many wonderful natural features as this one. A lot of this lollipop loop takes place on established trails, but there is a sizable chunk of off-trail navigation and alpine wandering involved as well. The hike also creeps into scrambling territory on the Hourglass Ridge. Utilizing the 17-mile loop reviewed below, you get no less than five alpine lakes, beautiful stretches of healthy alpine, a low-end and confidence-boosting scramble, a 13,000-foot summit, bountiful wildflowers in July, and the option to add three picturesque waterfalls. It’s a “best of” hike all on its own.
Due to the presence of necessary light scrambling, the route has been given a scrambling rating of Class 2+. For a comprehensive explanation of the factors that go into rating a scrambling route—please see the Scales and Criteria section below.

Table of Contents:
Article Navigation: Click on any of the listed items in the table of contents below to jump to that section of the article. Similarly, clicking on any large, white section header will jump you back to the Table of Contents.
- Overview
- Scales and Criteria
- Directions to Trailhead
- Places to Stay
- Field Notes
- Journal
- Final Thoughts
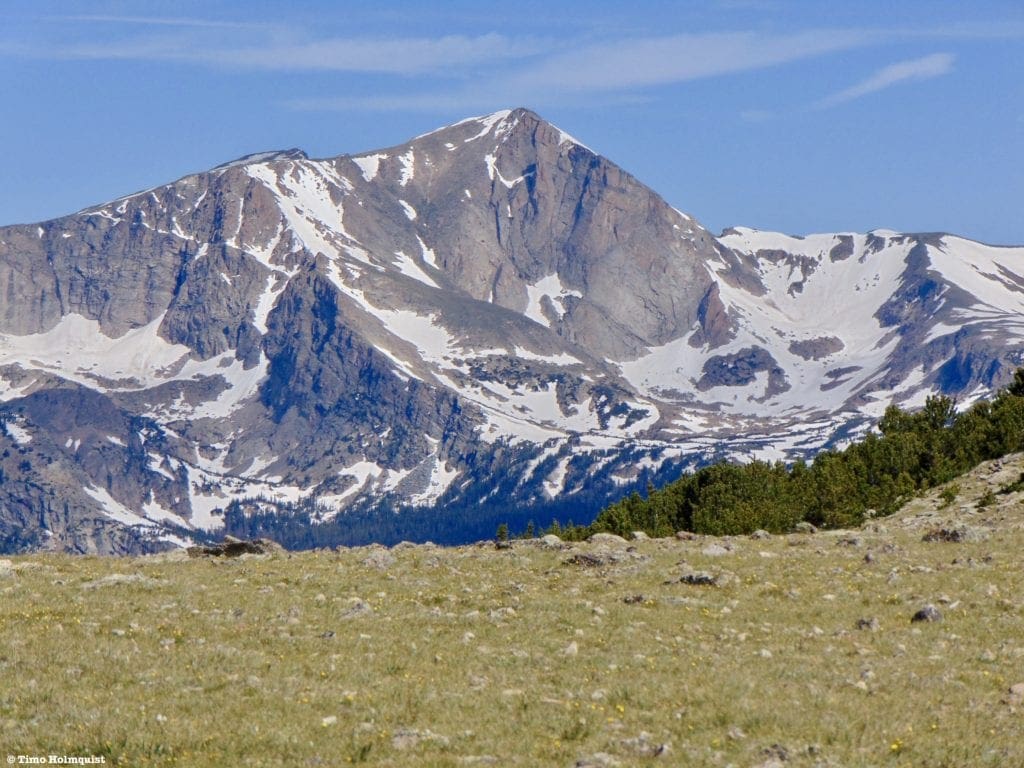
Mt Alice from St. Vrain Mountain
Scales and Criteria:
Scrambling Mt. Alice via the Hourglass Ridge has a Technical Rating of YDS Class 2+, (options for Class 3 scrambling).
This article utilizes three separate rating systems: Difficulty, Popularity, and a Technical Rating indicating the hardest move or set of moves encountered. The technical rating employs the Yosemite Decimal System. These are not hikes; navigational coherence, off-trail travel, and scrambling are necessary to complete them. You will also spend a long time in the alpine, know the signs of altitude sickness and how to respond to it.
Difficulty Ratings:
- Easy: less than 5 miles, less than 500 ft. of elevation gain
- Moderate: 5-10 miles, 500-2000 ft of elevation gain
- Hard: 5-15 miles, more than 2000 ft. of elevation gain
- Very Hard: 10+ miles, more than 3,500 ft. of elevation gain
Popularity Ratings:
- Low: Large sections of trail all to yourself
- Moderate: Sizeable trail sections to yourself, crowding possible on busy summer weekends
- High: You’ll be seeing people, still a chance for solitude in spring/fall/winter.
- Very High: Almost always busy.
Technical Rating:
- Class 1: Established hiking trail the entire length of the adventure. Low chance for injury.
- Class 2: Typically involves cross-country navigation, possibly using hands for balance but not required, steeper than Class 1.
- Class 3: Hands and feet used to scale areas, must use hands to proceed (either for balance or to help pull you up a section), increased exposure, a fall could be fatal. Helmet recommended, along with grippy hikers.
- Class 4: Climbing on very steep terrain just shy of vertical, falls could be fatal, hands employed for grip and balance continuously, ropes advisable but scalable without. Helmets are highly recommended, along with grippy hikers.
- Class 5-5.4: Vertical climbing that involves technical rock-climbing moves, exposed, falls likely to be serious or fatal, possible to scale without ropes but only for very experienced veterans. Helmets, grippy hikers, and/or rock-climbing shoes necessary.
The YDS system is widely used in North America but can be quite subjective, so it is not perfect. The biggest differences I’ve encountered between Class 3 and Class 4 sections relates to the slope angle of the technical section, the exposure, and putting your full weight and pressure on hand grips (4) instead of using hands mainly as a supporting point of contact (3). It is not possible to climb a Class 4 section without using your hands to pull up your body weight. If downclimbing, a key difference is that most people will descend a Class 4 section facing inward, i.e., your back faces the exposure.
Mount Alice from Lion Lake 1.
The Ultimate Offline GPS Hiking & Ski Maps
See why onX Backcountry is the ultimate GPS navigation app for your outdoor pursuits. Try Today for Free. No credit card required.
Directions to Trailhead:
Mount Alice is accessed via the Wild Basin Trailhead. You can approach this trailhead from the north, south, or east. If approaching from Grand Lake, traverse all of Trail Ridge, exit the park in Estes, and drive south to reach the trailhead.
From the north (Estes Park area), take CO7 south as if heading to Allenspark. Before you arrive in the town, keep an eye out for brown Wild Basin signs on your right. The access road will come up fairly quickly after seeing the signs. The turnoff is about twenty minutes south of town.
From the south, head north on CO7, passing through the town of Allenspark. You’ll be able to spot the towering Mt. Meeker on the approach. It’ll feel as though you passed the basin but keep looking for those brown signs and take a left where Wild Basin is indicated.
Once you’re off CO7, follow the narrow road west, passing the Wild Basin Lodge on your way to the park gate. Past the gate, the road turns to dirt and continues for another 2 miles before arriving at the parking lot. The lot is usually full by 8 or 9 AM on busy summer weekends.
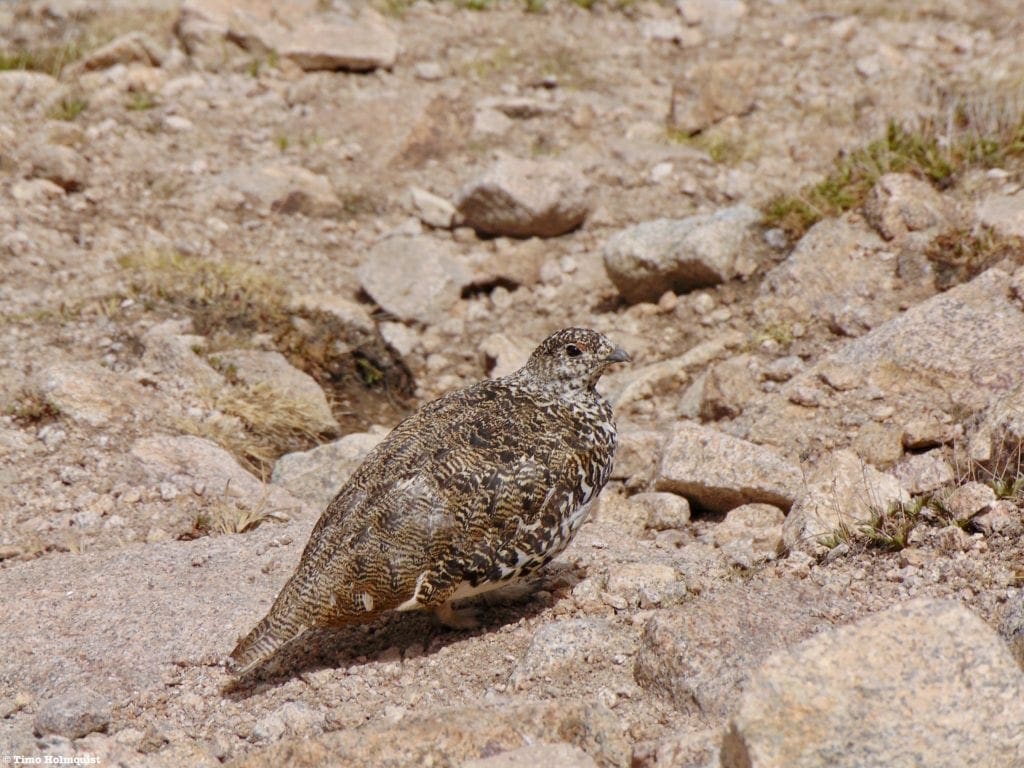
Curious Ptarmigan aka the Alpine Chicken.
Places to Stay:
Camping near Rocky Mountain National Park will cost you. The options for free area camping are limited. On a positive note, there are plenty of options, and the National Park is within driving distance of Fort Collins, Boulder, and Denver.
- Estes Park: Known as the gateway to Rocky Mountain National Park, Estes sees nearly 80% of park traffic as opposed to the much quieter western entrance near Grand Lake. The town has a ton of lodging options.
- Allenspark: A small town near Wild Basin that has a few lodging options, including the Wild Basin Lodgeand the Sunshine Mountain Lodge and Cabins.
- Rocky Mountain National Park Camping
- Moraine Park Campground: $30 per site. $20 in winter. Established campground with perks, facilities, campfire grate, wood for sale in summer, and bear boxes to store food. Only loop B is open in the winter, and it’s first-come, first-serve.
- For summer, a reservation is needed quite a ways in advance to secure a spot.
- Glacier Basin Campground: $30 per site. Established campground with the same perks as Moraine Park. Reservation required.
- Backcountry Campsites: Rocky Mountain National Park has backcountry sites that you could book in advance. There is no open camping in the backcountry; it must be at designated backcountry sites. Please check the park website for more details. Backcountry sites require an overnight permit of $30.
- Camping near Estes Park
- Estes Park Campground at Mary’s Lake: Established campground, pricey $45-55. Good backup if other campgrounds are full.
- Hermit Park Open Space: $30 for a tent site, price increases if towing a trailer or for group spots.
- Estes Park Koa: Rates dependent on what you’re bringing with you but will run more than $50 a night in the busy season.
- Free or close to free: but a little farther (if you’re willing to drive)
- Ceran St. Vrain Trail Dispersed Camping ($1)
- County Road 47. Users have reported trash and ATV noise at this location, but it is free.
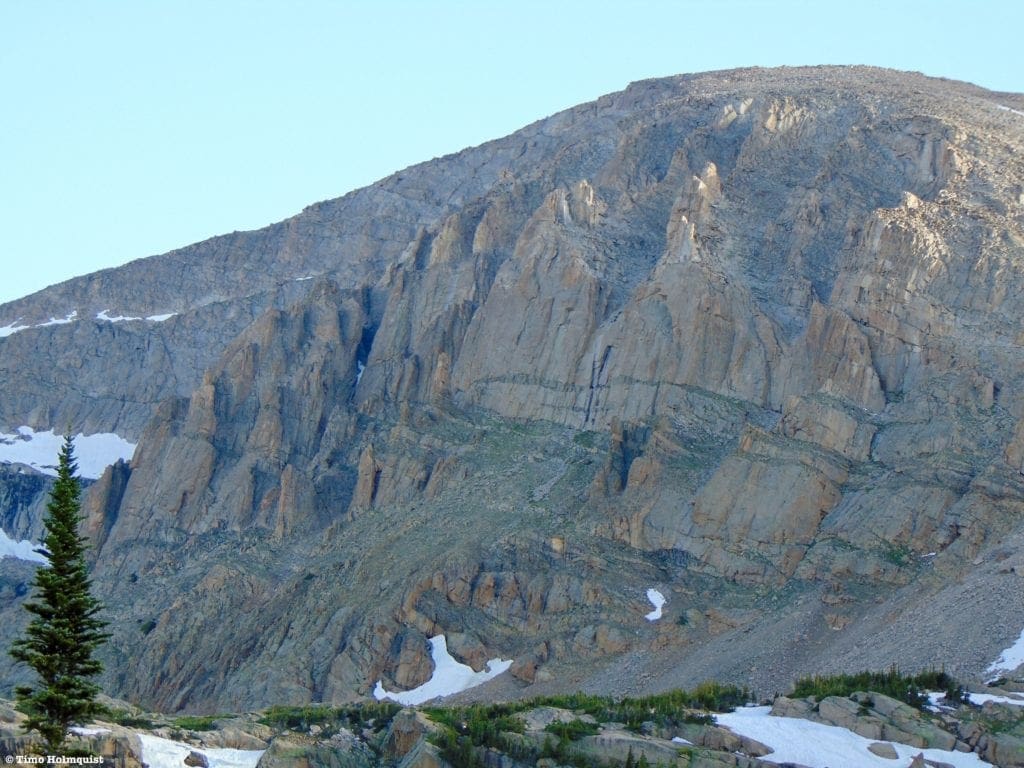
Cliffs on Chiefs Head Peak.
Field Notes:
Mt. Alice is a beautiful mountain situated within Wild Basin, part of Rocky Mountain National Park on the Continental Divide. This is one of the most complete hikes in Rocky Mountain National Park and Colorado in general. Despite its length and commitment, you can reap the rewards of Copeland Falls, Calypso Cascades, Ouzel Falls, Lion Lakes, the beautiful Hourglass Ridge, tundra strolling to Boulder-Grand Pass, Lake of Many Winds, and finally Thunder Lake. Few hikes combine so many beautiful elements into one. In either scenario, you’re going to want to start early and hike fast to avoid the potential for afternoon thunderstorms.
Up until late June or early July, large parts of the trail will be snow-covered, dramatically increasing the effort. Bring mosquito spray for the lower elevations of this trail, especially around the boggy areas leftover from snowmelt. It’s best to hike this trail from July-Sept when the snow is less or completely gone. The later into the summer it gets, however, the more common lightning strikes are. As a general rule, you want to be off of a summit or high point by noon latest. Thunderstorms can form quickly and without much warning.
A lot of the highlights of this hike occur above treeline where the environment has not adapted to human presence. Please do your absolute best to stay on rocks and avoid trampling the vegetation. It takes roughly fifty years for an inch of alpine topsoil to form; you can dislodge that amount with one finger. This is a sensitive environment, tread lightly and leave no trace.
For weather forecasting, start with the Allenspark extended forecast, which should cover the first 4-5 miles of trail. Since a lot of the hike is above treeline, specific mountain forecasts area also useful; pay special attention to temperature differences and wind speed between Allenspark and the summit. You can look at Mt. Alice’s weather, as well as Longs Peak for a nice trio of forecasts to compare against. Weather in the mountains is notoriously fickle; make sure to check the forecast once more before you leave to get the most accurate assessment.
Rocky Mountain National Park requires an entrance pass. You can find out about the pricing options here. During the summer of 2021, there will also be a timeslot permit necessary for entry. The only way around this second permit is to arrive in Wild Basin before 9 am AND with an entrance pass. Since it’s such a long hike, starting earlier is always better anyway. It is incumbent upon each individual hiker to understand their limits, understand the effects of high elevations on health, and know how to orient themselves in a true wilderness setting.
Moss Campion on the south ridge of Mt. Alice
Journal:
The trail to Mt. Alice begins at the Wild Basin Trailhead in Rocky Mountain National Park. Wild Basin itself is a gigantic, completely protected alpine basin ringed with mountains and feels like one of the most expansive areas of the park’s eastern half. There’s a good chance for solitude on many parts of this hike, but you really want to start this one early. You’ll begin by taking the well-trodden Wild Basin Trail west into the woods, passing Copeland Falls within a couple points of a mile. There are short side trails to see the falls, though you may want to save that for on the way back, you’ve got a long day ahead of you.
About 1.3 miles into your adventure, you’ll come across a junction; take the right branch, which leads past a bunch of campsites, instead of the detour to Calypso Cascade and Ouzel Falls. If you have energy on the return, you can give these features a look, but first things first. The campsite trail knocks some distance off your hike, so in any case, it’s the recommended route.
Meadow Mountain and St. Vrain from a viewpoint on the campsite trail.
Continue on, eventually reconnecting with the trail that led to Calypso Cascade. Once the trails merge back together, continue west, gaining elevation until you reach the trail junction with Lion Lakes Trail.
Take a right here and begin a sharper bit of elevation gain amongst a mature forest with ample canopy coverage from the powerful summer sun. At this point, it’s been mostly trees with occasional glimpses of higher peaks.
The views slowly open up as you approach the Lake.
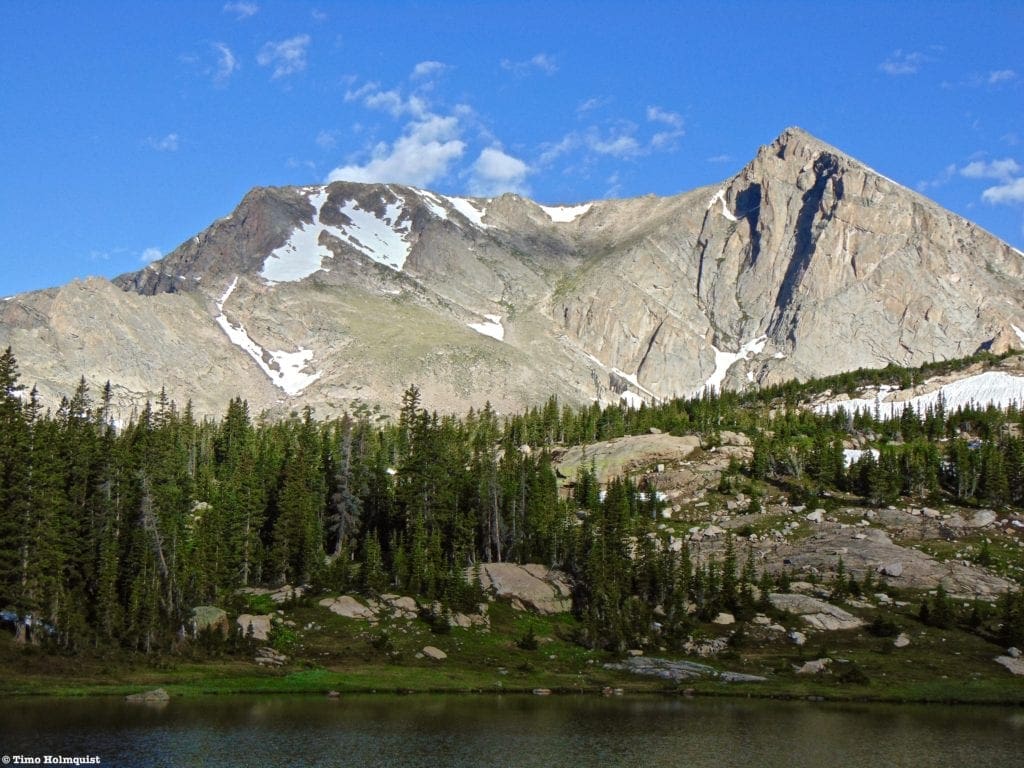
Perhaps that’s why the reveal at Lion Lake 1 is so stunning. The trees seem to melt back and reveal a crystal-clear lake with breathtaking views to Mt. Alice and the sharp sides of Chiefs Head Peak.
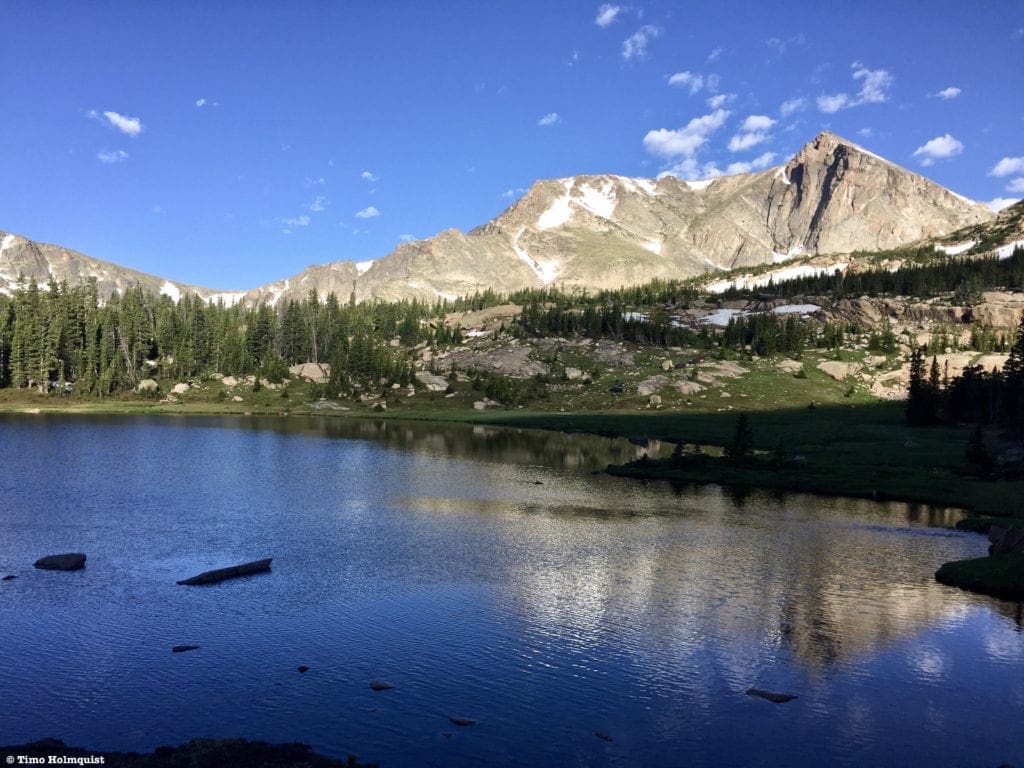
Mt. Alice from Lion Lake 1.
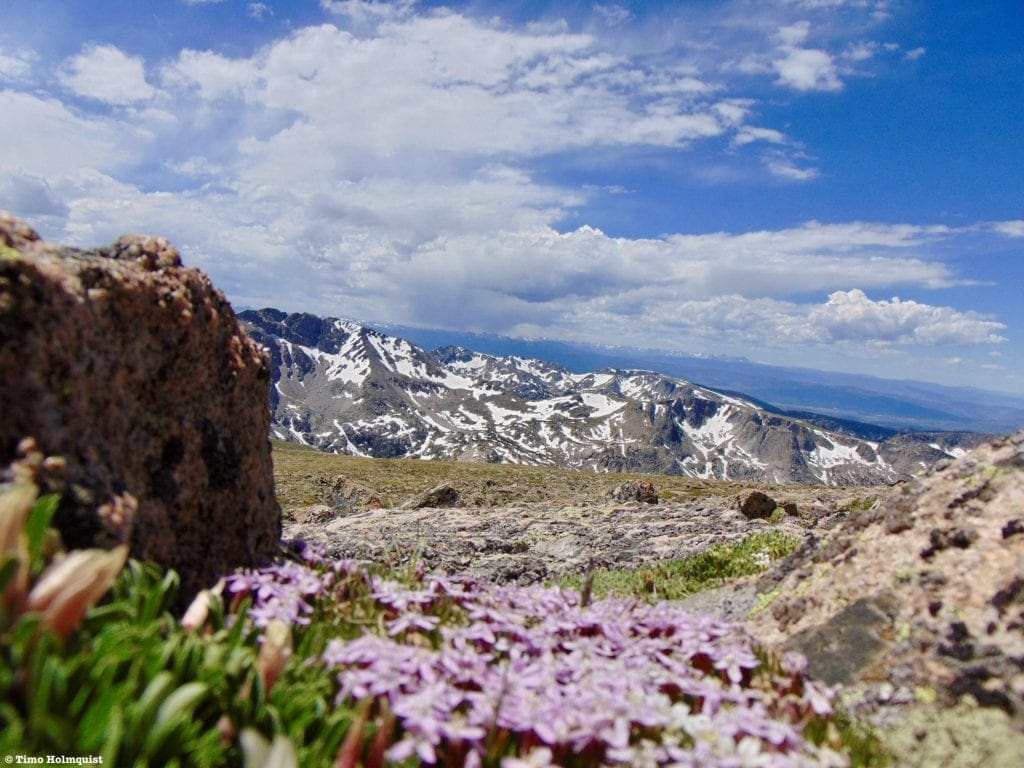
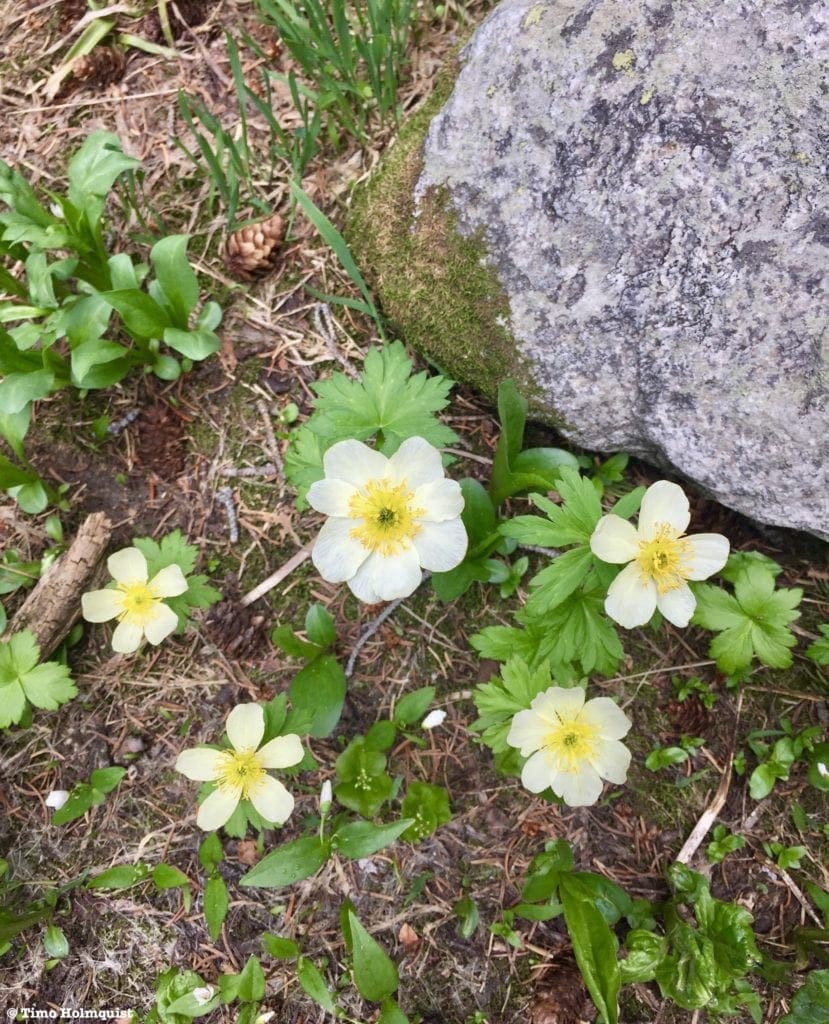
After soaking up the views, continue around the eastern side of the lake. The trail officially ends here, although careful spotting will find multiple trail braids and small cairns leading north towards Trio Falls. Follow the path of least resistance, eventually climbing a slope to the left of Trio Falls. In July, this area is absolutely popping with wildflowers.
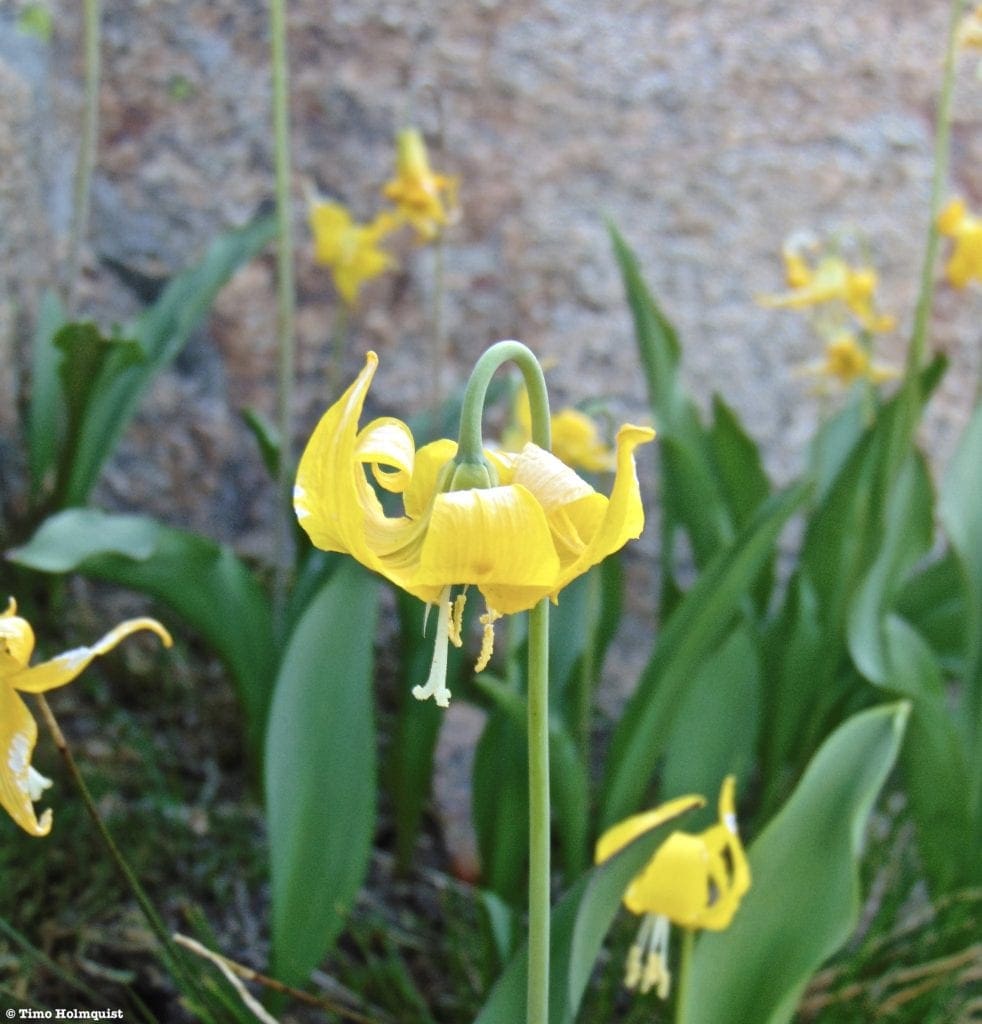
Snow-lily.
Once you curve past Trio Falls, the smaller Lion Lake 2 comes into view. Instead of heading towards it, stay a little higher and pass by on the left (west) side. Continue north up a subsequent bench, reaching Snowbank Lake.
From the west side of snowbank lake, take a sharper left turn and walk to the ridge crest.
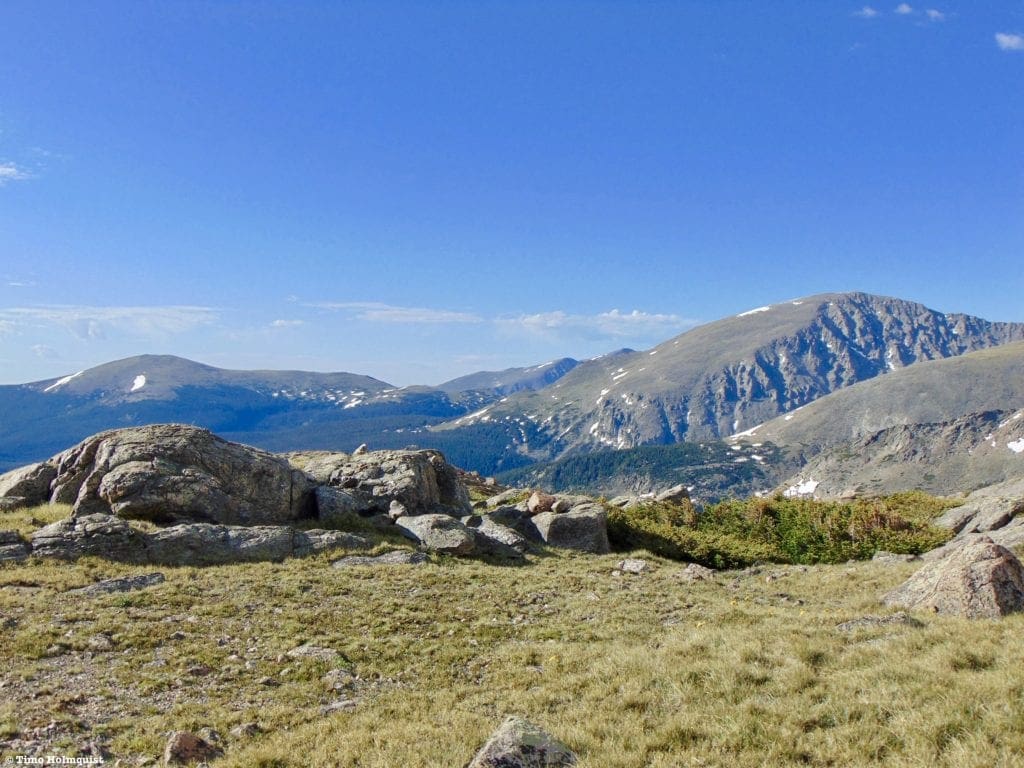
Looking south into more of Wild Basin with St. Vrain Mountain (left) and the rippled sides of Copeland Mt (right).
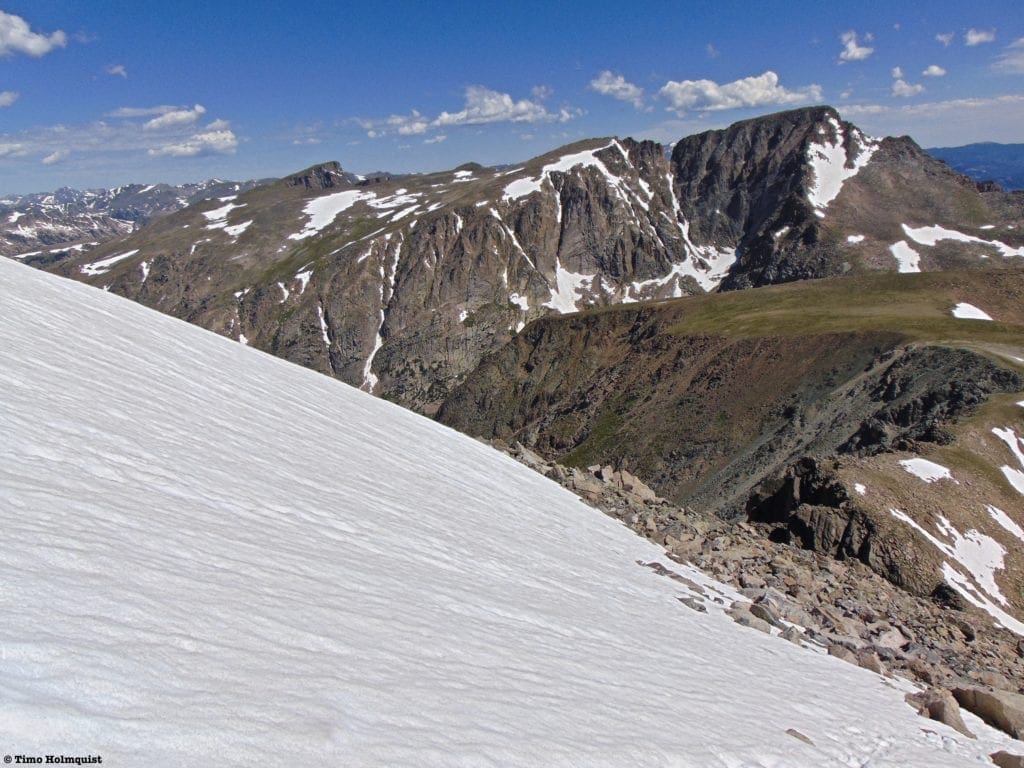
Once on the ridge crest, you’ll be offered a stunning view of Mt. Alice’s eastern cliffs.
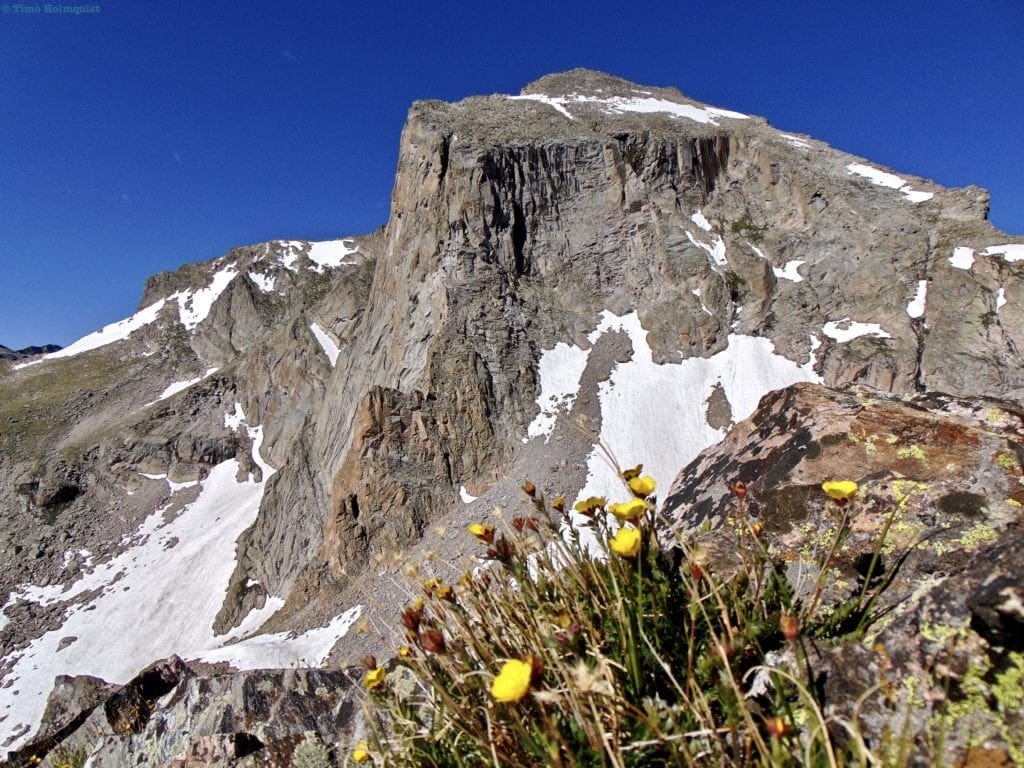
Mount Alice’s eastern cliffs.
Turn back north and follow the ridge crest as it rises to the ridge west of the saddle between Chiefs Head and Alice.
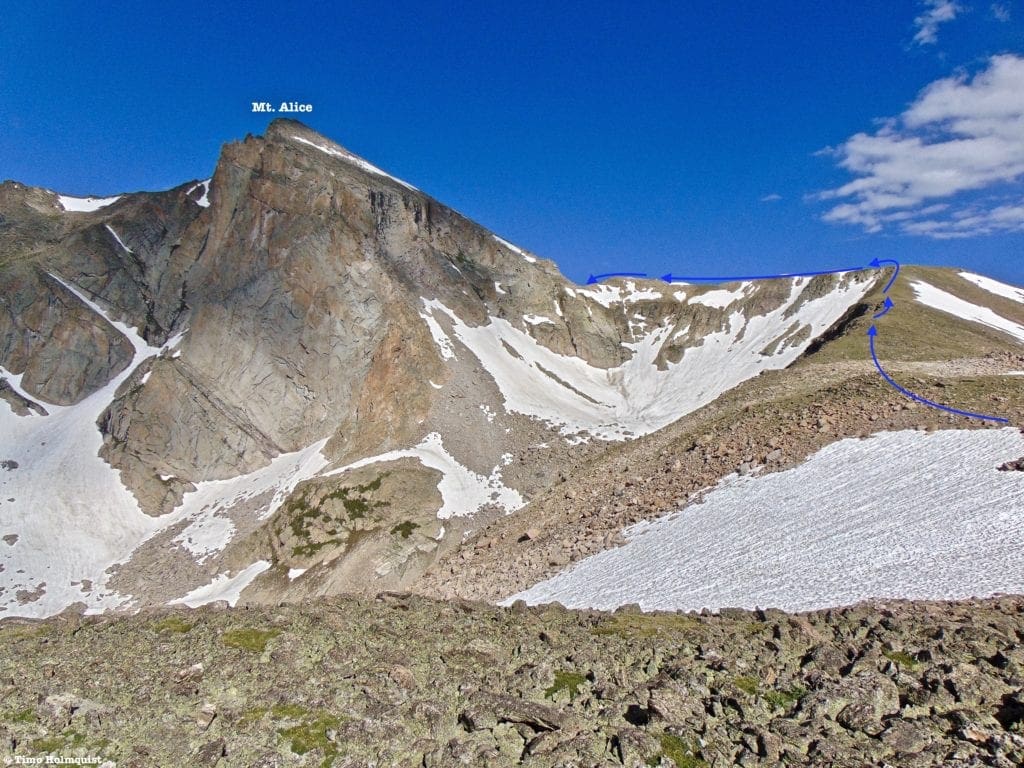
Marked up ascent route.
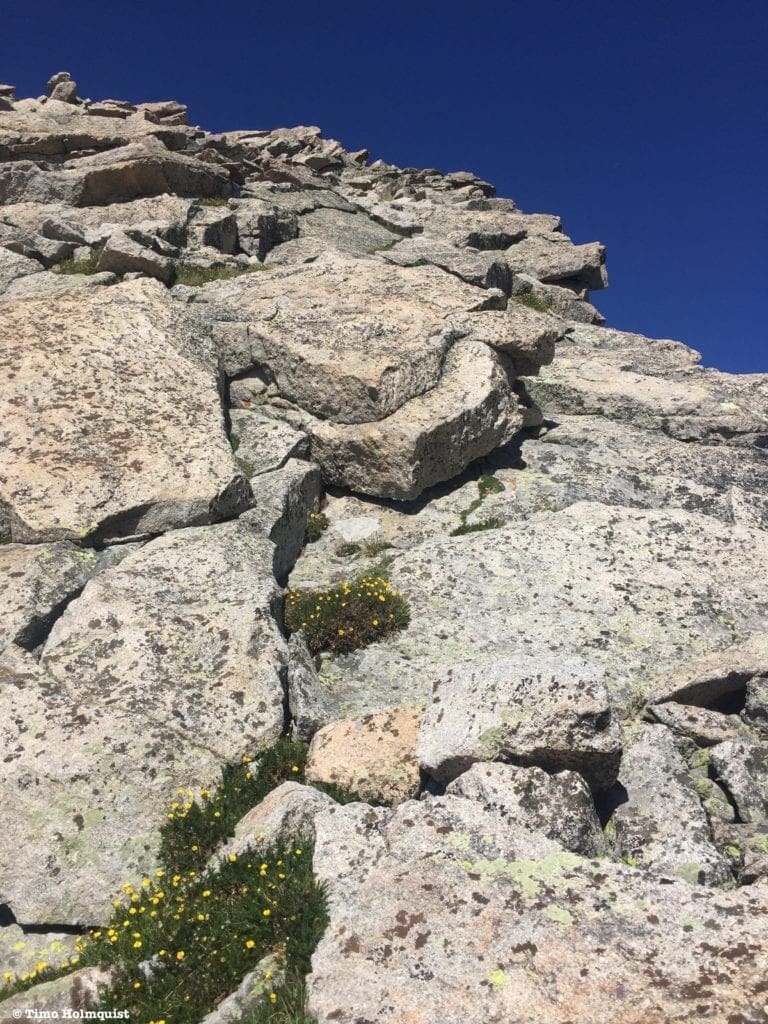
Take care not to step on alpine plants when able; rock hopping is always preferable.
Once you ascend to the ridge connecting Alice and Chiefs Head, you’ll be on the continental divide. Enjoy views to Chiefs Head, McHenry’s, and McHenry’s notch as well as Alice.
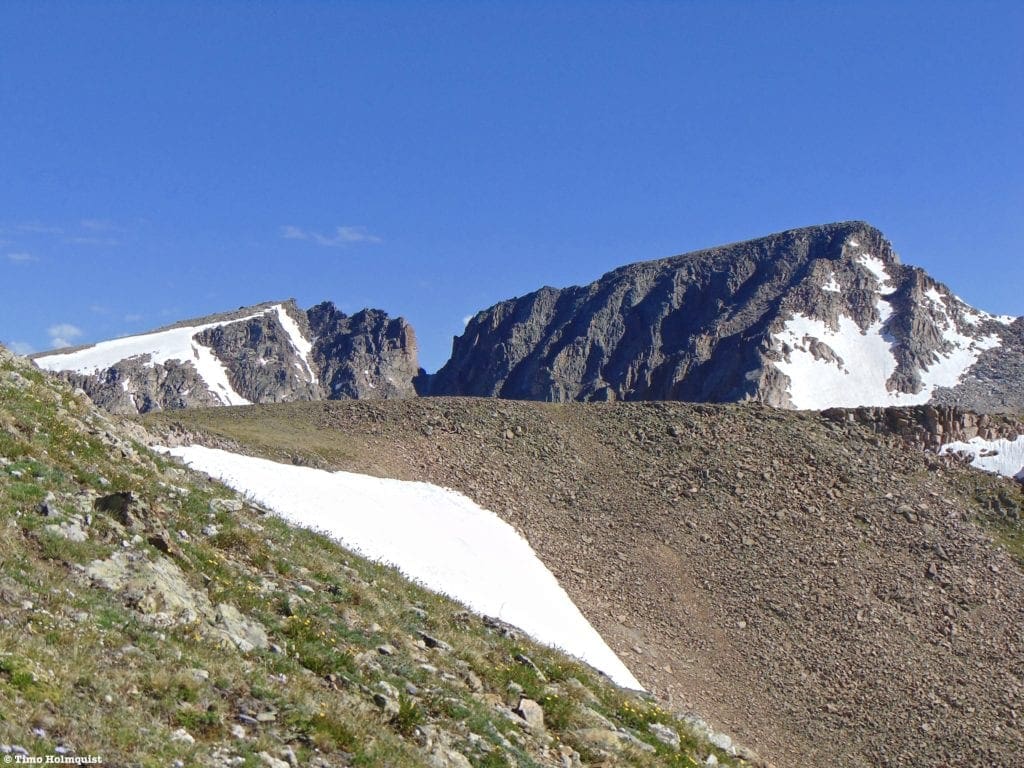
McHenry’s Peak and notch from near the Continental Divide.
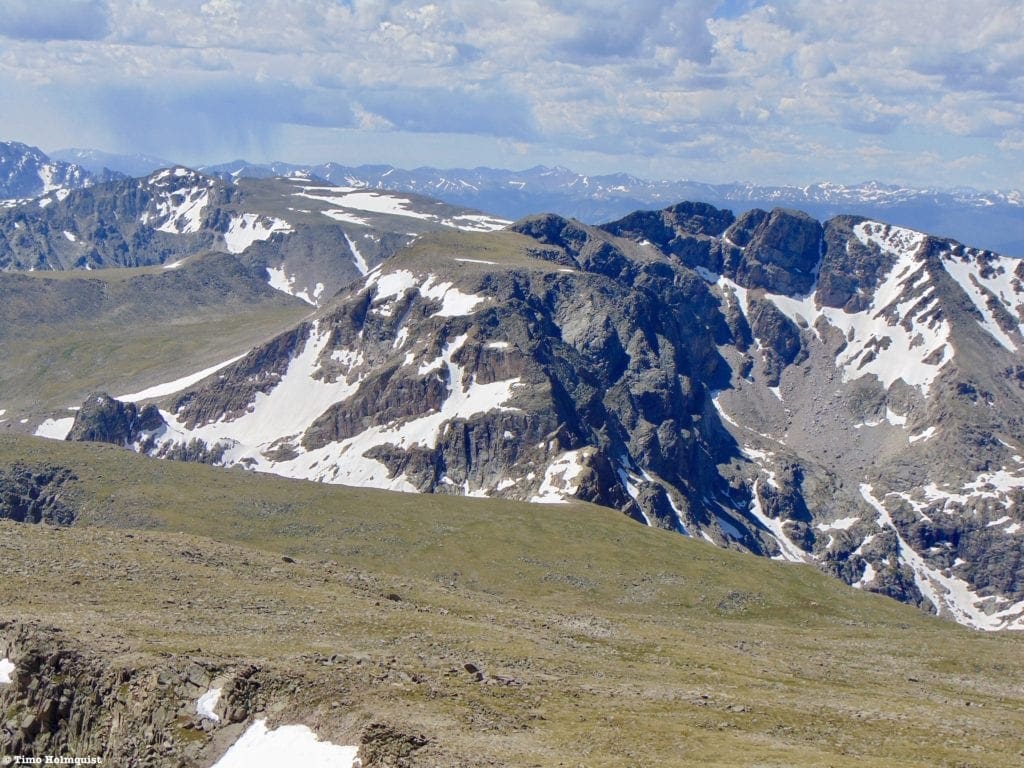
Turn towards Mt. Alice and scope out Hourglass Ridge. The view here can be quite intimidating, but take heart; the scrambling is on the lower end of the scale (YDS 2+ if you stick to the middle of the Hourglass).
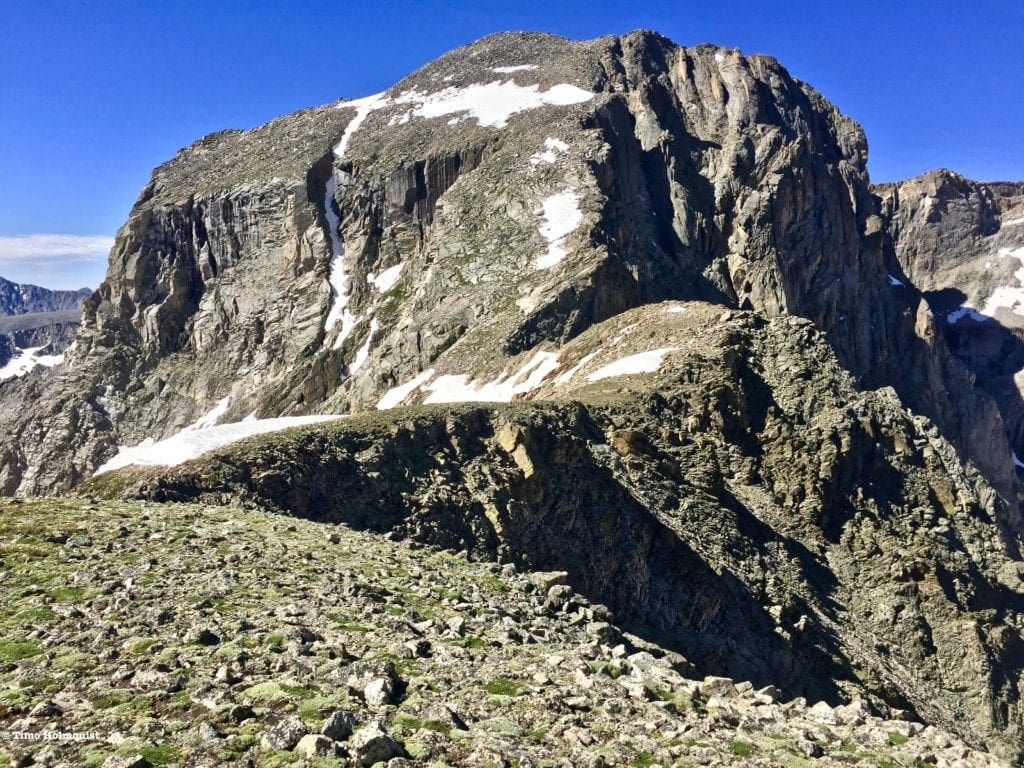
The Hourglass Ridge.
If you want a bit of challenge, once you start climbing, stick to the right side of the ridge where you can play with wild exposure on Alice’s north side and keep the scrambling at a more continuous Class 3 level.
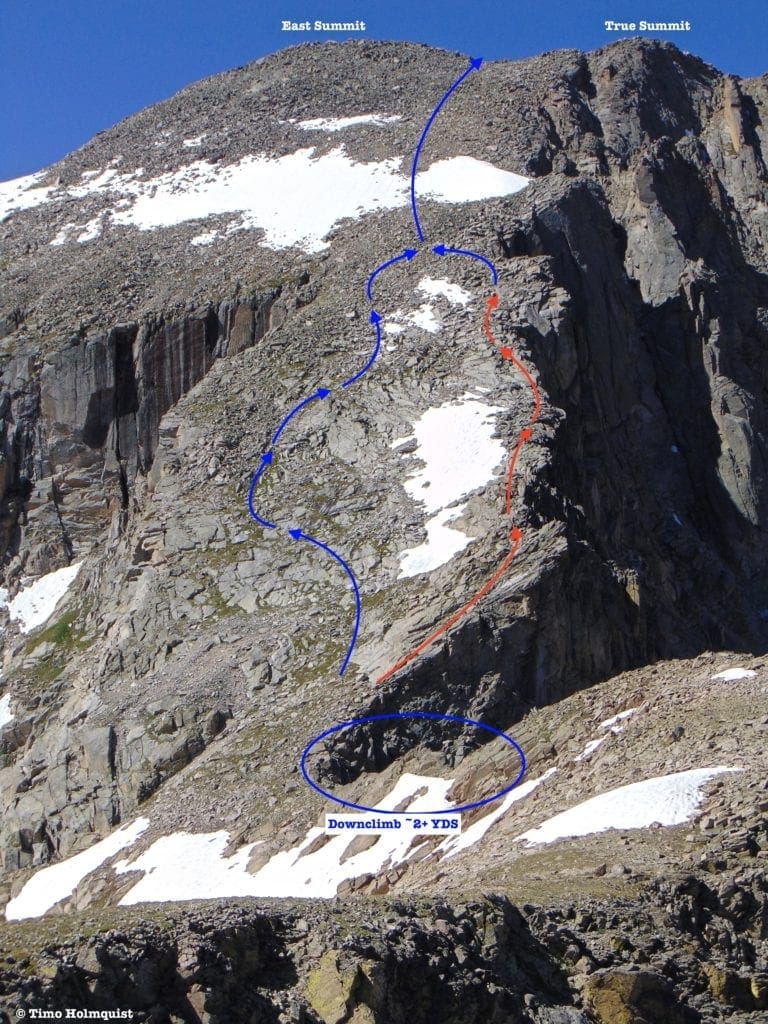
Zoomed in on the Hourglass Ridge, where Blue lines and circles indicate a YDS Class 2 or 2+ scramble and Red indicates a YDS Class 3 route.
Sample of the scrambling part, Hourglass right. While tougher, the right side has much sturdier rock slabs. As always, double check your holds.
If tackling this slope earlier in the summer, chances are you’ll encounter some snow along the middle of the ridge that can be avoided, but if you want the variety, it’s usually soft enough to kick step in. I’d still bring a pair of micros with you just in case.
The snowfield above the Hourglass.
Once you dispense with the Hourglass Ridge, you’ll arrive between two summit bumps. The right bump is slightly higher, but since they’re so close, you might as well tag both of them. Enjoy the stunning views east towards Longs, Meeker, and Chiefs Head.
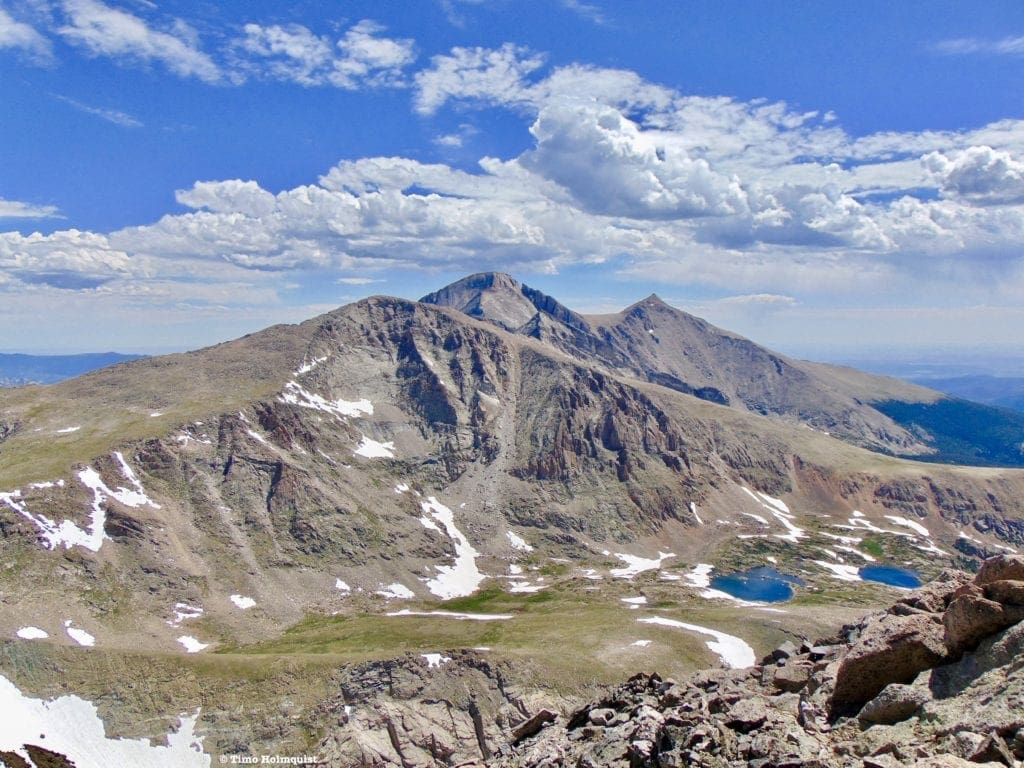
Otherworldly views from the top of Alice.
If you venture over to Alice’s eastern summit, you’ll be able to see Thunder Lake, where the hike will eventually take you.
Thunder lake from Alice’s east summit, the lake in the center of the photo.
From here on out, the character of the route changes. You’ll notice it immediately as you look south towards Isolation Peak.
Wide open tundra on the way to Boulder-Grand Pass.
Descending from the summit, you’ll stroll across a very healthy stretch of alpine.
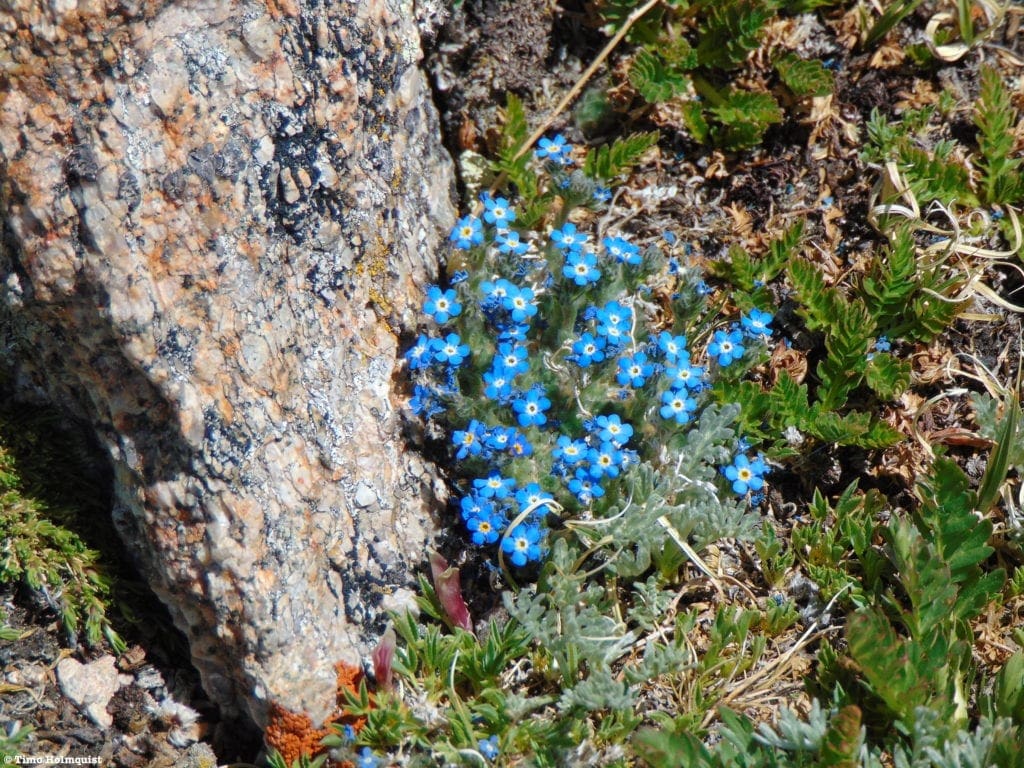
Alpine Forget-me-not.
Andrews Peak from the southern slopes of Alice.
It’s just a lovely, downhill alpine stroll with excellent views into the remote southwest corner of the park. Remember to avoid stepping on sensitive alpine vegetation!! If you focus hard to the south, you can see the Cleaver rock feature along the divide, in front of the imposing north face of Isolation Pk.
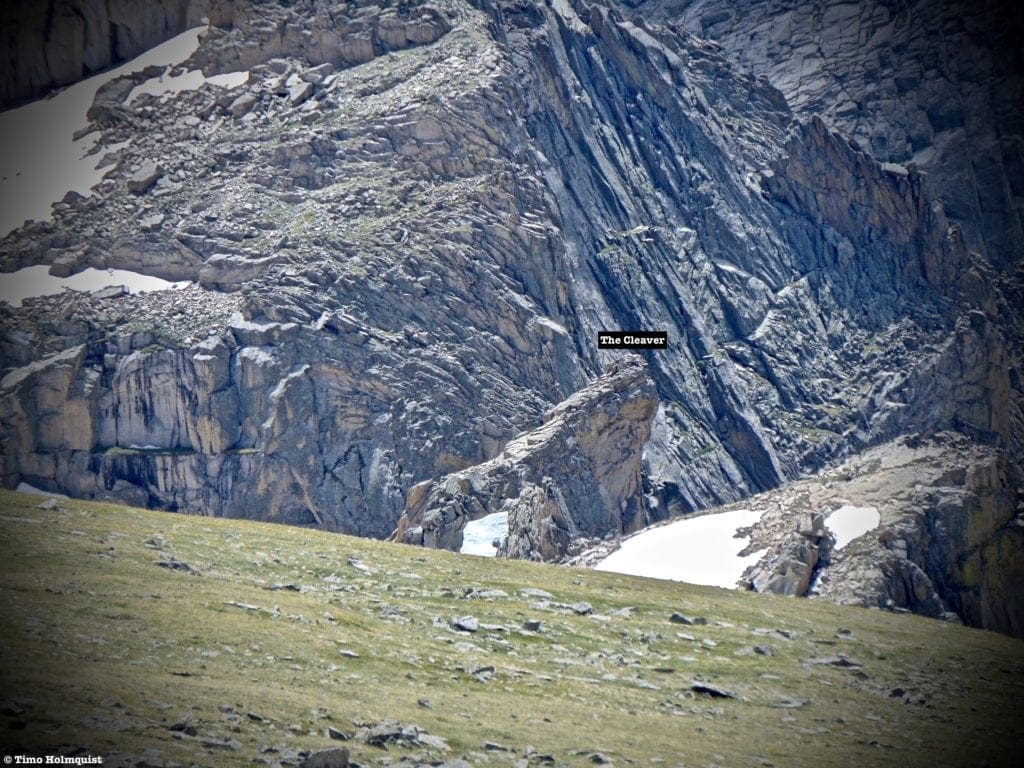
The Cleaver.
Eventually, you’ll descend to Boulder-Grand Pass.
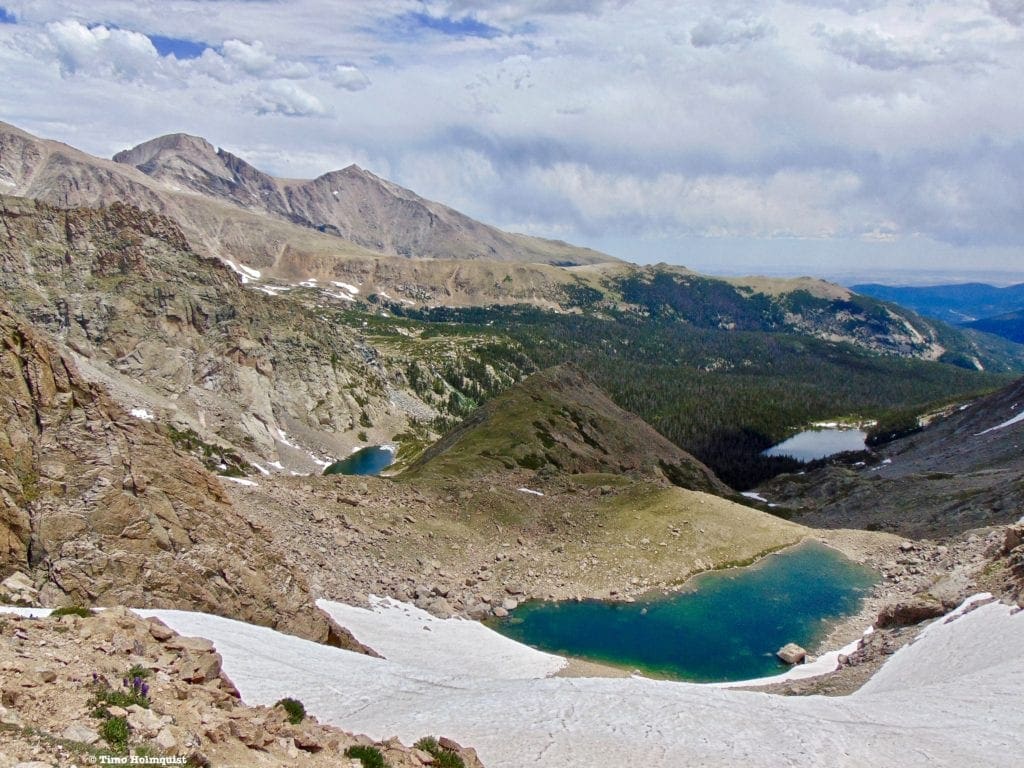
Looking east from the top of Boulder-Grand Pass.
Look for a rocky chute on the near side, heading left. That’s your descent route. This is a fairly steep descent; it’s absolutely manageable, but take your time and use your hands to brace when it feels appropriate. Through at least mid-July, the rest of the pass is snowy and quite steep.
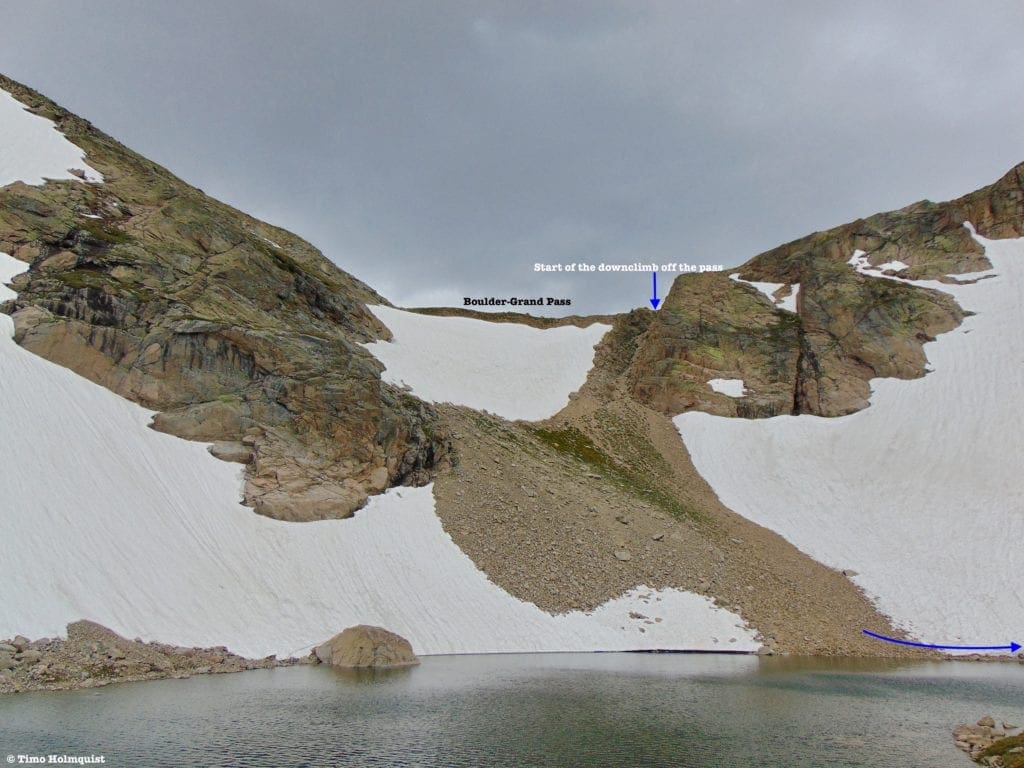
Looking up at the pass from Lake of Many Winds.
The lake below you is called Lake of Many Winds. Once you reach the bench around the lake, you’ll be off ridgelines for the rest of the hike. Pick up a strong hiker path as it weaves below Lake of Many Winds and reenters the trees above Thunder Lake. There are multiple braids here, but as long as your heading east, you’ll make it down to Thunder Lake. Earlier in the summer, this descent is loaded with wildflowers. Here’s a sampling of what I saw.
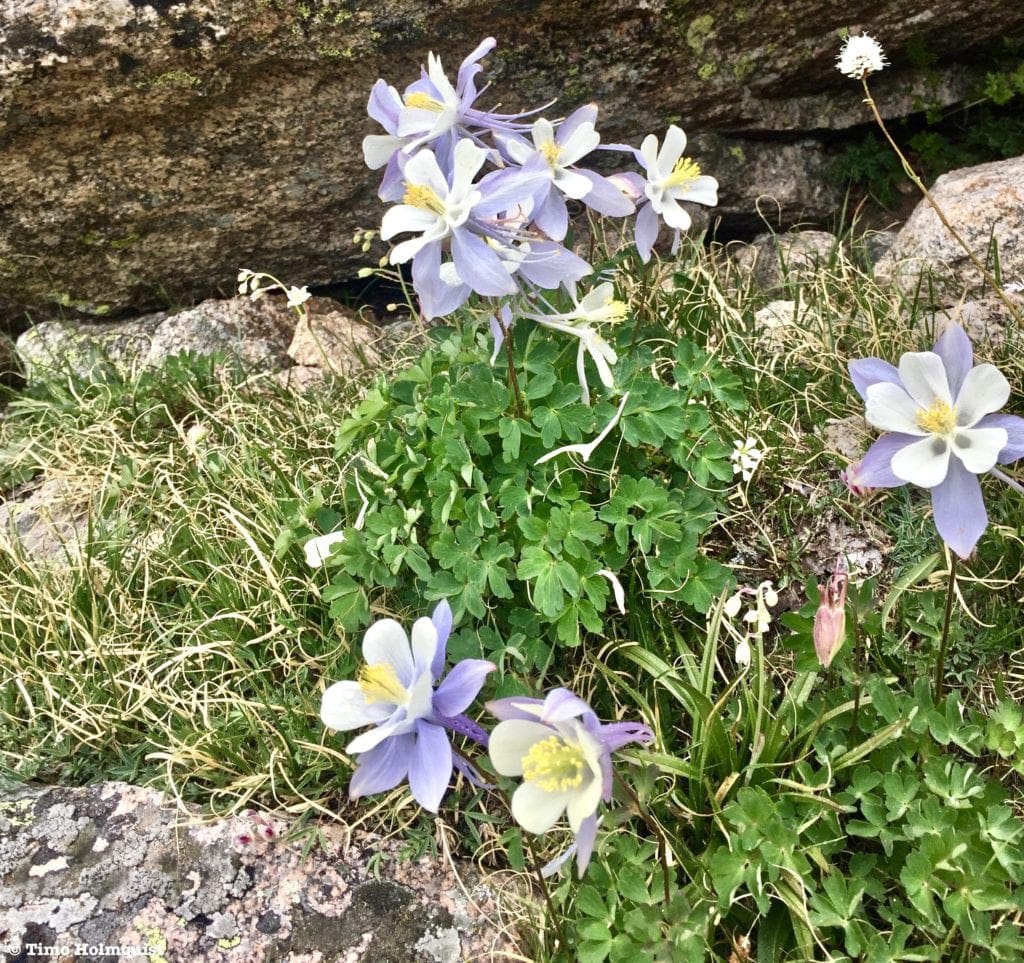
Columbine.
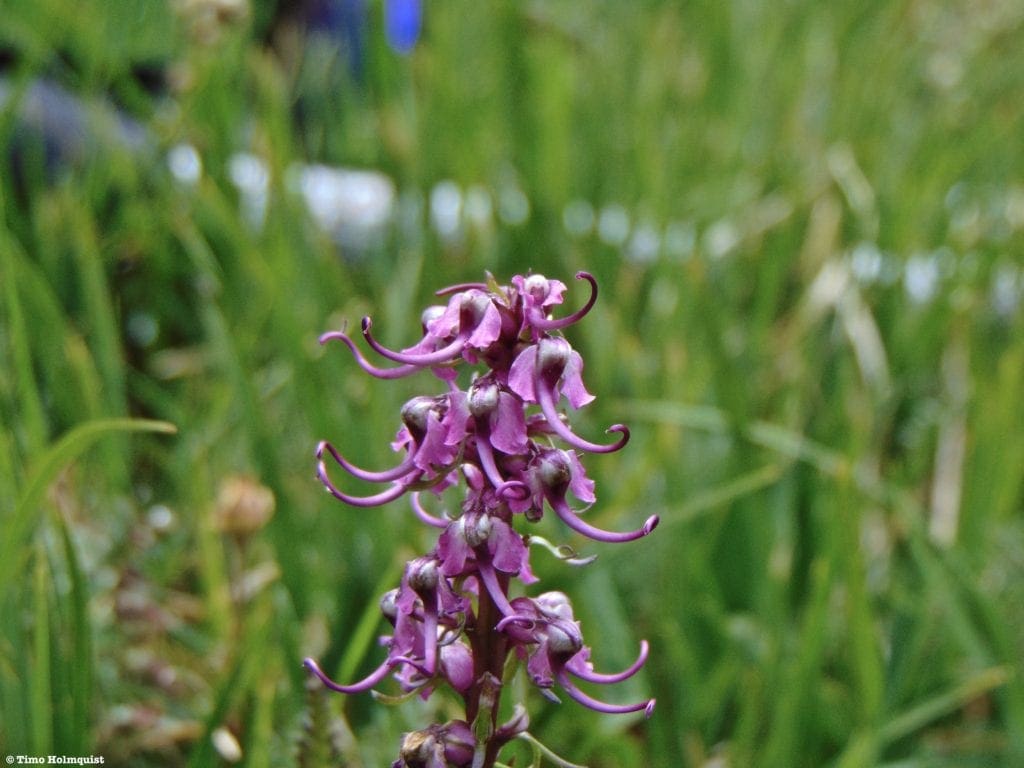
Elephants Head.
White Mountain Aven.
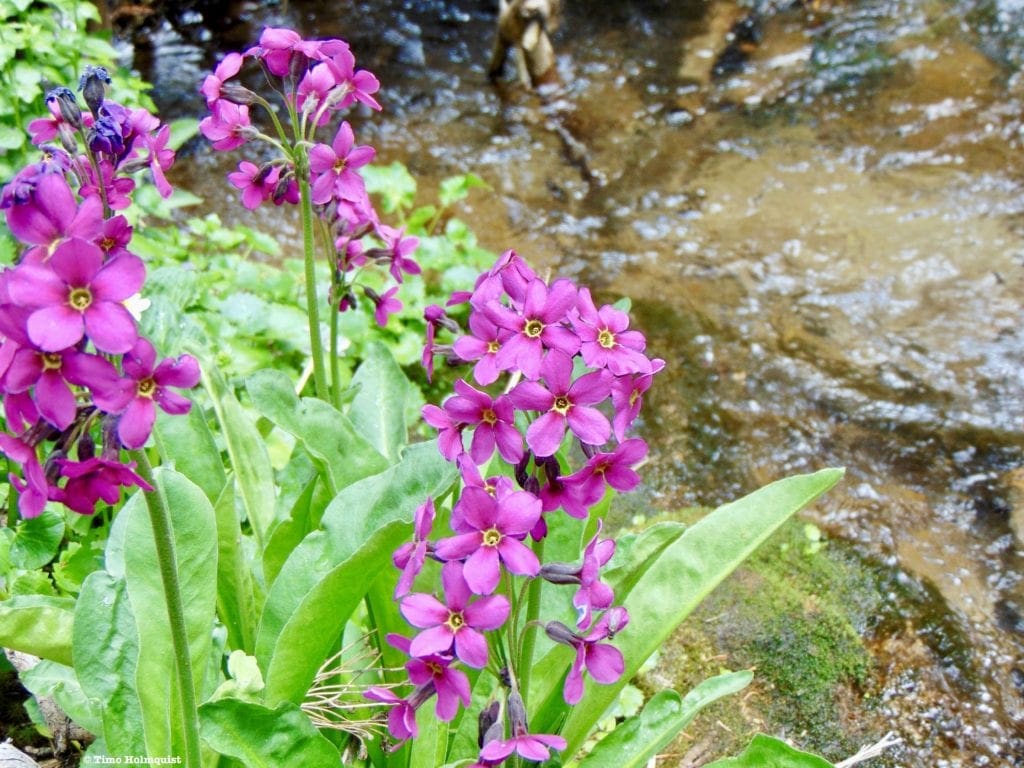
Parry Primrose.
I also spent ten minutes chatting with an inquisitive Ptarmigan.
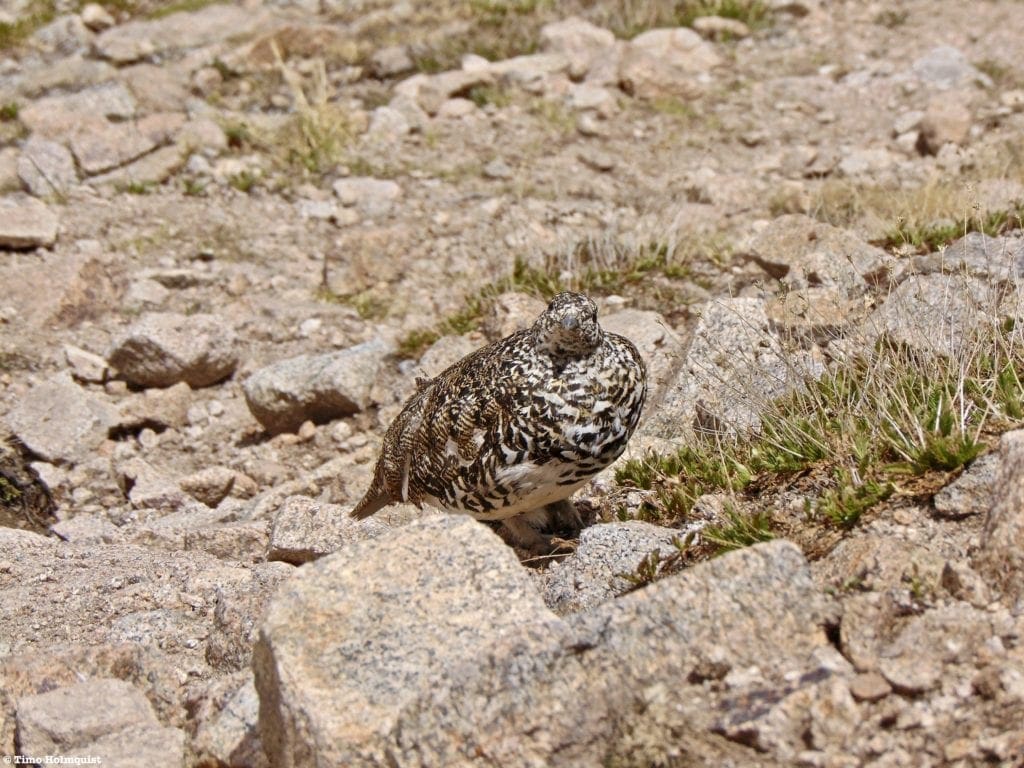
Probably wondering why I’m still talking to it.
Once you make it to the edge of Thunder Lake, stay to the left of it and followed an obvious herd path to the patrol cabin at the eastern foot of the lake.
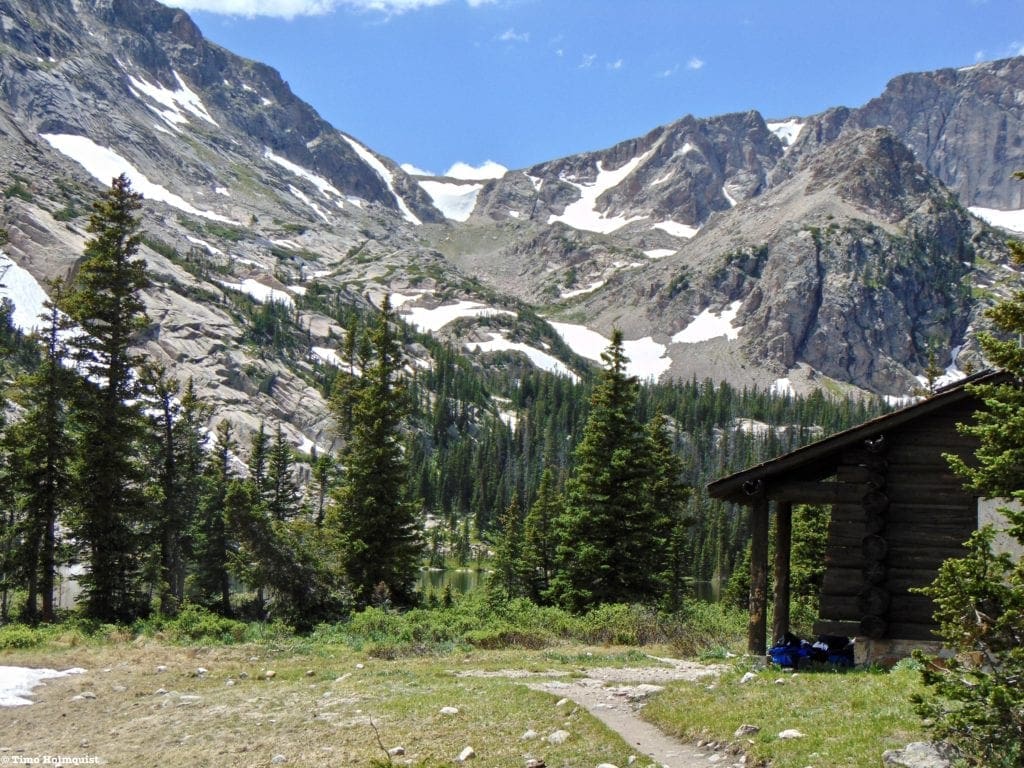
Patrol cabin near Thunder Lake, looking back up to Boulder Grand Pass.
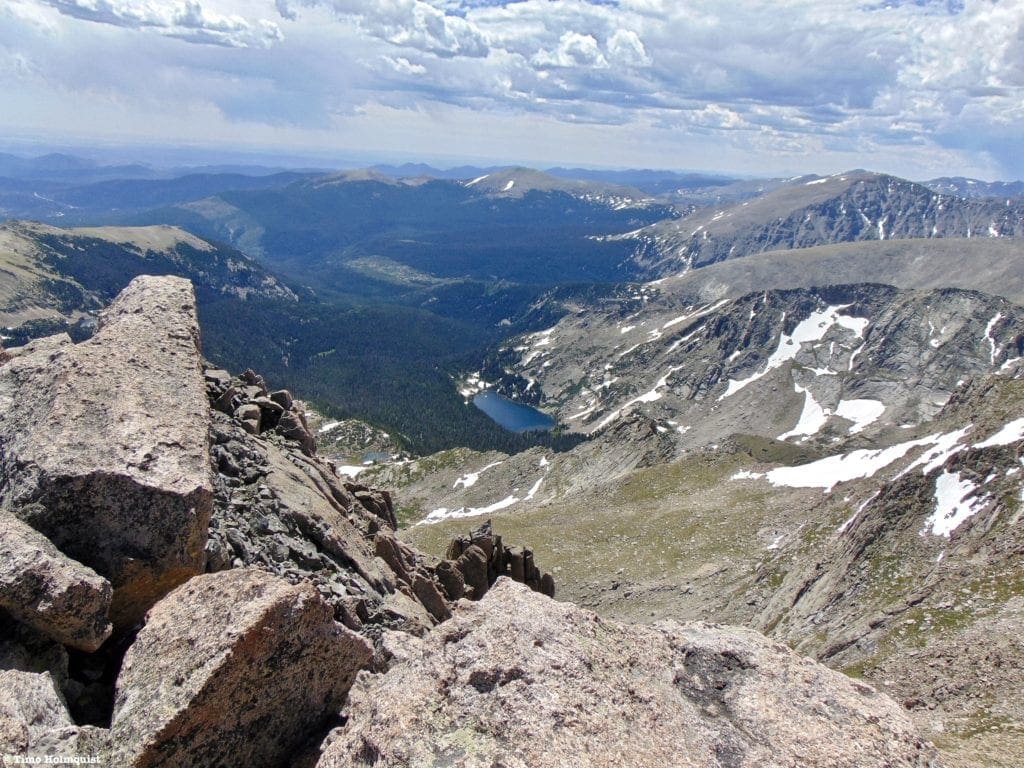
Once you find the cabin, you can pick up the official trail, which will perplexingly head uphill for a few minutes (stick with it), before curling around a boggy area and descending. The next few miles consist of a long downhill, with fantastic views into seldom explored basins to the south of Thunder Lake. Eventually, you’ll pass the trail junction to Lion Lake, thus completing the loop portion of the hike.
If you have gas left in the tank, take the spur trail at the next intersection to Ouzel Falls and Calypso Cascade. If not, continue heading east on the campsite trail, reconnect with the main Wild Basin Trail and walk by Copeland Falls on the way to your car.
Final Thoughts:
This is a long and arduous hike. If you’re not comfortable with starting before dawn, there’s a chance it’ll be dark by the time you get back to your car. Additionally, the long stretch of trail above treeline is prime lightning territory. There aren’t a lot of places to hide up there if storms roll through. Because it is such a high loop, it’s really in the best shape from July-September or before the first large snowfall.
Despite its difficulty and length, as previously stated, it’s hard to find a hike with so many wonderful features and wildflowers. For the most colorful experience, an early to mid-July timeframe is best. Due to its location south of the ever-popular Bear Lake and Longs peak areas, the chances for a true wilderness experience here are high. They don’t call it Wild Basin because it’s tame.
If you’re in shape, can hike 17 miles in a day, and want to really experience Rocky Mountain as the hiking park it’s known for, Mt. Alice via the Hourglass Ridge has you covered. As always, tread lightly, don’t feed wildlife, and leave no trace to help maintain the natural beauty of the area.
Popular Articles:
- Guide to the Best Hiking Trails in Rocky Mountain National Park, Colorado
- The Dyrt: The 10 Best Campgrounds In Colorado
- Top Adventure Sports Towns 2021: Boulder, Colorado
- Epic Adventures with the Best Guides In Colorado
- Bear Lake Nature Trail, Rocky Mountain National Park, Colorado
- Mills Lake via Glacier Gorge Trail, Rocky Mountain National Park, Colorado
- Black Lake Via Glacier Gorge Trail, Rocky Mountain National Park, Colorado
- Lake Haiyaha Trail, Rocky Mountain National Park, Colorado
- Sky Pond via Glacier Gorge Trail, Rocky Mountain National Park, Colorado

Skyblue Overland Strongly Recommends That You Enroll With Global Rescue Prior To Embarking On Your Next Adventure.
With more people outside now more than ever, Global Rescue expanded services to include field rescue within 100 miles of home. With Local Field Rescue — automatically included in any travel protection services membership — Global Rescue is there whether you’re hiking, kayaking, snowmobiling, fishing or simply enjoying the outdoors and get ill or injured and you’re unable to get to safety on your own. Purchase a Global Rescue membership for your next adventure and travel with peace of mind. Single trip, annual and family options are available.
Memberships start at $119.
Terms of Use:
As with each guide published on SKYBLUEOVERLAND.com, should you choose to this route, do so at your own risk. Prior to setting out check current local weather, conditions, and land/road closures. While taking a trail, obey all public and private land use restrictions and rules, carry proper safety and navigational equipment, and of course, follow the #leavenotrace guidelines. The information found herein is simply a planning resource to be used as a point of inspiration in conjunction with your own due-diligence. In spite of the fact that this route, associated GPS track (GPX and maps), and all route guidelines were prepared under diligent research by the specified contributor and/or contributors, the accuracy of such and judgement of the author is not guaranteed. SKYBLUE OVERLAND LLC, its partners, associates, and contributors are in no way liable for personal injury, damage to personal property, or any other such situation that might happen to individuals following this route.


