


High Point:
~11,520 feet at Snowbank Lake

Total Ascent:
~2,700 feet for Lion Lake #1 (3,200 ft for Snowbank Lake).

Difficulty:
Hard

Distance:
11.7 miles to Lion Lake #1 (~14 miles to explore all 3 Lakes)

Waypoints:
40.20845, -105.56672

Route Type:
Out and back
Hidden in Rocky Mountain National Park, Lion Lakes and Snowbank Lake boast untouched alpine scenery. Photographers will relish the remote views. Swimming is limited but treed shores are perfect for hammocks. Snowbank Lake offers even more water options. Best views of Wild Basin!

Overview:
Lion Lakes and Snowbank Lake form a trio of beautiful alpine destinations tucked carefully between the long north ridge of Chiefs Head and the impressive eastern flank of Mt. Alice. They are often passed on the way to tag both summits but are worth exploring as destinations on their own. The overall mileage to get to them is a fairly large detractor for casual recreationists but also helps give the lakes a pristine and remote feeling. This area provides some of the best impressions of Wild Basin and the southern reaches of Rocky Mountain National Park.
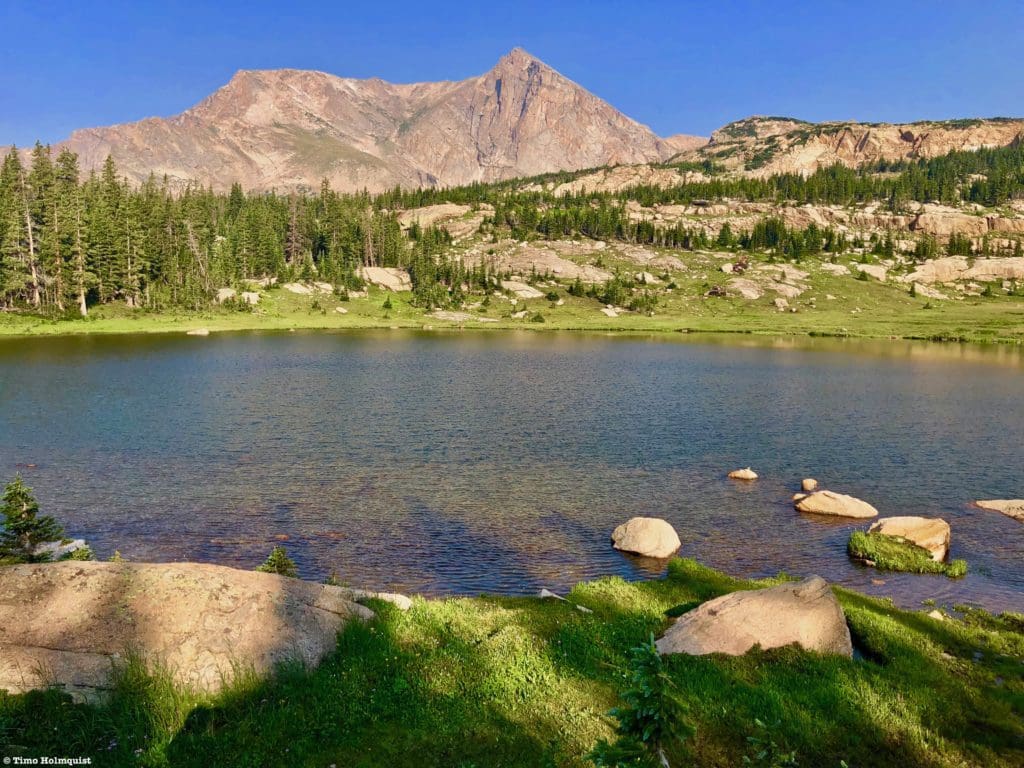
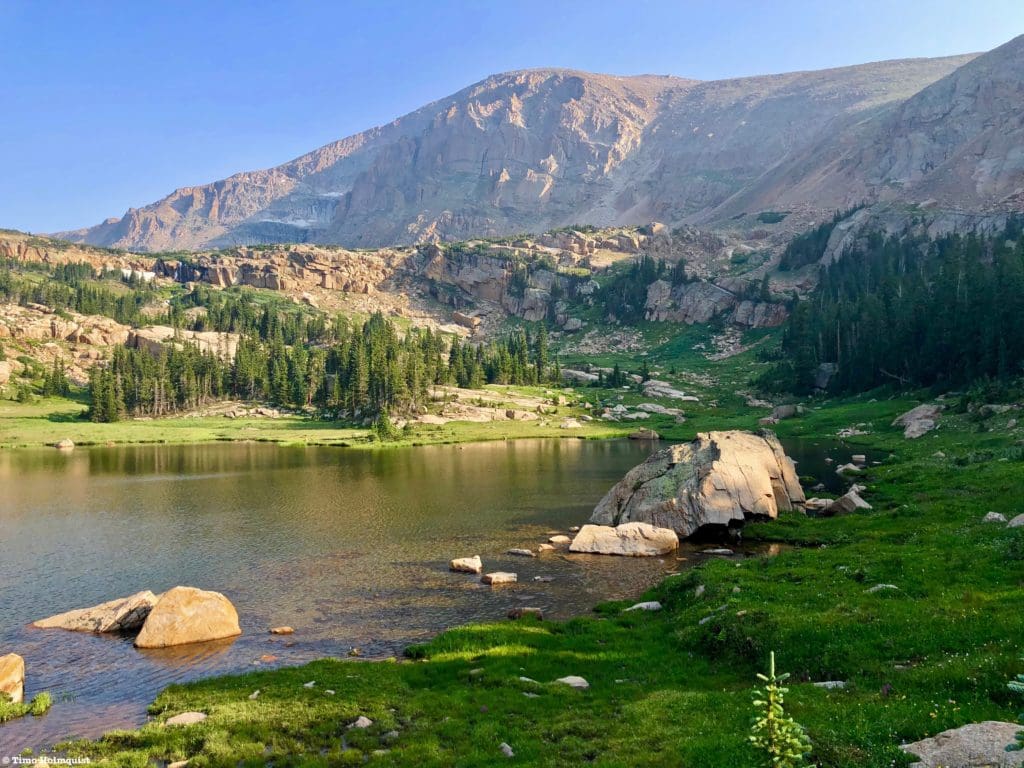
Lion Lake #1 with Mt. Alice behind.
Table of Contents:
Article Navigation: Click on any of the listed items in the table of contents below to jump to that section of the article. Similarly, clicking on any large, white section header will jump you back to the Table of Contents.
The Ultimate Offline GPS Hiking & Ski Maps
See why onX Backcountry is the ultimate GPS navigation app for your outdoor pursuits. Try Today for Free. No credit card required.
Directions to Trailhead:
This hike takes off from the main Wild Basin trailhead. It is located off of US 7, just north of Allenspark. Find US 7 and approach from either the north (Estes area) or the south (Allenspark, Lyons, Boulder, Nederland, etc.). If approaching from the south, make your way through Allenspark and look for a large brown sign for Wild Basin; there is a small left turn lane in the middle of the road. Once you see the sign, slow down, the turn is abrupt. You’ll make a hard left onto a small road and proceed past some houses and the Wild Basin Lodge. The National Park gate is located on the right side of the road and is visible when you approach.
From the north, there will be a large Wild Basin sign on your right after you pass the Meeker Park Overflow Campground. While the sign is large, there is only one, so when you see it, slow down. It’ll be a right-hand turn onto a small road. Proceed until seeing the National Park gate on your right. Approach the gate and drive through to enter into Wild Basin.
Regardless of how you get to the Park gate, you’ll want to drive the dirt road into Wild Basin for its entire length until coming to a parking lot. Make sure to follow the one-way road signs and park where able. The trail takes off from the lower loop portion.
Lush vegetation on the way to Trio Falls.
Places to Stay:
Camping near Rocky Mountain National Park will cost you. The options for free area camping are limited. On a positive note, there are plenty of options, and the National Park is within driving distance of Fort Collins, Boulder, and Denver.
- Estes Park: Known as the gateway to Rocky Mountain National Park, Estes sees nearly 80% of park traffic as opposed to the much quieter western entrance near Grand Lake. The town has a ton of lodging options.
- Allenspark: A small town near Wild Basin that has a few lodging options, including the Wild Basin Lodgeand the Sunshine Mountain Lodge and Cabins.
- Rocky Mountain National Park Camping
- Moraine Park Campground: $30 per site. $20 in winter. Established campground with perks, facilities, campfire grate, wood for sale in summer, and bear boxes to store food. Only loop B is open in the winter, and it’s first-come, first-serve.
- For summer, a reservation is needed quite a ways in advance to secure a spot.
- Glacier Basin Campground: $30 per site. Established campground with the same perks as Moraine Park. Reservation required.
- Backcountry Campsites: Rocky Mountain National Park has backcountry sites that you could book in advance. There is no open camping in the backcountry; it must be at designated backcountry sites. Please check the park website for more details. Backcountry sites require an overnight permit of $30.
- Camping near Estes Park
- Estes Park Campground at Mary’s Lake: Established campground, pricey $45-55. Good backup if other campgrounds are full.
- Hermit Park Open Space: $30 for a tent site, price increases if towing a trailer or for group spots.
- Estes Park Koa: Rates dependent on what you’re bringing with you but will run more than $50 a night in the busy season.
- Olive Ridge Campground in Roosevelt National Forest is the closest campground to the Lookout Mt. trail. ~$20 for a standard nonelectric site.
- Free or close to free: but a little farther (if you’re willing to drive)
- Ceran St. Vrain Trail Dispersed Camping ($1)
- County Road 47. Users have reported trash and ATV noise at this location, but it is free.
- Meeker Park Overflow Campground
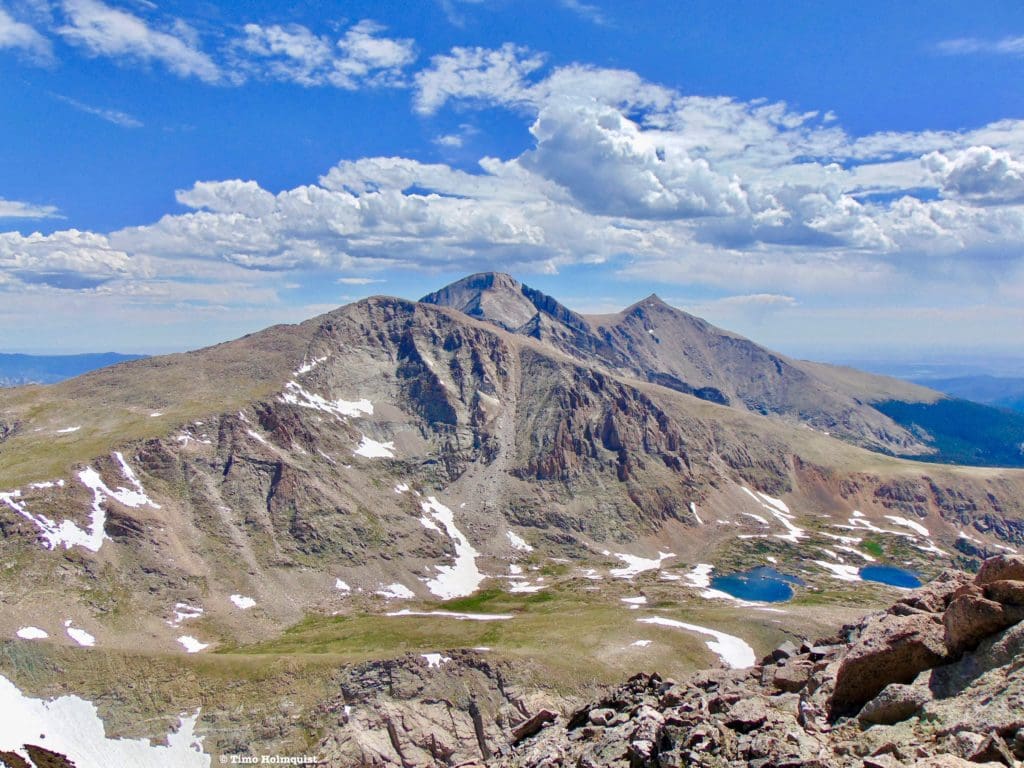
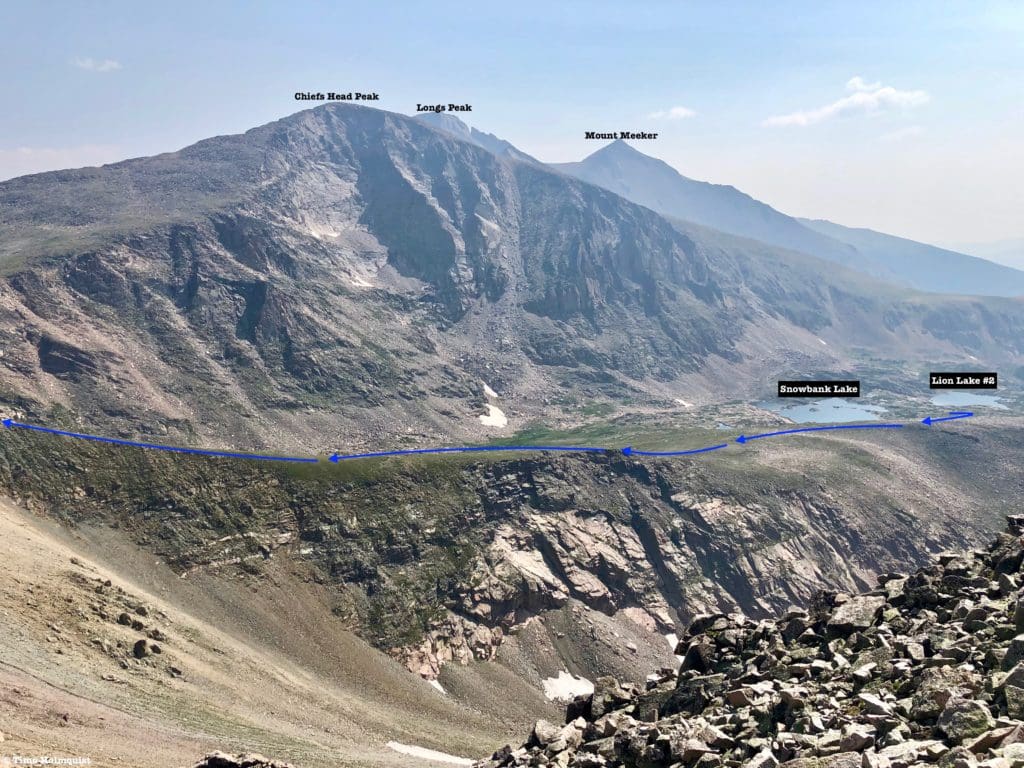
Snowbank Lake (L.) and Lion Lake #2 (R.) from near the summit of Mt. Alice.
Field Notes:
Like many destinations in Wild Basin, Lion Lakes and Snowbank Lake require a sizable amount of effort to reach. They are remote and tucked into a quiet corner of the basin but offer what Rocky Mountain National Park is best known for: stunning vistas, clear mountain lakes, streams, cascades, and a vibrant alpine ecosystem. If you’re incorporating the lakes into a lollipop loop featuring Mt. Alice, be sure to check out our review here.
For your weather needs, start with Allenspark’s extended forecast. The mountain forecast for Mt. Alice is a good option for the higher portions of Wild Basin. Chiefs Head Peak’s forecast is also useful. Using the three forecasts above, you should be able to hone in on what the conditions will be like near Lion Lakes. Remember to check the forecast religiously until the minute you leave for the trailhead, mountain weather changes. While Lion Lake #1 is fairly forested, both Lion Lake #2 and Snowbank Lake are firmly above treeline, meaning they can be in the crosshairs of some nasty afternoon thunderstorms. Make sure you are watching the skies.
With the elevation of Snowbank Lake at more than 11,500 feet, and any of the mountains or ridges around it crossing 12,000 feet, it’s important to be aware of and know how to respond to signs of altitude sickness. If you are coming from a low-lying area and haven’t had a chance to acclimatize, a splitting headache, lethargy, and nausea will almost certainly dampen the mountain spirit.
Chiefs Head framing the shoreline of Lion Lake #1.
Journal:
From the main Wild Basin parking lot, proceed west on a wide and obvious trail. You’ll pass Copeland Falls after 0.3 miles. 1.4 miles into your journey, you’ll arrive at a trail junction. If you haven’t checked out Ouzel Falls or Calypso Cascade, take a left and enjoy those beautiful water features. You can read more about them and Thunder Lake by clicking here.
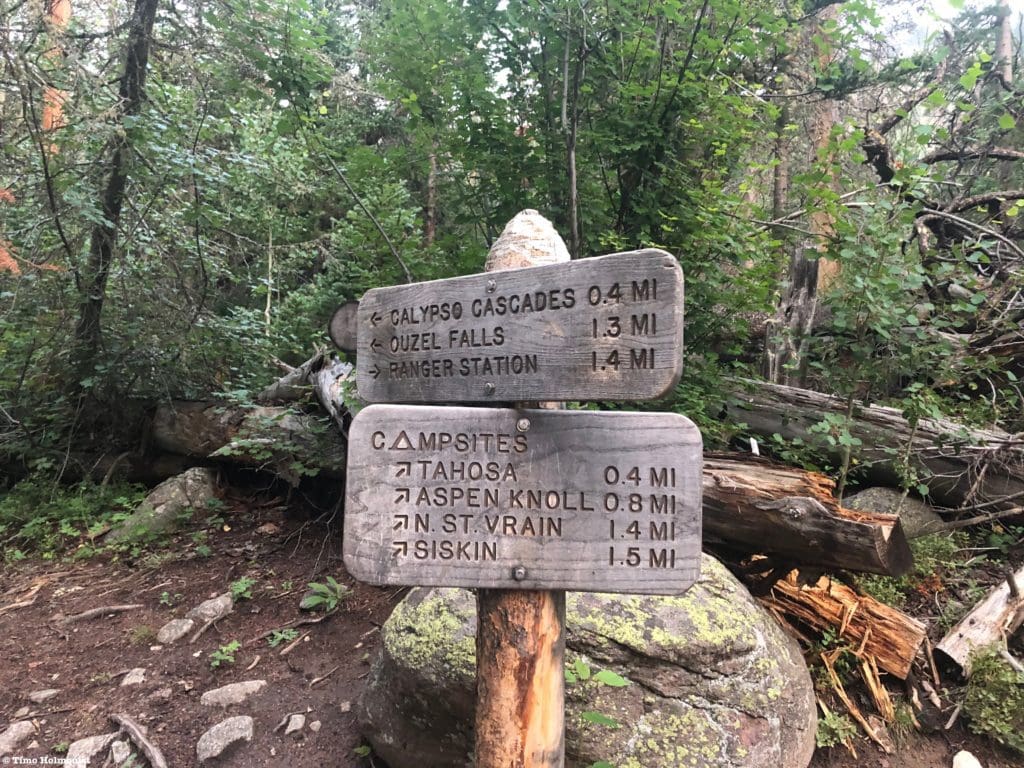
The trail Junction with the Campsites cutoff.
If you’d rather skip the crowds common at the falls, and save two miles of total distance, take the Campsites cutoff by heading right. The cutoff trail is a little rougher than the main trail but helps to shed the crowds. There are a couple of open rock areas next to the trail where you can stare across Wild Basin towards Mt. St. Vrain, but, by in large, the approach is treed. After 1.4 miles of the Campsites cutoff, you’ll merge back with the main Thunder Lake trail. Continue by hanging a right towards Thunder Lake.
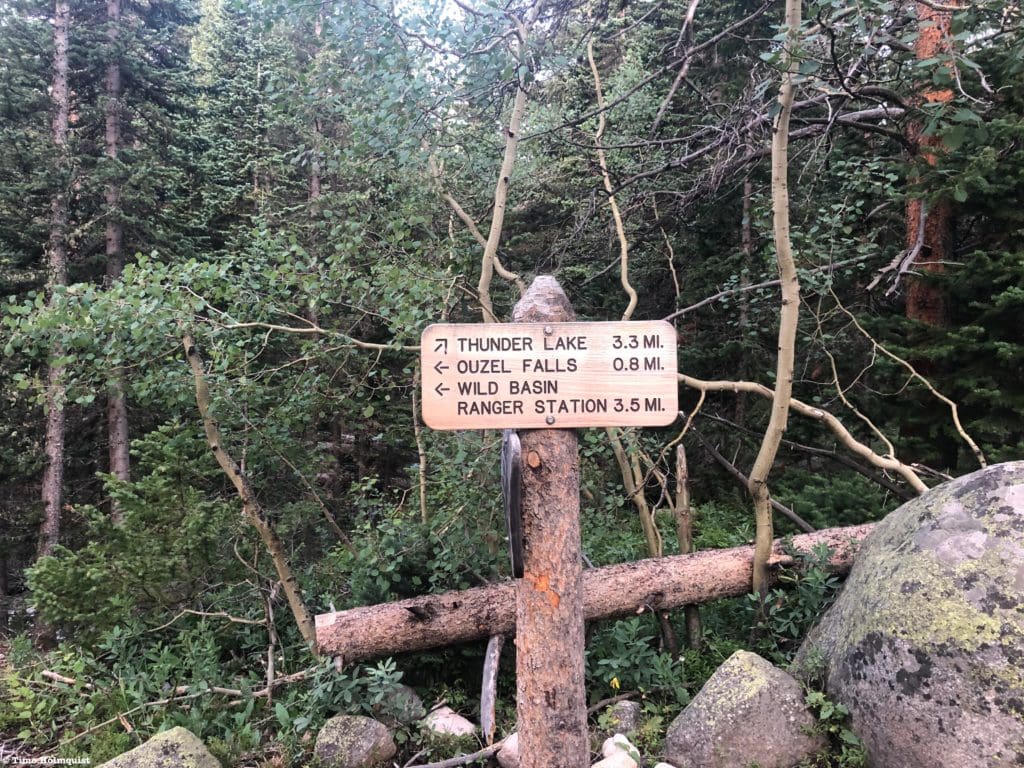
The second trail junction after merging back with the main trail.
Once the trails merge, you’ll begin gaining more elevation though not at a strenuous pace. After another 1.3 miles, you’ll come to your final junction with the Lion Lake trail. When you see the sign, take a right.
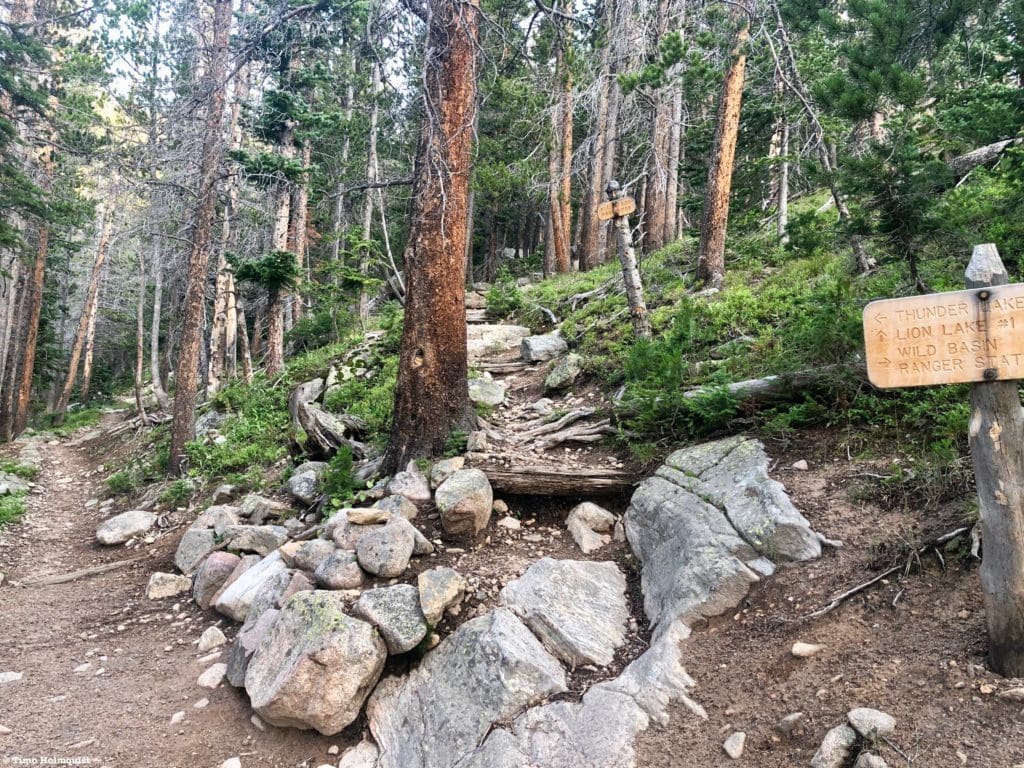
Lion Lake trail sign.
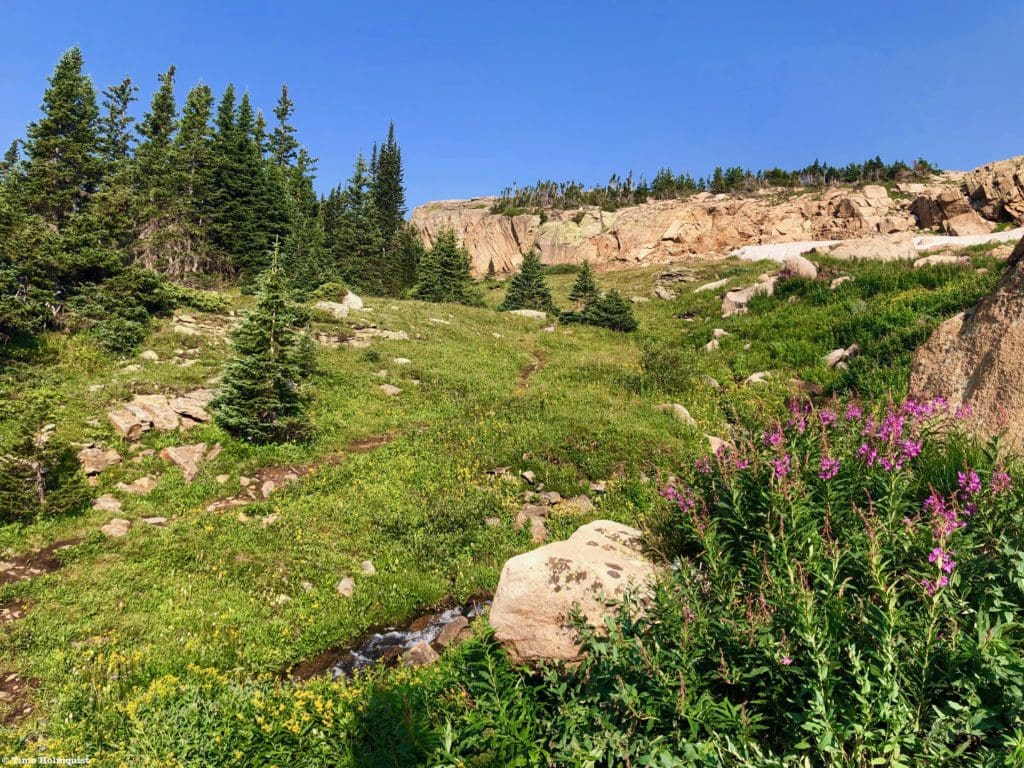
The trail will immediately begin climbing a steeper pitch before leveling off for a little bit. The woods here are dense and often retain moisture longer than other areas in Wild Basin. This is the one part of the trail where mosquitos may be more of an issue. However, in July, beautiful patches of wildflowers should be popping through the understory of the forest.
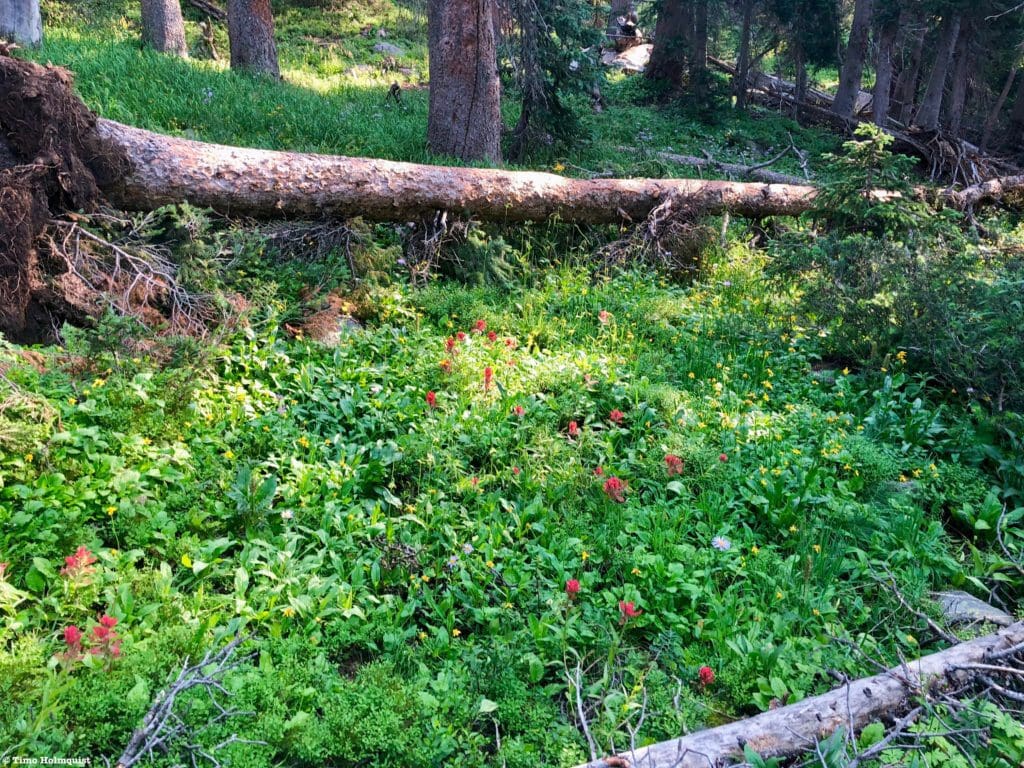
Wildflowers on the side of the trail.
Through this section, you’ll be oscillating between flatter parts in lush forests and drier ascents up a series of elevation steps. At the top of one of these steps, you’ll be given a great view south to Mt. Copeland, which is worth taking a look at.
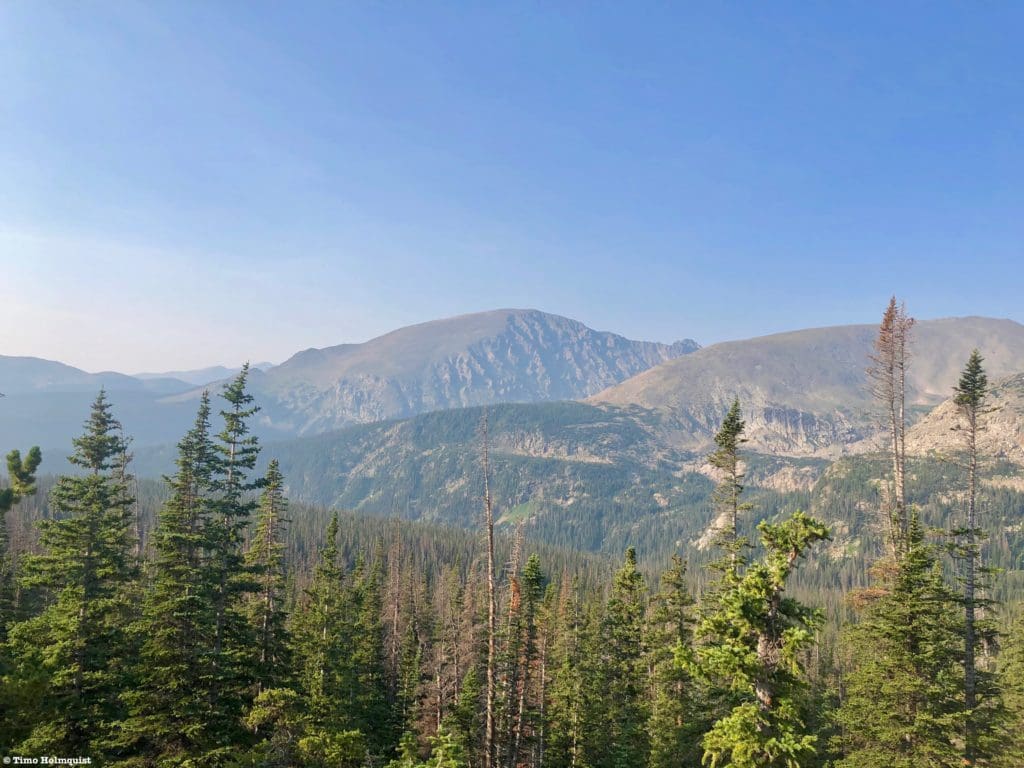
Looking deeper into Wild basin from the Lion Lake Trail.
The bit of trail from the Lion Lake trail junction to Lion Lake #1 takes longer than you might think. The intermittent uphill sections and thick forests limit orientation and make it seem like you aren’t making much progress. Stick with it; ultimately, the reveal at the lakes is what sells the whole hike.
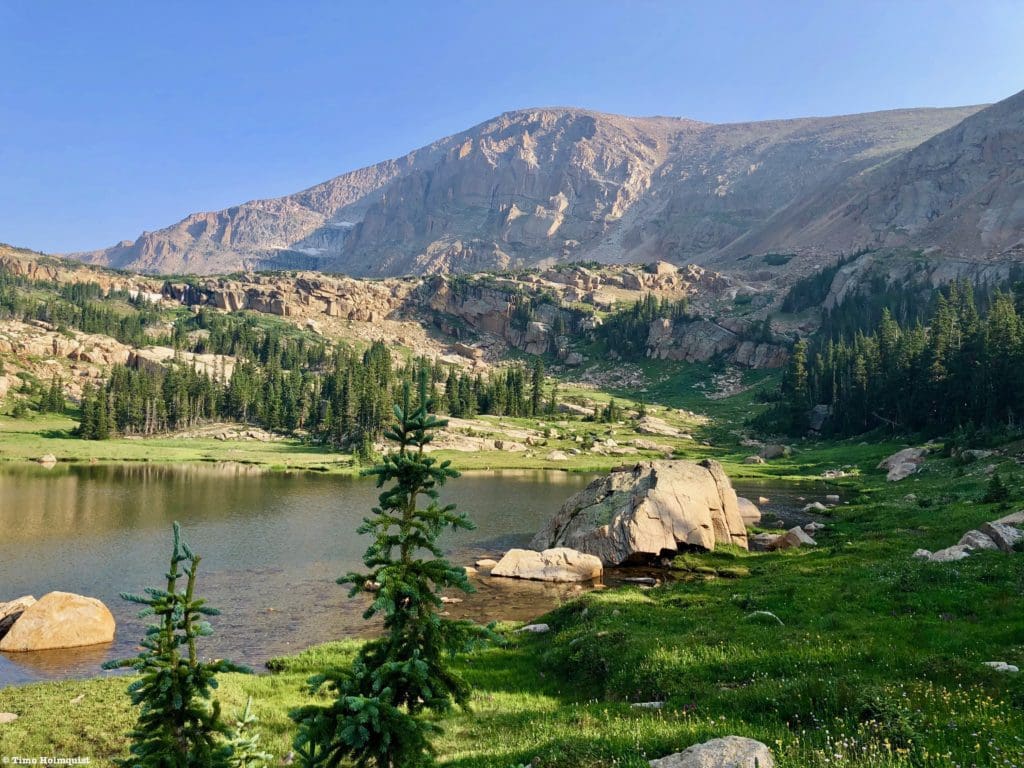
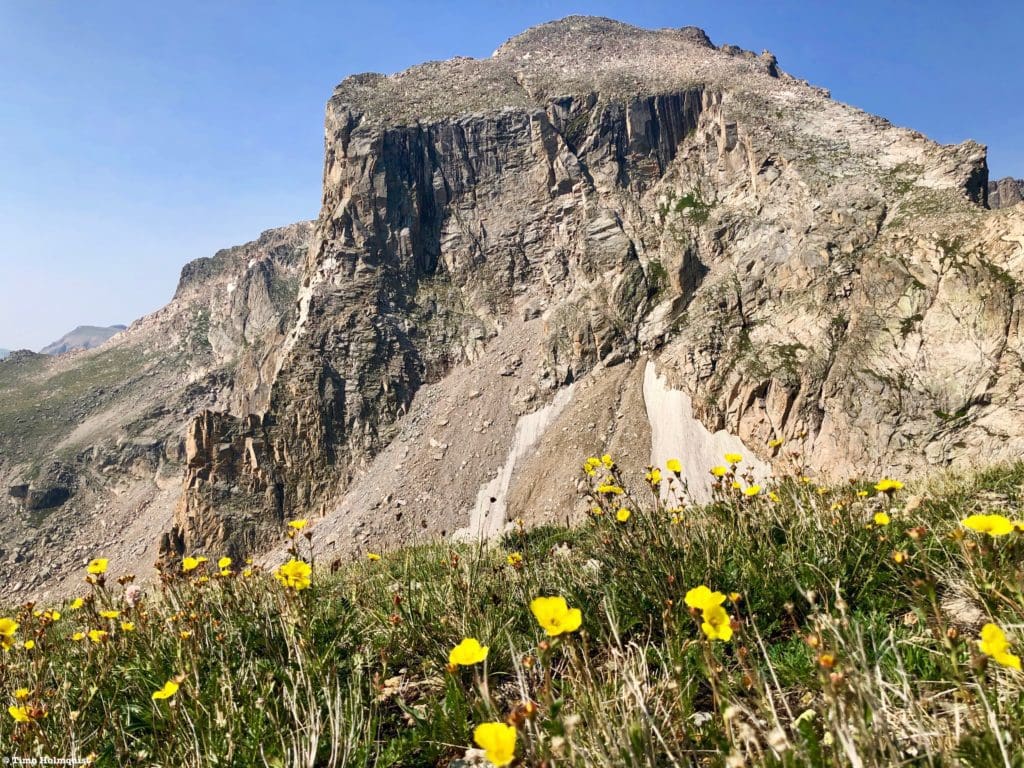
The trees will begin to break around the trail before you get to the lakes and you’ll get your first glimpse north towards the massive bulk of Chiefs Head.
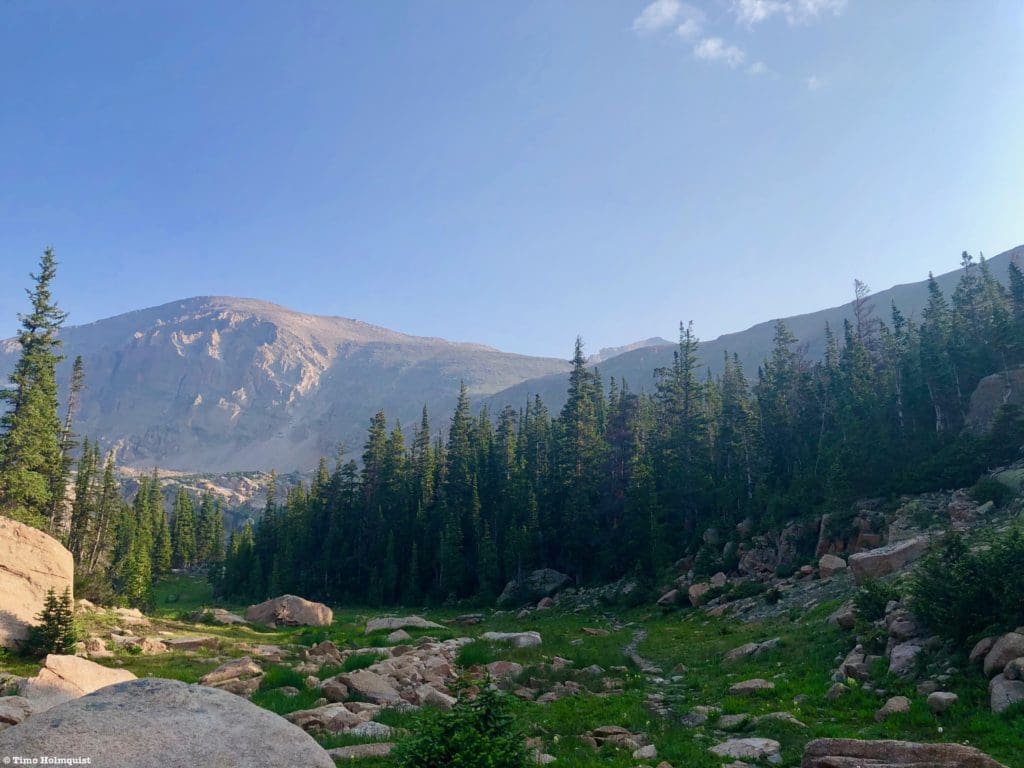
First views as the trees begin to peel back.
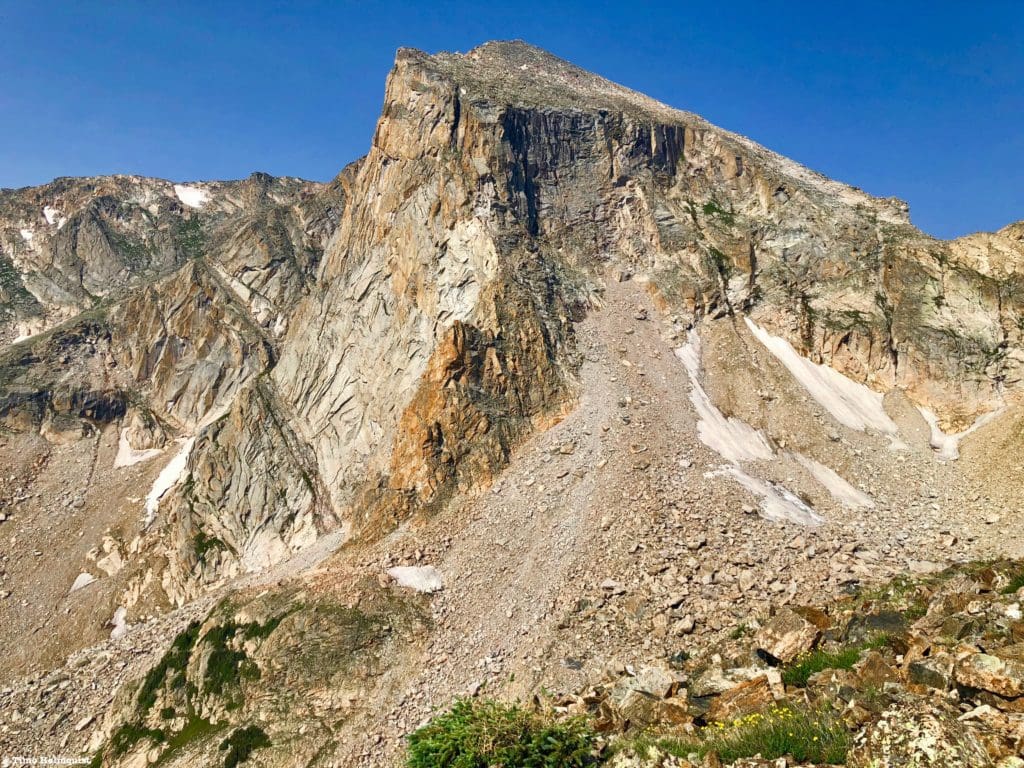
A smaller pond will appear on the left-hand side of your field of vision but the trail will continue on, with views focused on a set of sandy colored and dramatic cliffs off the western side of Chiefs Head.
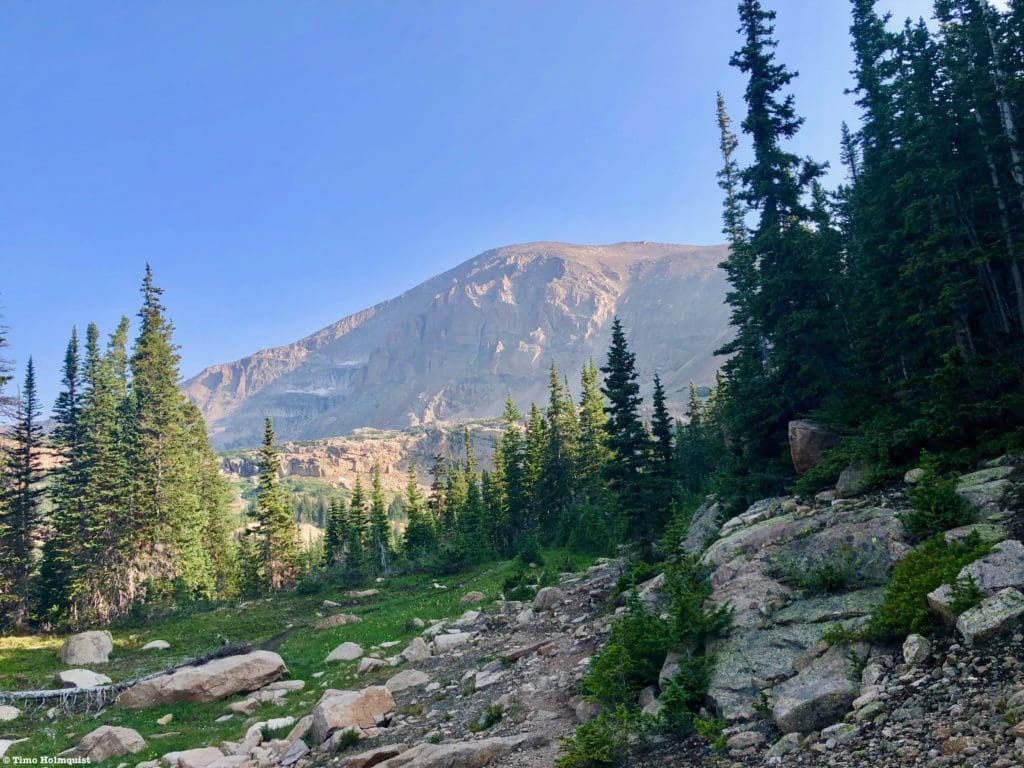
Chiefs Head cliffs in focus.
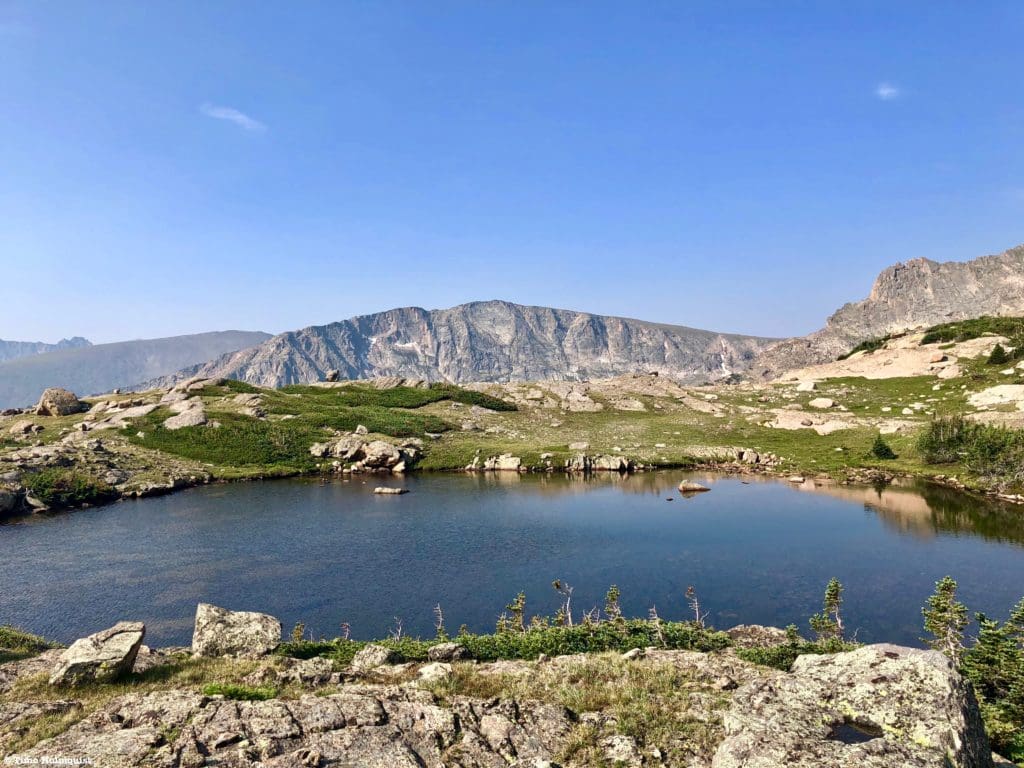
The trail will then drop slightly until reaching the edge of the lake, where fantastic views await. The position of Lion Lake #1 is so stunning because it’s your first real alpine panorama since beginning the hike. Mt. Alice looks particularly dramatic across the water.
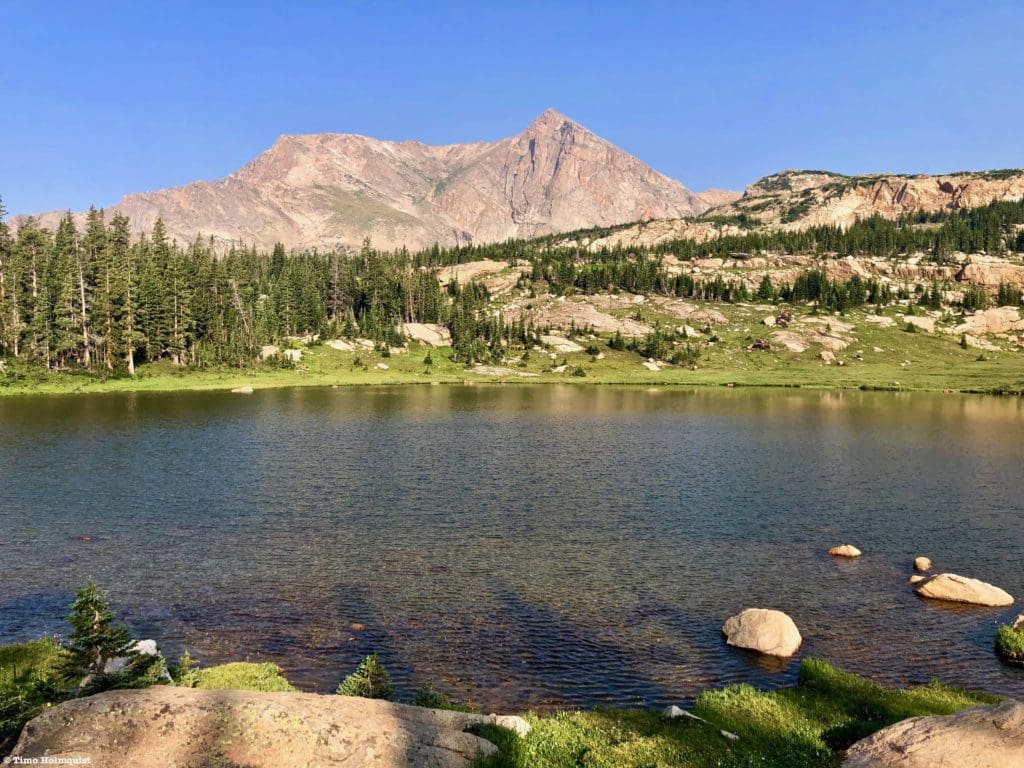
Mt. Alice to the west.
The lake is shallow, so the swimming options are somewhat limited; however, bringing a flotation device or tube is not out of the question.
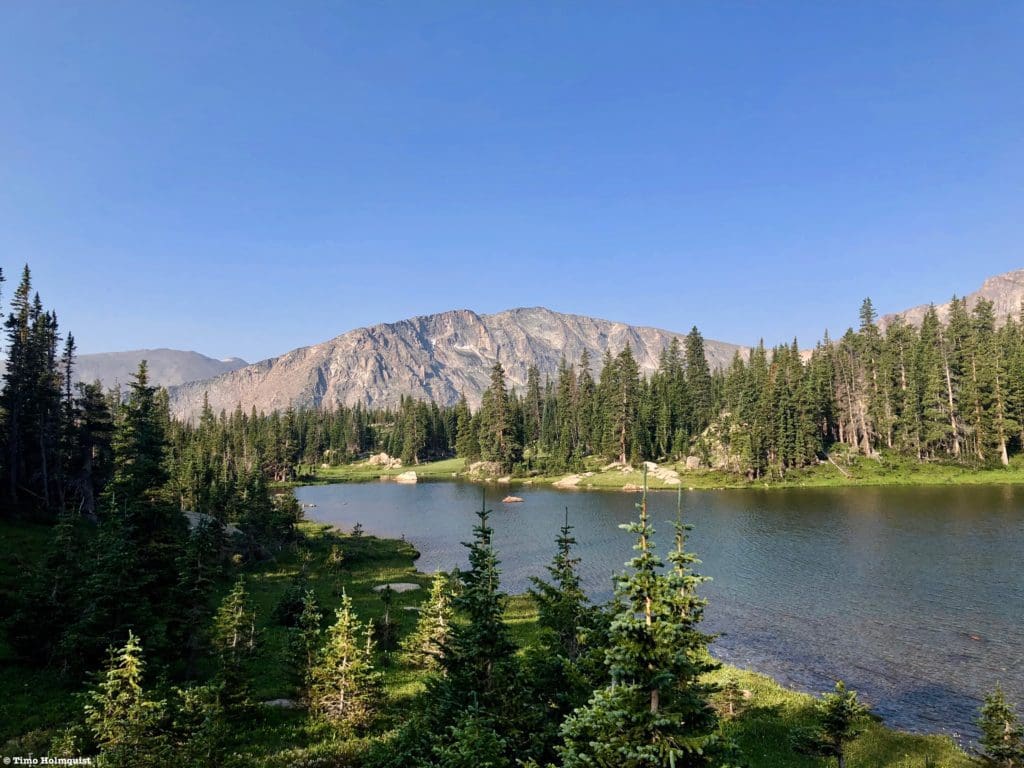
Looking along the shoreline with Chiefs Head behind.
It’s a great place to relax and breathe in the mountain atmosphere with a view completely devoid of any trace of human settlement. As far as east draining basins in Rocky Mountain National Park are concerned, Wild Basin is right behind Glacier Gorge in terms of both alpine beauty and recreation options.
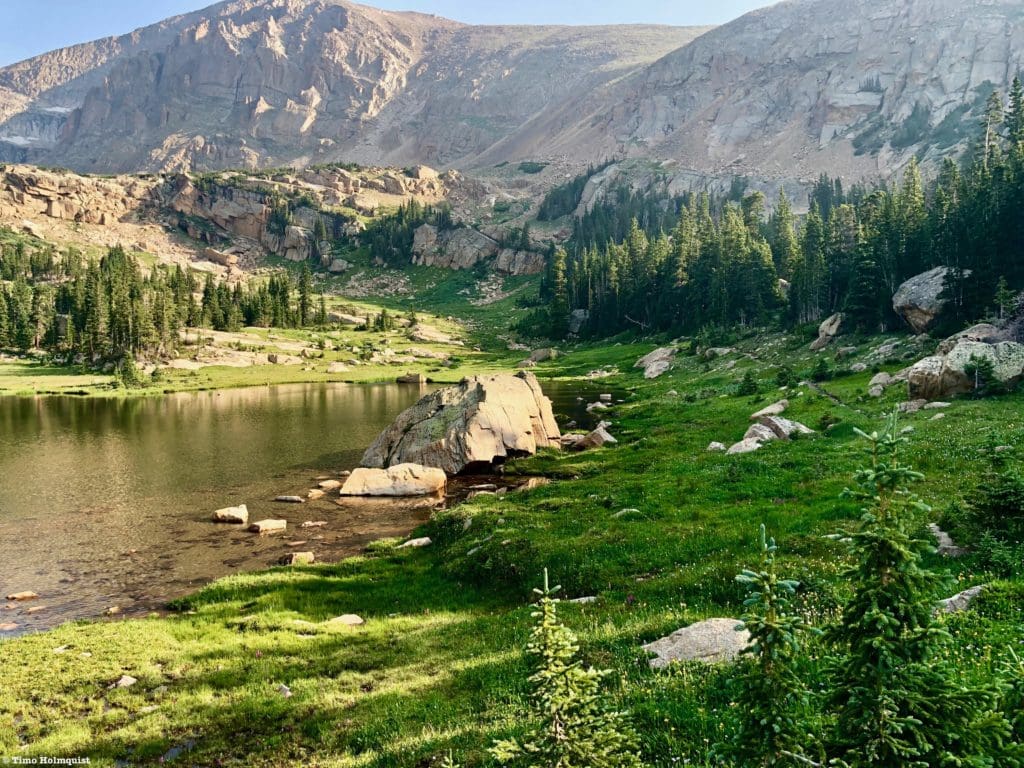
The view south to the eventual outflow of the lake with the long ridge of Tanima Peak taking center stage.
What’s nice about this hike is that Lion Lake #1 can act as the crown jewel of your adventure, or, merely the start of quality alpine exploration.
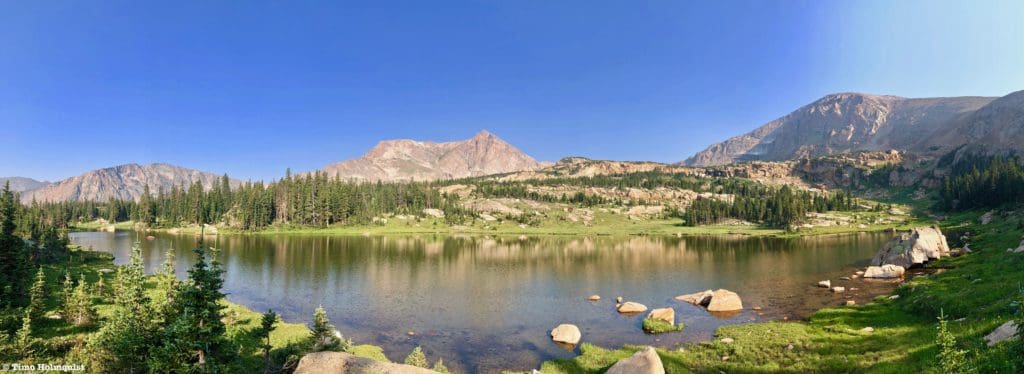
Panorama of the Lion Lake area.
There are two lakes, a waterfall, peak bagging options, and gentle alpine ridges still to explore, so when you’ve taken in the views at Lion Lake #1, proceed higher into the basin.
Where the trail will take you.
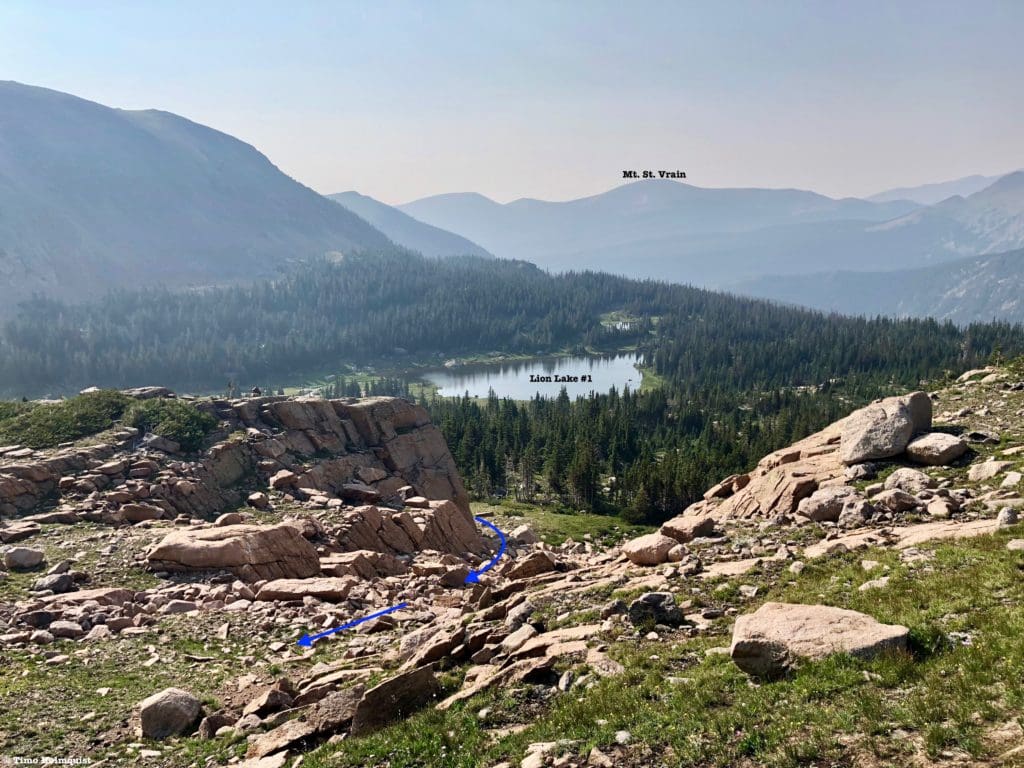
Somewhere along the shore of Lion Lake #1, the official trail ends but large braids and several prominent cairns help orient you. Once you round the lake, your next objective is to ascend to a break in the wall blocking easy passage northward.
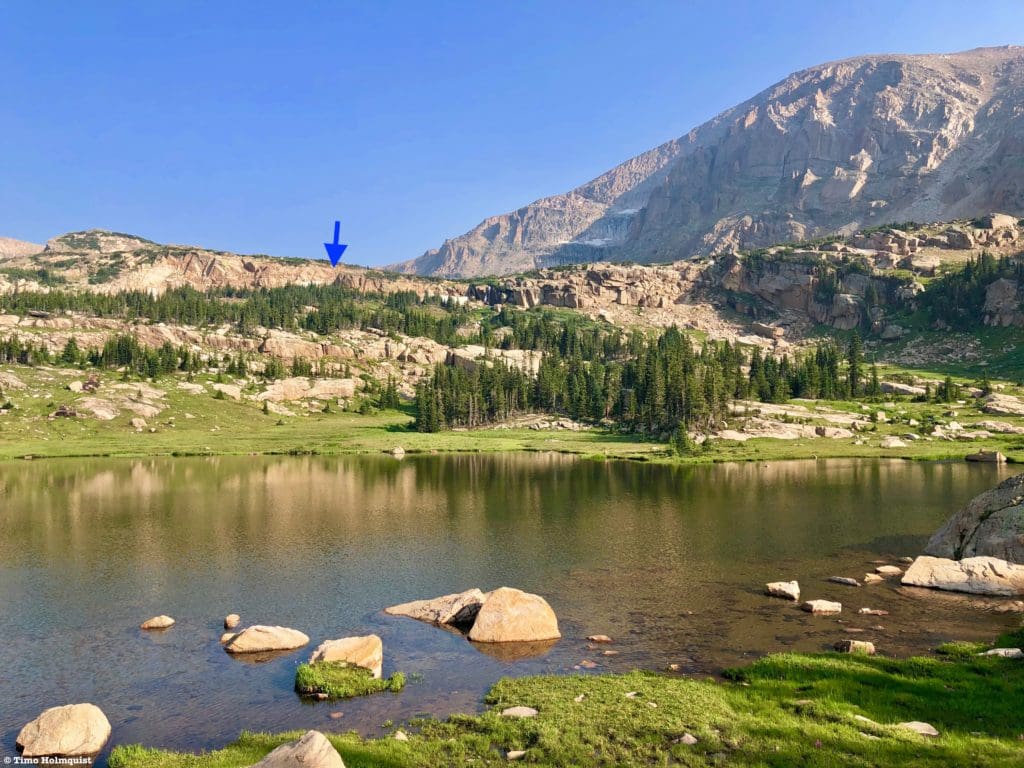
The low-lying wall you need to crest in order to get to Lion Lake #2. The easiest ascent route is marked.
After passing the head of Lion Lake #1, vibrant alpine takes over, supplied consistently with water from lingering snowfields and the lakes themselves. While a September hike will undoubtedly reveal a drier and browner-looking alpine, in July and even early August (depending on recent rainfall), the basin is alive with grasses, flowers, and streaks of Pine Trees.
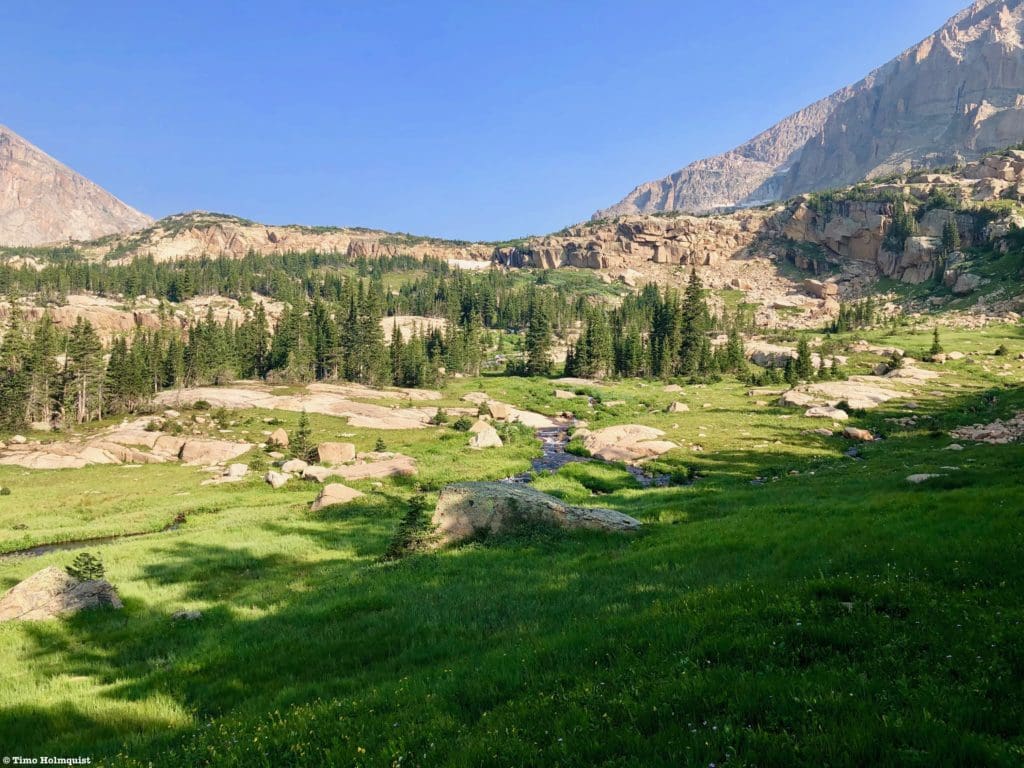
Vibrant and healthy alpine.
The hikers’ path will start on the right side of the main outflow stream and slowly make its way north while gaining elevation.
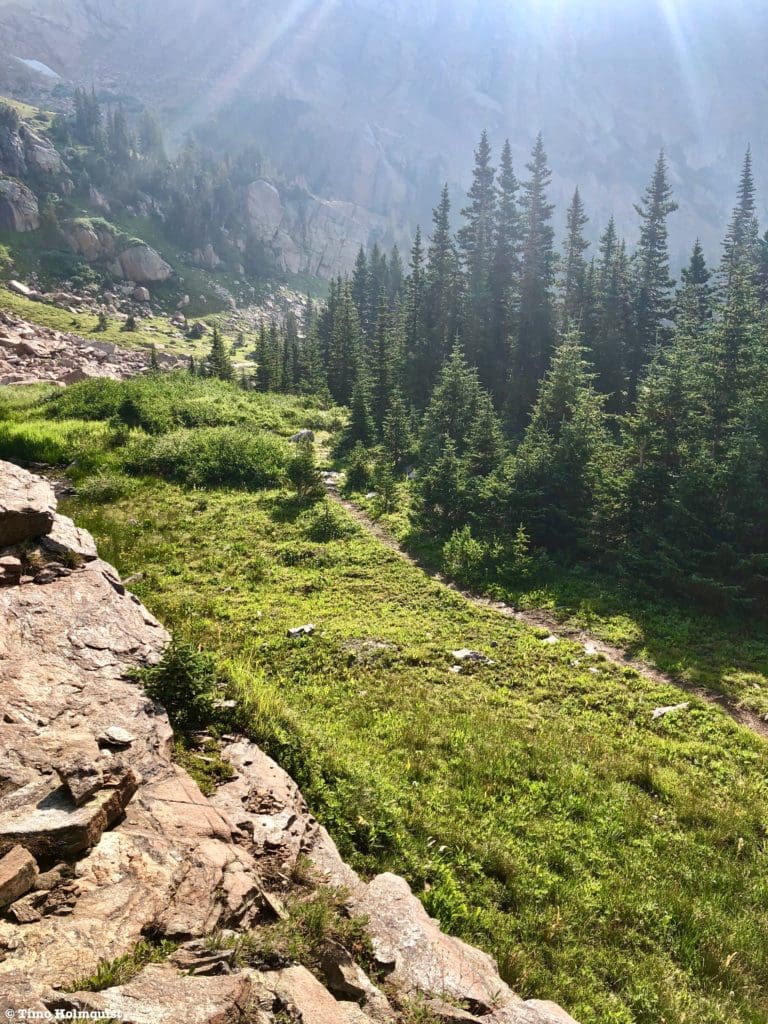
The strong hikers path threading up the alpine.
If it’s a clear day, orientation is fairly simple. You want the wall pictured below to be in front of you. Occasionally the path will veer left or right, but you always want to be getting closer to the wall.
The wall between the Lion Lakes.
A few minutes of ascending later and the path will move you towards the main outflow stream, which you need to cross so that you are on its left (western) side. Pay attention when you approach the stream because there are a couple of places to cross. If you cross earlier, it’s a fairly simple rock hop to the other side where you can pick up another obvious trail braid. If you miss this crossing, don’t panic, cairns and another obvious trail braid will follow the stream uphill and cross a little higher. The only difference is that the higher crossing will make you hop over two water channels.
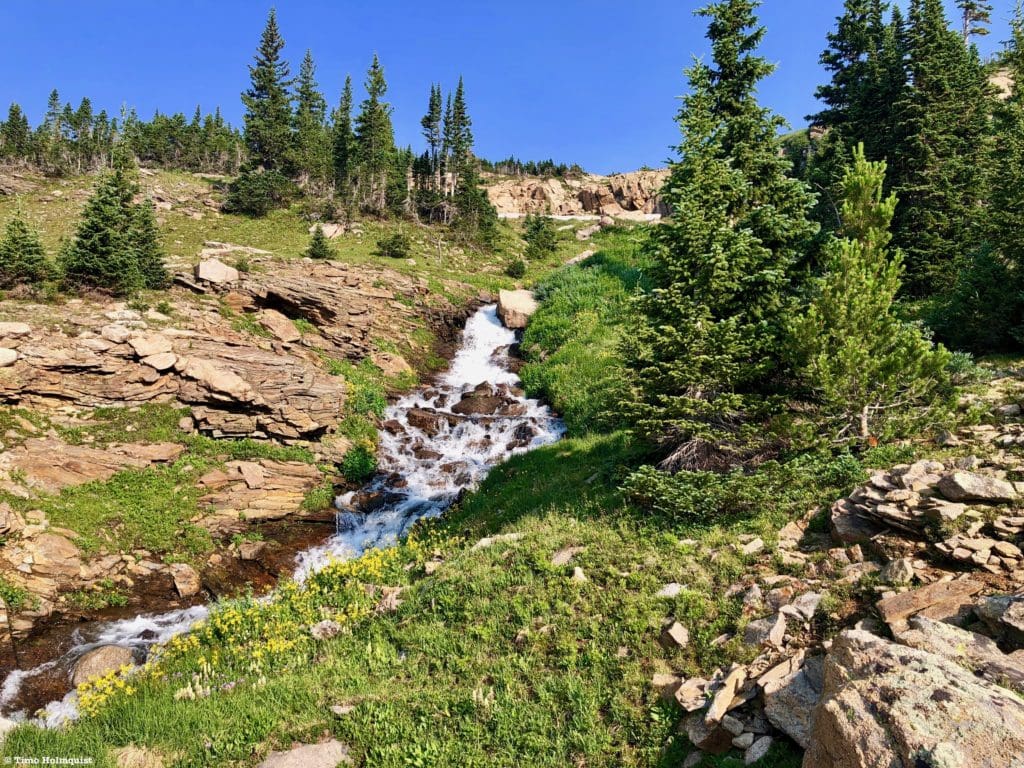
Beautiful alpine stream.
Once you’re on the other side, you’ll climb a little higher as if heading towards Trio Falls before the path veers left and cuts in front of the falls. The water drops into a cleft between two rock slabs, creating an interesting series of cascades.
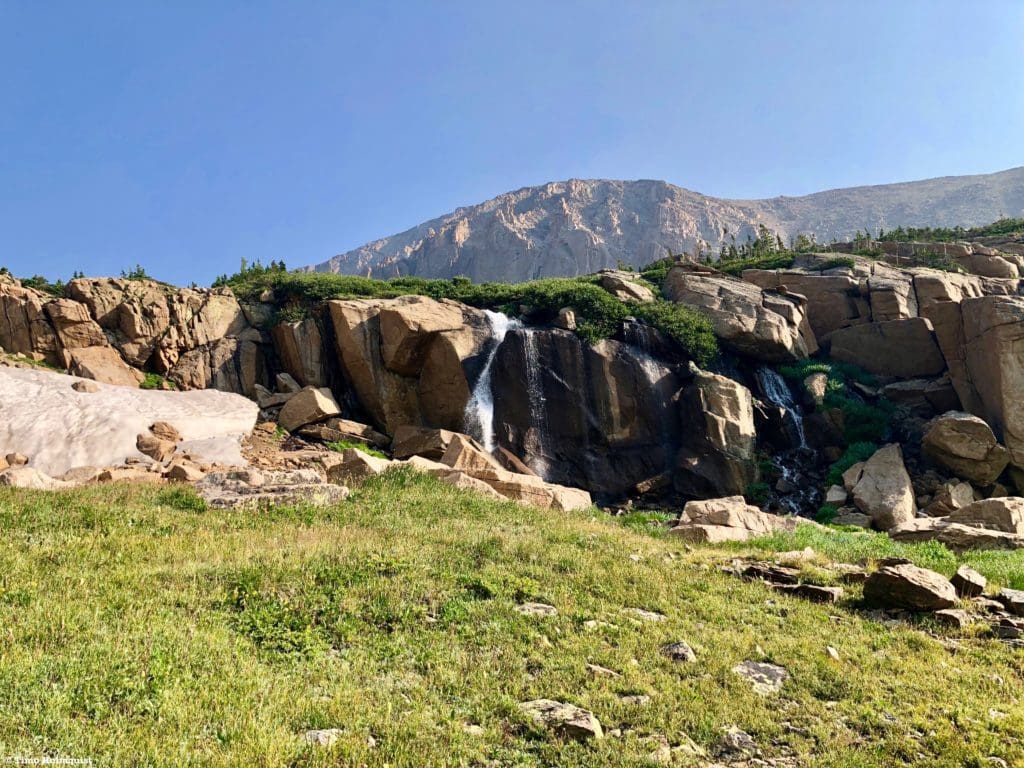
Trio Falls.
You may also notice a holdout snowfield that lingers through at least the first part of August.
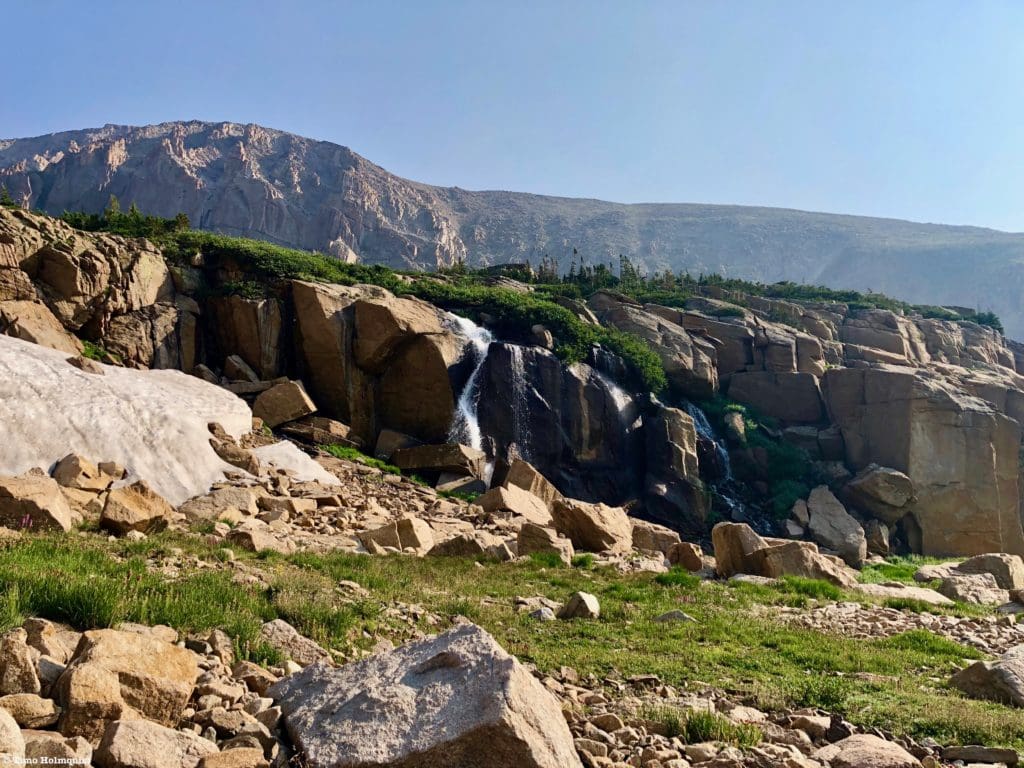
Another perspective on the falls as the unofficial trail heads west.
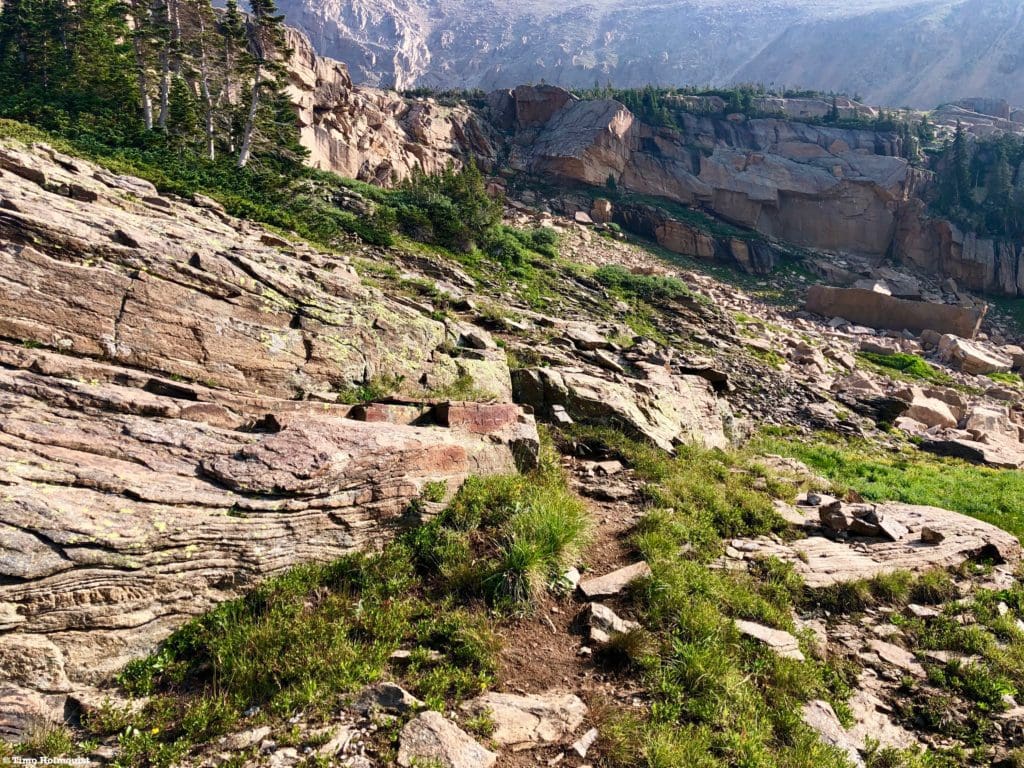
Once you pass by the falls, the path will loop through a small talus field and veer right. The route then follows cairns up a Class 2 weakness in the wall, which should only take a few minutes to climb through.
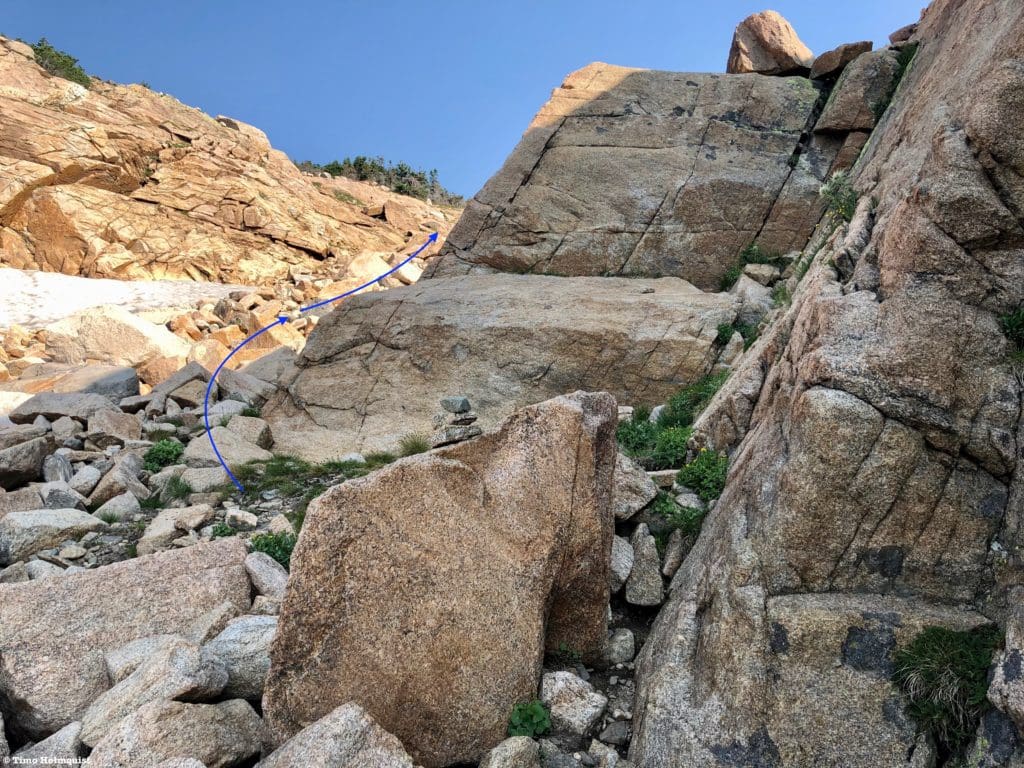
The route up the weakness in the wall.
Once you crest the wall, you can look back and see Lion Lake #1 and Mt. St. Vrain on the very opposite side of Wild Basin.
The view south and east from near Lion Lake #2.
The distance to Lion Lake #2 from where you are is negligible; just follow the cairns as they thread through some last layers of krummholz and rocky slabs until you arrive.
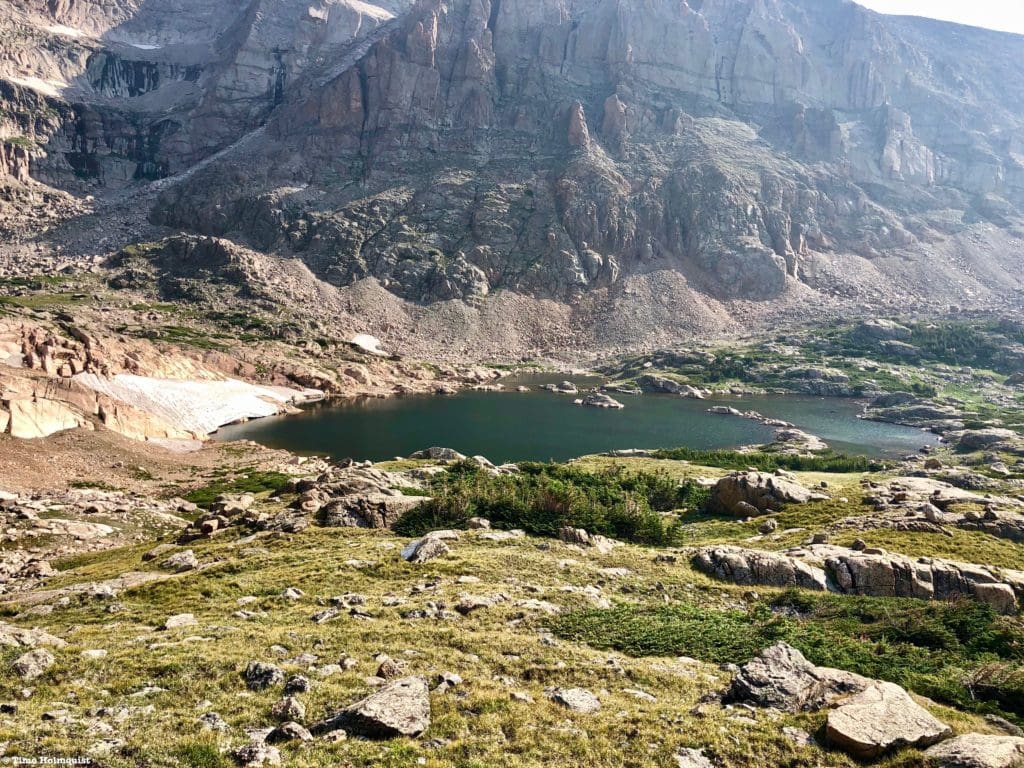
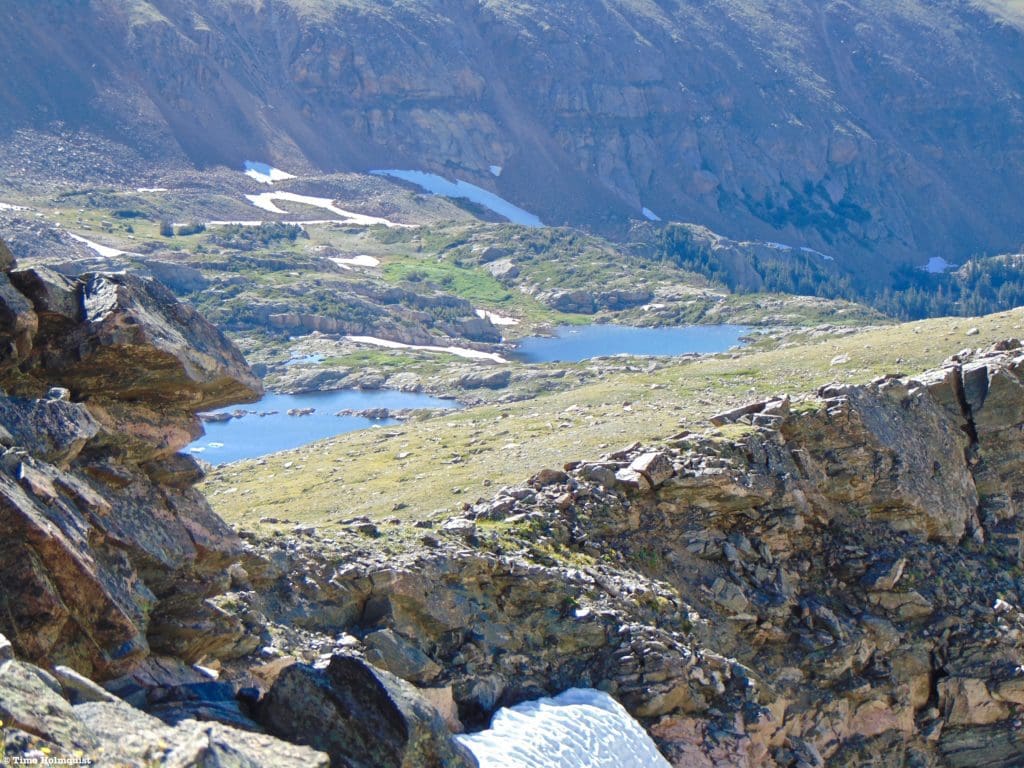
Lion Lake #2 from above.
While pretty in its own right, Lion Lake #2 is smaller and less dramatic than the first. Its position right above Trio Falls makes any floating prospects a little hairier, especially after a heavy rain or during the spring snowmelt.
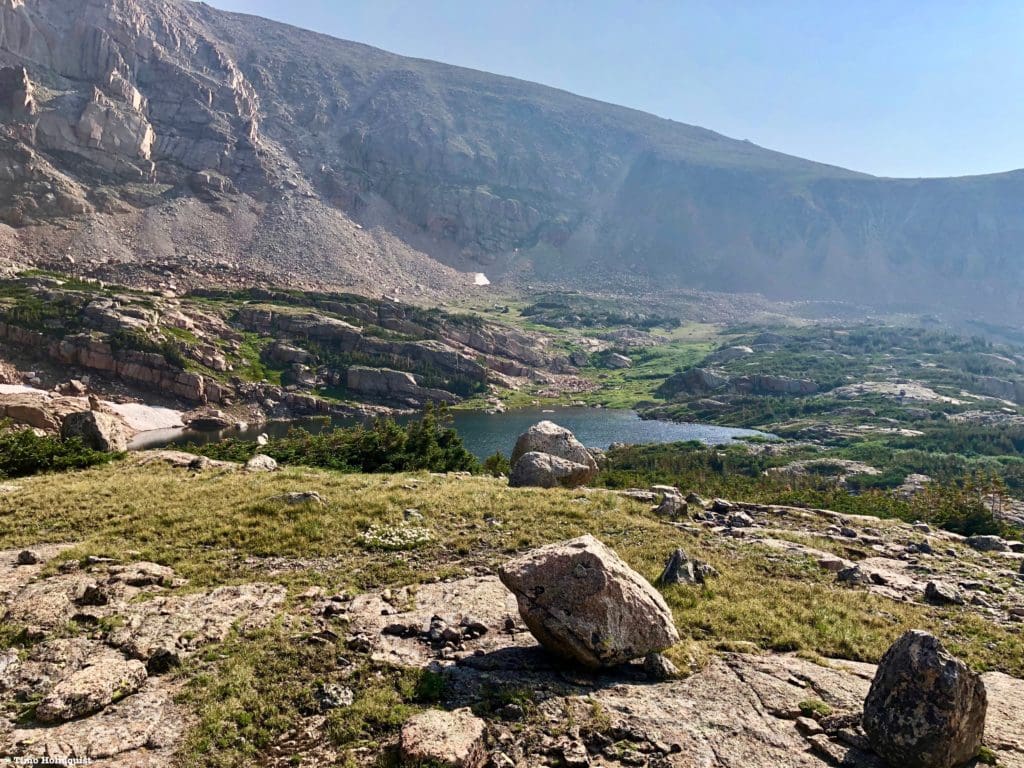
In order to reach Snowbank Lake, you want to bank left around the shoreline and gain some elevation until you are above the patches of thick brush and krummholz, which can scratch and bruise you. Appropriately named, Snowbank Lake has a semi-permanent snowbank on its northern side, lasting well into August and early September during cooler years.
Snowbank Lake with its resident snowbank.
The layout of Snowbank Lake is also more interesting than Lion lake #2. There is a crescent line of rocks running across a portion of the lake, which you can hop partially across. Additionally, there is a sheltered bay along the eastern side of the lake. The presence of the snowbank and rocky shoreline make the lake a pleasant place to explore and even take a frigid dip. The deepest part of the lake is close to the snowbank.
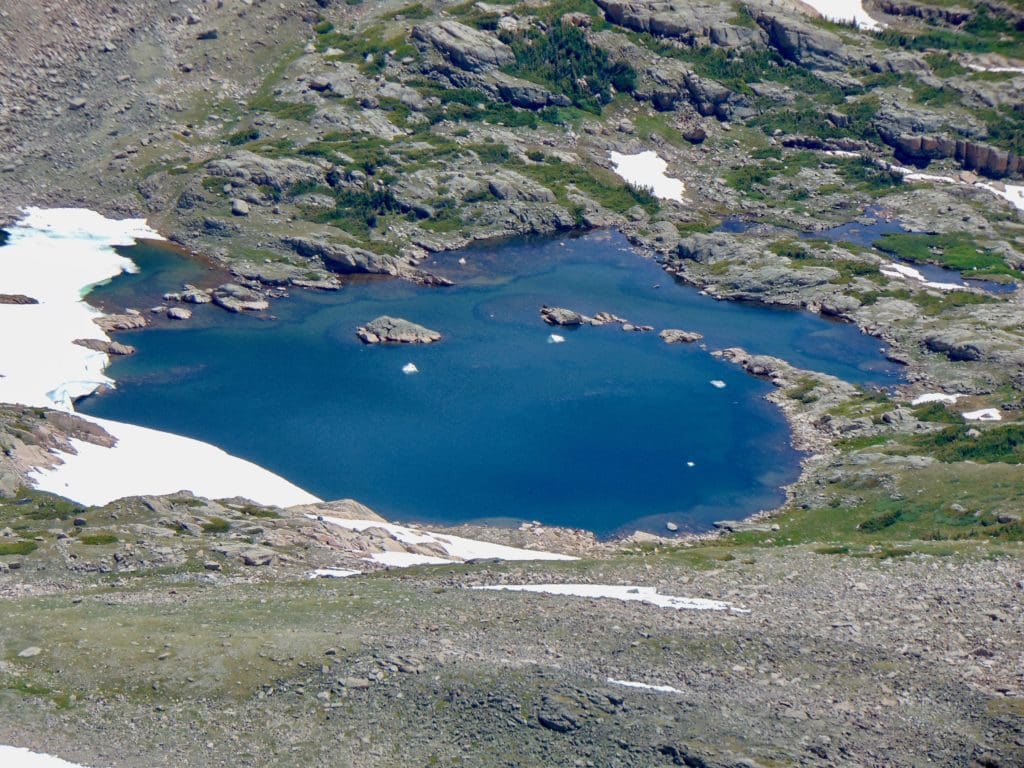
Another perspective of Snowbank Lake, taken in early July.
Once you’ve soaked in the beauty of these three alpine lakes, a few decisions await you. You can opt to return via the same route, making sure to stay to the right side of Trio Falls to find the easiest route down. If you fancy a longer adventure, you can also rope in a climb of Mt. Alice via the Hourglass Ridge, but it will push your total mileage closer to 18 and will involve some scrambling; click here to visit our scrambling review of that option.

The Hourglass Ridge up Mt. Alice.
Other options include climbing Chiefs Head or simply strolling along the Continental Divide by continuing up the basin and veering left to hit a light Class 2 ridge. From the ridge crest, it’s a nice uphill stroll to get to the Divide, where fantastic views of McHenry’s Peak, Mt. Alice, Chiefs Head, the Stone Man rock formation, and even Lake Powell await.
The ridge you want to take to advance to the Continental Divide.
A moderate option is to advance west from Snowbank Lake until you hit the ridge that will ultimately take you up to the Continental Divide. Instead of climbing it, continue west until you arrive at the ridge crest and can marvel at the dramatic Eastern Cliffs of Mt. Alice.
Mt. Alice and her cliffs.
The higher you go on the ridge, the more the perspective will change.
Alpine buttercup in front of Alice.
Whenever you’ve had enough, simply turn around and descend the ridge. From the crest, the lakes are obvious to your left. Walk down the ridge until you are roughly even with Lion Lake #2. Then, descend to it.
Snowbank and Lion Lake #2 from along the western ridge.
Around the shoreline, you should be able to find the numerous cairns that will guide you to descend back below Trio Falls. Once you pass Lion Lake #1, the trail will become more obvious, and you can retrace your route back to the Wild Basin Trailhead or your campsite if you managed to secure a backcountry site in the area.
If you do this as a day hike, be aware of the more than six miles of trail between Lion Lake #1 and the trailhead, pace yourself.
Final Thoughts:
Deep in the heart of Wild Basin, Lion Lakes and Snowbank Lake sit in an area of unspoiled alpine beauty. The lakes are often seen by peak baggers on their way to Chiefs Head or Mt. Alice but make for a wonderful day trip themselves. While swimming may be limited on the lower lake, the treed shores allow for multiple places to set up a hammock and relax. Snowbank Lake is a little deeper on its western side and may offer some better options for getting into the water but remember to wear thick-soled Chaco’s or reef walkers. The expansive vistas from the lakes and their surrounding ridges are a photographer’s dream, with no views of roads or human settlement unless you top out on one of the nearby mountain peaks. The sheltered atmosphere creates a perfect environment to absorb the splendor of an ecosystem that covers less than 1% of the earth’s surface.
Unnamed tarn near Snowbank Lake.
Popular Articles:
- Guide to the Best Hiking Trails in Rocky Mountain National Park, Colorado
- The Dyrt: The 10 Best Campgrounds In Colorado
- Top Adventure Sports Towns 2021: Boulder, Colorado
- Epic Adventures with the Best Guides In Colorado
- Sky Pond via Glacier Gorge Trail, Rocky Mountain National Park, Colorado
- Scrambling Hallett Peak’s East Ridge, Rocky Mountain National Park, Colorado
- Scrambling Mt. Alice via the Hourglass Ridge, Rocky Mountain National Park, Colorado
- Gorge Lakes Rim Scramble, Rocky Mountain National Park, Colorado
- Black Lake Via Glacier Gorge Trail, Rocky Mountain National Park, Colorado
- Scrambling To The Lake Of The Clouds, Rocky Mountain National Park, Colorado

Skyblue Overland Strongly Recommends That You Enroll With Global Rescue Prior To Embarking On Your Next Adventure.
With more people outside now more than ever, Global Rescue expanded services to include field rescue within 100 miles of home. With Local Field Rescue — automatically included in any travel protection services membership — Global Rescue is there whether you’re hiking, kayaking, snowmobiling, fishing or simply enjoying the outdoors and get ill or injured and you’re unable to get to safety on your own. Purchase a Global Rescue membership for your next adventure and travel with peace of mind. Single trip, annual and family options are available.
Memberships start at $119.
Terms of Use:
As with each guide published on SKYBLUEOVERLAND.com, should you choose to this route, do so at your own risk. Prior to setting out check current local weather, conditions, and land/road closures. While taking a trail, obey all public and private land use restrictions and rules, carry proper safety and navigational equipment, and of course, follow the #leavenotrace guidelines. The information found herein is simply a planning resource to be used as a point of inspiration in conjunction with your own due-diligence. In spite of the fact that this route, associated GPS track (GPX and maps), and all route guidelines were prepared under diligent research by the specified contributor and/or contributors, the accuracy of such and judgement of the author is not guaranteed. SKYBLUE OVERLAND LLC, its partners, associates, and contributors are in no way liable for personal injury, damage to personal property, or any other such situation that might happen to individuals following this route.


