


High Point:
11,014 feet

Total Ascent:
~2,000 feet

Difficulty:
Hard

Distance:
9 miles

Waypoints:
40.310468, -105.64041

Route Type:
Out and Back
Timberline Falls and Sky Pond are a beautiful destination, often called the prettiest lake in Rocky Mountain National Park. The trail is longer and more difficult than Bear Lake or Emerald Lake, so plan your trip accordingly and bring a camera.
Field Notes
Often called the prettiest lake in Rocky Mountain National Park, Timberline Falls and Sky Pond are an excellent destination in a beautiful part of the Rockies. The pond sits high in an alpine valley, carved by Taylor Glacier, which still lives on, above the lake. It is the third in a string of alpine lakes you’ll pass en-route. Carve out a significant chunk of time for this hike as it is longer and more difficult than Bear Lake or Emerald Lake. Because of its stunning beauty, the trail is visited all year long. Plan your trip accordingly and bring a camera.
Sky Pond Colorado
Bear Lake Road is plowed in the winter but is often closed after heavy snowstorms until the snow can be removed. Because it is plowed, winter access is possible. In the summer, the snow melts out the lower stretches first, but you may be dealing with snowbanks well into July near the top of the trail.
Timberline Falls is located along the trail to Sky Pond in Rocky Mountain National Park.
The Ultimate Offline GPS Hiking & Ski Maps
See why onX Backcountry is the ultimate GPS navigation app for your outdoor pursuits. Try Today for Free. No credit card required.
Directions To Trailhead
Sky Pond and Timberline Falls are located southwest of Estes Park and can be accessed via the Bear Lake road. If arriving from the east, make your way to Estes Park, enter the park on US 36, and take a left onto Bear Lake Road, located only a minute or two past the entrance booths. From the west, approach Rocky Mountain National Park and enter on US34, which becomes Trail Ridge as it climbs over the divide and drops down to the eastern portion of the park. Locate Bear Lake Road before reaching the edge of the park and take a right.
Once on Bear Lake Road, continue as it winds its way higher. Glacier Gorge Junction Trailhead will be on your left-hand side about 90% of the way up the road (~8.3 miles). The absolute end of the road is at Bear Lake Parking area. The trailhead is exceptionally popular, so arrive early. There is additional parking along Bear Lake Road and at Bear Lake Parking Area, but these spots also fill up quickly. Alternatively, head down to the Park and Ride lot near Glacier Gorge Campground and take a free shuttle to the trailhead.
Since the trail is in Rocky Mountain National Park, you’ll need to pay to enter. The fee is $25 per car, or $15 if entering the park on foot. For frequent visitors, there is an $80 annual pass. Please check with RMNP’s website to stay up to date with current pass rules and regulations.
Journal:
Sky Pond is located in what is arguably the most beautiful part of Rocky Mountain National Park. As such, the summer tourist crowd near the trailheads can be disheartening. However, with the effort it takes to get to Sky Pond, you’ll likely lose a lot of the crowds the farther you hike.
As previously stated, once the Glacier Gorge trailhead becomes full, your next best bet is to park at Bear Lake and take a connector trail to Alberta Falls. If Bear Lake is also full: start at the Park and Ride lot and take a free shuttle up to the trailhead.
<img src=”https://www.skyblueoverland.com/wp-content/uploads/2021/02/20200725-DAA0E678-FCFF-46E9-8DBB-177689EA3C5F.jpg” alt=”Photo 2: Arriving at the Glacier Gorge trailhead before sunrise is a must since the parking area fills up fast each morning. On this morning, the Rocky Mountain sunrise lit up the sky. Photo by Brian Hamilton” />
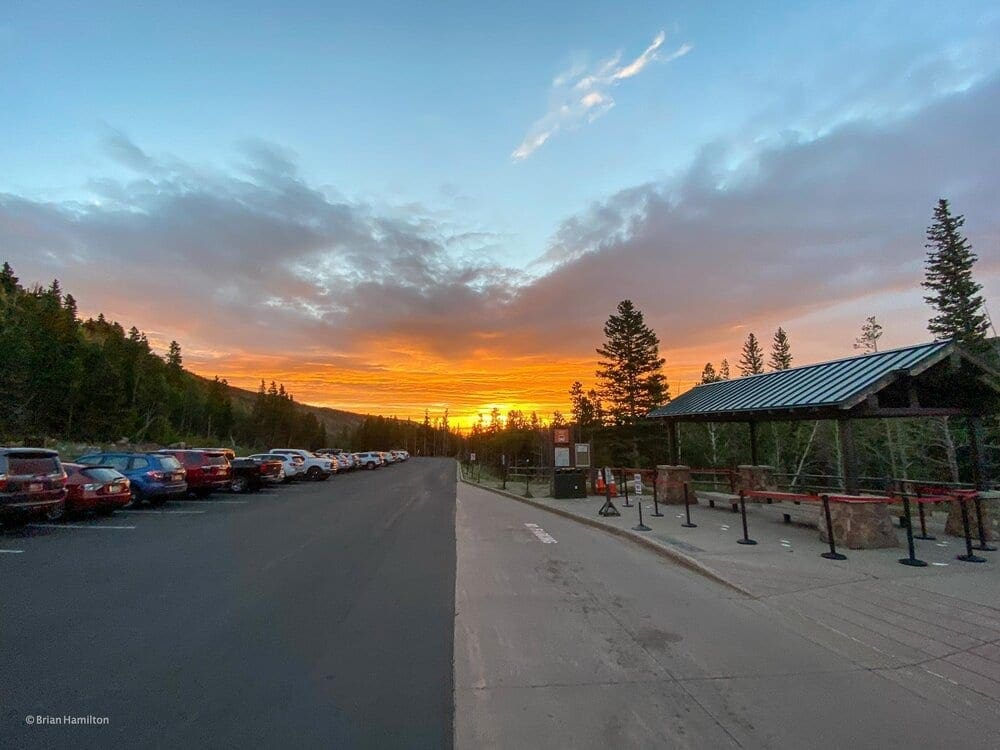
Photo 2: Arriving at the Glacier Gorge trailhead before sunrise is a must since the parking area fills up fast each morning. On this morning, the Rocky Mountain sunrise lit up the sky. Photo by Brian Hamilton
From the trailhead, walk a quarter-mile south-southwest until the trail converges with the Glacier Creek Trail. The convergence is brief; you’ll head west, following signs to Alberta Falls, until the Glacier Creek Trail splits to head up to Bear Lake. At this junction, take a left. The Alberta Falls are very popular as it doesn’t take much effort to get to. Once you pass the Falls, the tourist crowd should slim down somewhat.
<img src=”https://www.skyblueoverland.com/wp-content/uploads/2021/02/AdobeStock_243610063.jpg” alt=”Photo 3: Alberta Falls in Rocky Mountain National Park, Colorado is just 0.7 miles from the Glacier Gorge trailhead.” />

Photo 3: Alberta Falls in Rocky Mountain National Park, Colorado is just 0.7 miles from the Glacier Gorge trailhead.
Continue past Alberta Falls on the well-established trail, ultimately hitting a junction with North Longs Peak trail at roughly 1.6 miles in. Take a right here.
<img src=”https://www.skyblueoverland.com/wp-content/uploads/2021/02/20200712-7B21AA86-53CE-448D-A00B-87A804ADDA91.jpg” alt=”Photo 4: Looking up toward the destination valley. That’s Thatchtop Mountain on the left. Photo by Brian Hamilton” />
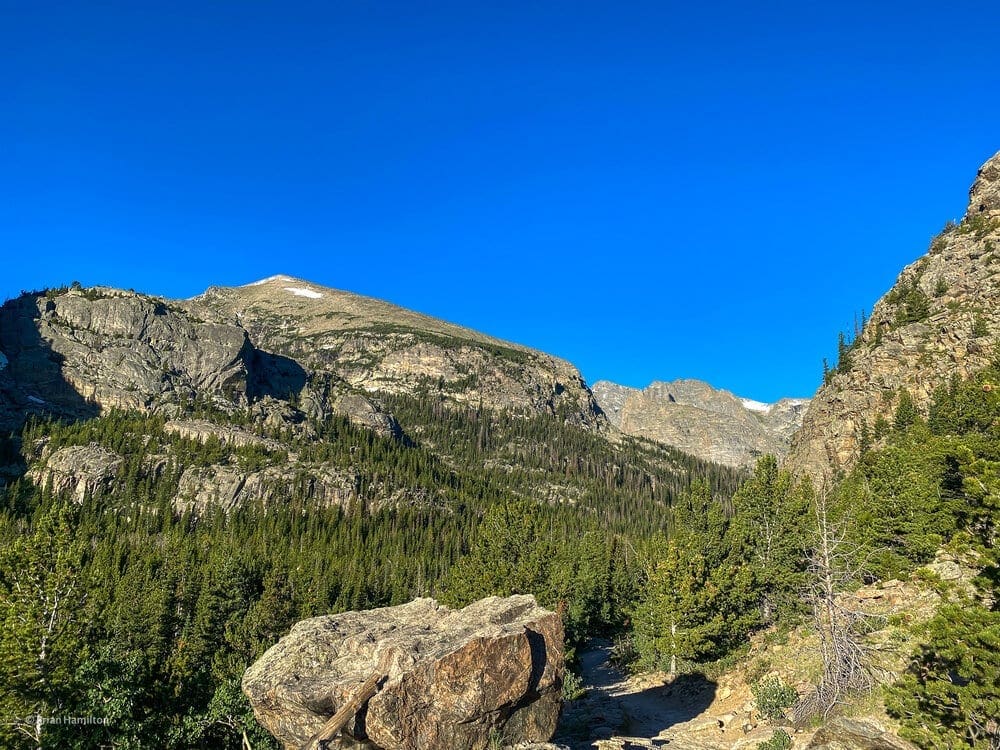
Photo 4: Looking up toward the destination valley. That’s Thatchtop Mountain on the left. Photo by Brian Hamilton
After another half mile, you’ll reach Mills Junction, where you’ll take another right, following signs for Sky Pond, Loch Vale, and Andrews Glacier.
Now on the Loch Vale Trail, you’ll begin a more serious section of climbing, with Icy Brook on your left, creating a series of rapids and waterfalls.
<img src=”https://www.skyblueoverland.com/wp-content/uploads/2021/02/20200712-348A239C-DC7D-49B0-84DD-D97164C137E2.jpg” alt=”Photo 5: Small gorge with Icy Brook. Photo by Brian Hamilton” />
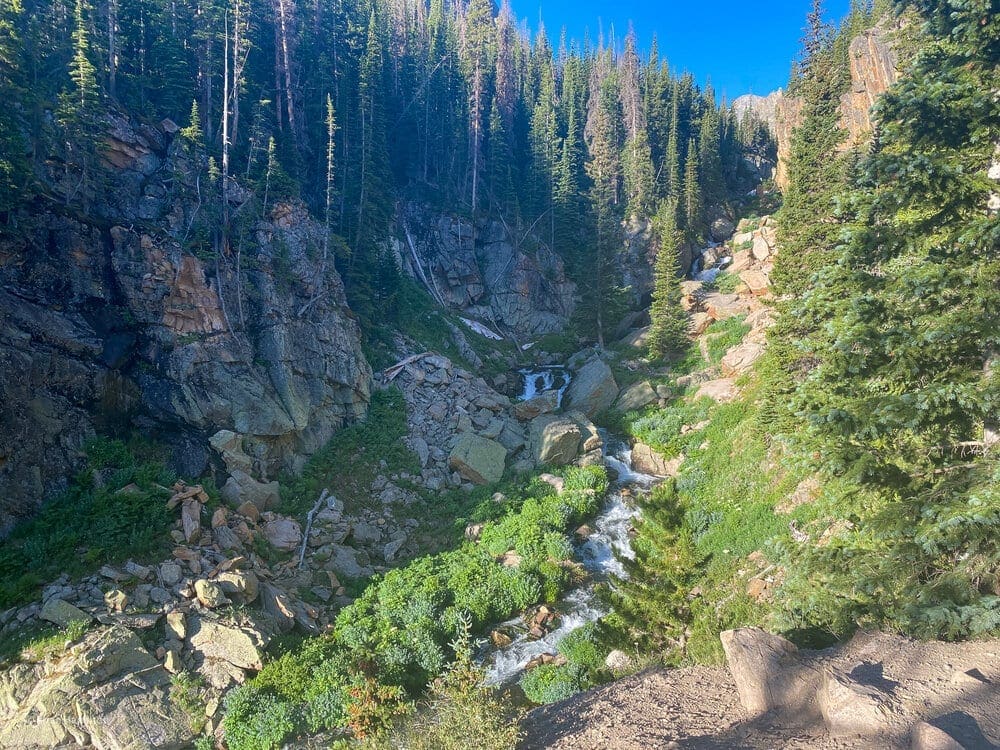
Photo 5: Small gorge with Icy Brook. Photo by Brian Hamilton
<img src=”https://www.skyblueoverland.com/wp-content/uploads/2021/02/20200714-050A1581.jpg” alt=”Photo 6: Another view of Icy Brook on the trail to Sky Pond. Photo by Brian Hamilton” />
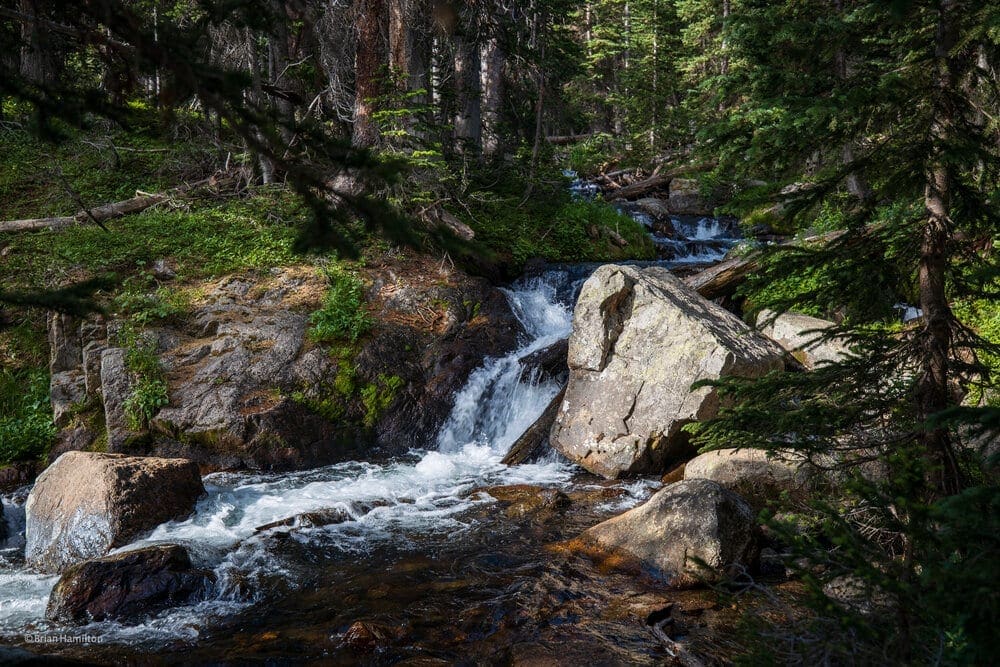
Photo 6: Another view of Icy Brook on the trail to Sky Pond. Photo by Brian Hamilton
This is a picturesque area. At roughly 2.8 miles in, you’ll reach Loch Vale, AKA The Loch. This sub-alpine lake is the first of two lakes you’ll pass en-route to Sky Pond.
<img src=”https://www.skyblueoverland.com/wp-content/uploads/2021/02/20200712-55165341-6706-4DD9-8A98-CE0CC95F50DB.jpg” alt=”Photo 7: First view of the Loch Vale AKA the Loch. Photo by Brian Hamilton” />
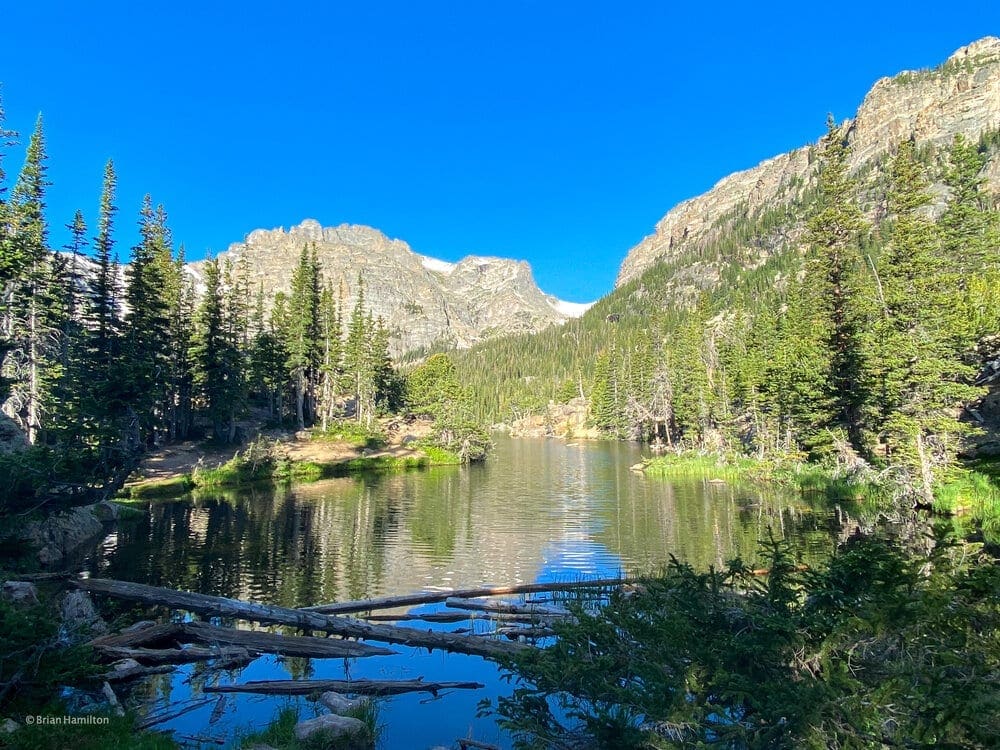
Photo 7: First view of the Loch Vale AKA the Loch. Photo by Brian Hamilton
<img src=”https://www.skyblueoverland.com/wp-content/uploads/2021/02/20200712-66B5E347-CEC1-45EC-A265-A834066B4CFA.jpg” alt=”Photo 8: View of the Loch as you pass around it on the lake’s northern shore. Photo by Brian Hamilton” />
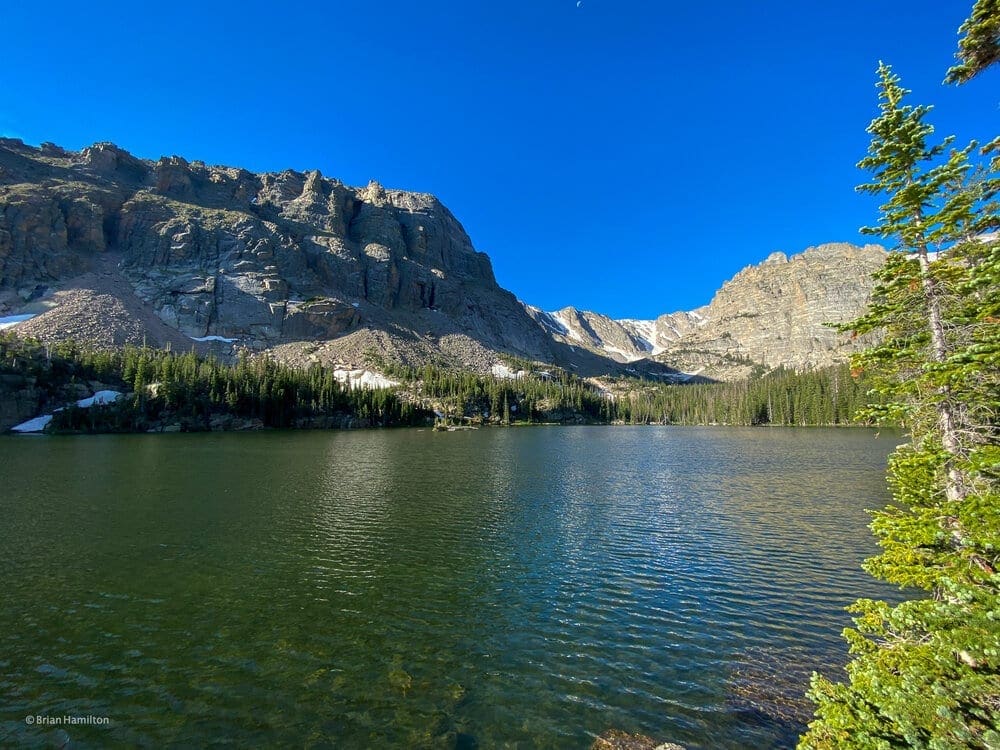
Photo 8: View of the Loch as you pass around it on the lake’s northern shore. Photo by Brian Hamilton
<img src=”https://www.skyblueoverland.com/wp-content/uploads/2021/02/20200712-1C4B38E3-6C2C-4616-B6C8-2BBD47DA27E9.jpg” alt=”Photo 9: Great head-on view of Loch Vale. Thatchtop Mountain to the left, Powell Peak behind. Photo by Brian Hamilton” />
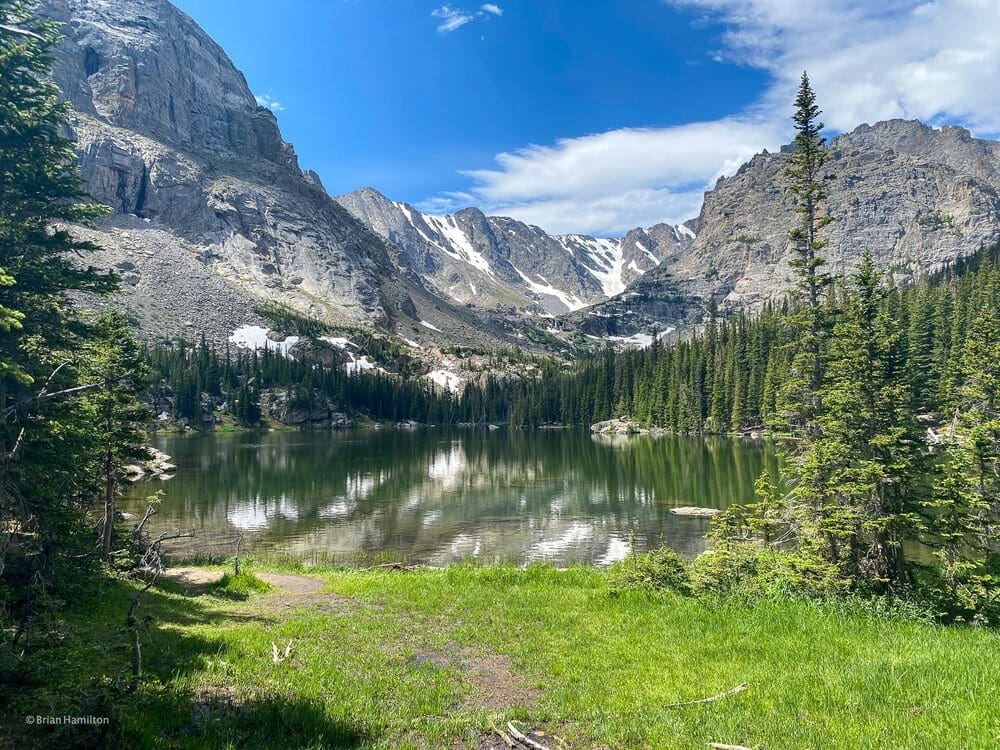
Photo 9: Great head-on view of Loch Vale. Thatchtop Mountain to the left, Powell Peak behind. Photo by Brian Hamilton
<img src=”https://www.skyblueoverland.com/wp-content/uploads/2021/02/20200714-050A1537.jpg” alt=”Photo 10: Admiring the view from Loch Vale. Photo by Brian Hamilton” />
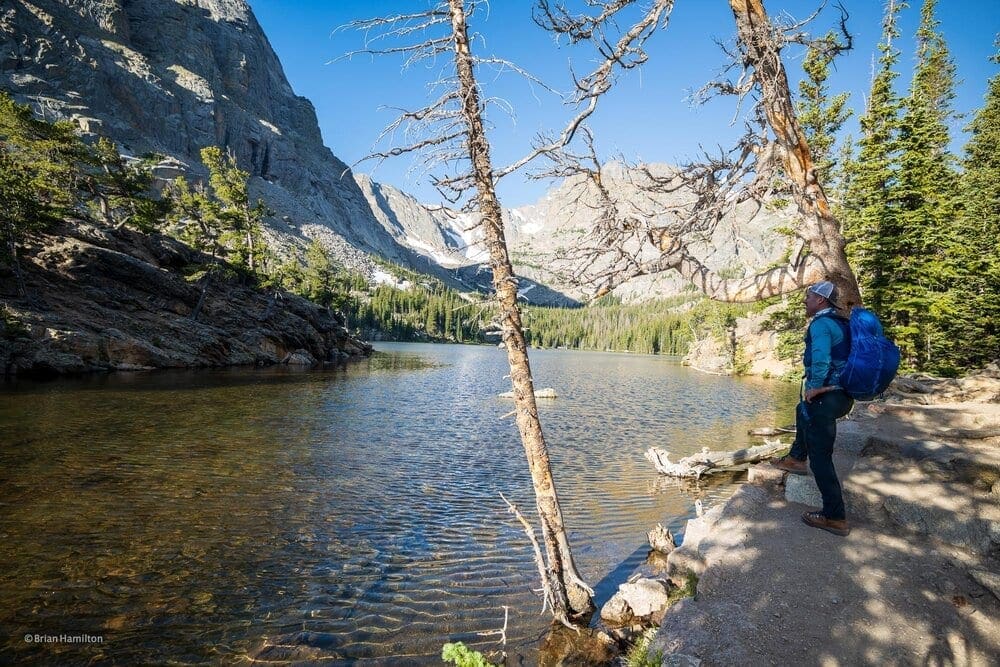
Photo 10: Admiring the view from Loch Vale. Photo by Brian Hamilton
After leaving the Loch Vale area, the next big marker is your final trail junction. A right-arm heads to Andrews Glacier and the left extension heading to Sky Pond. Take the left. For those camping in the area, a short jaunt up the right arm leads to the Andrews Creek Backcountry Sites, realistically the only camping sites in the area.
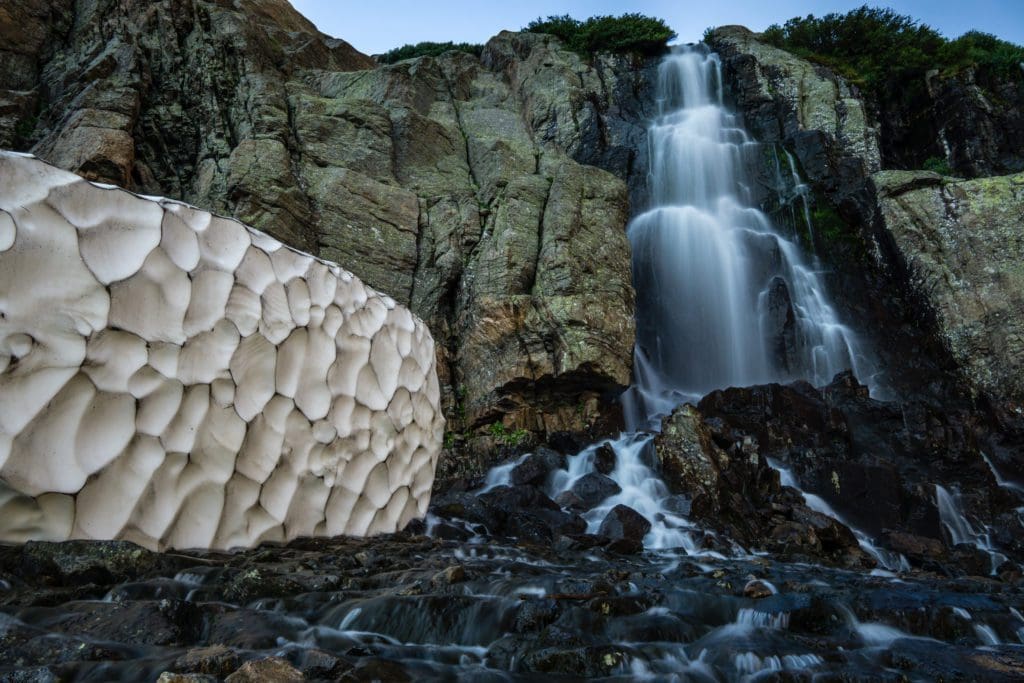
Now on the Sky Pond Trail, after almost another half mile, you’ll reach the base of the impressive Timberline Falls. The trail now becomes a short scrambling route as it attacks a chute to the right of the falls. This is the toughest part of the hike and only allows for one person to ascend (or descend) at a time.
<img src=”https://www.skyblueoverland.com/wp-content/uploads/2021/02/20200712-E966AE5F-A0CE-4B48-B766-84C803DD2BAD.jpg” alt=”Photo 11: Light rays shine on Timberline Falls. Photo by Brian Hamilton.” />
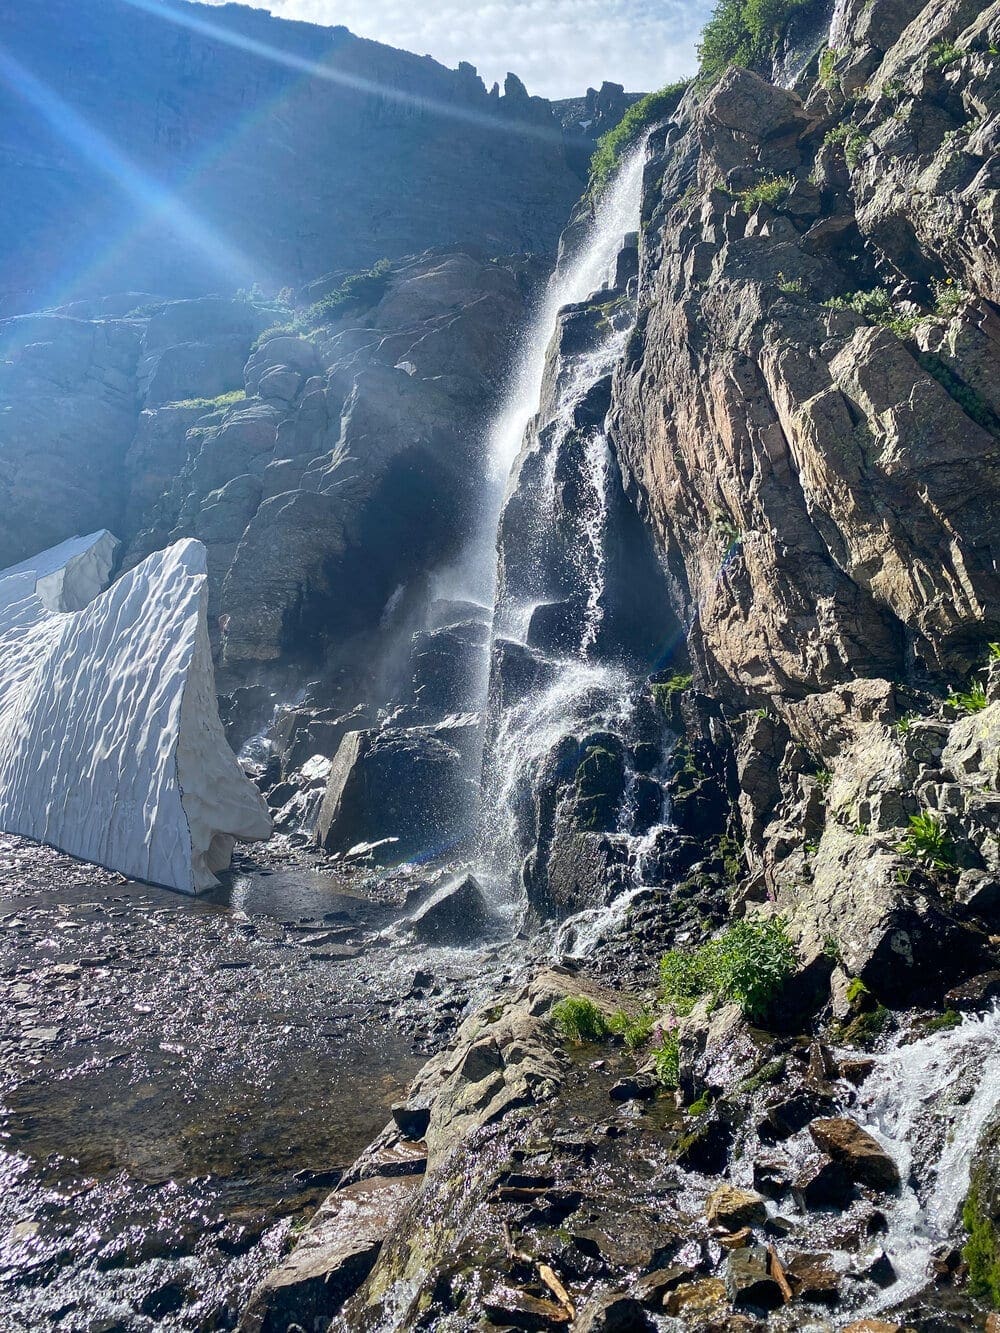
Photo 11: Light rays shine on Timberline Falls. Photo by Brian Hamilton.
<img src=”https://www.skyblueoverland.com/wp-content/uploads/2021/02/20200712-0DDE7295-D1A6-4583-999D-B62CBD5445FC.jpg” alt=”Photo 12: After the scrambling up Timberline Falls, take a look back towards Loch Vale. Photo by Brian Hamilton.” />
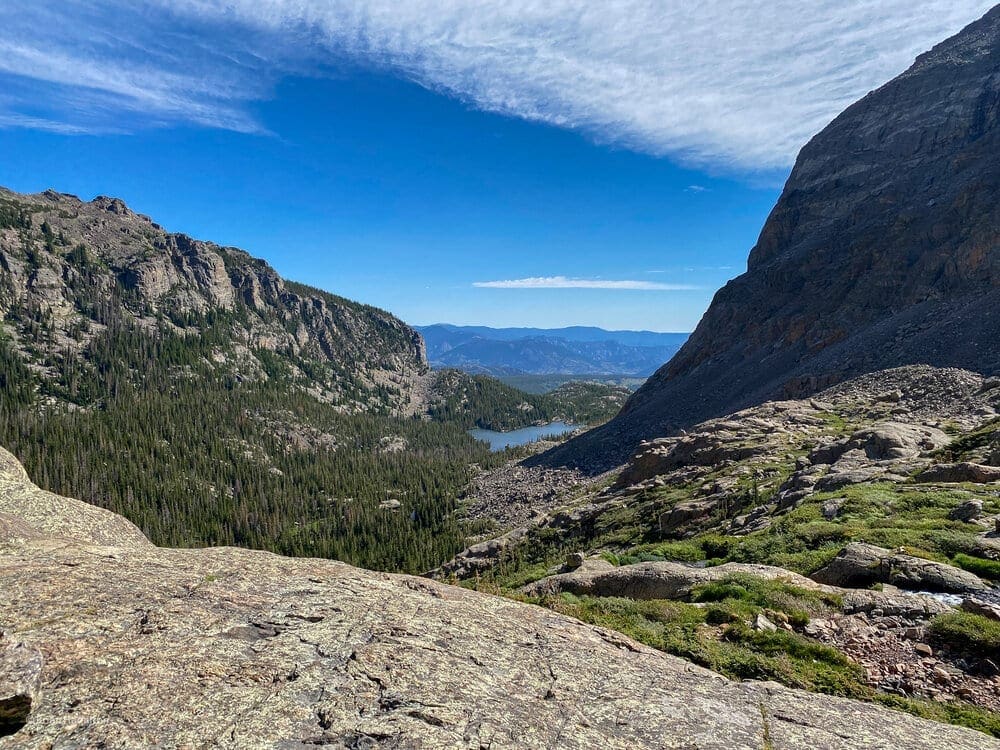
Photo 12: After the scrambling up Timberline Falls, take a look back towards Loch Vale. Photo by Brian Hamilton.
<img src=”https://www.skyblueoverland.com/wp-content/uploads/2021/02/20200712-DCD962F3-8F4E-4C44-BA90-D6F69BA81EB5.jpg” alt=”Photo 13: Looking back at Loch Vale zoomed in. Photo by Brian Hamilton.” />
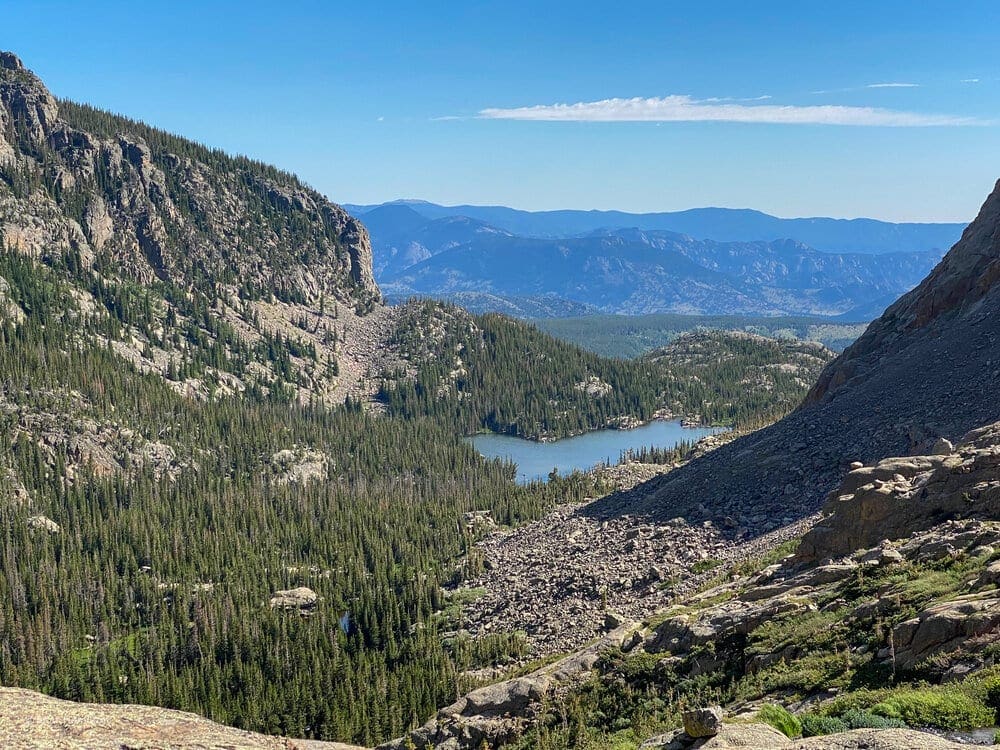
Photo 13: Looking back at Loch Vale zoomed in. Photo by Brian Hamilton.
After the scrambling, proceed to the shores of the Lake of Glass, more commonly referred to as Glass Lake.
<img src=”https://www.skyblueoverland.com/wp-content/uploads/2021/02/20200712-00279A1D-B289-4EEE-9670-3C7391C4FF68.jpg” alt=”Photo 14: Glass Lake and higher terrain behind it. Photo by Brian Hamilton.” />
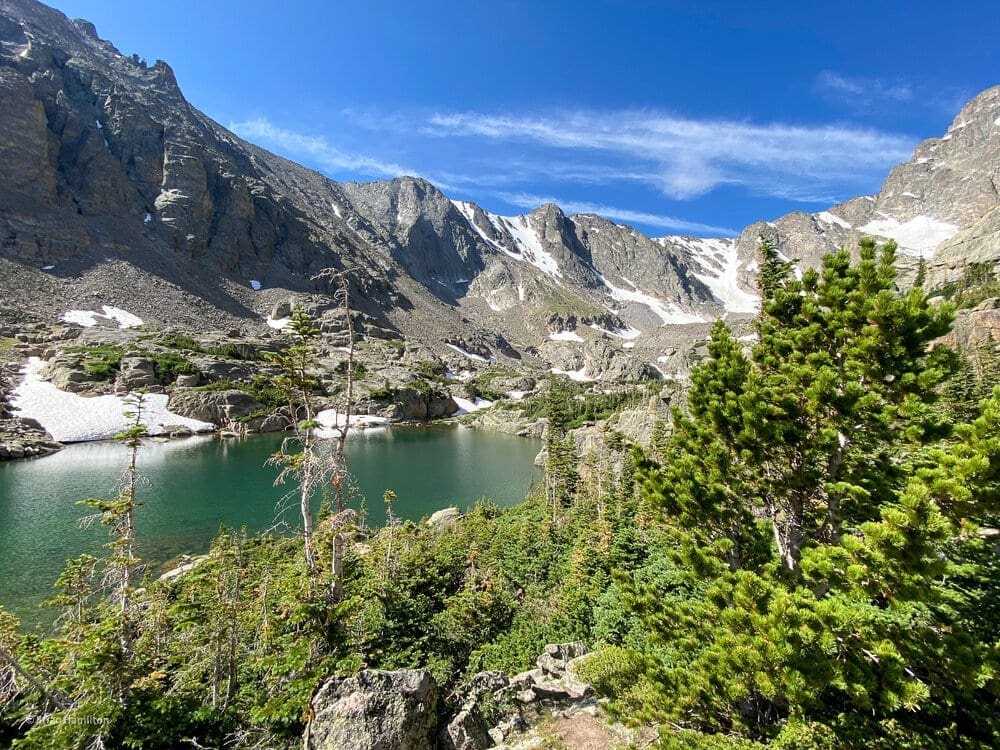
Photo 14: Glass Lake and higher terrain behind it. Photo by Brian Hamilton.
<img src=”https://www.skyblueoverland.com/wp-content/uploads/2021/02/20200712-CD24E966-FAF1-4588-9158-B18134D7991E.jpg” alt=”Photo 15: Glass Lake with Thatchtop behind. Photo by Brian Hamilton.” />
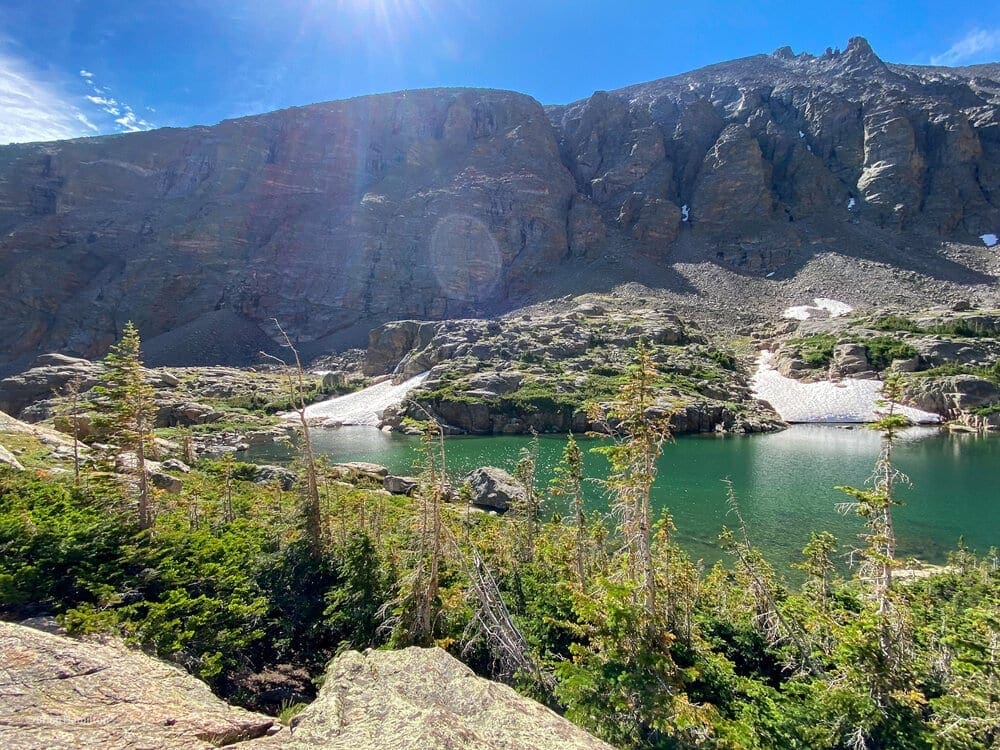
Photo 15: Glass Lake with Thatchtop behind. Photo by Brian Hamilton.
<img src=”https://www.skyblueoverland.com/wp-content/uploads/2021/02/20200712-510AE137-3336-4014-92BF-3F4AF91BD237.jpg” alt=”Photo 16: Great Glass Lake perspective. Photo by Brian Hamilton.” />
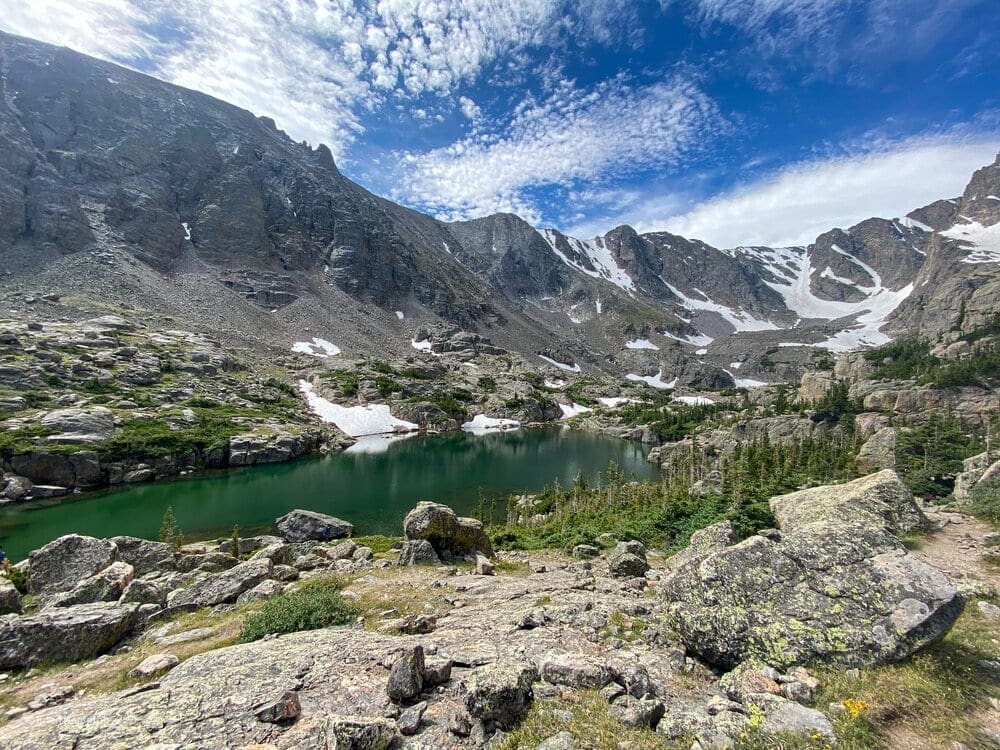
Photo 16: Great Glass Lake perspective. Photo by Brian Hamilton.
<img src=”https://www.skyblueoverland.com/wp-content/uploads/2021/02/20200714-050A1610.jpg” alt=”Photo 17: Fantastic view south to higher terrain from Glass Lake. Photo by Brian Hamilton.” />
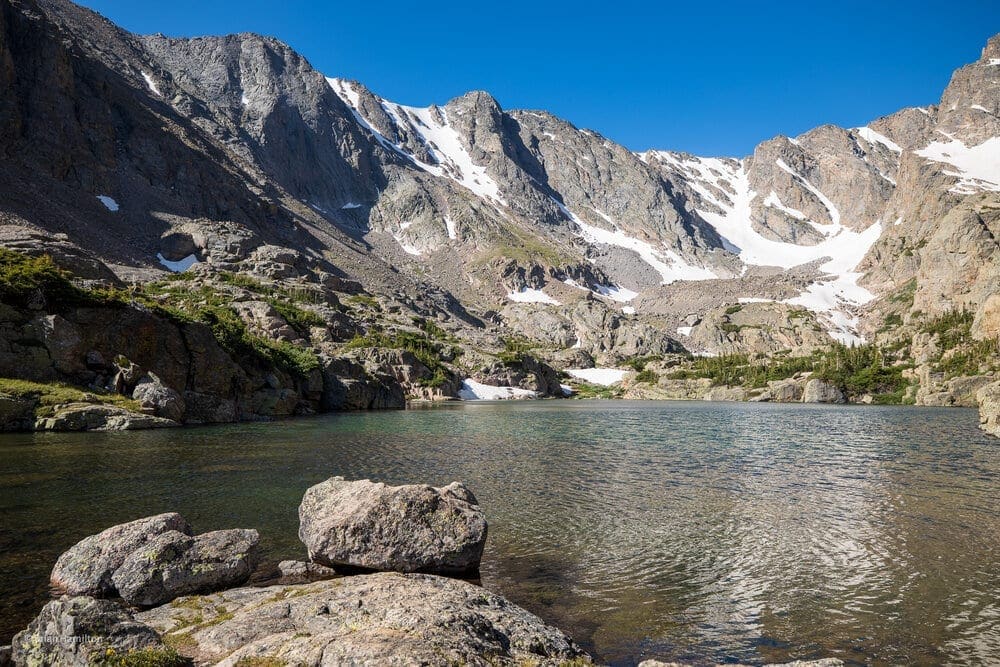
Photo 17: Fantastic view south to higher terrain from Glass Lake. Photo by Brian Hamilton.
Despite its beautiful setting, this is not your final destination. Many make the mistake of stopping here. After taking in the wonderful scenery, continue around Glass Lake on its western side. Less than half a mile later, you’ll reach the shores of the pristine Sky Pond.
<img src=”https://www.skyblueoverland.com/wp-content/uploads/2021/02/20200712-0CBBAD98-9159-40B7-B7B8-C51DC078B595.jpg” alt=”Photo 18: The trail passes through a wetland as it continues towards Sky Pond. Photo by Brian Hamilton” />
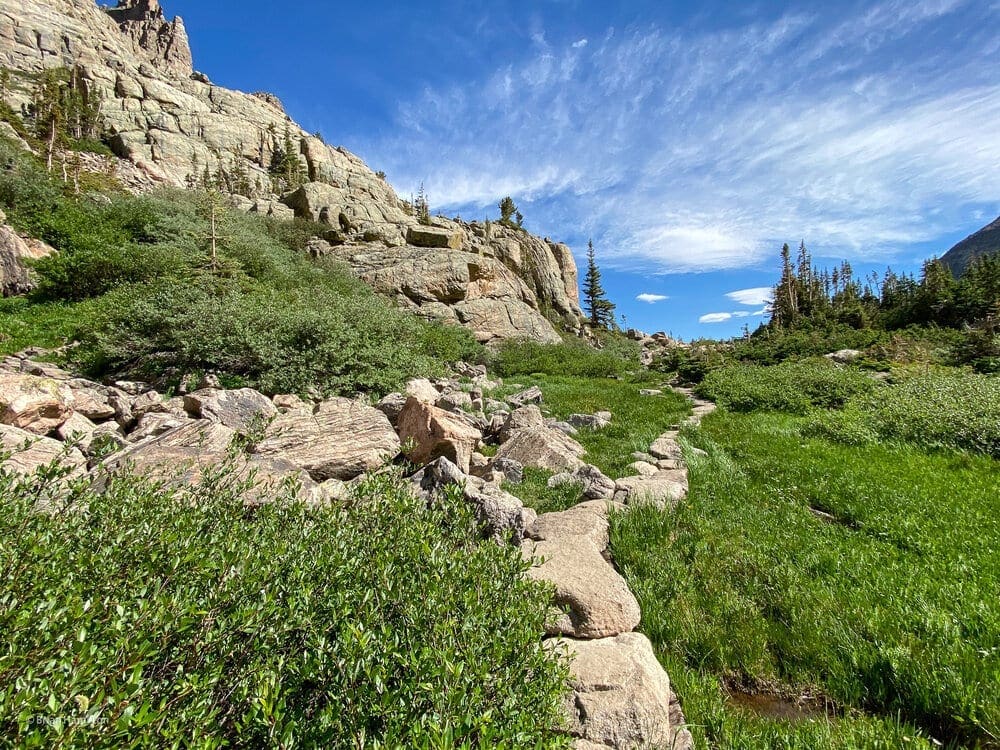
Photo 18: The trail passes through a wetland as it continues towards Sky Pond. Photo by Brian Hamilton
<img src=”https://www.skyblueoverland.com/wp-content/uploads/2021/02/20200712-1A803C96-2A5E-4A0A-955B-95DF10747C1C.jpg” alt=”Photo 19. Sky Pond view with Taylor Peak front and center, Sharkstooth to the right. Photo by Brian Hamilton.” />
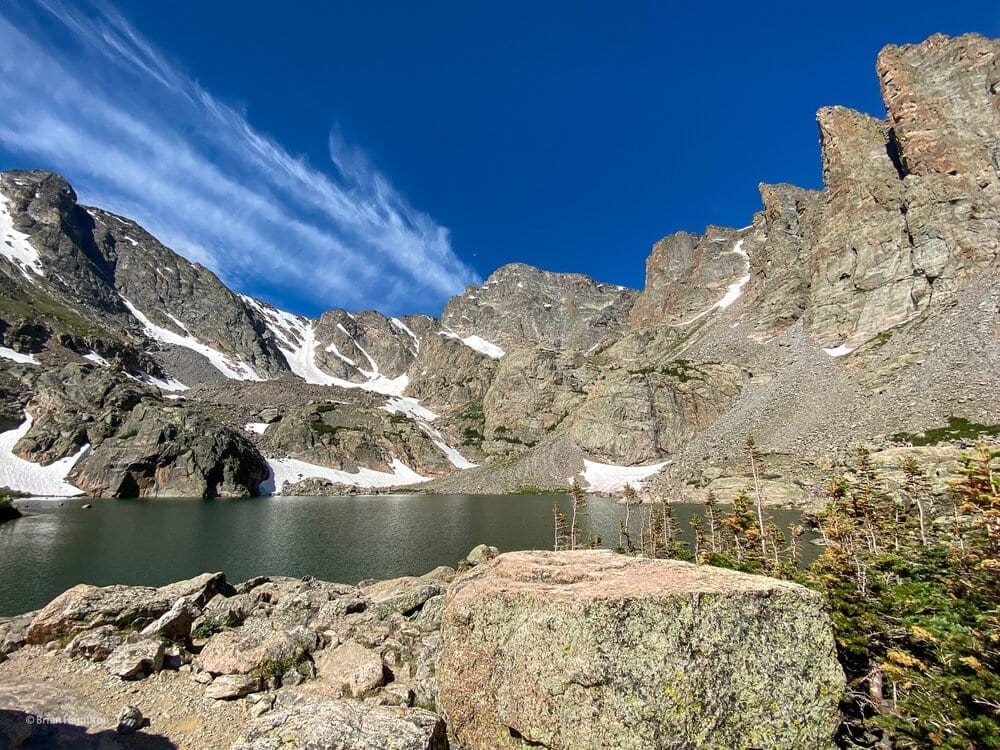
Photo 19. Sky Pond view with Taylor Peak front and center, Sharkstooth to the right. Photo by Brian Hamilton.
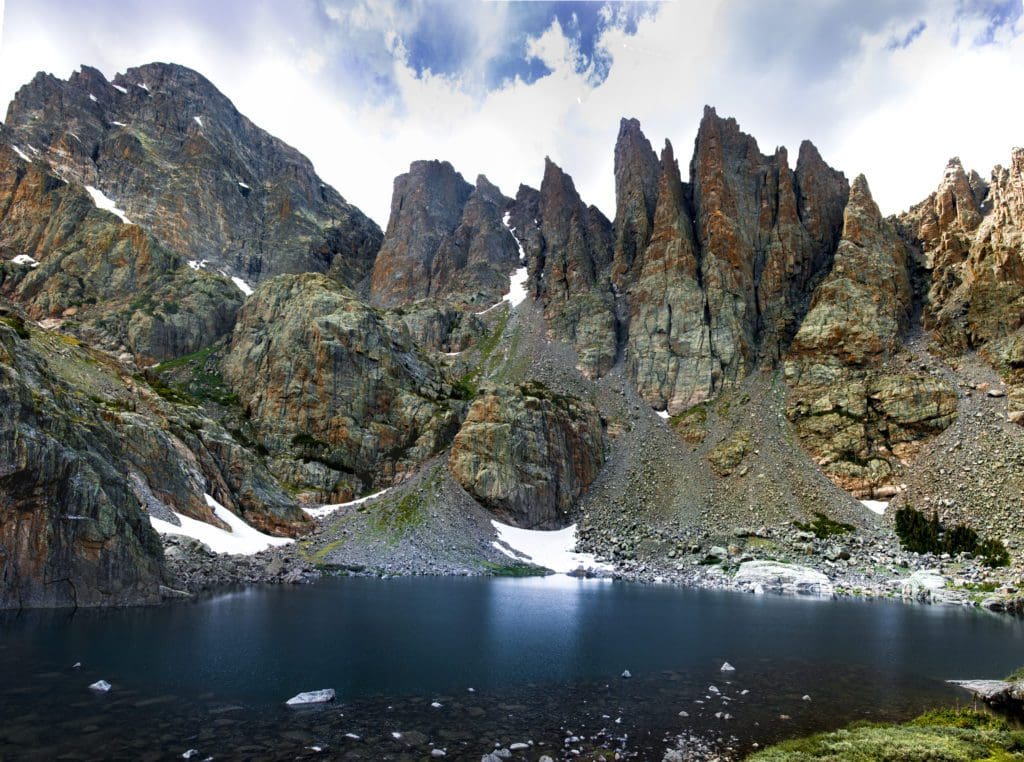
<img src=”https://www.skyblueoverland.com/wp-content/uploads/2021/02/20200714-050A1617-Edit.jpg” alt=”Photo 20. Often called the prettiest lake in Rocky Mountain National Park, Sky Pond is an excellent destination in a beautiful part of the Rockies. Photo by Brian Hamilton.” />
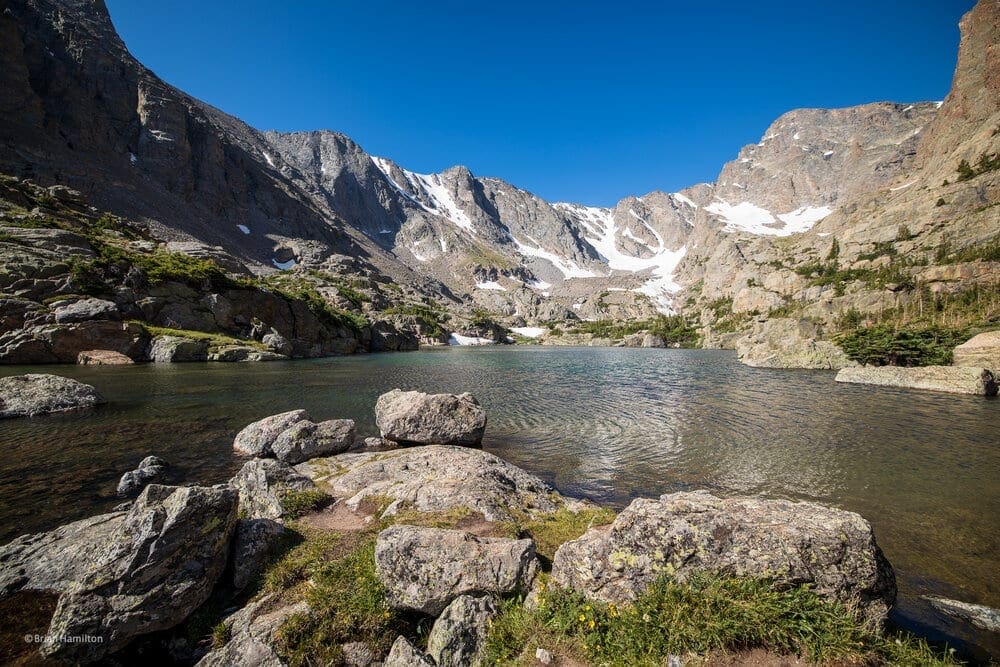
Photo 20. Often called the prettiest lake in Rocky Mountain National Park, Sky Pond is an excellent destination in a beautiful part of the Rockies. Photo by Brian Hamilton.
<img src=”https://www.skyblueoverland.com/wp-content/uploads/2021/02/20200714-050A1623.jpg” alt=”Photo 21: Photo of Brian Hamilton at Sky Pond. Photo by Brian Hamilton.” />
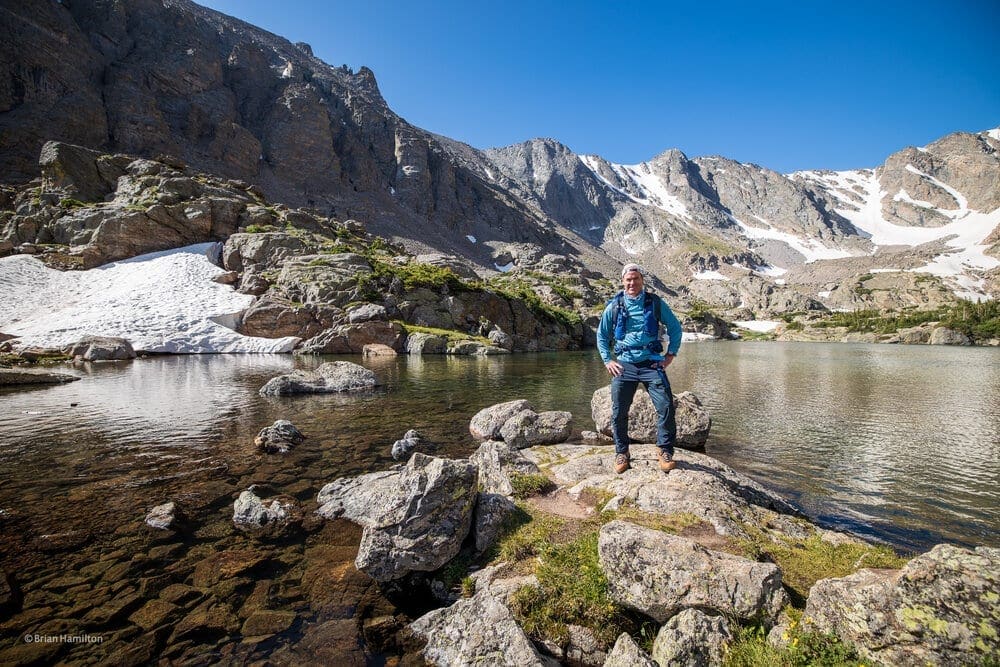
Photo 21: Photo of Brian Hamilton at Sky Pond. Photo by Brian Hamilton.
The views here are phenomenal. To the right are a series of prominent and crooked looking rock features called the Sharkstooth. The larger mountain at the head of the cirque (along the same ridge as the Sharkstooth) is Taylor Peak, which reaches 13,153 feet. Looking left from Taylor Peak, you’ll be able to glimpse Taylor Glacier before the land rises up to Powell Peak, another 13er. Closer in on the right is the bulk of Thatchtop Mountain. Take some time to enjoy this brilliant slice of the park.
For the descent, retrace your steps. Broken down it’ll look like this:
-
Head back to Glass Lake
-
Pass the junction for Andrews Glacier
-
Descend passed Timberline Falls until reaching The Loch
-
Continue descending, passing Mills Junction on the way
-
At the following junction with North Longs Peak Trail make a left
-
Continue to Alberta Falls
-
Take a quick right at Glacier Gorge Trail
-
Finally, take a left at the next junction to head back to the trailhead.
Final Thoughts
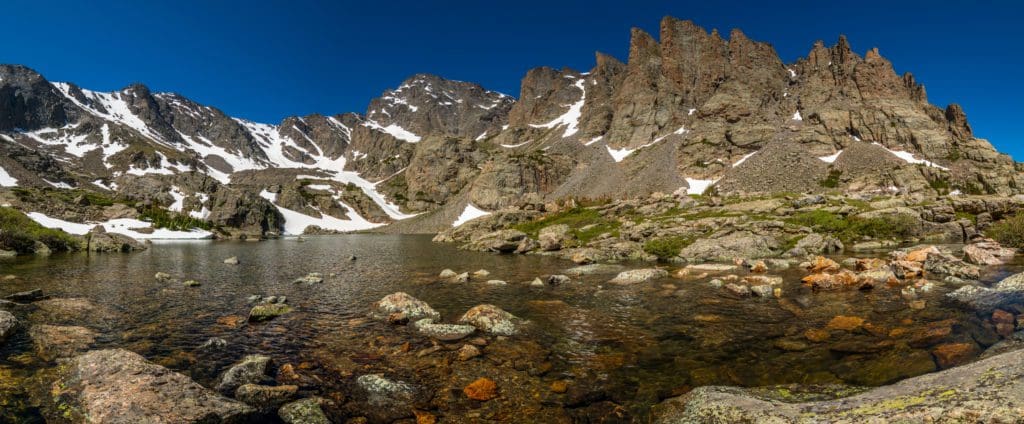
Panorama of Sky Pond in Rocky Mountain National Park, Colorado. The series of prominent and crooked looking rock features are called the Sharkstooth.
Sky Pond is often called the prettiest lake in Rocky Mountain National Park. This is a great trail with three stunning lakes. The first part 3.5 miles of the trail has a relatively mild incline and it’s not long until you’re at the Loch Vale, which is personal favorite of the three lakes. The section just before you get to Timberline Falls is where it gets very steep. The scramble up the falls was not difficult. There are plenty of friendly hikers who are ready to give a hand when needed. Many rocks on the scramble up were relatively dry and footing was good. Overall, I highly recommend this hike! Make sure to go to Sky Pond after the scramble! We saw many people not continuing the 15 minutes to Sky Pond. The trail restarts just behind a boulder to the right of Glass Lake. The trail isn’t 100% obvious but you should be able to get there with minimal route finding.
Terms of Use: As with each guide published on SKYBLUEOVERLAND.com, should you choose to this route, do so at your own risk. Prior to setting out check current local weather, conditions, and land/road closures. While taking a trail, obey all public and private land use restrictions and rules, carry proper safety and navigational equipment, and of course, follow the #leavenotrace guidelines. The information found herein is simply a planning resource to be used as a point of inspiration in conjunction with your own due-diligence. In spite of the fact that this route, associated GPS track (GPX and maps), and all route guidelines were prepared under diligent research by the specified contributor and/or contributors, the accuracy of such and judgement of the author is not guaranteed. SKYBLUE OVERLAND LLC, its partners, associates, and contributors are in no way liable for personal injury, damage to personal property, or any other such situation that might happen to individuals following this route.


