


High Point:
10,240 feet

Total Ascent:
850 feet

Difficulty:
Moderate

Distance:
3.6 miles

Waypoints:
40.31215, -105.64602

Route Type:
Out and Back
Lake Haiyaha, in Rocky Mountain National Park, is a 3.6 mile round-trip hike surrounded by huge granite boulders. Arriving early gives hikers a peaceful retreat away from the park’s east side bustle. The Native American word “Haiyaha” translates to “rock” or “lake of many rocks”, fitting for this trail through Chaos Canyon.
The Lake Haiyaha Trail is a moderate 3.6 mile heavily trafficked out and back trail located in Rocky Mountain National Park near Estes Park, Colorado that features a waterfall and a lake. “Haiyaha” is a Native American word that means “rock” or “lake of many rocks”, or “big rocks”, depending on the translation. This trail leads through the appropriately named Chaos Canyon.
Field Notes:
Because Bear Lake Road is plowed in the winter, access to Lake Haiyaha is open throughout the year. However, winter hiking is very different than summer hiking and requires snowshoes, traction devices, extra layers, nutrition, and good orientation skills because the summer trails are all buried in snow. If new to the area, the best time to hike to Lake Haiyaha is also the busiest time of year, from roughly late June-early October depending on snowpack.
The first part of the hike overlaps with the trail to Dream and Nymph Lakes. These lakes are very popular, and the trail to them will have other people on it. Once you head out to Haiyaha, you may lose some of the crowds, but it is best to assume you’ll run into others along the whole length of the hike.
Weather in Rocky Mountain is fickle; it can snow in June at the higher elevations. While Lake Haiyaha isn’t the highest point in the park, it is still over 10,000 feet. Plan to check multiple local weather stations prior to hiking. Here are a few useful forecasts: Estes Park Forecast, Otis Pk. Weather (Otis Peak sits above Lake Haiyaha).
Remember, as this is a national park, no dogs are allowed on the trails. There are restrooms at the trailhead, though they are closed in the winter.
Fun fact: “Haiyaha” is a Native American word originating from the Ute tribe, whose influence is all over Colorado. It means either “rock” or “big rocks,” depending on the translation. The name is a reference to the abundance of large boulders near the lake and along its rugged shoreline.
The Ultimate Offline GPS Hiking & Ski Maps
See why onX Backcountry is the ultimate GPS navigation app for your outdoor pursuits. Try Today for Free. No credit card required.
Directions to Trail:
Lake Haiyaha is accessed via the always popular Bear Lake Trailhead at the end of Bear Lake Road in Rocky Mountain National Park. The two main ways into Rocky Mountain National Park from the east are either on US 34 or US 36. A third method is to take CO 7 north from Allenspark. From the west, enter the park near Grand Lake on US34 and take Trail Ridge over to the eastern side. Please note, Trail Ridge is closed during the winter months.
Bear Lake Trailhead is accessed via Bear Lake Road, which is very close to Beaver Meadows Visitor Center. If entering on US36 from Estes, after the visitor center, take your first left onto Bear Lake Road. The road winds its way 9.4 miles south to Bear Lake parking area. While the road is plowed in the winter, it is not always open right after a large storm rolls through. The road is paved all the way to the trailhead. From the west, look for signs for Bear Lake Road; the road will be on your right-hand side as you near the Beaver Meadows Visitor Center.
The trailhead is exceptionally popular, so arrive early. There is additional parking along Bear Lake Road, but these spots also fill up quickly. Alternatively, head down to the Park and Ride lot near Glacier Gorge Campground and take a free shuttle to the trailhead.
Since the trail is in Rocky Mountain National Park, you’ll need to pay to enter. The fee is $25 per car, or $15 if entering the park on foot. For frequent visitors, there is an $80 annual pass. Please check with RMNP’s website to stay up to date with current pass rules, regulations, and Park and Ride operating hours.
Places to Stay:
Camping near Rocky Mountain National Park will cost you. The options for free area camping are limited. On a positive note, there are plenty of options, and the National Park is within driving distance of Fort Collins, Boulder, and Denver.
Estes Park: Known as the gateway to Rocky Mountain National Park, Estes sees nearly 80% of park traffic, as opposed to the much quieter western entrance near Grand Lake. The town has a ton of lodging options.
Rocky Mountain National Park Camping
-
Moraine Park Campground: $30 per site. $20 in winter. Established campground with perks, facilities, campfire grate, wood for sale in summer, and bear boxes to store food. Only loop B is open in the winter, and it’s first-come, first-serve.
For summer, a reservation is needed way in advance to secure a spot.
-
Glacier Basin Campground: $30 per site. Established campground with the same perks as Moraine Park. Reservation required.
-
Backcountry Campsites: There are a few backcountry sites nearby that you could use, the best being Andrews Creek. There is no open camping in the backcountry; it must be at designated backcountry sites. Please check the Park website for more details. Backcountry sites require an overnight permit of $30. Rangers regularly patrol the area.
Camping near Estes Park
-
Estes Park Campground at Mary’s Lake: Established campground, pricey $45-55. Good backup if other campgrounds are full.
-
Hermit Park Open Space: $30 for a tent site, price increases if towing a trailer or for group-spots.
-
Estes Park Koa: Rates dependent on what you’re bringing with you but will run more than $50 a night in the busy season.
Free or close to free: but a little farther (if you’re willing to drive)
-
County Road 47. Users have reported trash and ATV noise at this location, but it is free.
Journal:
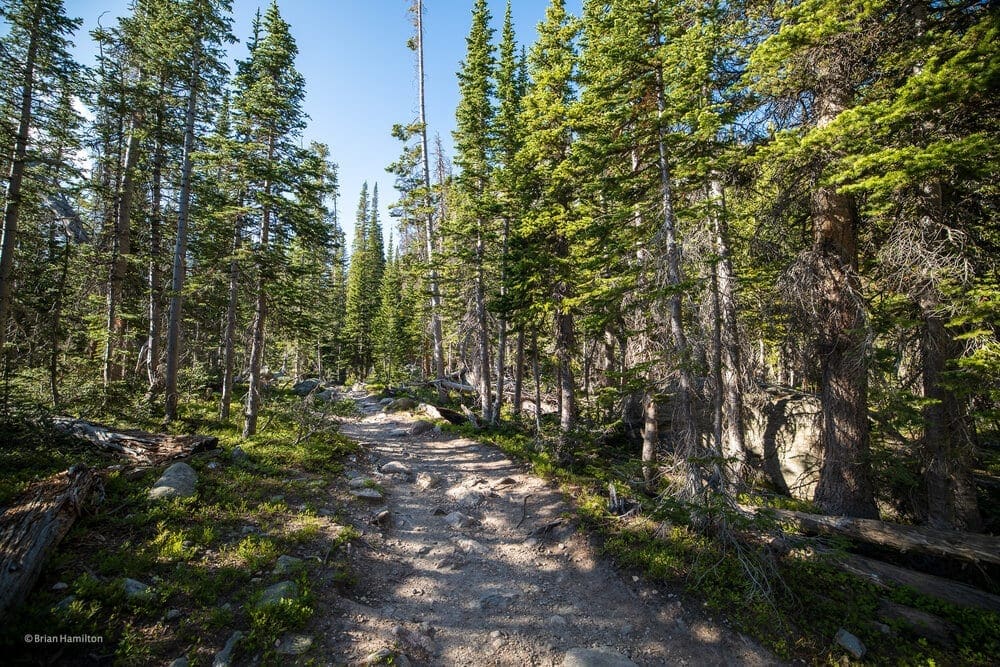
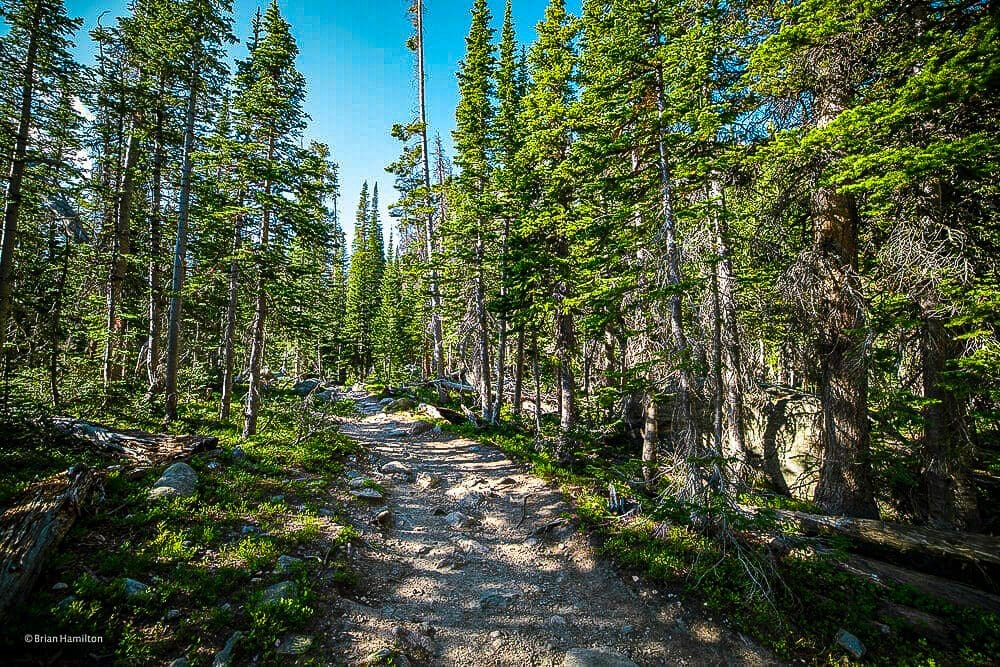
Once you’ve found parking at Bear Lake Trailhead or taken the free shuttle in, you’ll begin by heading west past the head of the parking area on a very well-maintained path. Almost immediately, there is a split, with the right-hand portion leading to Bear Lake and the left-hand heading to Nymph Lake, Dream Lake, and eventually Lake Haiyaha. Take the left option. The trail will begin to ascend at a moderate clip towards Nymph Lake. A lot of this section is paved due to its popularity.

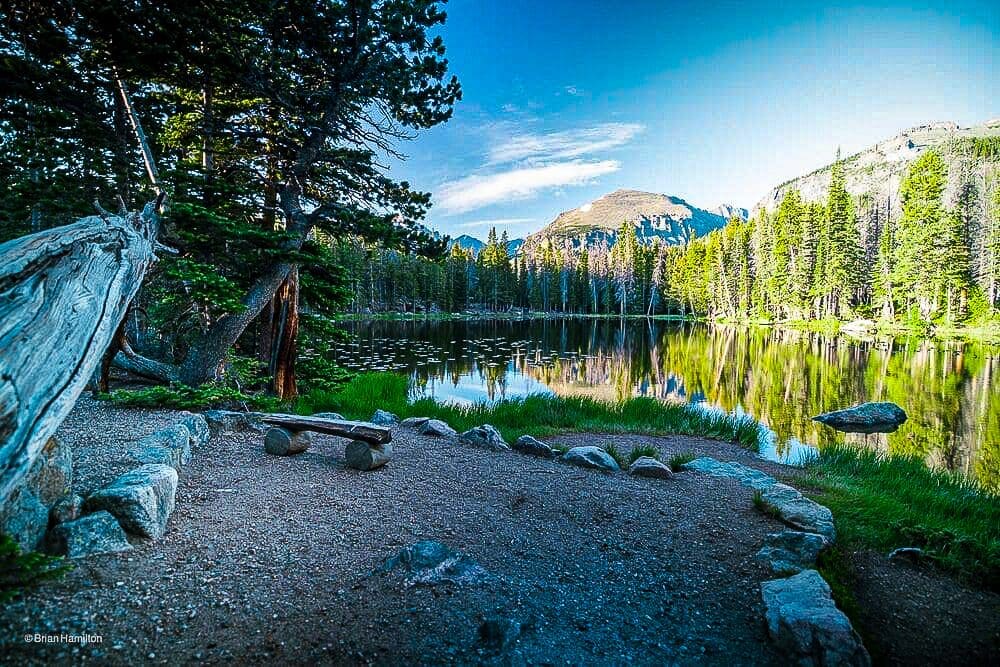
Nymph Lake
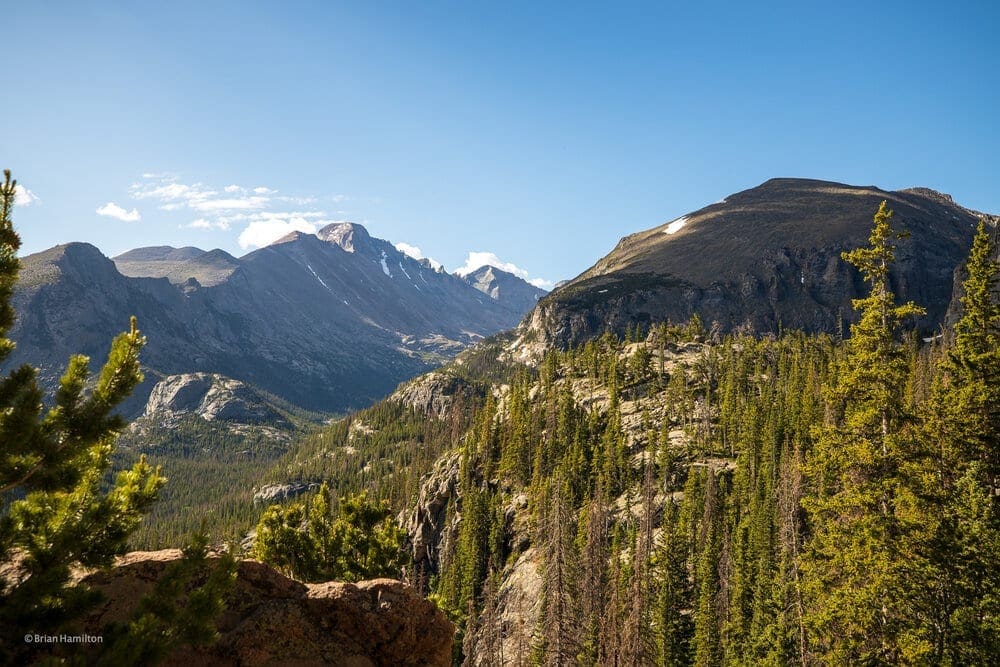
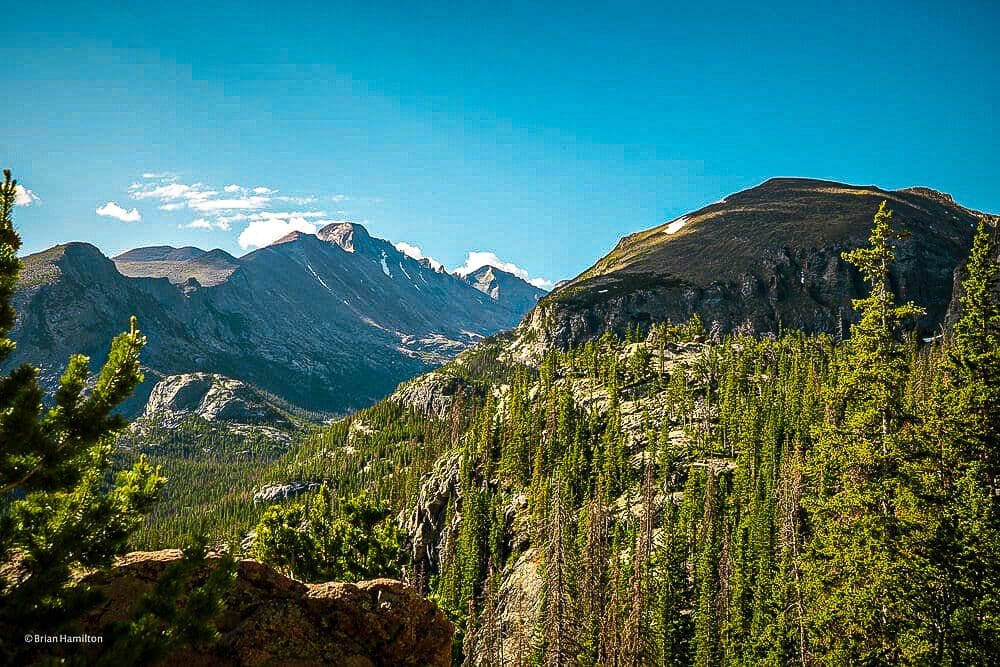
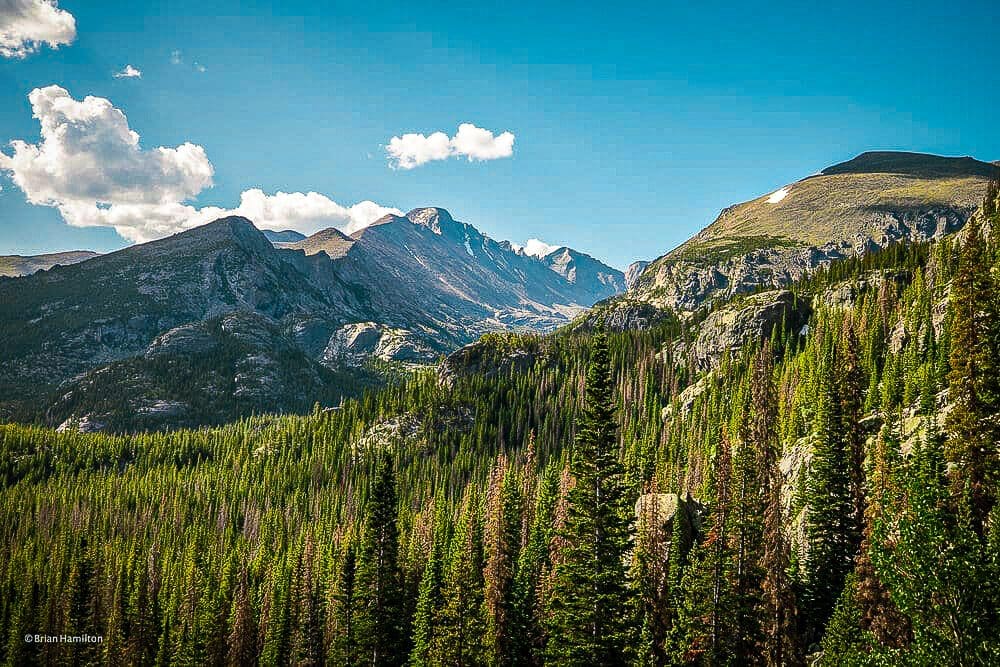
Once you pass Nymph Lake, roughly a half-mile in, you’ll begin a much more pronounced ascent to Dream Lake. In this section, you will be afforded some stunning views south into Glacier Gorge, framed by Longs Peak on its left-hand side.
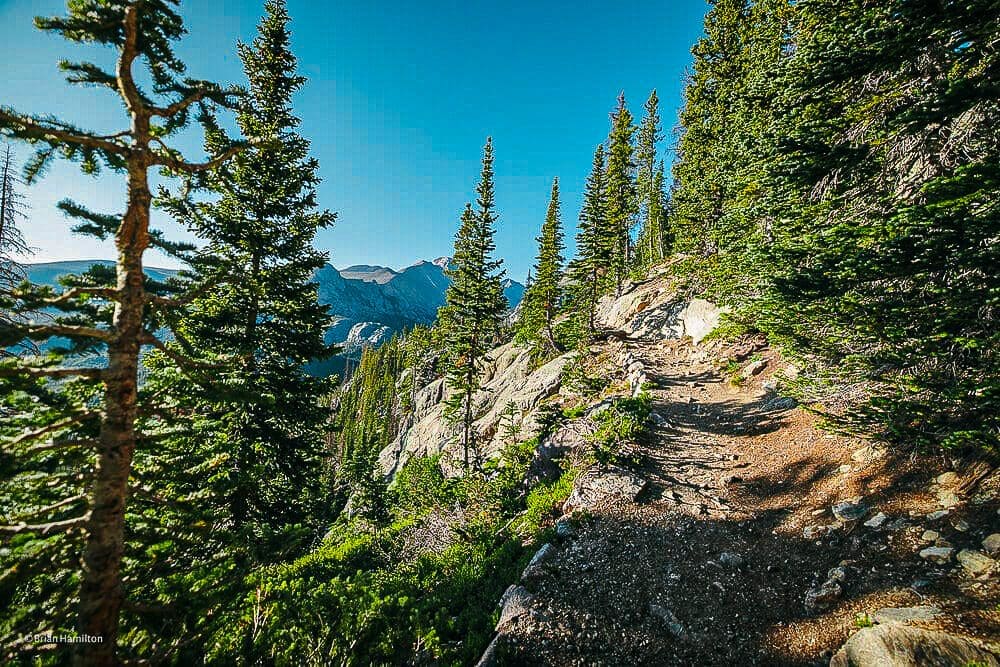
Heading up the trail towards Lake Haiyaha.

Awesome early morning views of Longs Peak and Glacier Gorge.
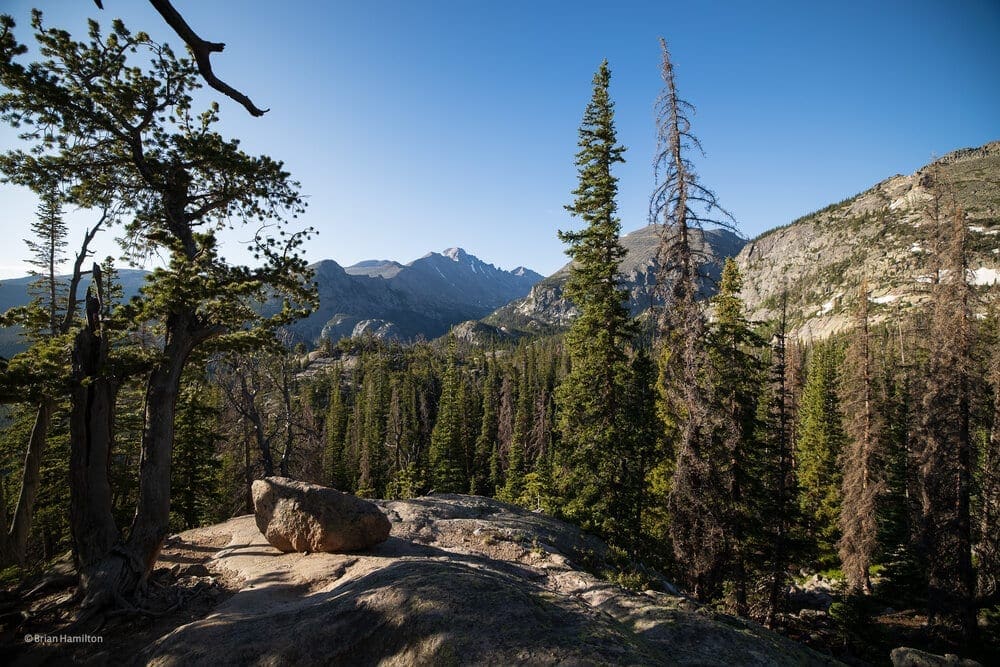
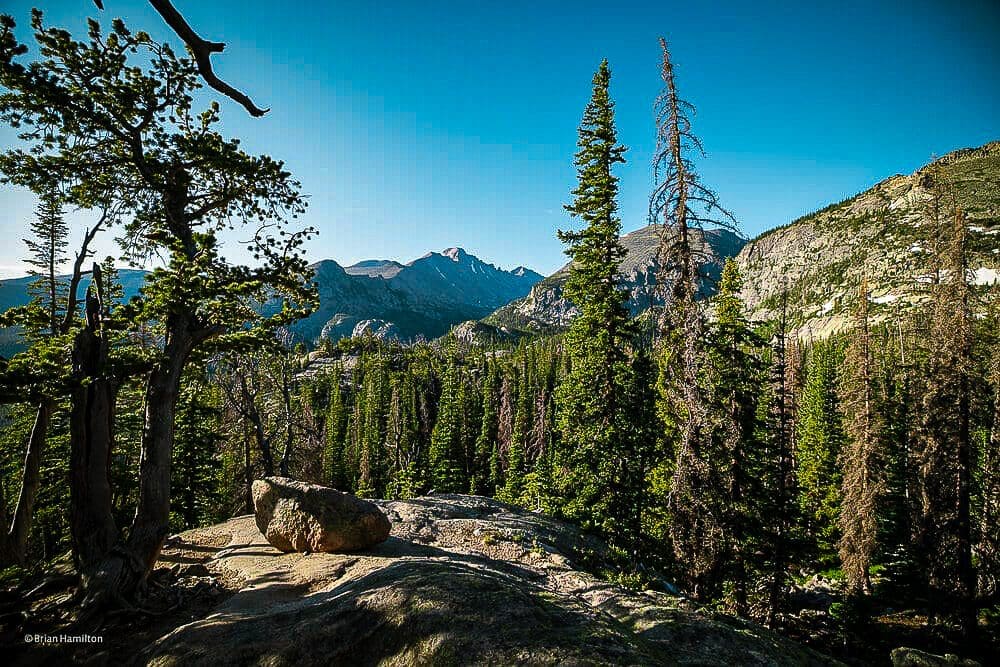
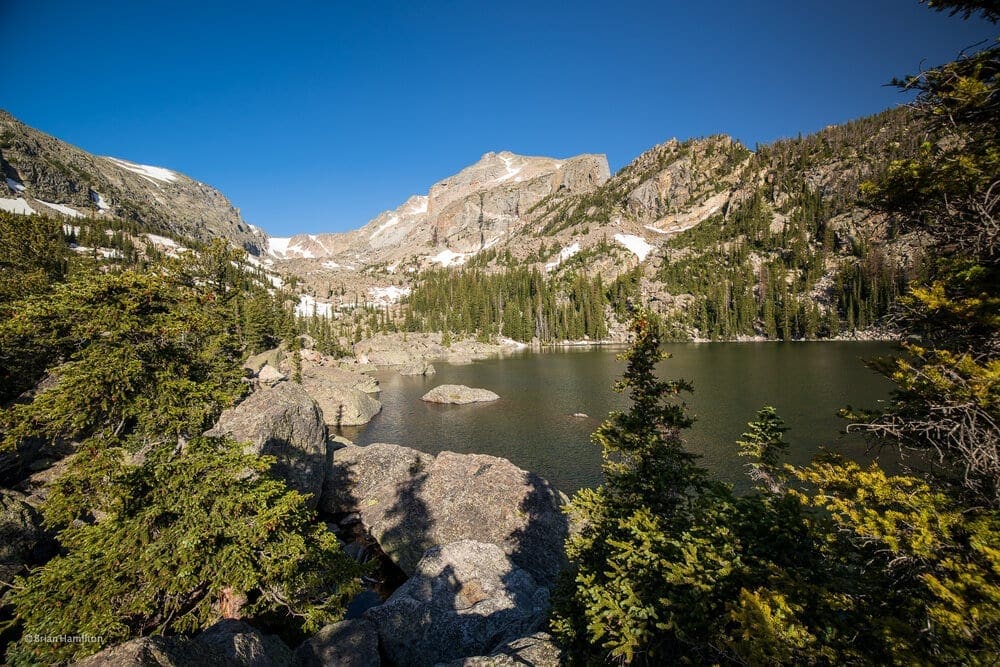
Right before you reach the shores of Dream Lake (a worthy destination on its own), you will come across a trail junction. Take the left extension to Lake Haiyaha. The trail begins a moderate climb higher as it takes a southward jaunt around an extension of Hallet Peak’s lower reaches. Hallet Peak is the tilted square block mountain visible from multiple trails in the area, and one of the most photographed peaks in the park; at Haiyaha, you’ll have an excellent view of it.
After your climb, there will be an open section in the pine forest where you can look back at Nymph Lake and Bear Lake for reference.
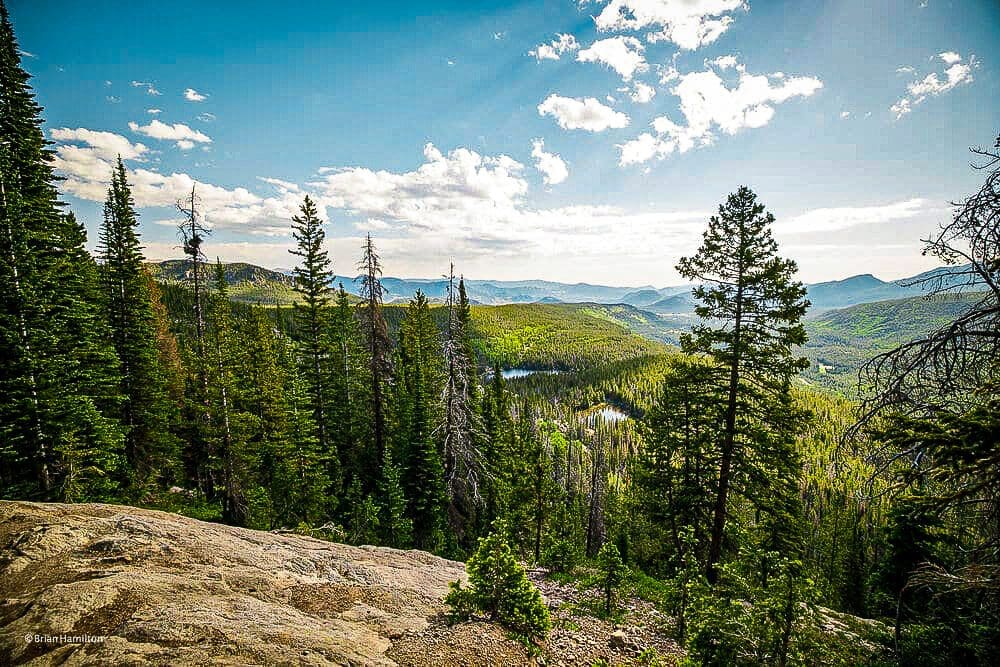
Looking down on Bear Lake and Nymph Lake.
Looking down on Bear Lake and Nymph Lake.
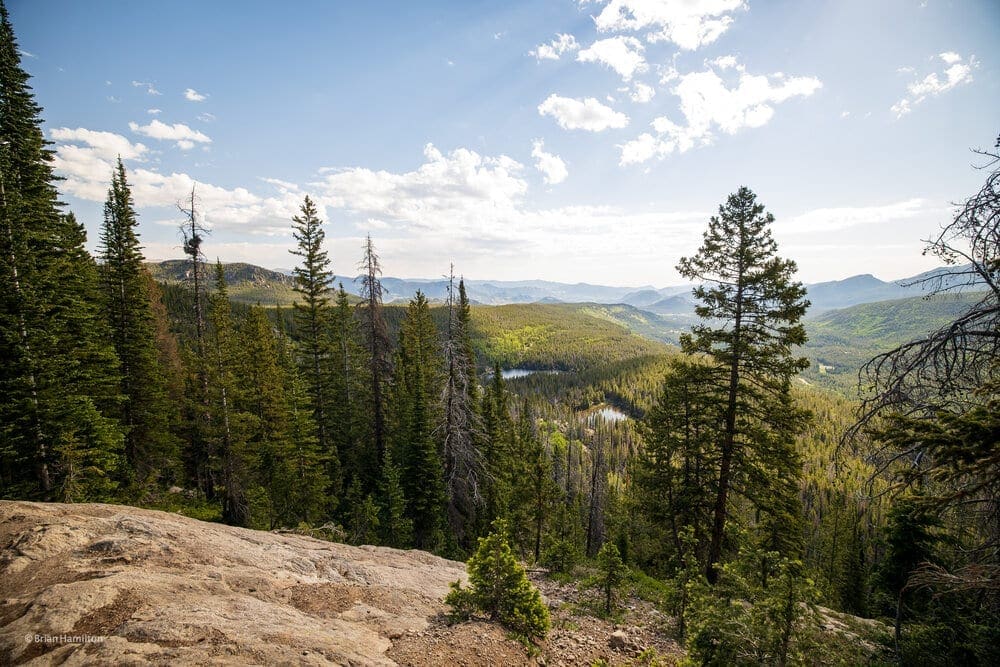
This area also has more stunning perspectives into Glacier Gorge.
Looking towards Longs Peak and Glacier Gorge.
At the next trail junction, take a right to Lake Haiyaha. Continuing straight ahead will get you deeper into Glacier Gorge.
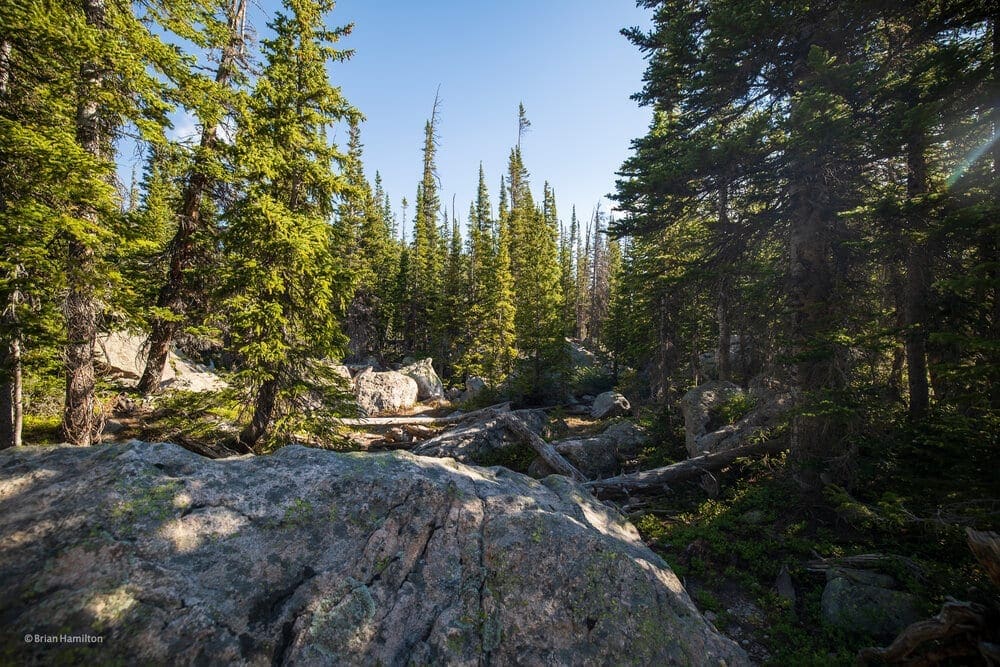
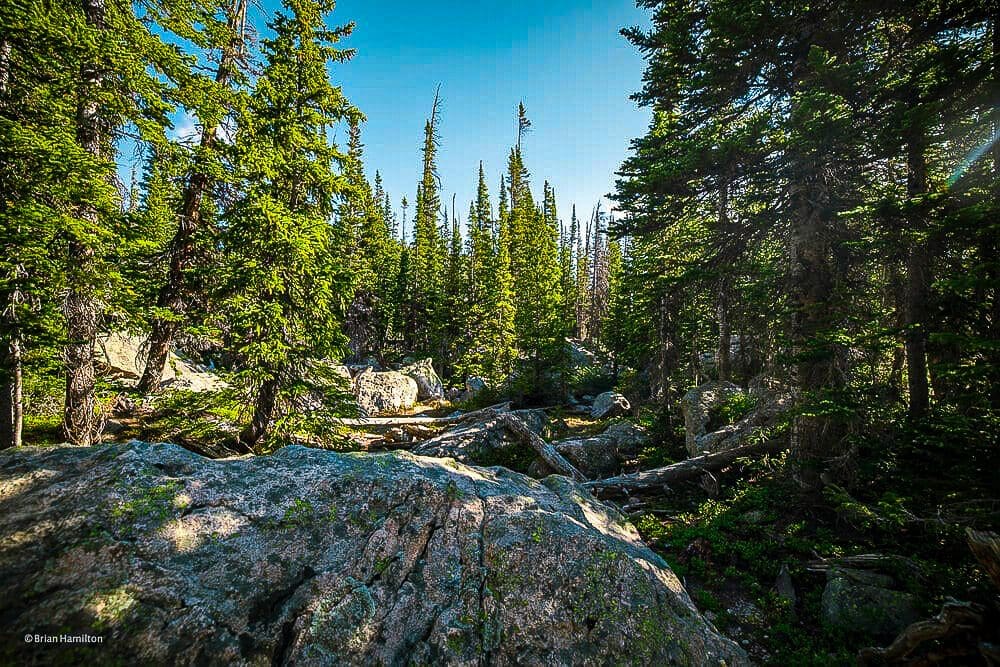
From the junction, it’s an easy walk to the lake.
Easy stretch of trail to the lake.
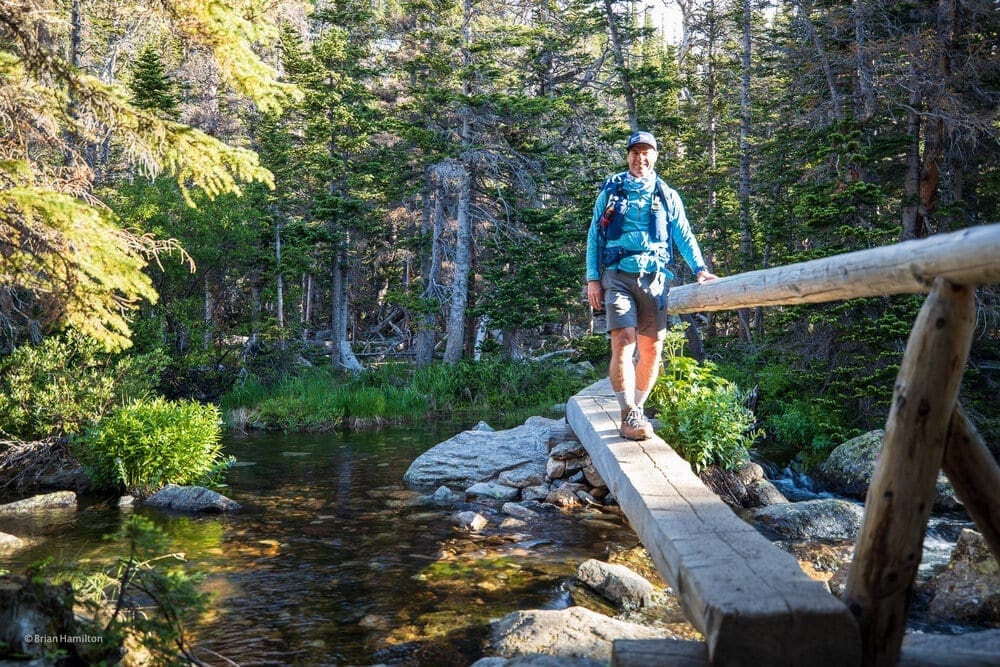
You will cross Chaos Creek on a footbridge.
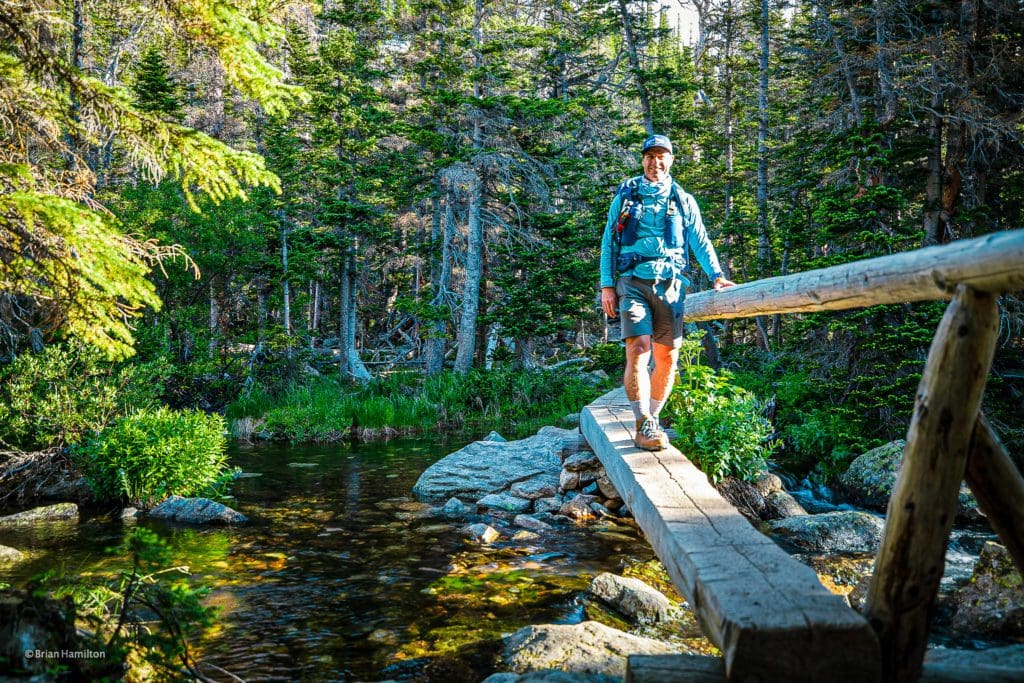
Crossing Chaos Creek.
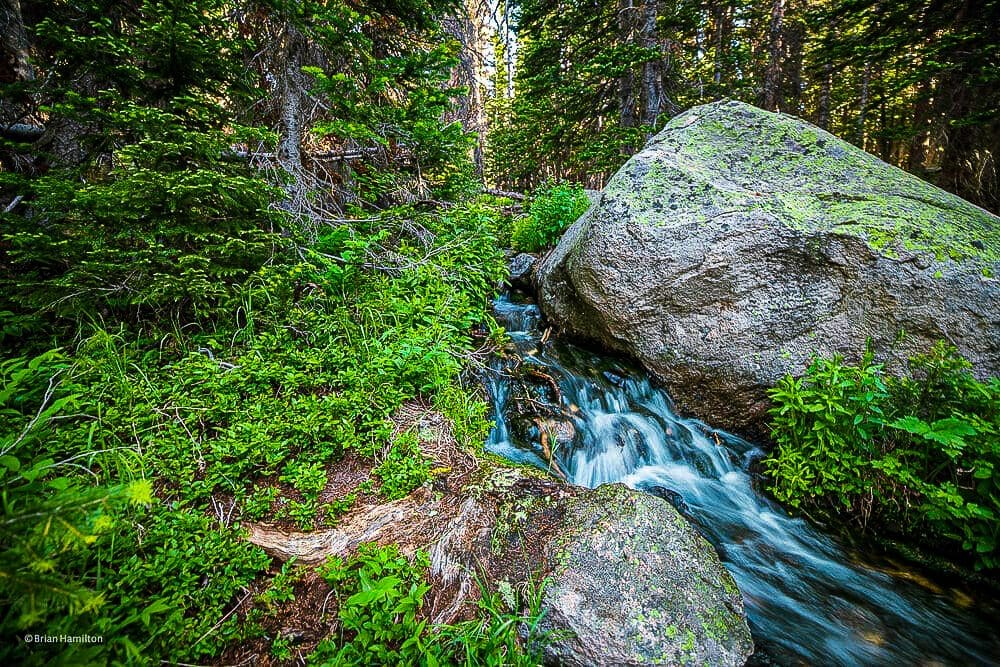
Chaos Creek
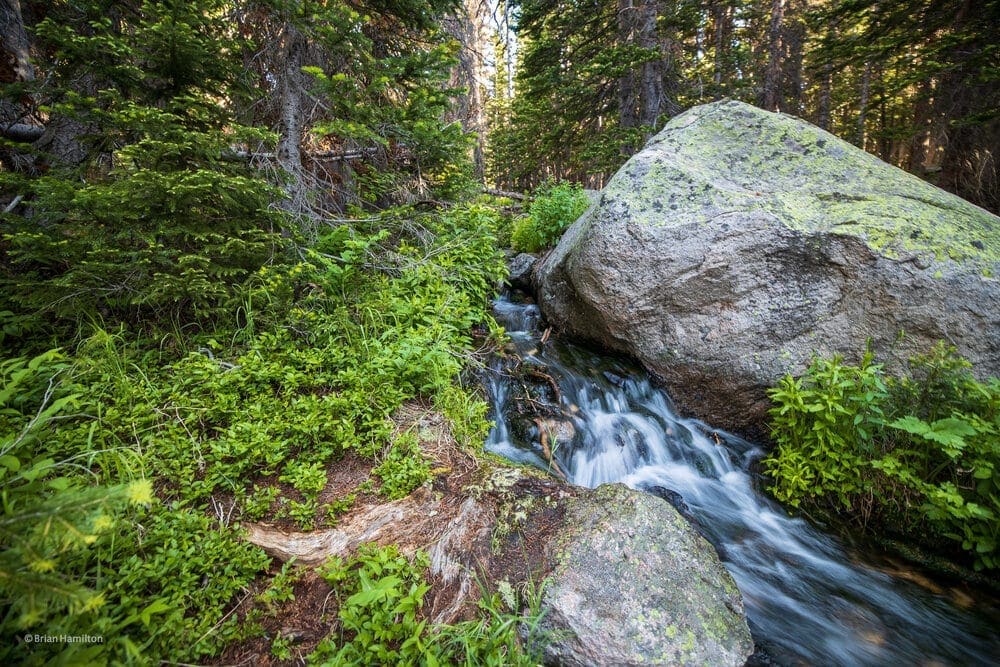
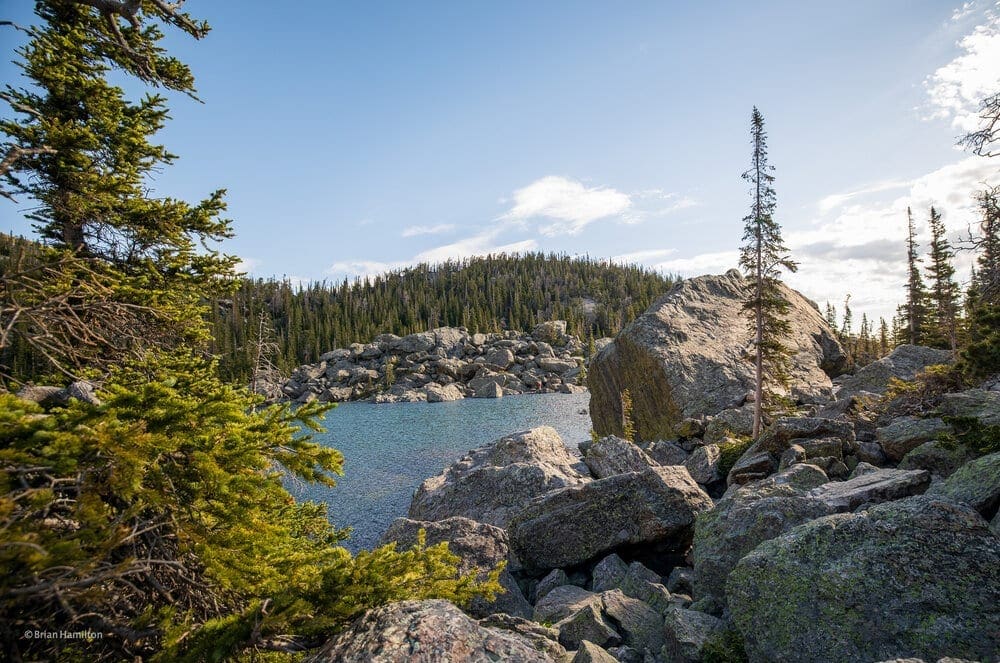
Keep in mind; there is a fairly rugged area of boulder navigation to contend with before you reach the shoreline.
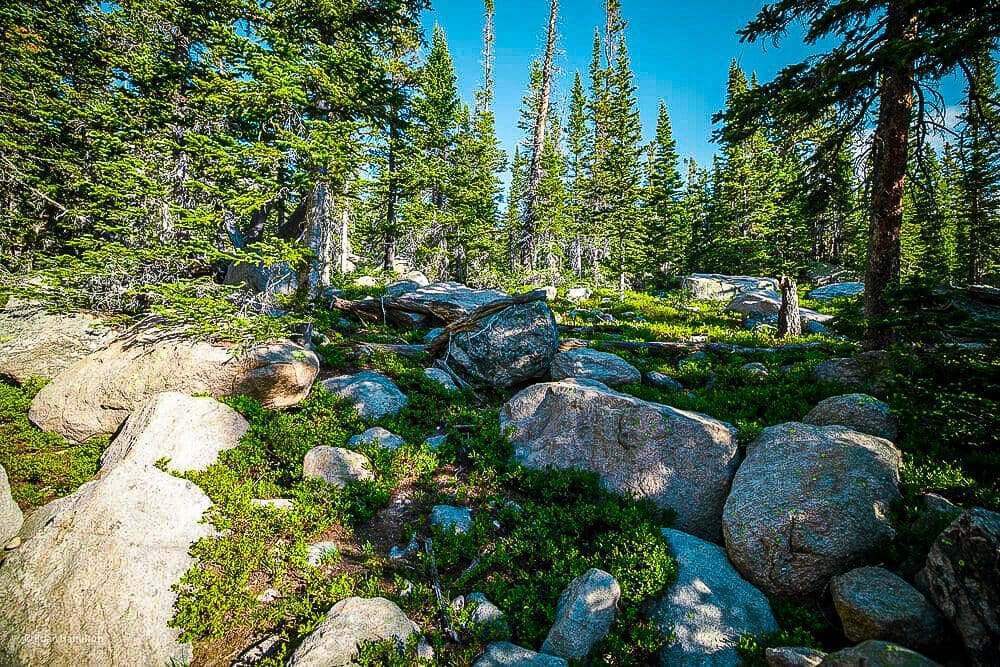
Increasing boulders alongside the trail.
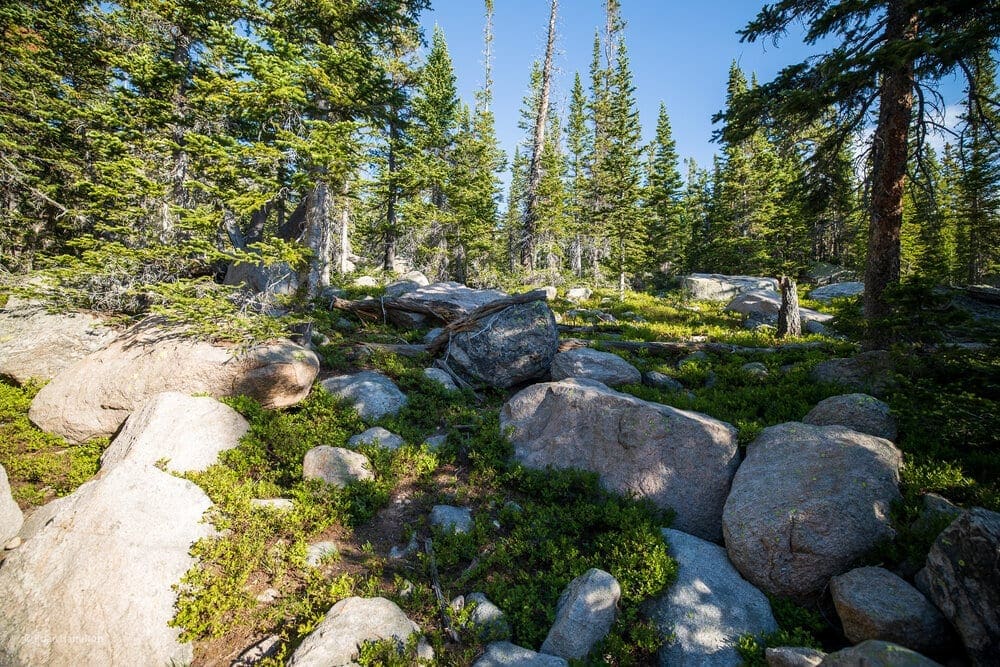
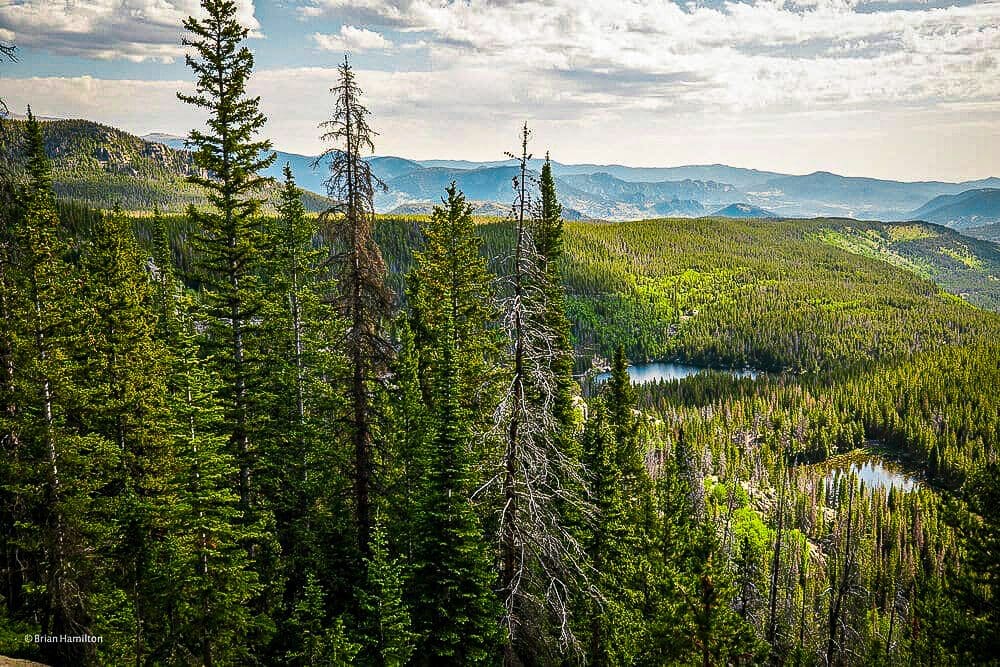
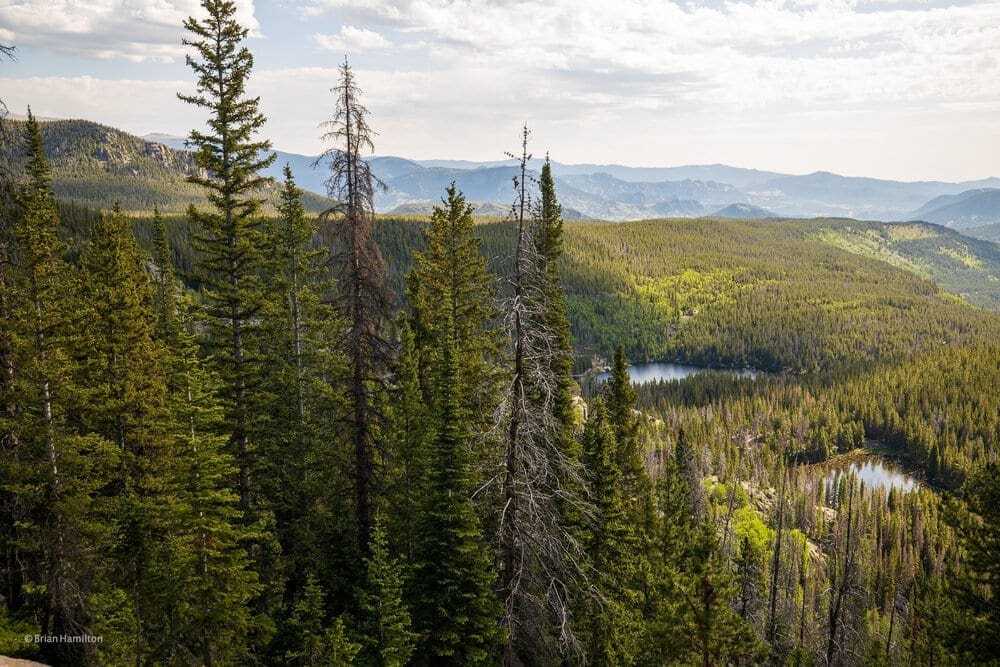
Once negotiated, however, enjoy the pristine waters of the lake and take in the expansive views.
Boulders
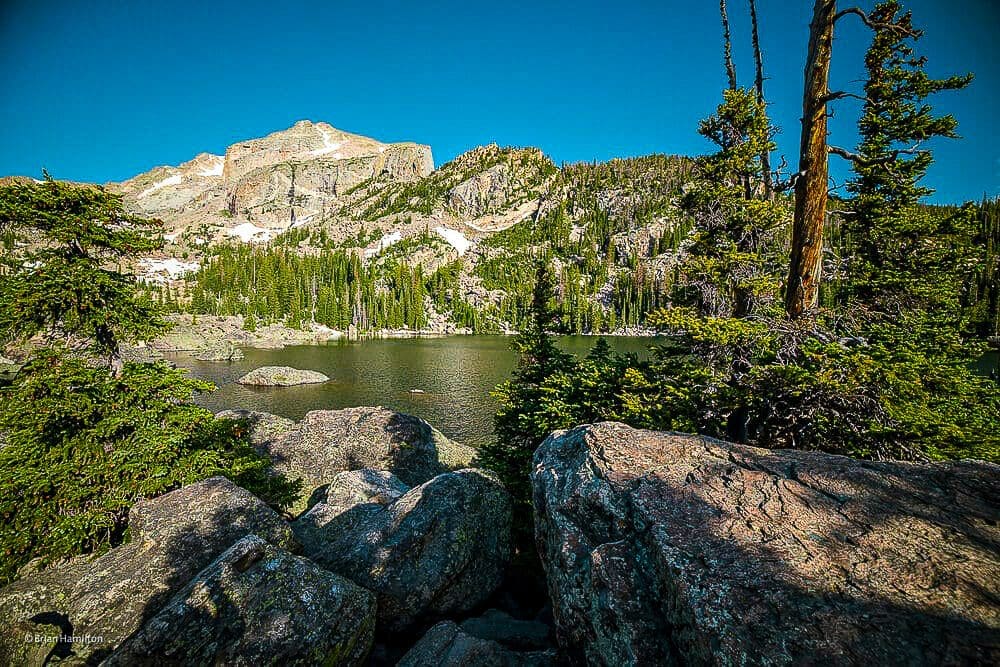
Lake Haiyaha with Hallet Peak behind.
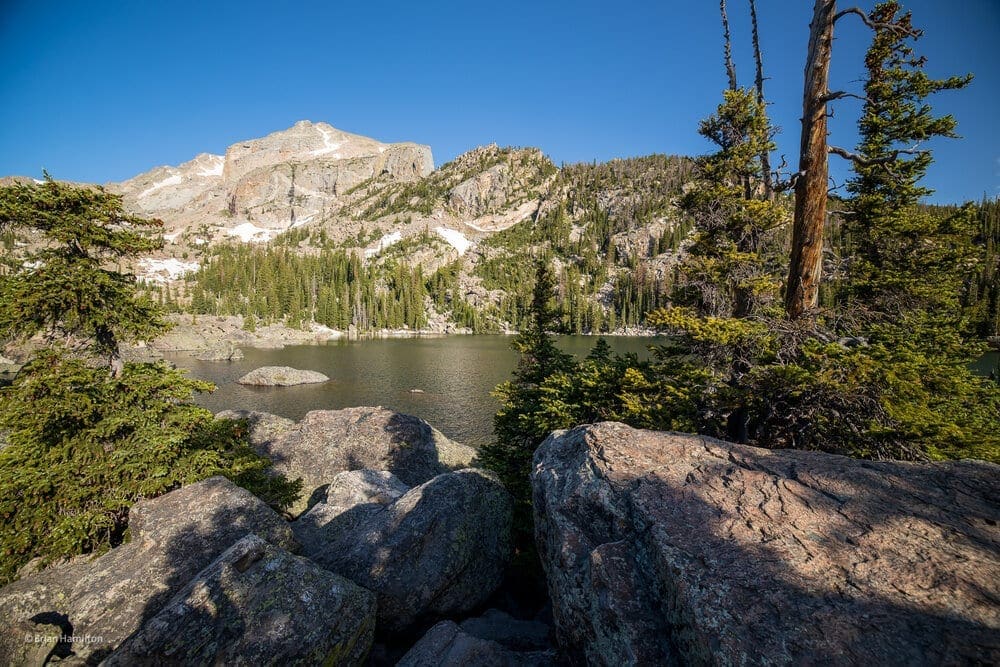
Rocky shoreline of Lake Haiyaha.
Another look at Hallet Pk.
<img src=”https://www.skyblueoverland.com/wp-content/uploads/2021/02/20200705-050A1309.jpg” alt=”(Pic 26/48: Looking up Chaos Canyon with Otis Pk on the left and Hallet on the right).” />

Looking up Chaos Canyon with Otis Pk on the left and Hallet on the right
To the west, you’ll be able to easily spot Hallet Peak (12,713 ft.) looming over the north side of Chaos Canyon. Framing the left (south) side of the canyon is Otis Peak (12,486 ft.). Chaos Canyon and the area around the lake was formed and shaped by the movement of glaciers. During periods of retreat and advance, they deposited the plethora of boulders around the lake to give Haiyaha its distinctive look. The area is popular for bouldering and provides access to upper Chaos Canyon. The upper part of Chaos Canyon is officially trail-less but fairly easily navigated.
The Descent:
From Lake Haiyaha, head back to a three-way intersection, making sure to take a left in order to head back towards Dream lake. At the Dream Lake Junction, take a right and continue descending down to Nymph lake, stealing glances back to the always gorgeous Glacier Gorge.
Looking back at Longs Peak.
After Nymph Lake, the trail will ease you back down to the Bear Lake area, where it should be easy to find the parking lot.
Final Thought
There are lots of steps along the way and incline to make the hike challenging, but manageable. There are some rocks on the path and some really awesome overlooks along the way. Don’t get scared off by the big boulders you have to climb to get to the lake. Take your time, there’s a relatively simple way down. It’s worth the climb, every second of it. Just breathtaking!

Photography for this article provided by Brian Hamilton, who hiked this trail on July 5, 2020. Skyblue Overland uses SmugMug, a paid image sharing, image hosting service, and online video platform on which users can upload photos and videos. The SmugMug also facilitates the sale of digital and print media for amateur and professional photographers. See Skyblue Overland’s Adventure Photo Galleries from the Best Trails in Colorado at SmugMug.com. Here is the entire Lake Haiyaha Trail Gallery:
Popular Articles:
- Guide to the Best Hiking Trails in Rocky Mountain National Park, Colorado
- The Dyrt: The 10 Best Campgrounds In Colorado
- Top Adventure Sports Towns 2021: Boulder, Colorado
- Epic Adventures with the Best Guides In Colorado
- Sky Pond via Glacier Gorge Trail, Rocky Mountain National Park, Colorado
- Scrambling Hallett Peak’s East Ridge, Rocky Mountain National Park, Colorado
- Scrambling Mt. Alice via the Hourglass Ridge, Rocky Mountain National Park, Colorado
- Gorge Lakes Rim Scramble, Rocky Mountain National Park, Colorado
- Black Lake Via Glacier Gorge Trail, Rocky Mountain National Park, Colorado
- Scrambling To The Lake Of The Clouds, Rocky Mountain National Park, Colorado

Skyblue Overland Strongly Recommends That You Enroll With Global Rescue Prior To Embarking On Your Next Adventure.
With more people outside now more than ever, Global Rescue expanded services to include field rescue within 100 miles of home. With Local Field Rescue — automatically included in any travel protection services membership — Global Rescue is there whether you’re hiking, kayaking, snowmobiling, fishing or simply enjoying the outdoors and get ill or injured and you’re unable to get to safety on your own. Purchase a Global Rescue membership for your next adventure and travel with peace of mind. Single trip, annual and family options are available.
Memberships start at $119.
Terms of Use:
As with each guide published on SKYBLUEOVERLAND.com, should you choose to this route, do so at your own risk. Prior to setting out check current local weather, conditions, and land/road closures. While taking a trail, obey all public and private land use restrictions and rules, carry proper safety and navigational equipment, and of course, follow the #leavenotrace guidelines. The information found herein is simply a planning resource to be used as a point of inspiration in conjunction with your own due-diligence. In spite of the fact that this route, associated GPS track (GPX and maps), and all route guidelines were prepared under diligent research by the specified contributor and/or contributors, the accuracy of such and judgement of the author is not guaranteed. SKYBLUE OVERLAND LLC, its partners, associates, and contributors are in no way liable for personal injury, damage to personal property, or any other such situation that might happen to individuals following this route.


