


High Point:
10,940 ft. (11,970 ft. at the Glacier)

Total Ascent:
455 ft. to Lake Isabelle (1,765 ft. to Isabelle Glacier)

Difficulty:
Moderate

Distance:
4.5 miles for Lake Isabelle (8 miles for the Isabelle Glacier)

Route Type:
Out and back
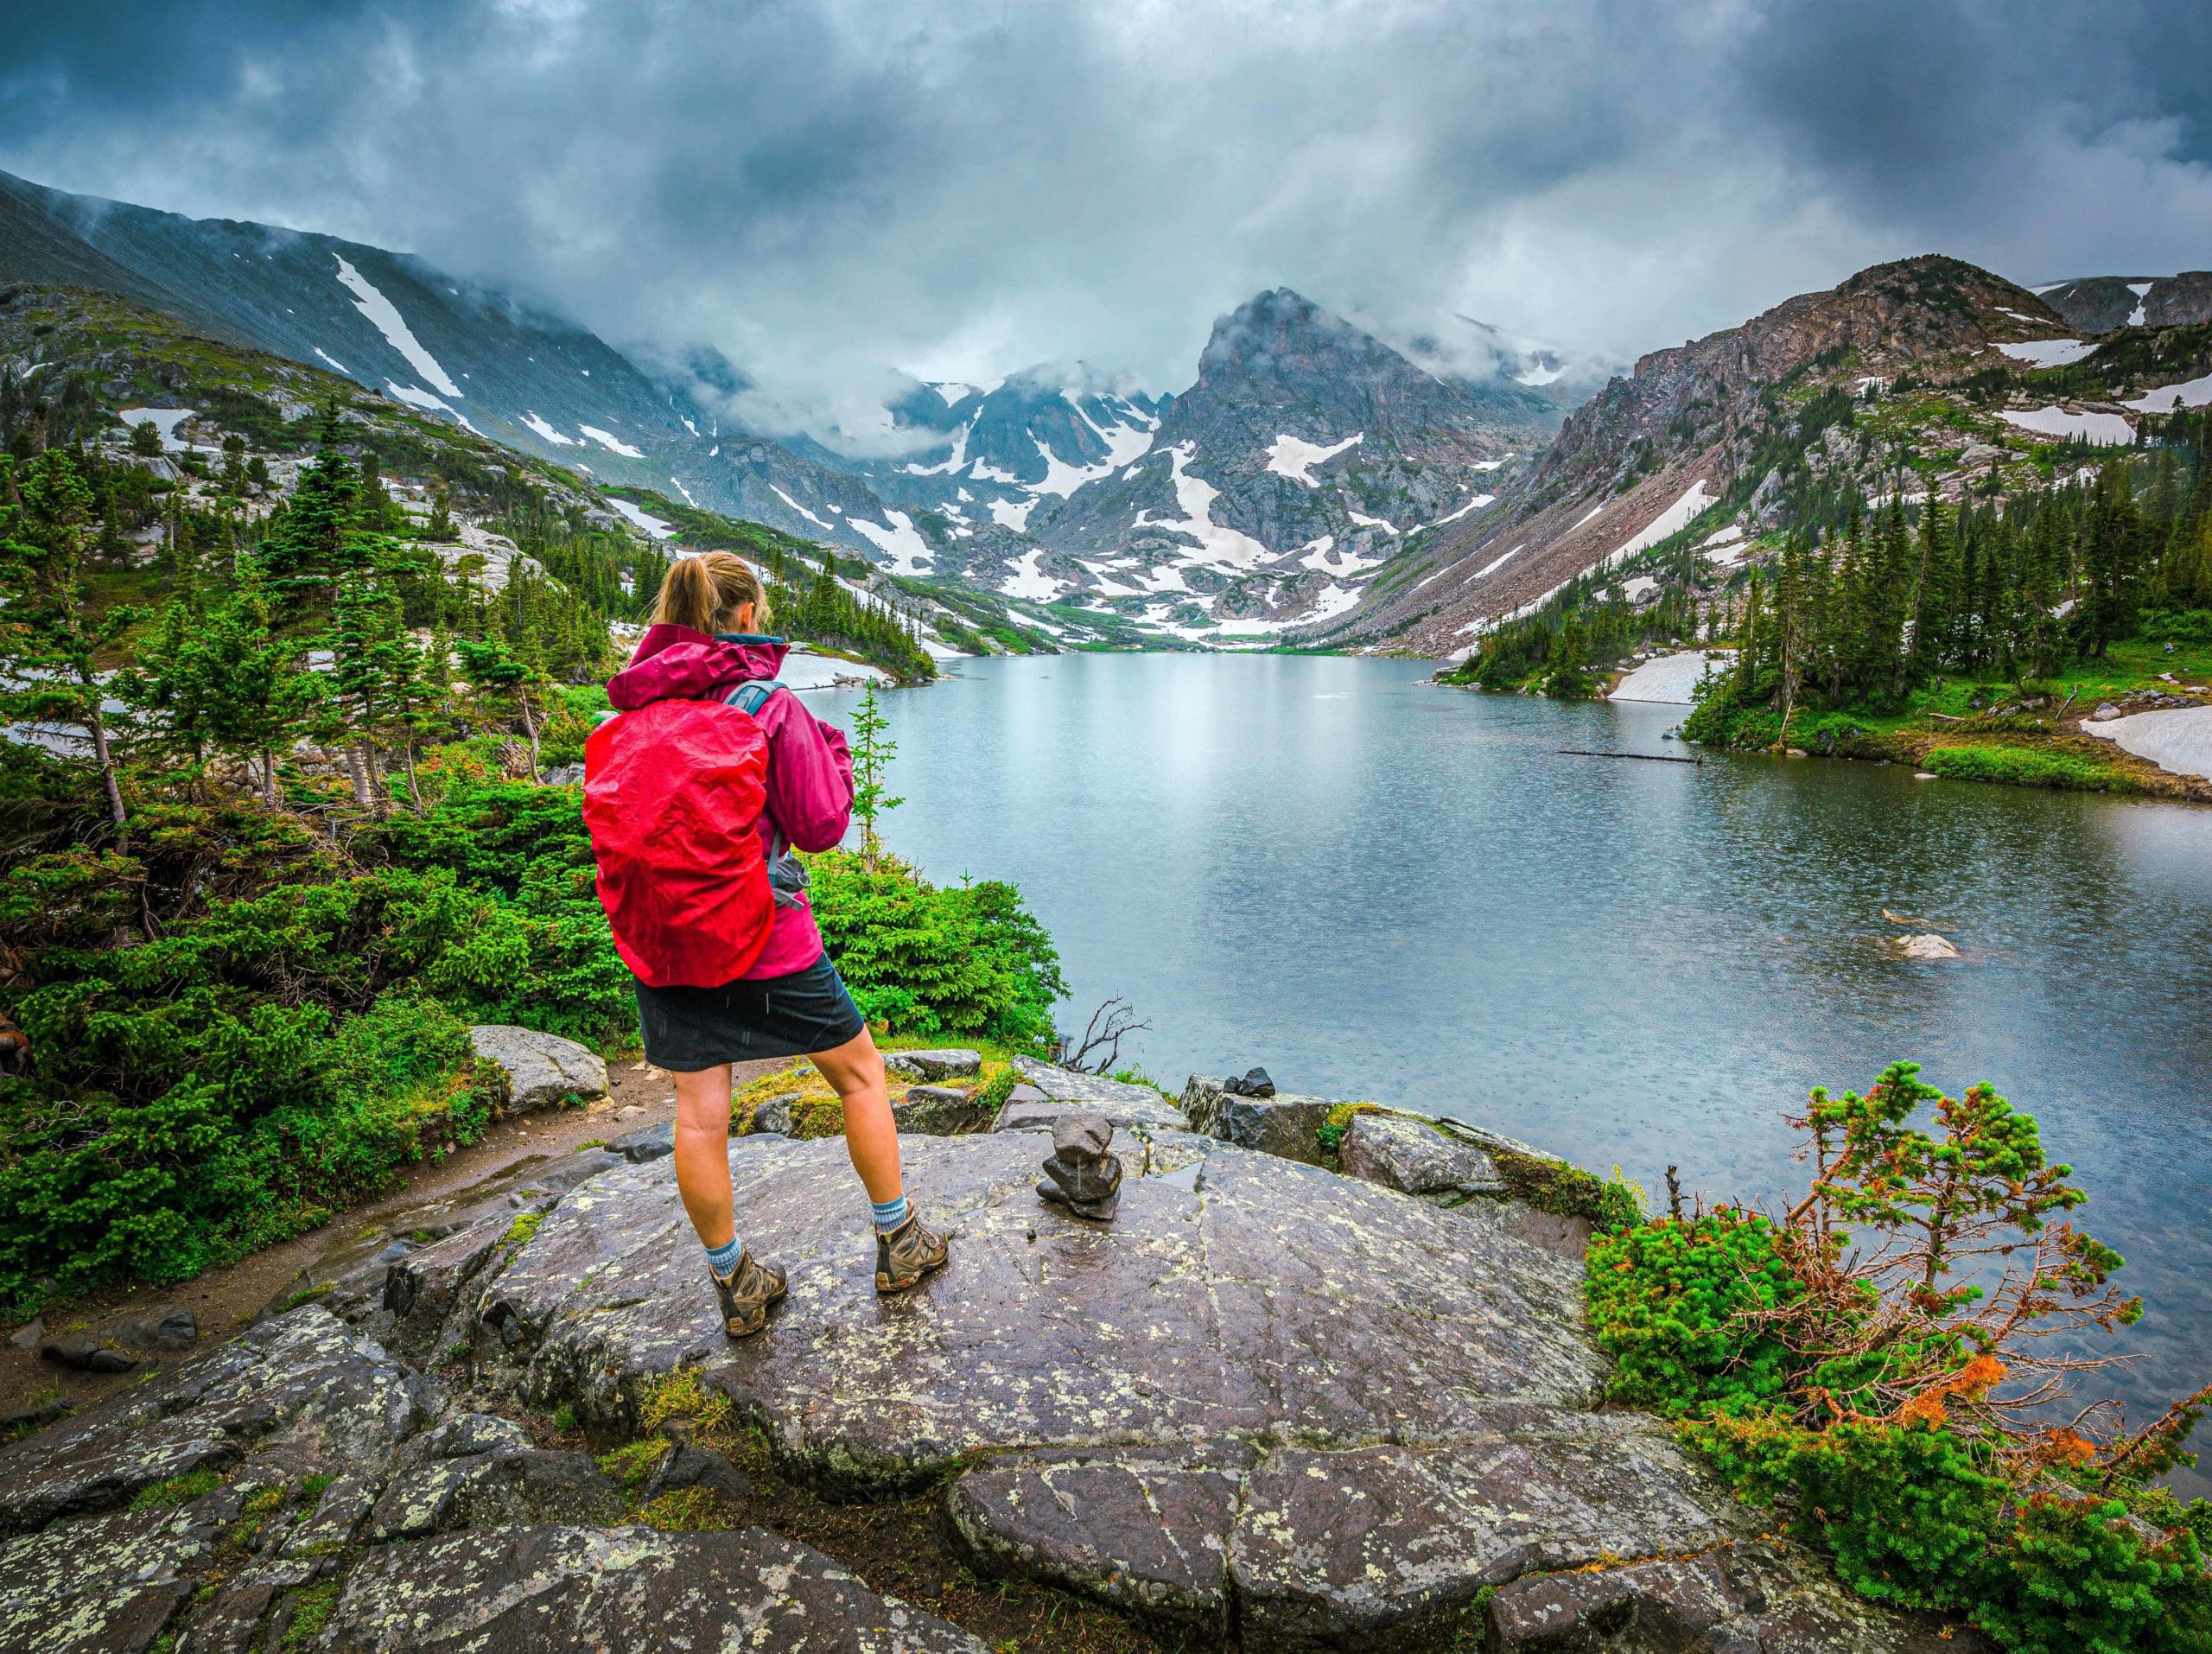
Get ready for an exhilarating hike through the rugged terrain of the Indian Peaks Wilderness to reach the breathtaking Lake Isabelle. Don’t forget to set your alarm early and beat the crowds, as this popular trail tends to fill up fast. But trust us, the stunning views of the looming Isabelle Glacier against the alpine lake will be worth every step. A must-do for any adventure seeker in Nederland, Colorado!
Overview
Nestled in the rugged Indian Peaks Wilderness of Colorado lies the magnificent Lake Isabelle, a subalpine oasis that calls out to adventurers with its stunning beauty. To embark on this epic journey, make your way to the Brainard Lake Recreation Area, where you’ll discover an array of day hike options suitable for all experience levels. The trek to Lake Isabelle spans approximately 4.5 miles round trip and includes a gain of 751 feet, providing both a challenge and a rewarding sense of accomplishment.
With a duration of 3-4 hours, prepare for an exhilarating journey through forests and by lakeside views before reaching the breathtaking destination. Choose from two hiking routes: the Long Lake Trailhead Route, which leads you through picturesque forests and past serene Long Lake before ascending towards Lake Isabelle, or the Isabelle Glacier Trail, which takes you along the north side of the lake and offers stunning views of peaks such as Shoshone, Apache, and Navajo. Don’t forget to obtain any necessary permits and leash up your furry companion if bringing them along.
And during winter months, take advantage of the Brainard Lake Area Winter Trailhead for access to this unforgettable adventure through nature’s wonderland. Get ready to fully immerse yourself in the captivating beauty of Lake Isabelle – let the pristine air and crystal-clear waters revitalize your spirit!
Nestled in the majestic mountains of the Front Range, the nearby (just 30 minutes south of the trailhead) adventure town of Nederland is a scenic town serves as the gateway to the Indian Peaks Wilderness. With a small population of only 1,523 residents, Nederland is a charming and lively town that lies at a crucial intersection. It is conveniently located just 20 miles from Boulder, an hour from Rocky Mountain National Park, and less than 30 minutes from the Indian Peaks Wilderness. Eldora Ski Resort is a mere 10-minute drive away, and the town also sits on the picturesque Peak-to-Peak Scenic Byway. Whether you’re taking a day trip from nearby Front Range cities or planning to spend a few days exploring the area, Nederland is an adventurous destination worth visiting.
Bonus Option – Isabelle Glacier: For a longer adventure, continue past Lake Isabelle to explore Isabelle Glacier, extending the hike to 8.75 miles.
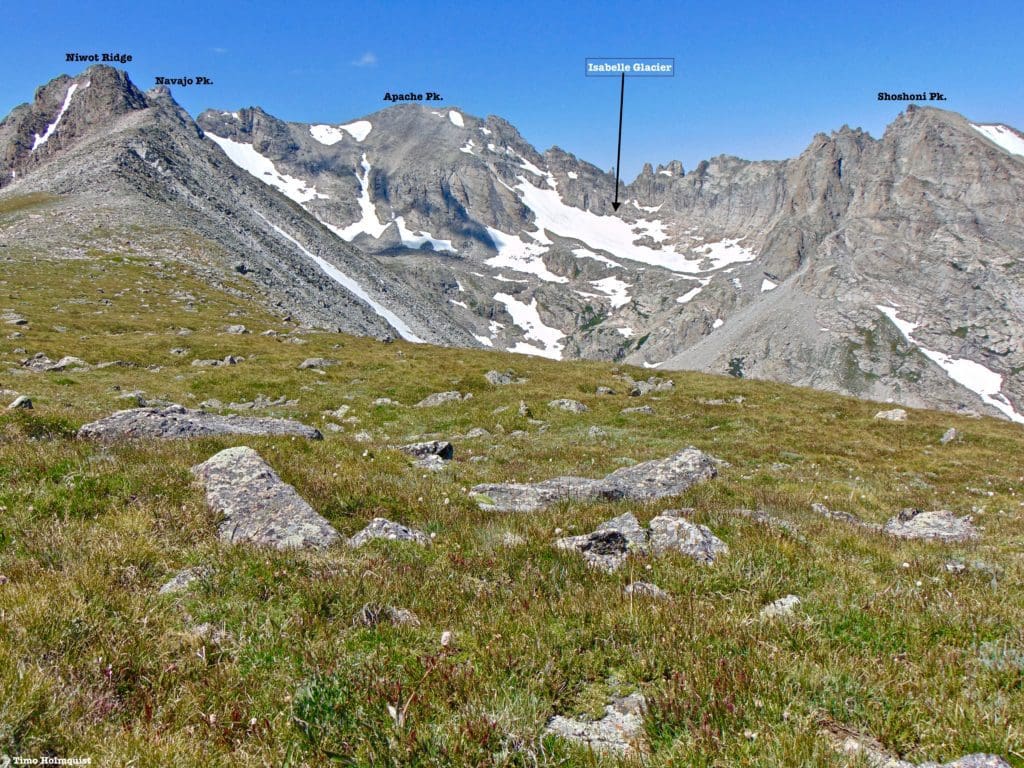
Hidden in the rugged landscape, a treasure awaits adventurers – the Isabelle Glacier. A challenging hike leads to this breathtaking sight, nestled south of Shoshoni Peak and overlooking Lake Isabelle. As you trek through the wet valley, be prepared for magnificent views of meadows and cascading waterfalls. And upon reaching the glacier, prepare to be awe-struck as you take in the majestic peaks of Navajo, Apache, and Shoshoni. This is an adventure not to be missed.
Located in Roosevelt National Forest in Colorado, Isabelle Glacier is a picturesque alpine glacier. It sits .28 mi (0.45 km) northeast of Apache Peak and .25 mi (0.40 km) southwest of Shoshoni Peak, on the eastern side of the Continental Divide and directly opposite Fair Glacier. This glacier is the starting point for the South Saint Vrain Creek and is accessible via an 8.4 mi (13.5 km) round-trip hike from the nearby trailhead.
Bonus Option – Navajo Peak
The majestic Navajo Peak looms over the rugged landscape of the Indian Peaks Wilderness. At an impressive altitude of 13,409 ft, this formidable mountain beckons to adventurers and thrill-seekers. Though just shy of being classified as a Colorado 14er, summiting Navajo Peak is no easy feat, making it a desirable challenge for avid hikers. As the third highest peak in the Indian Peaks Wilderness, Navajo is renowned for its treacherous terrain and was the site of a fatal plane crash in 1948, leaving behind haunting remnants that still remain on its slopes. Embark on this daring expedition at your own risk – but the reward of conquering Navajo Peak will be well worth it. See our Guide to Scrambling Navajo Peak, Indian Peaks Wilderness, Colorado

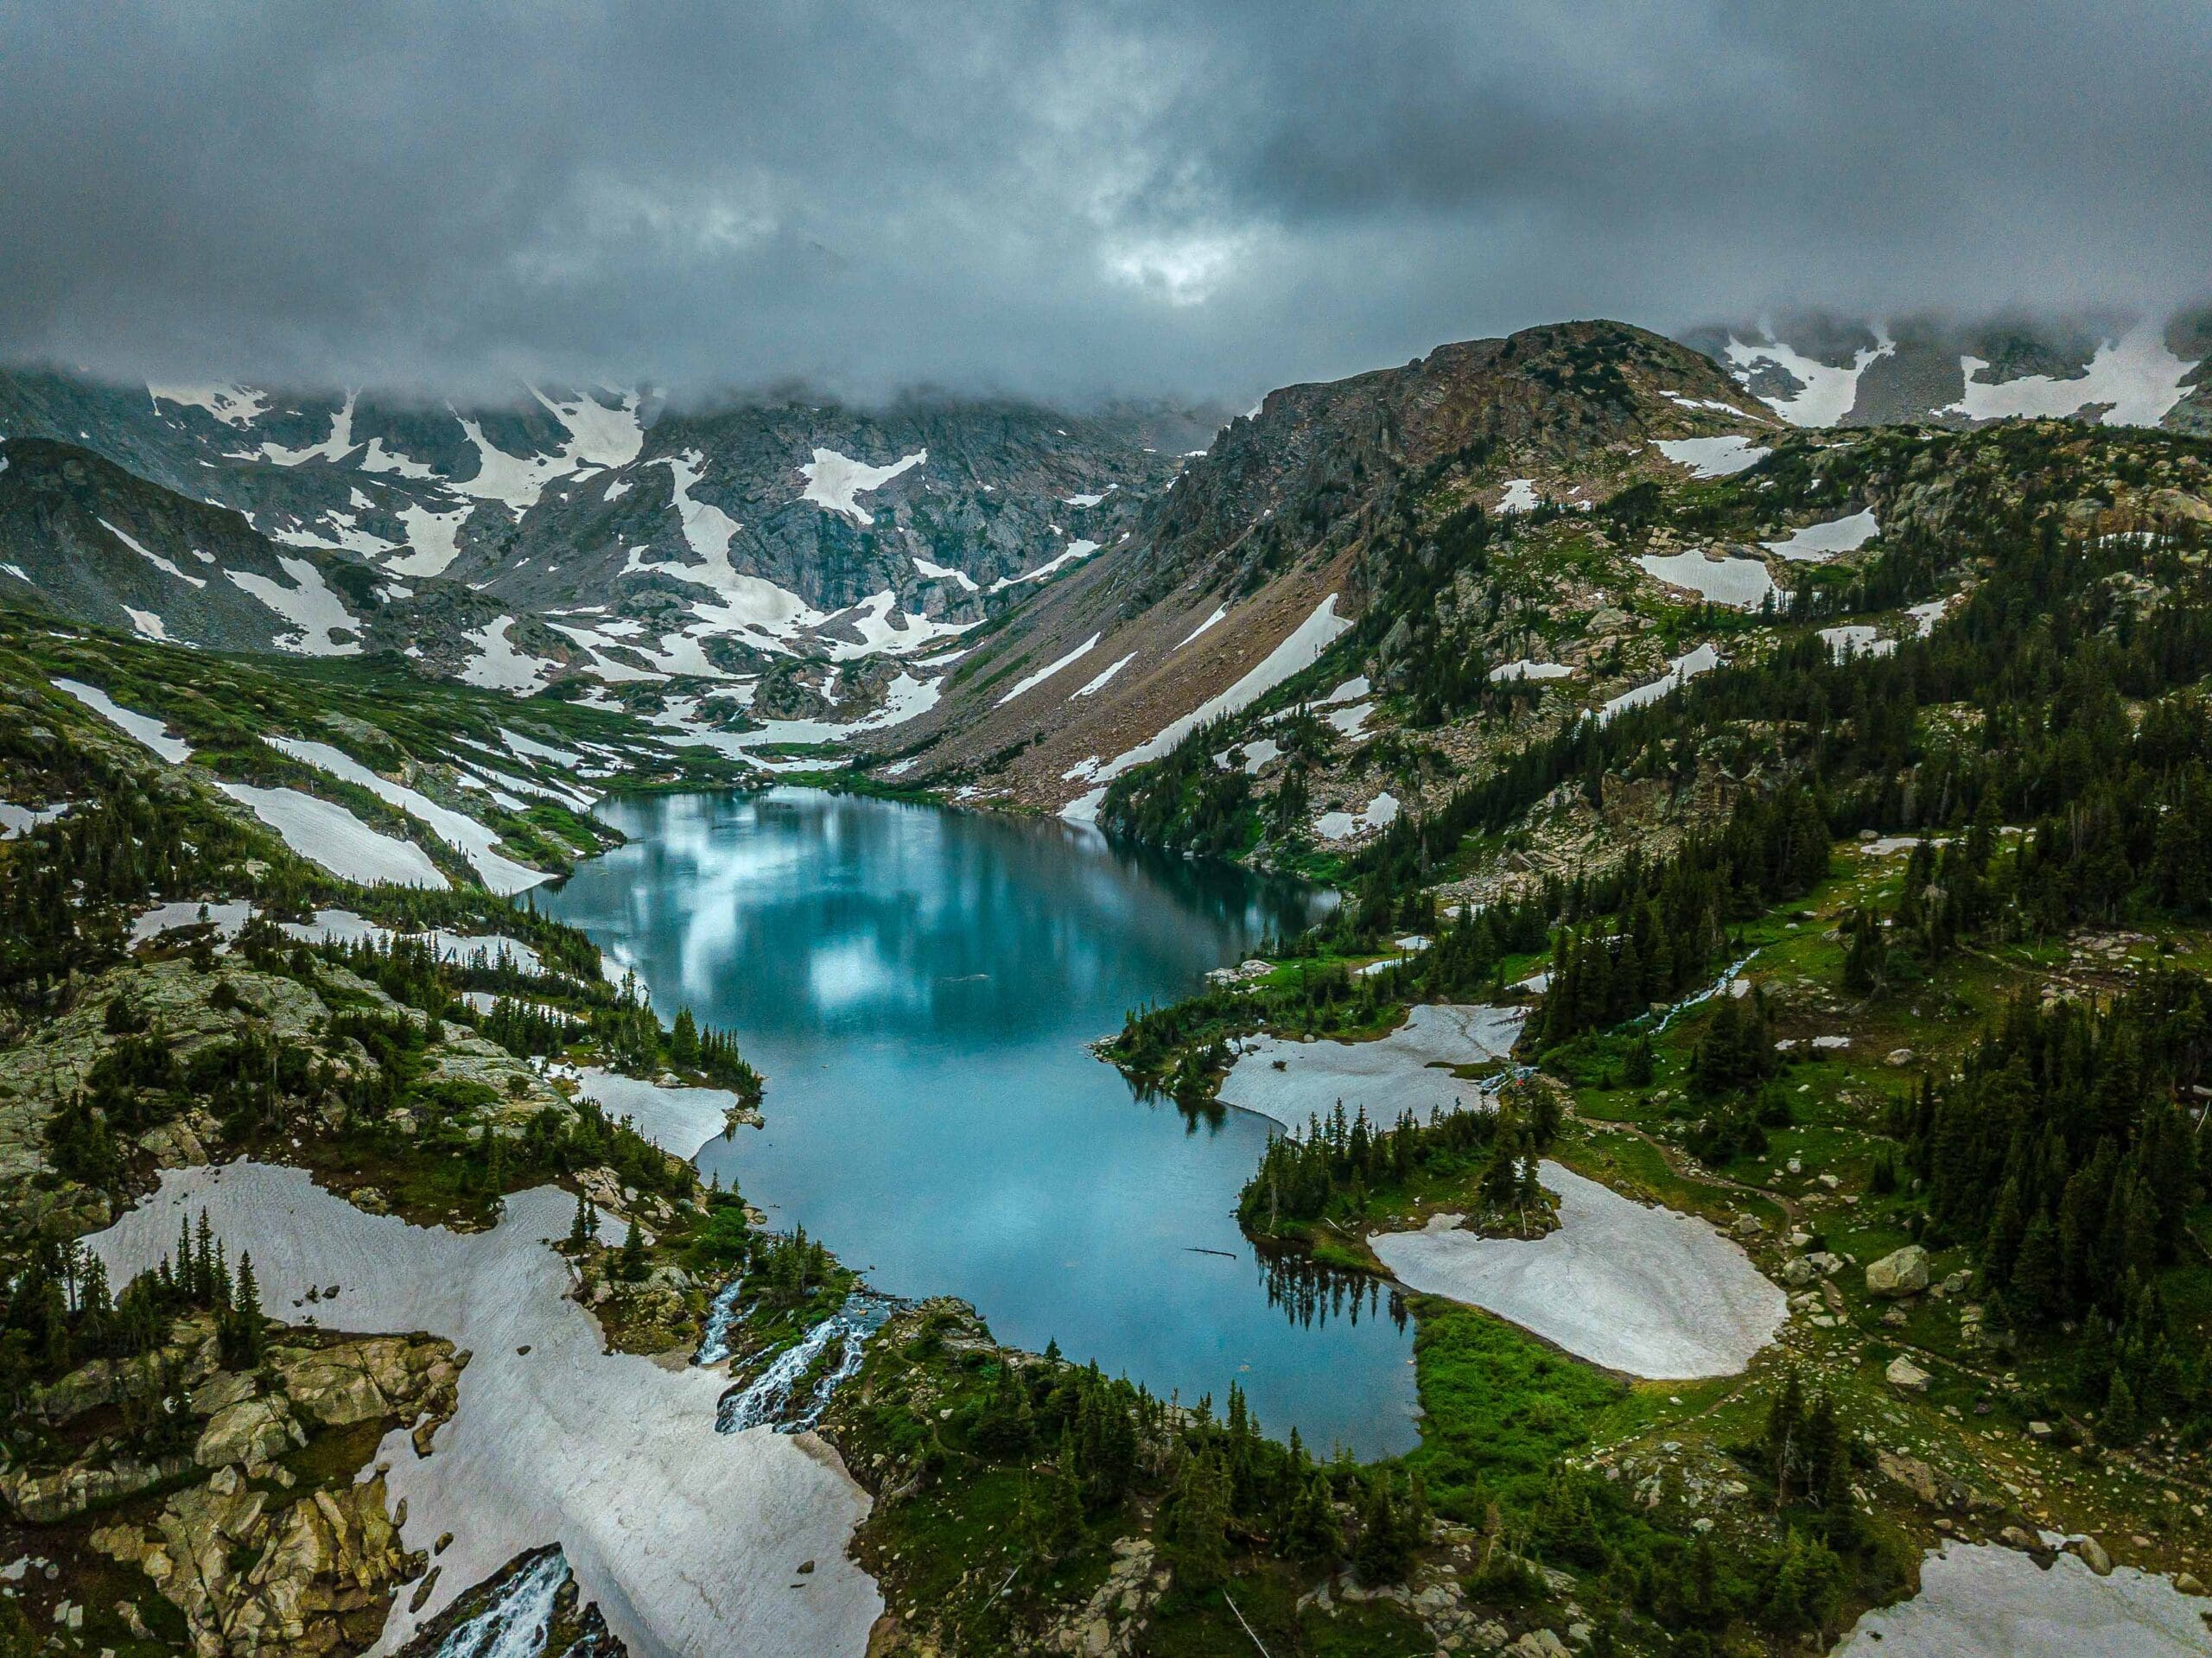
Lake Isabelle and the approximate route to the Glacier from above. The mountain in the upper left corner is Longs Peak in Rocky Mountain National Park.
Directions to Trailhead
Brainard Recreation Area is the most popular access point for the eastern Indian Peaks. The road to the trailhead is paved, and the area is stunningly beautiful. It can, however, get very crowded. Arriving early is key.
The area is pay-to-play, and the current cost for day parking a personal vehicle is $12.00. Brainard Gateway Trailhead is free but will add a total of five miles to any mountain objective. Interagency passes like the America the Beautiful recreation pass will work. However, if you arrive after 5 AM, an additional timeslot reservation (similar to the National Park) will be required for entrance. You can find out about all this information by visiting the national forest website here. IF you have a pass AND arrive before 5 AM, you still have to print a timeslot for 5-8 AM ($2) and display it on your windshield, along with the entrance pass.
To get to Brainard Lake Recreation area from downtown Boulder, head north on Broadway and take a left onto Lee Hill Drive. From Denver, take US36 to Boulder, which will eventually turn into 28th street. Follow 28th north (be careful, lots of red-light cameras, the yellow lights in Boulder only last for three seconds), and then take a left on Lee Hill Drive.
Continue west into the foothills until coming to an intersection between Lee Hill Drive and Olde Stage Road. Either road works, Lee Hill is faster but windier as it traverses many hilltops, Olde Stage is a couple minutes longer but much easier to drive. In both cases, you’ll eventually take a left on Lefthand Canyon Road when you come to it. Lefthand Canyon Road will continue west. If you took Olde Stage Road to Left-hand, make sure to take an additional left once you’re in Lefthand Canyon to stay on course (there are obvious signs near the intersection). Continuing straight will take you up James Canyon. Lee Hill Drive avoids this intersection; you’ll just take a left on Lefthand Canyon at the end of the road and motor up to Ward.
Once you make it to the tiny town of Ward, slow down, and pass through the couple dozen buildings, being cognizant of the 25-mph speed limit. Beyond Ward, the road loops up a steep slope and dead ends into CO119. Take a quick right, followed by an almost immediate left to access Brainard Lake. Drive this road up to the entrance station, and continue to the Long Lake parking area to begin your hike.
From the Estes Park area, take 119 south beyond Allenspark, then take a right to stay on 119 instead of taking US7 down to Lyons. You’ll be following signs for Nederland, and Peaceful Valley. As you wind south towards Nederland pay attention to signs for Brainard Lake; the turn will be on your right.
The directions from Boulder and Denver may sound complicated, but google maps will do the heavy lifting for you, and it really is the fastest way to get there. Unless you live right at the entrance to Boulder Canyon, taking that up to Ned and going north to Brainard takes longer.
Scales and Criteria
This article utilizes three separate rating systems: Difficulty, Popularity, and a Scramble Rating indicating the hardest move or set of moves encountered. The scramble rating employs the Yosemite Decimal System. By the easiest routes, Tanima Peak is a Class 2+ hike, while the Cleaver retains a solid Class 3 rating regardless of how you scale it.
Difficulty Ratings:
- Easy: less than 5 miles, less than 500 ft. of elevation gain
- Moderate: 5-10 miles, 500-2000 ft of elevation gain
- Hard: 5-15 miles, more than 2000 ft. of elevation gain
- Very Hard: 10+ miles, more than 3,500 ft. of elevation gain
Popularity Ratings:
- Low: Large sections of trail all to yourself
- Moderate: Sizeable trail sections to yourself, crowding possible on busy summer weekends
- High: You’ll be seeing people, still a chance for solitude in spring/fall/winter.
- Very High: Almost always busy.
Scramble Rating:
- Class 1: Established hiking trail the entire length of the adventure. Low chance for injury.
- Class 2: Typically involves cross-country navigation, possibly using hands for balance but not required, steeper than Class 1.
- Class 3: Hands and feet used to scale areas, must use hands to proceed (either for balance or to help pull you up a section), increased exposure, a fall could be fatal. Helmet recommended, along with grippy hikers.
- Class 4: Climbing on very steep terrain just shy of vertical, falls could be fatal, hands employed for grip and balance continuously, ropes advisable but scalable without. Helmets are highly recommended, along with grippy hikers.
- Class 5-5.4: Near vertical and vertical climbing that involves technical rock-climbing moves, exposed, falls likely to be serious or fatal, possible to scale without ropes but only for very experienced veterans. Helmets, grippy hikers, and/or rock-climbing shoes necessary.
- Class 5.5 and up: Not covered as scrambling, full-on rock climbing with ropes, helmets, etc.
The YDS system is widely used in North America but can be quite subjective, so it is not perfect. The biggest differences I’ve encountered between Class 3 and Class 4 sections have to do with slope angle, exposure, and putting weight and pressure on hand grips (4) instead of using hands and feet interchangeably as supporting points of contact (3). It is not possible to climb a Class 4 section without using your hands to pull up some or all of your body weight. Typically, a Class 4 section will also require some type of rock-climbing move, like stemming, where hands or feet are pressed in opposition as if climbing the inside of a chimney. If downclimbing, a key difference is that most people will descend a Class 4 section facing inward, i.e., your back faces the exposure.
IPW Weather
Like Rocky Mountain National Park to the north, the Indian Peaks can be subject to high rates of snowfall, especially later in the winter into early spring. The weather tends to slam into the western part of the wilderness before lifting over the divide; however, upslope storms (east to west) are fairly common and can produce up to 60 inches in a 2-3 day stretch. Checking the forecasts for the wilderness area is as important as any of the backcountry planning steps listed above.
Focusing on the Brainard area of the wilderness, there are a few essential forecasts worth checking. First is the forecast for Brainard Lake, which sits just east of the wilderness boundary and has views of both the Isabelle and Blue Lake Basins. Secondly, the mountain forecast for Mt. Audubon is beneficial for the Blue Lake Basin, covering weather at three separate elevation gradients. Mt. Toll’s forecast is great for Blue Lakes Basin, Pawnee Basin, and Isabelle Basin. You can even use the forecast for Lone Eagle Peak to gauge conditions near Apache and Navajo Peaks. A little farther south, the mountain research branch of Colorado University has multiple weather stations atop Niwot Ridge, which help illustrate alpine conditions for the eastern portion of the wilderness.
Keep in mind there are multiple components to the weather; it’s not just about precipitation. The temperature will dictate what layers to bring, and local weather patterns will help you figure out what’s important. For example, in the IPW and the larger Front Range in general, make sure to check the wind forecast. The Front Range is notorious for strong, blustery winds, and fighting your way up to a ski line in 50mph gusts is not fun.
Field Notes
This is a unique and beautiful hike. Unlike Niwot Mountain, there isn’t an easy way to hike to Isabelle without parking at the Long Lake Trailhead, which will cost you $12.00. The price, however, is entirely worth the experience. If you arrive before the entrance booth is staffed, there is a self-serve tube where you can drop the $12.00. A lot of people think they’re super slick by blowing by the station, but this is not a hidden area; rangers will patrol parking lots. If you’re there for more than a couple hours without paying, chances are you’re going to get a ticket. Click here for a map of the entrance areas and various trailheads.
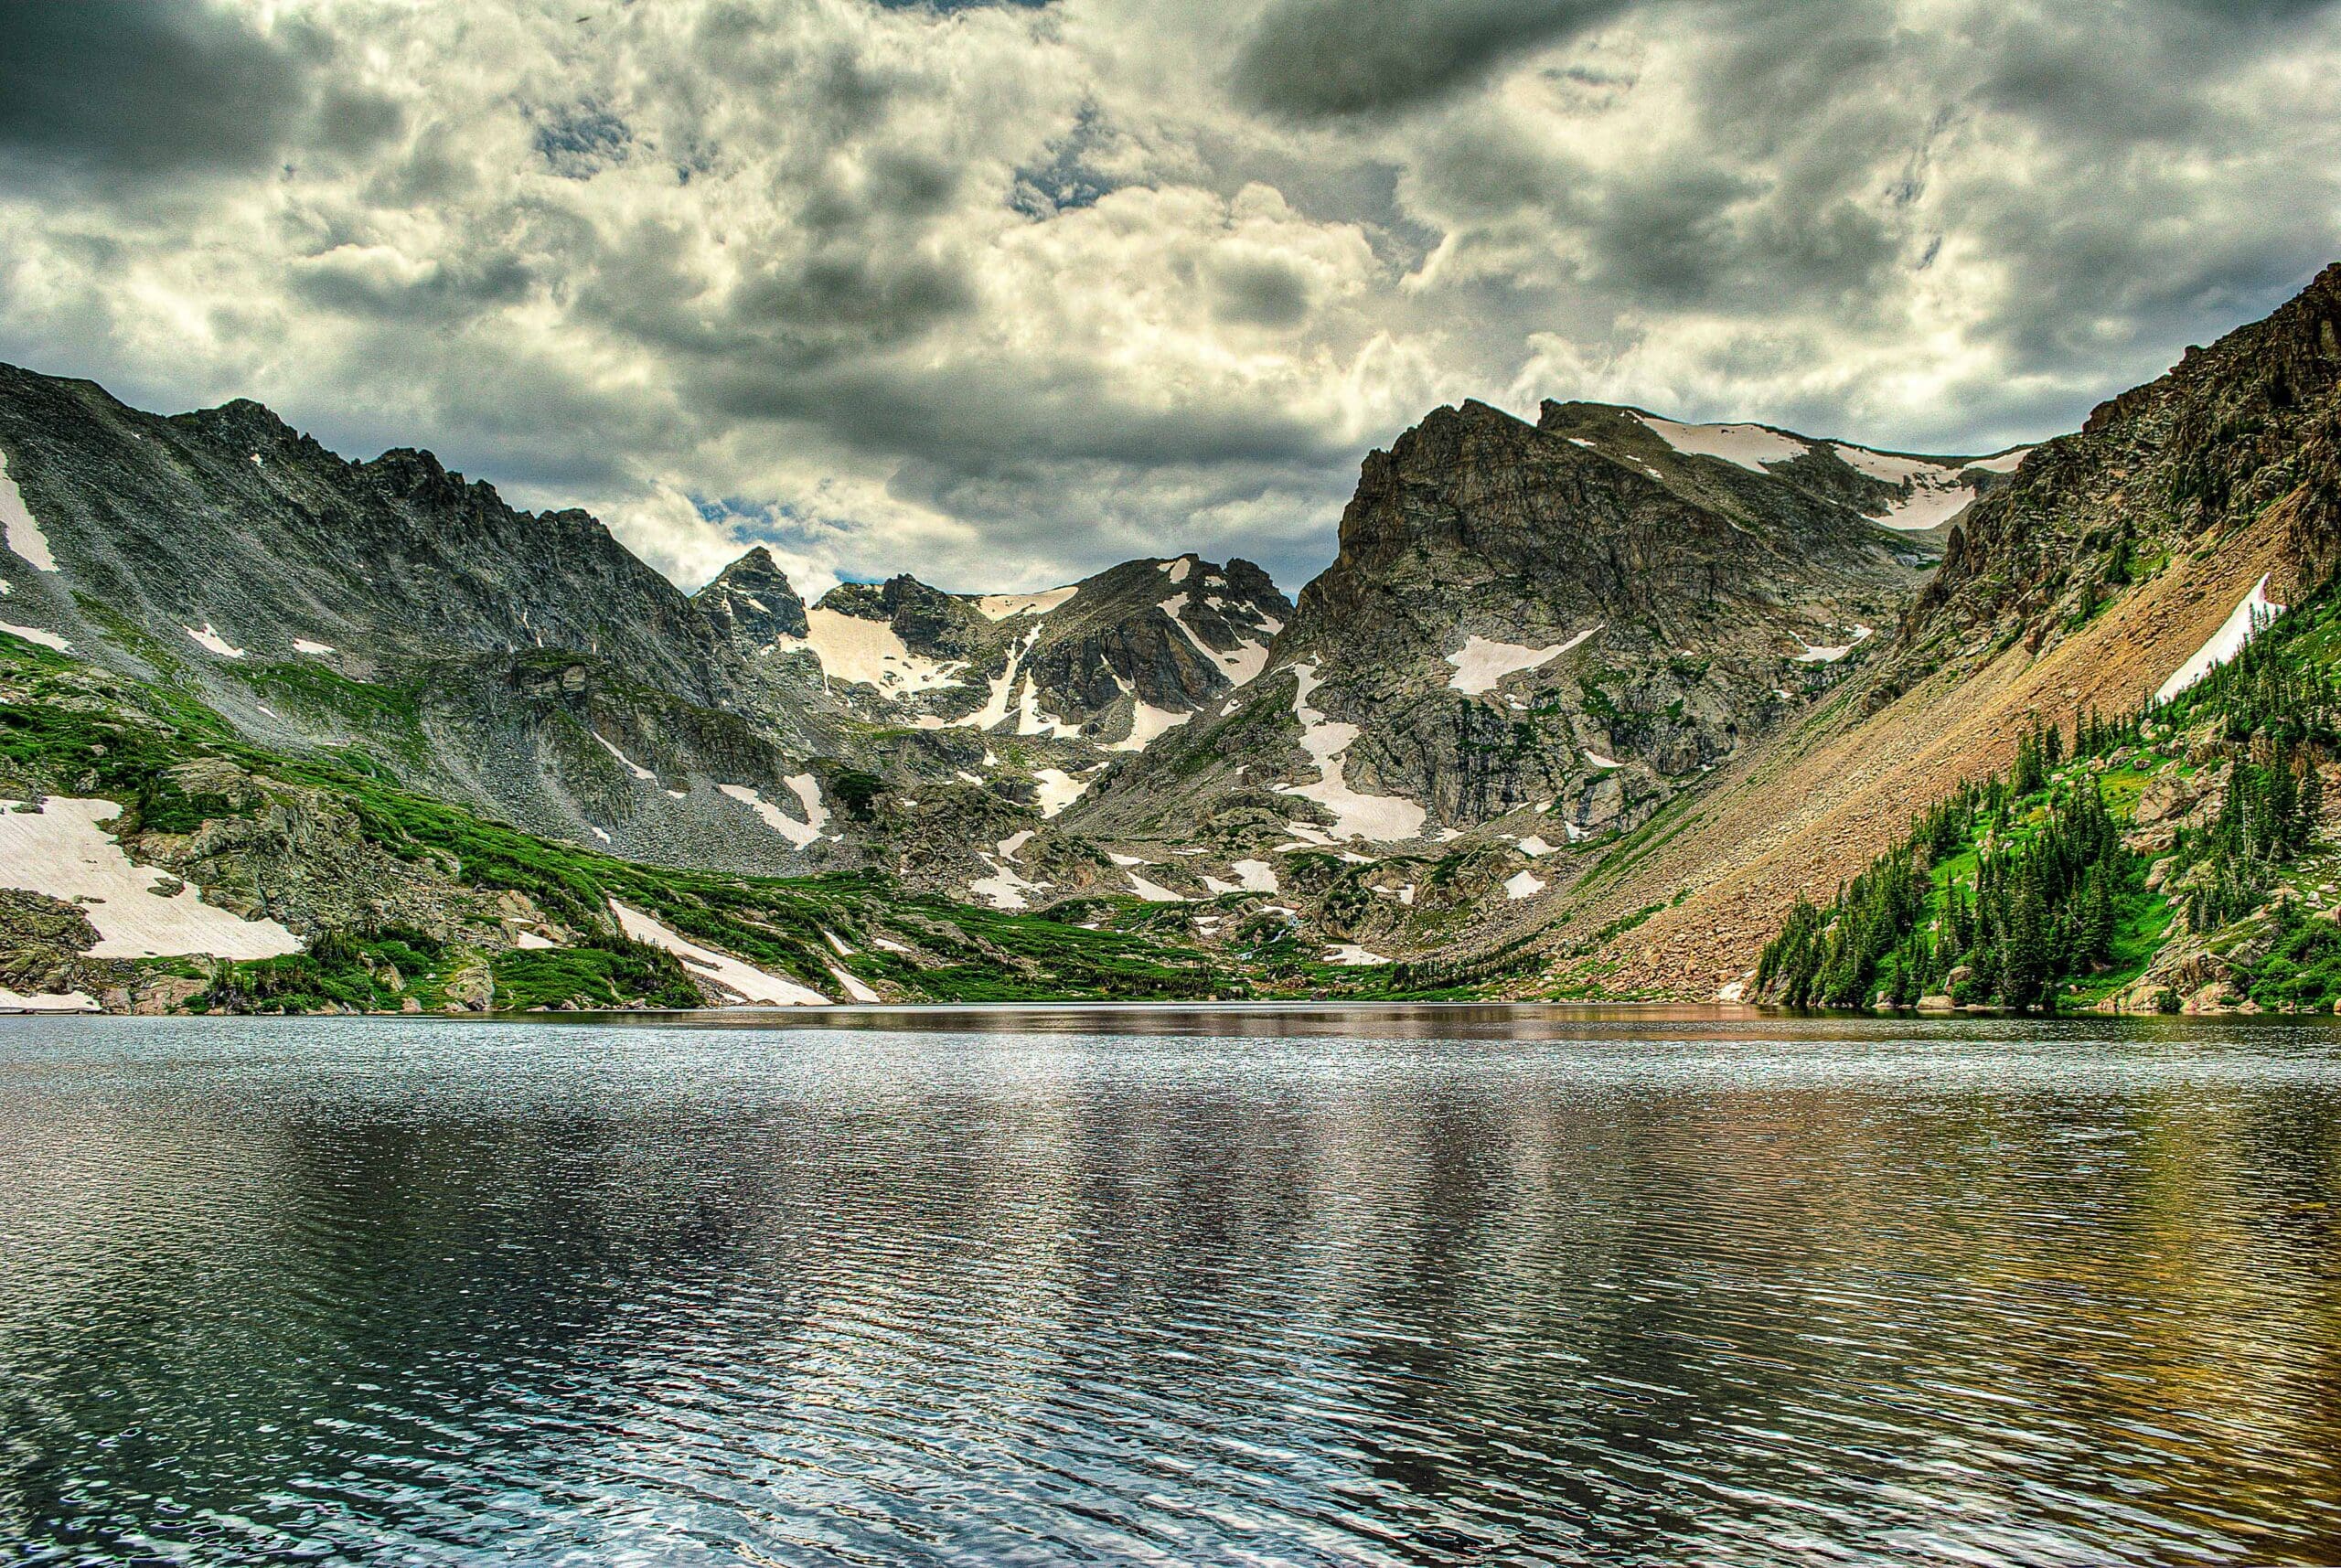
Starting from Long Lake Trailhead (or Brainard Lake if Long Lake is full), you’ll take the Pawnee Pass Trail west. The trail can sport snowy spots until July, and in early June, you may catch backcountry skiers tackling some popular routes here. There’s only one major trail junction around Long Lake, and it is clearly signed. Take a right, staying on the Pawnee Pass Trail, and rise up to Lake Isabelle. Most of your elevation gain happens in the last bit of the hike. At the following trail junction, take a left toward the lake instead of continuing up to Pawnee Pass. The lake is breathtakingly beautiful in all seasons and provides fantastic views of serrated ridgelines.
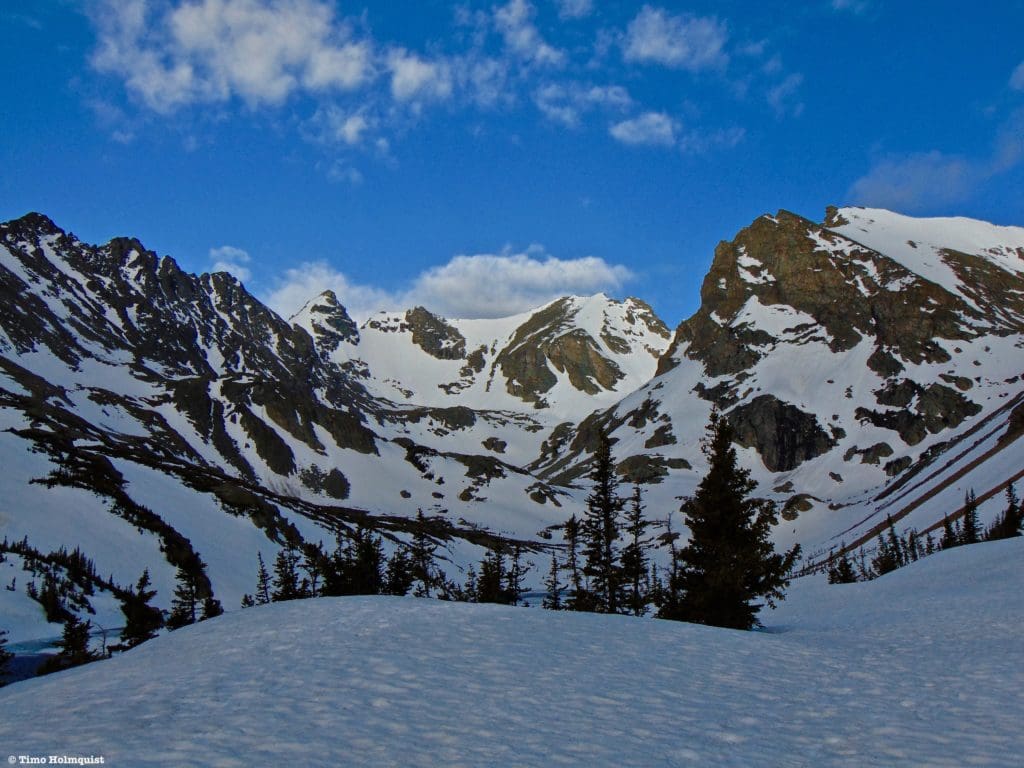
Looking west from a bench near Lake Isabelle.
If you’re ready for the glacier, continue westward, paralleling the north shore of the lake. At its western edge, the trail will begin to ascend into an alpine basin. There is no tree cover once you pass Lake Isabelle.
The trail will rise in a southwest direction with the stout cliffs of Shoshoni Peak framing the right-hand side of the basin. Along the way, you’ll get increasingly dramatic looks at Navajo Peak, one of the most identifiable summits in the Indian Peaks Wilderness. The peak itself holds a handful of fantastic scrambles and snow climbs, so it’s a regular mountaineering target.
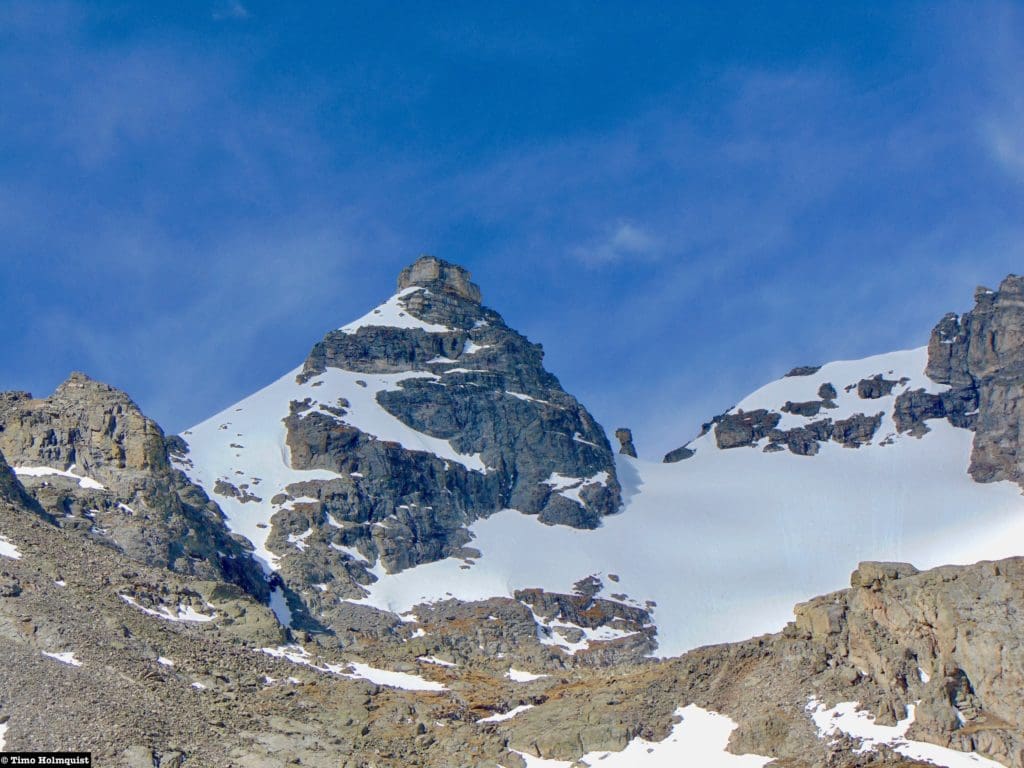
Navajo Peak.
The Glacier is located on a bench between Apache Pk. and Shoshoni Peak. After arriving at an unnamed tarn, the route takes a turn to the right (north) and climbs the glacial bench. This final section is short but steep with some switchbacks thrown in to ease the ascent. Once you top out on the glacial bench, you’ll have excellent views of Isabelle Glacier and the Queensway Couloir to the west.
Isabelle Glacier is best visited from late July-September. If you arrive earlier than that, the basin it’s located in will have additional, large snowfields that may obscure the true size of the glacier. By September, Isabelle Glacier and the Navajo “glacier” (a permanent snowfield just to the right of Navajo’s summit cone) should be the only large patches of snow left. Later in the summer, Isabelle Glacier also develops a beautiful little tarn at its lowest point. The water is stunningly clear and stunningly cold.
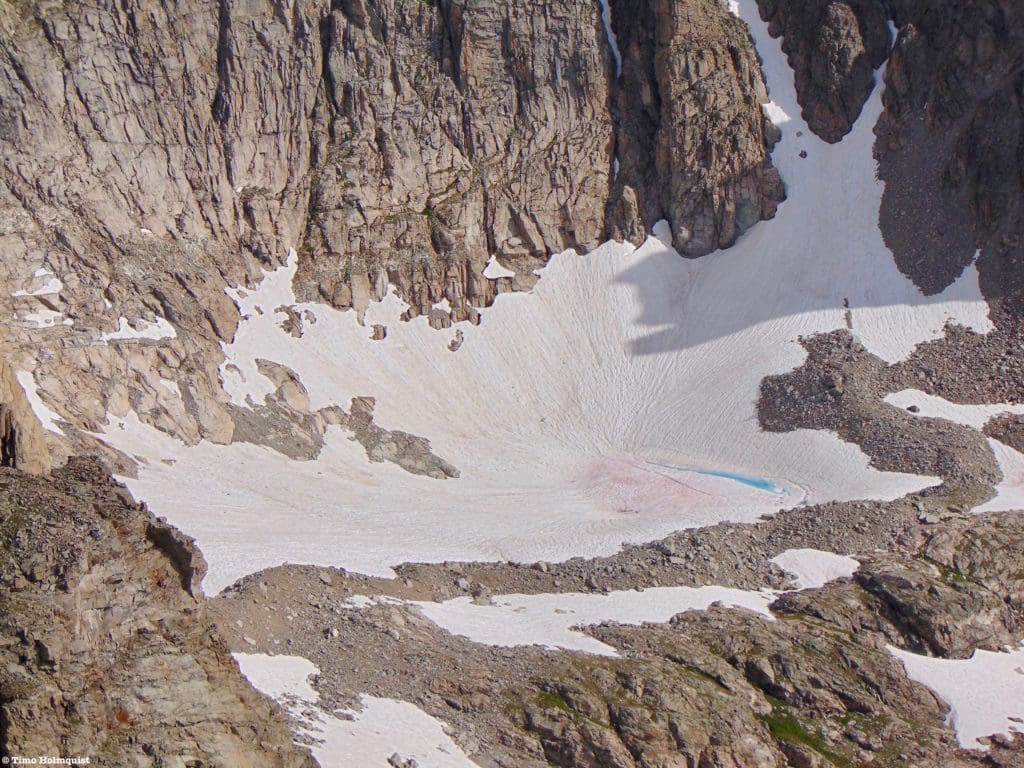
Zoomed in on the glacier with the tarn visible at its lower end.
If you plan on hiking onto the glacier, make sure you have microspikes, snowshoes, or some type of comparable traction device. Slipping and sliding into the glacial tarn would certainly be an unpleasant experience; unless getting into a glacial tarn is the goal. You won’t need mountaineering equipment unless you’re climbing any of the three couloirs on Shoshoni Pk. or Queensway Couloir.
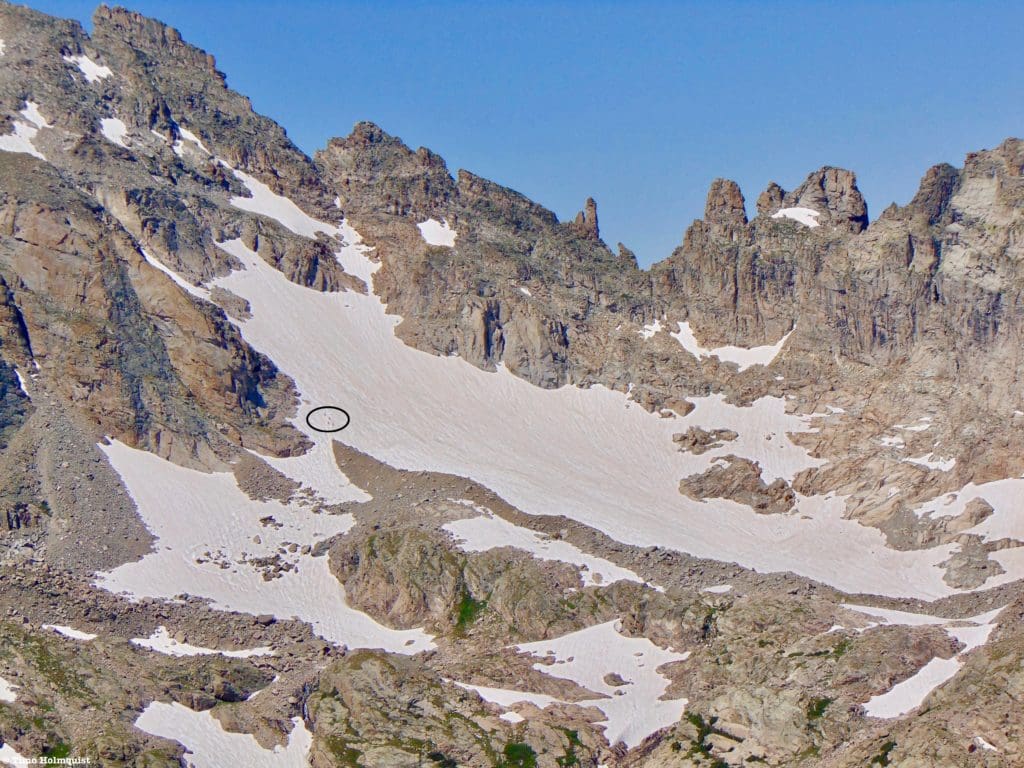
Isabelle Glacier from Niwot Ridge. There are four climbers in the circle for scale.
Despite its manageable 8-mile distance, you’re going to want to spend some time up here if you have the weather, so budget most of the day for this one. Now, obviously, this is no Columbia or Southern Patagonia Icefield, but the handful of glacial remnants left in Colorado harken back to the last ice age, providing a brief window into thousands of years of mountain history and evolution. There’s also no telling how long these little pieces of alpine ice will continue to hang out in Colorado, with nearly all of the documented glaciers in retreat. Get out there while you can.
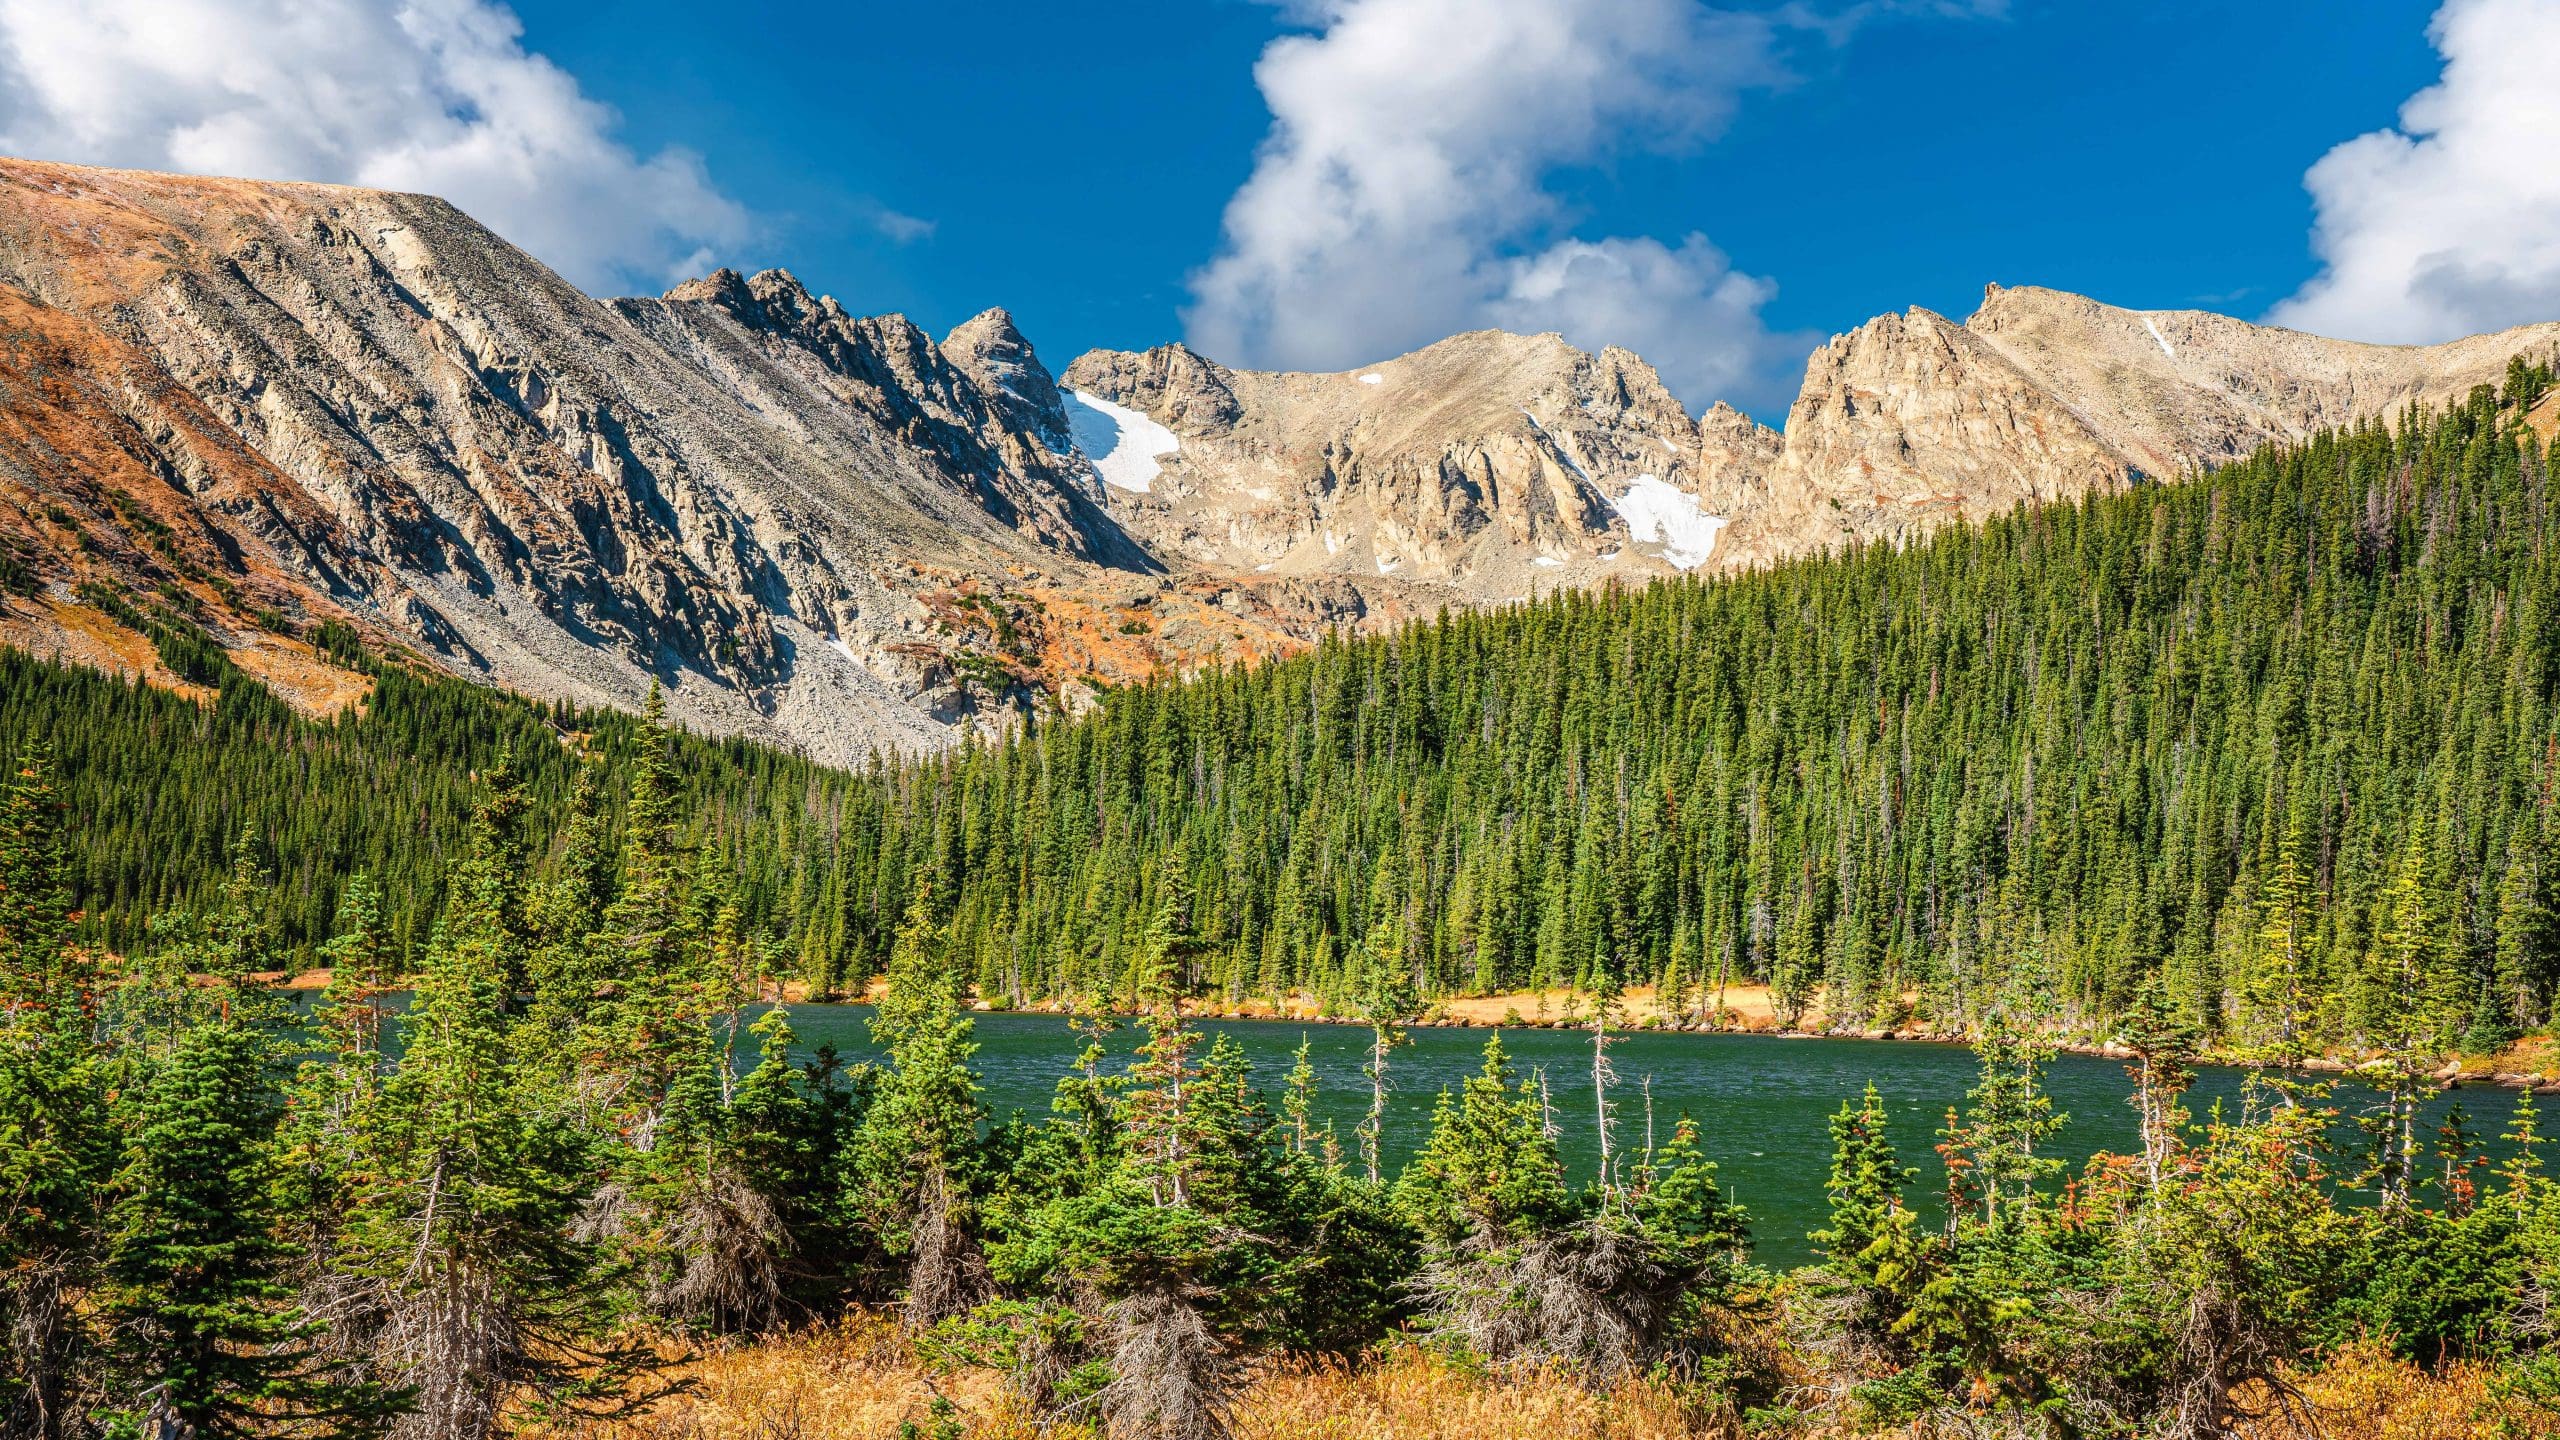
A better view of the bench where Isabelle sits.
Want more Skyblue Overland? Follow us on Instagram and Twitter

Enroll With Global Rescue Prior To Embarking On Your Next Adventure.
When a travel emergency arises, traditional travel insurance may not come to your aid, and a medical evacuation can cost up to $300,000.
The cost when you have a Global Rescue membership? $0. That’s why when the unexpected happens, you want the leader in rescue, evacuation and medical advisory behind you. You want Global Rescue.
Popular Articles:
Best Hikes Within An Hour Of Boulder, Colorado
Top Adventure Sports Towns: Boulder, Colorado
Hiking The Shadow Canyon Trail to South Boulder Peak, Boulder, Colorado
Hiking To Flagstaff Mountain Summit, Boulder Mountain Park, Colorado
Hiking The Walker Ranch Loop Trail, Boulder, Colorado
Hiking The Five Peak Challenge, Boulder Colorado
Terms of Use: As with each guide published on SKYBLUEOVERLAND.com, should you choose to this route, do so at your own risk. Prior to setting out check current local weather, conditions, and land/road closures. While taking a trail, obey all public and private land use restrictions and rules, carry proper safety and navigational equipment, and of course, follow the #leavenotrace guidelines. The information found herein is simply a planning resource to be used as a point of inspiration in conjunction with your own due-diligence. In spite of the fact that this route, associated GPS track (GPX and maps), and all route guidelines were prepared under diligent research by the specified contributor and/or contributors, the accuracy of such and judgement of the author is not guaranteed. SKYBLUE OVERLAND LLC, its partners, associates, and contributors are in no way liable for personal injury, damage to personal property, or any other such situation that might happen to individuals following this route.

Popular Articles:
Best Scrambles in the Indian Peaks Wilderness, Colorado
Scrambling The Blue Lake Traverse, Indian Peaks Wilderness, Colorado
Scrambling Mount Neva, Indian Peaks Wilderness, Colorado
Scrambling the Arapaho Traverse, Indian Peaks Wilderness, Nederland, Colorado
Gateway to the Indian Peaks, Nederland is a Scenic Adventure Town
Guide To Backcountry Skiing In The Indian Peaks Wilderness Brainard Area


