


High Point:
8,549 ft. atop South Boulder Peak

Total Ascent:
~5500 ft. (descent total: ~6,000 ft.)

Difficulty:
Very Difficult

Distance:
17.5 miles one way (35 out and back)

Waypoints:
40.03377, -105.31591

Route Type:
Through Hike
The Boulder 5 Peaks Challenge, or Skyline Traverse, is one of the most stunning hikes in Boulder, Colorado. This traverse sends hikers up and over the five highest peaks along the skyline for a breathtaking bird’s eye view of the area.
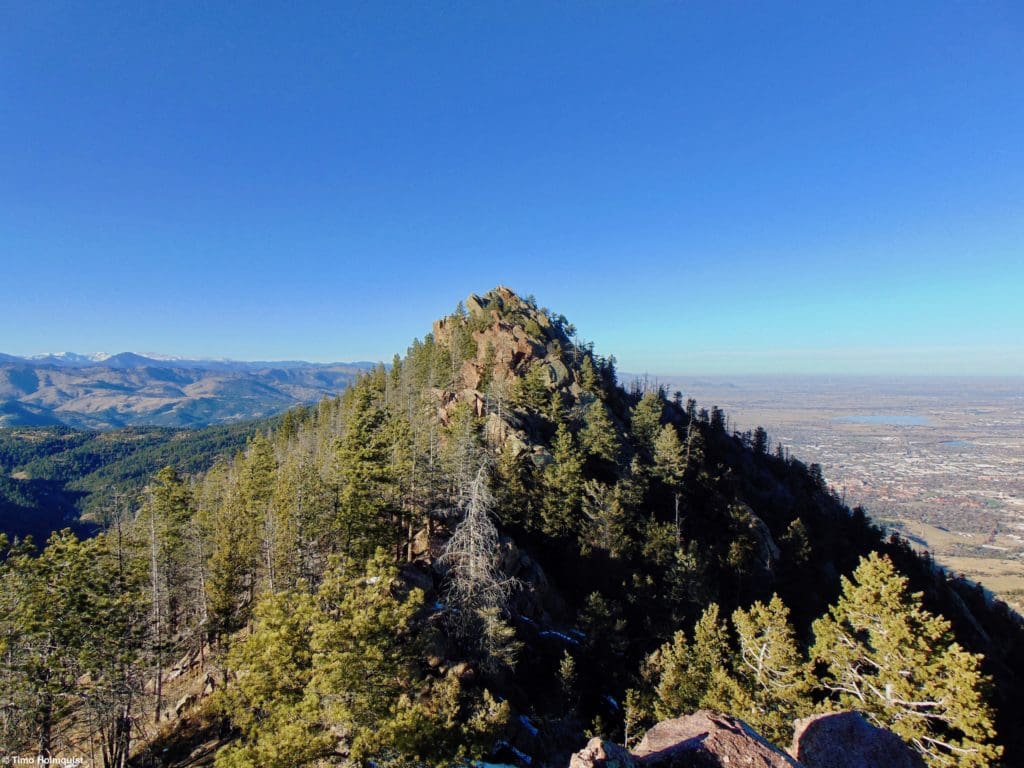
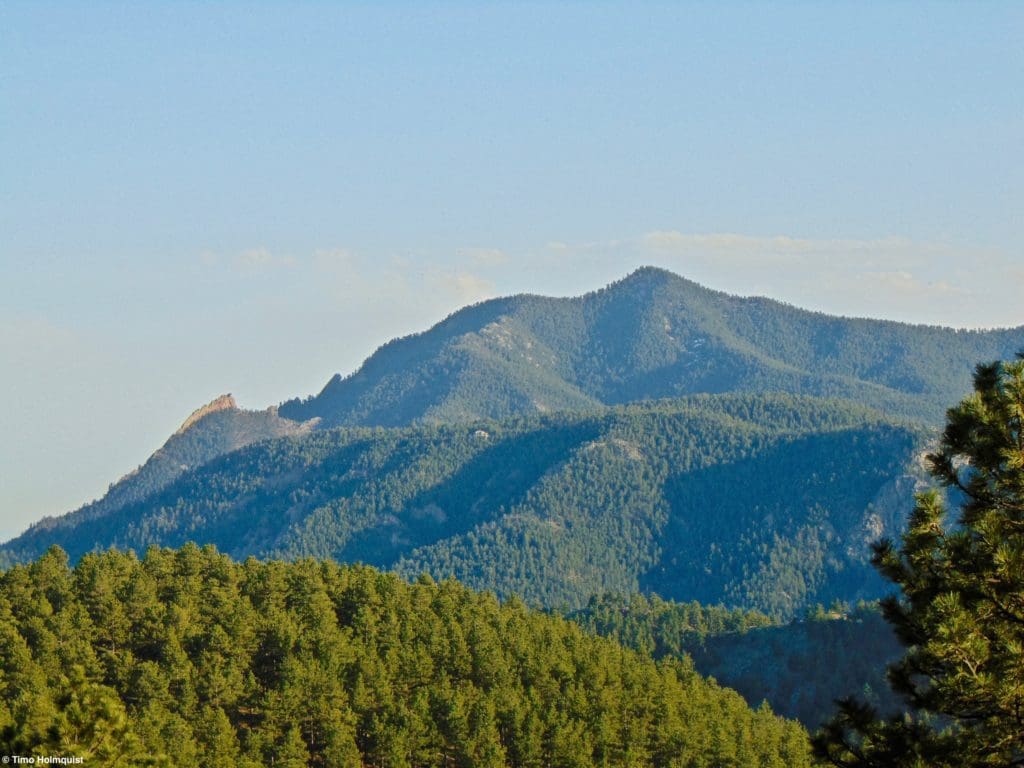
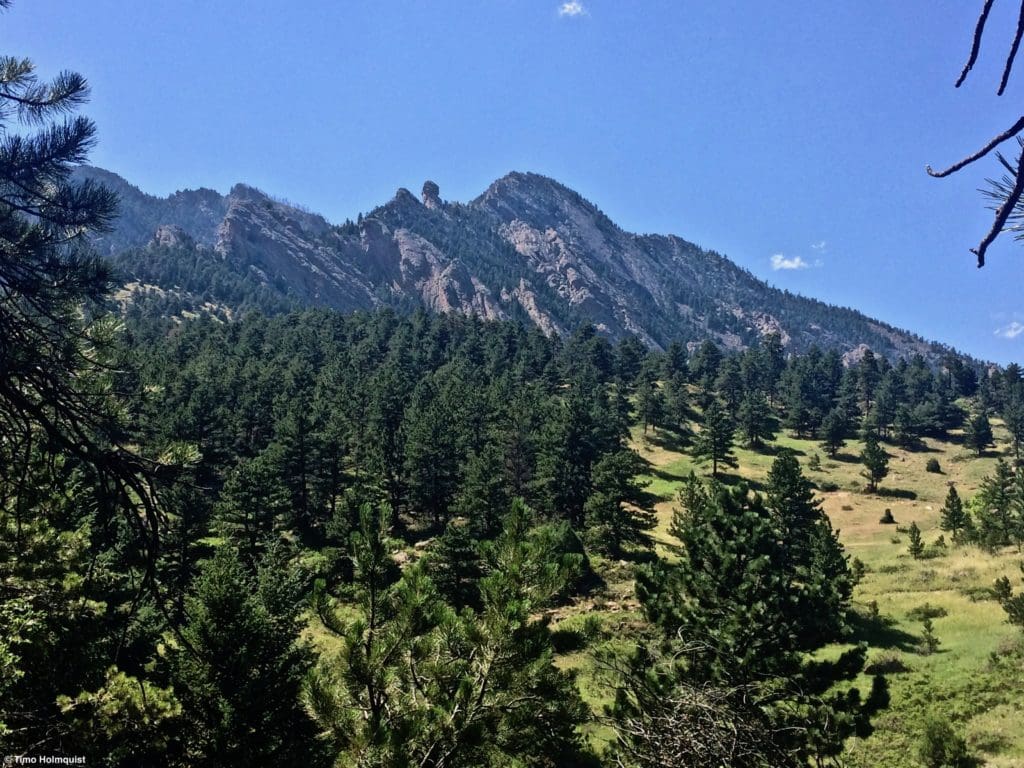
Bear Peak, part of the 5 Peaks Challenge, is a perfect example of how dramatic the Front Range can be.
Overview
It should come as no surprise that Boulder, Colorado, embodies a lot of the outdoor spirit. The city, although close to Denver and a major international airport, is situated right at the foot of the mountains. Within an hour of town, you have unfettered access to the James Peak and Indian Peaks Wildernesses, Rocky Mountain National Park, El Dorado Canyon State Park, Boulder Canyon, a ton of open spaces, and Roosevelt National Forest.
While the options can initially be overwhelming, there are some classic Boulder area adventures that everyone should do or at least know about. One of the most epic is the Boulder 5 Peaks Challenge, also known as the Skyline Traverse. This through-hike traces a line across Boulder’s mountainous skyline by going over the five most notable peaks west of town. From north to south, the peaks are Mt. Sanitas (6,863 ft.), Flagstaff Mt. (7,283 ft.), Green Mt. (8,144 ft.), Bear Pk. (8,461 ft.). and South Boulder Pk. (8,549 ft.).
Table of Contents
Article Navigation: Click on any of the listed items in the table of contents below to jump to that section of the article. Similarly, clicking on any large, white section header will jump you back to the Table of Contents.
The high terrain of the Indian Peaks Wilderness is visible from many points along the trail.
Best Hikes Within An Hour Of Boulder, Colorado
Highlighting the best hiking options within an hour of Boulder, Colorado.
Scales and Criteria
This article uses two metrics to calculate difficulty: overall distance and elevation gain. In addition to Difficulty, there’s also a Technical Rating. For winter ascents, a snow rating may be used as well, but this article covers the trail when its dry, roughly April-November. The technical rating indicates the hardest move or set of moves encountered and employs the Yosemite Decimal System.
Keep in mind, there are MULTIPLE ways to do this challenge. As explained below, this writeup focuses on a north to south route that takes advantage of the Lion’s Lair Trail to climb Mt. Sanitas first.
Difficulty Ratings:
- Easy: less than 5 miles, less than 500 ft. of elevation gain
- Moderate: 5-10 miles, 500-2000 ft. of elevation gain
- Hard: 5-15 miles, more than 2000 ft. of elevation gain
- Very Hard: 10+ miles, more than 3,500 ft. of elevation gain
Technical Rating:
- Class 1: Established hiking trail the entire length of the adventure. Low chance for injury.
- Class 2: Typically involves cross-country navigation, possibly using hands for balance but not required, steeper than Class 1.
- Class 3: Hands and feet used to scale areas; must use hands to proceed (either for balance of to help pull you up a section), increased exposure, a fall could be fatal. Helmet recommended, along with grippy hikers.
- Class 4: Climbing on very steep terrain just shy of vertical, falls could be fatal, hands employed for grip and balance continuously, ropes advised but scalable without. Helmets are highly recommended, along with grippy hikers.
- Class 5-5.4: Vertical climbing that involves technical rock-climbing moves, exposed, falls likely to be serious or fatal, possible to scale without ropes but only for very experience veterans. Helmets, grippy hikers, and/or rock-climbing shoes necessary.
- Class 5.5 and up: Not covered as scrambling, full-on rock climbing with ropes, helmets, etc.
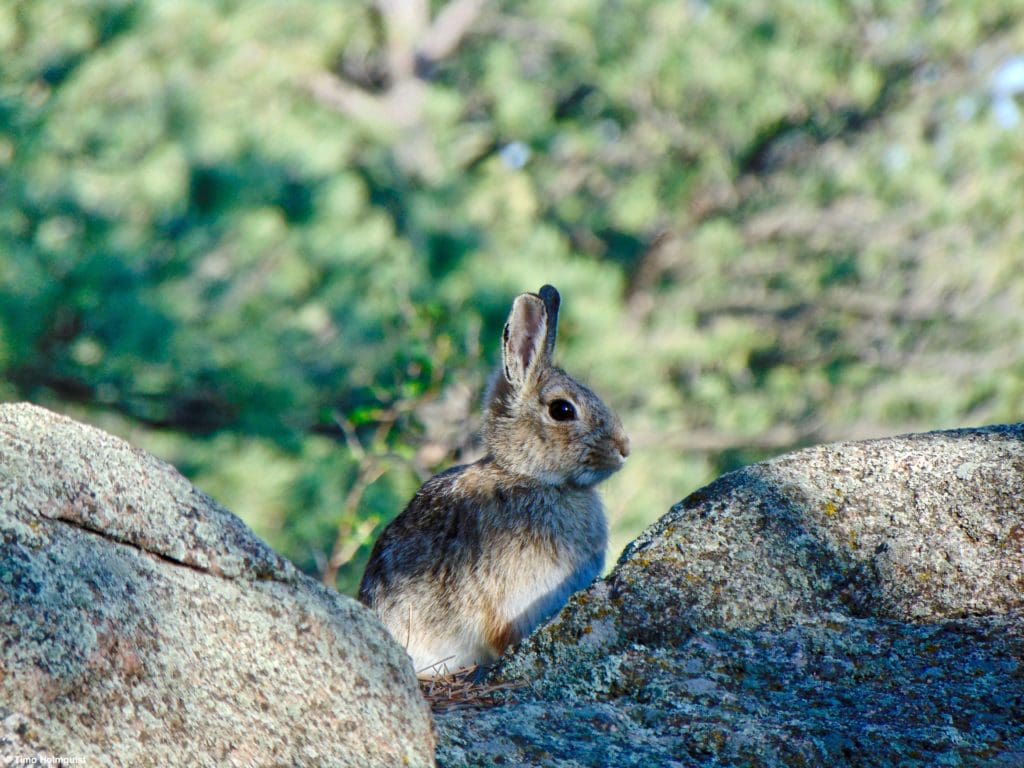
A rabbit just off of the Lion’s Lair Trail.
The Ultimate Offline GPS Hiking & Ski Maps
See why onX Backcountry is the ultimate GPS navigation app for your outdoor pursuits. Try Today for Free. No credit card required.
Directions to Trailhead
Since this is a car positioning hike (an out and back will cost you 35+ miles), there are at least two ways to start. The description below runs the trail from north to south, but you can go south to north as well. In fact, the most popular way is to go south to north because you conquer the taller peaks first; however, going against the grain is a better workout, more gratifying, and almost guarantees late afternoon solitude between Bear Peak and Shadow Canyon, a relative rarity for such a popular area.
From the north end, there are a few possible ways to start. You can park at the Centennial Parking area in Sunshine Canyon, climb Sanitas to the north, turn around at the summit and continue south to do the rest of the challenge. If you have a friend drop you off, there’s a small trailhead where Forest Ave dead ends into 3rd street. There isn’t much parking there, so a drop off would be ideal; from there, take the Goat Trail west up to Sanitas, then take the ridge trail south to continue the challenge.
Part of the rock scramble on Bear Peak.
The simplest way to start the challenge is on the Lion’s Lair Trail. From the center of downtown Boulder, find where Broadway meets Mapleton Avenue and take Mapleton west. You’ll pass some lovely old houses and large trees before getting to Centennial Parking area (which is the main lot for people summiting Sanitas). Drive beyond Centennial and enter Sunshine Canyon. Roughly a mile and a half up the road, you’ll see your first large hairpin turn. There’s a dirt space to the right for parking and fits 6-7 cars; that’s the start of Lions Lair Trail. If it’s a weekend, get there EARLY (6 am or earlier).
If you go south to north, the easiest parking lot is South Mesa Trailhead, but again, if you go on a weekend, get there EARLY. The trailhead is south of town, with the easiest access road being Broadway. When you get to the intersection of Broadway (CO 93) and Marshall Mesa Road (CO 170), take a right as if heading to the town of Eldorado Springs. A few minutes down the road, you should see signs for South Mesa Trailhead on your right-hand side; park there. Even if you start north to south, it’s helpful to park a car here or organize a pickup at this lot. There is a parking fee ($5, payable at the kiosk in the lot), but the fee is waived if you have a Boulder county license plate. You can also purchase a year pass for $25 here.
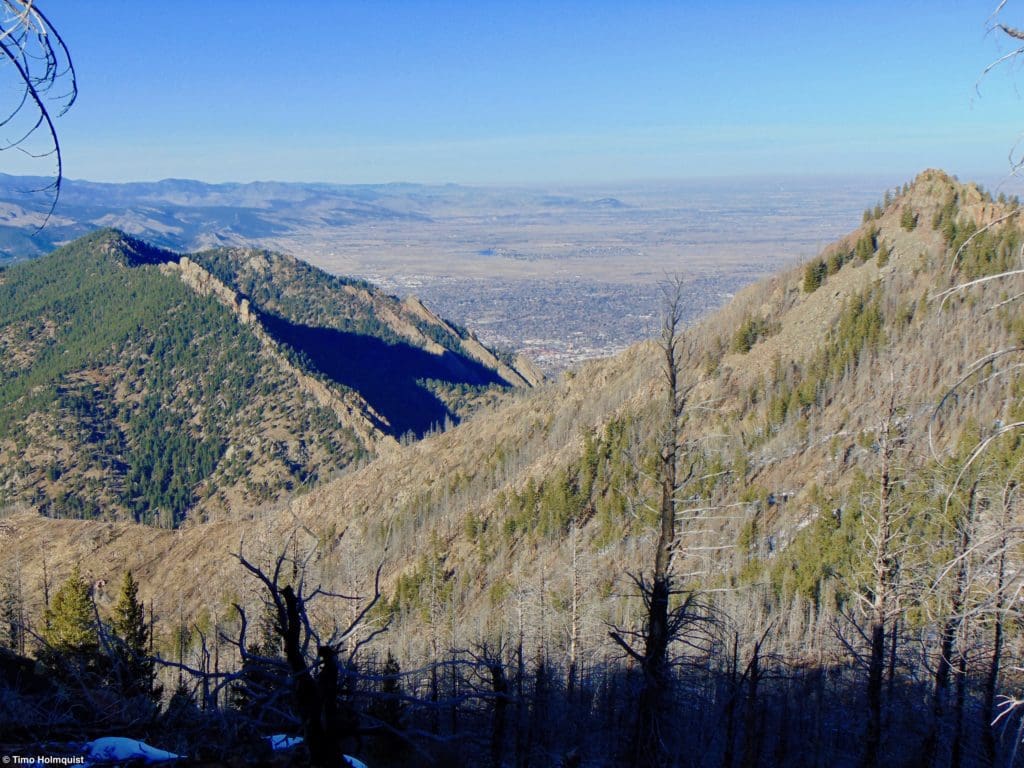
The view west from South Boulder Peak.
The Ten Essentials: How to Equip Yourself for the Backcountry
Packing the “Ten Essentials” whenever you step into the backcountry, even on day hikes, is a good habit. When something goes awry, you’ll truly appreciate the value of carrying these items that could be essential to your survival.
Field Notes
Since this challenge covers five popular peaks, there are a lot of resources you can use to check conditions and weather. Since the higher peaks are 3,000 feet above Boulder, if you only look at Boulder’s weather, make sure to knock a few degrees off the temperature. Wind also whips through the peaks at higher speeds than down lower, so take a second to check wind forecasts as well.
Start by checking Boulder’s extended weather forecast. I also utilize Opensummit, which has forecast details for Mt. Sanitas, Green Mountain, Bear Peak, and South Boulder Peak. The lowest stretches of the trail make the forecast for Chautauqua park relevant as well. For full forecast details, Opensummmit charges a membership fee, if that’s undesirable; you can always check mountain-forecast, which has details for Twin Sisters, a nearby mountain with comparable weather.
Things you should watch out for in the summer include wind, temperature differences between summits and Boulder, heat, and the threat of afternoon thunderstorms, which can develop quickly. Once you have a good handle on what to expect, start preparing for a long day. This will be an all-day affair and, depending on when you start, may have you coming off South Boulder Peak at dusk. Maximize daylight by starting early and going at your pace; all the trails (when not covered in snow) are easily identifiable and have clearly marked signs.
With such a long challenge, water should be a concern as well; this part of Colorado gets downright toasty. You can refill water along Boulder Creek or Bear Canyon Creek, but make sure to treat all the water you get. After Bear Canyon Creek, you’re up high for a long time and won’t have water access until deep into Shadow Canyon, at which point you might as well hoof it to the ending trailhead.
Green Mountain, Flatiron 1, and Flagstaff Mt. in front and below them, seen from the slopes of Mt. Sanitas.
Places to Stay
Being right alongside Boulder’s western suburbs, places to stay are numerous and easy to find. Any hotels in Boulder, northern Denver, Golden, Lyons, Berthoud, Loveland, Longmont, Superior, Erie, and Broomfield all work. If you want to find some area camping, check out the following locations. Gross Reservoir, Gordon Gulch Dispersed Area, and along some forest service road near Switzerland Trail. A little farther out, the Meeker Overflow Camping Area, Rainbow Lakes, Buckingham Campground, and Beaver Reservoir road dispersed camping work.
Global Rescue has expanded services to include local field rescue within 100 miles of home. Global Rescue is there whether you’re hiking, kayaking, snowmobiling, fishing or simply enjoying the outdoors and get ill or injured and you’re unable to get to safety on your own. Global Rescue is the red button you push in an emergency. Their team of medical and security experts come through for you when it matters most.
Journal
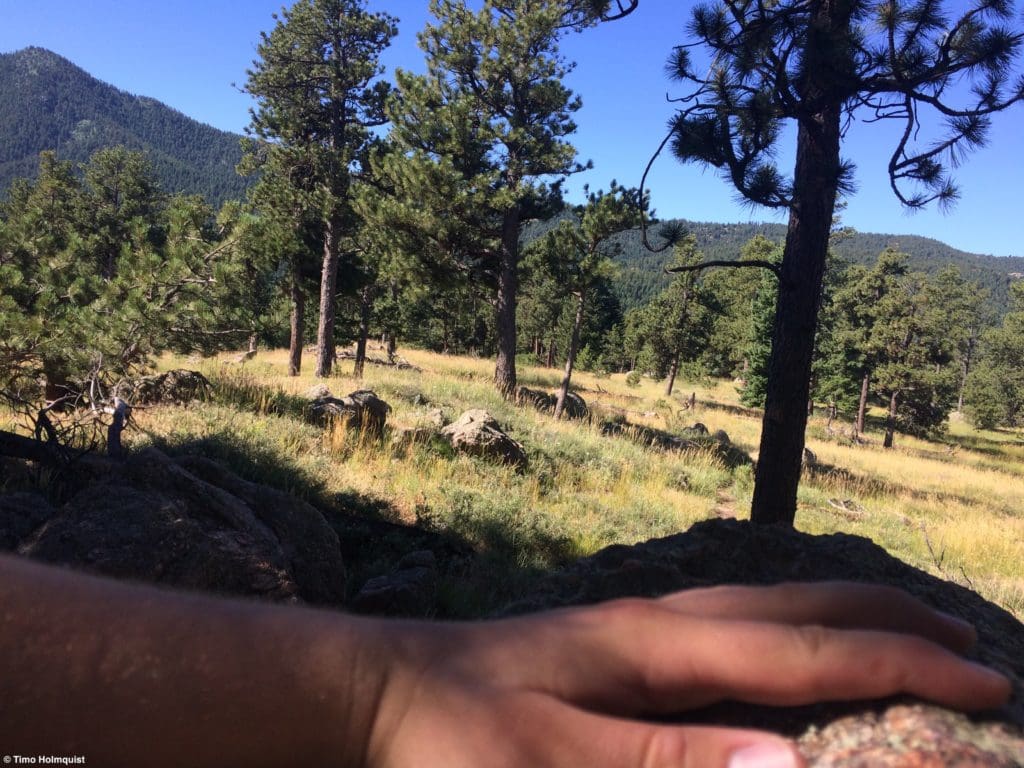
We’ll start our description from the Lion’s Lair Trail, but you can start from the Goat Trail or Centennial Parking area, tag Sanitas and then turn around. The Lion’s Lair Trail begins in a dry valley, threading through pine forests and fields before climbing up into a higher bowl. Once the trail rims the edge of the bowl on its way to the summit, you get superb views back to the Indian Peaks.
Looking west to higher peaks from the Lion’s Lair Trail.
Continue on the Lion’s Lair Trail and pass the highest point, which is actually located a few points of a mile back from what’s generally considered the “summit.” Sanitas is kind of a geographic mess; the actual peak is in a private neighborhood where no trail goes so that’s out and what most people think is the summit is a dozen feet lower than the highest point on public land. Naturally, this only matters to certain hikers but if you’re feeling deviant, see if you can find the highest point.
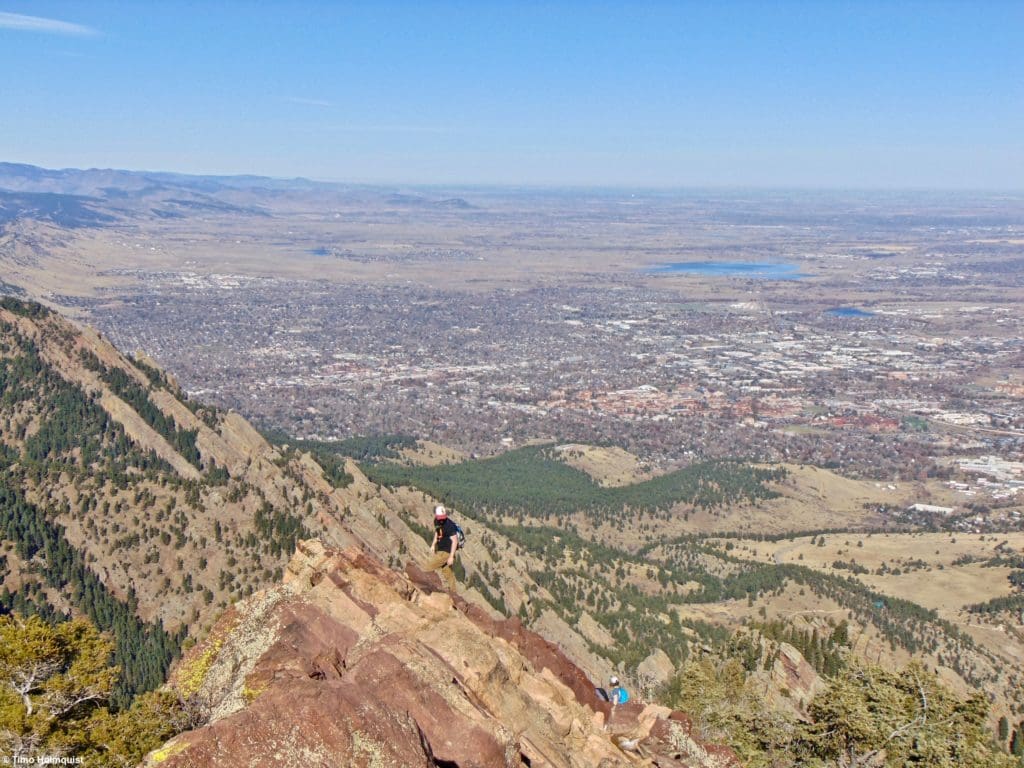
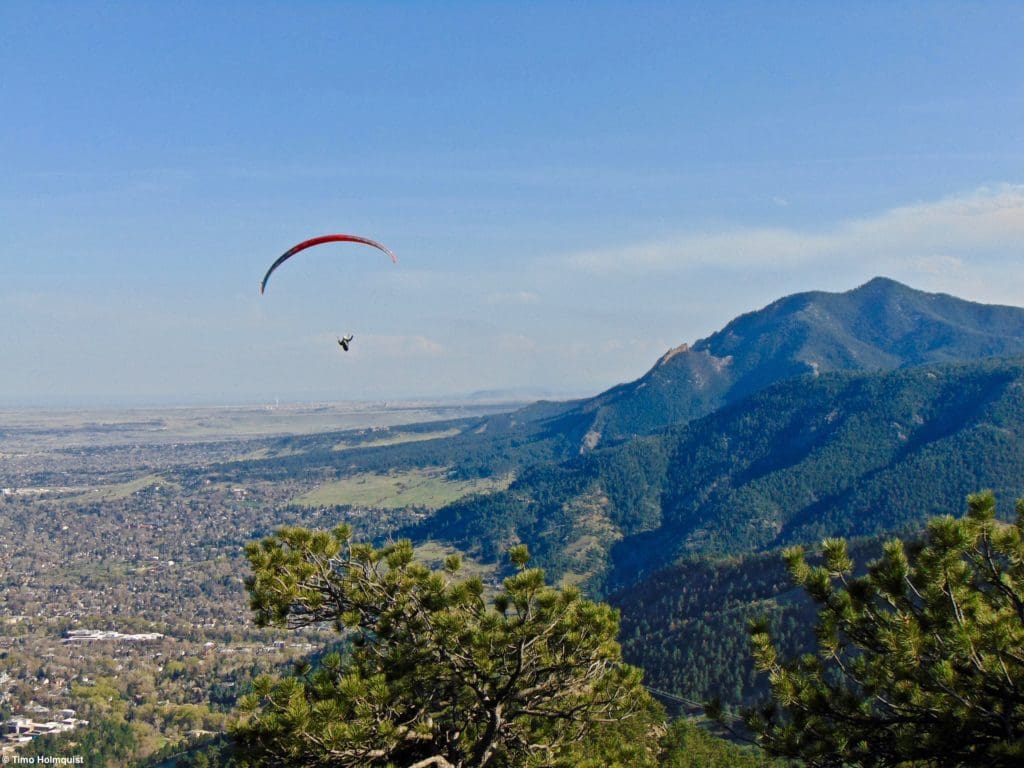
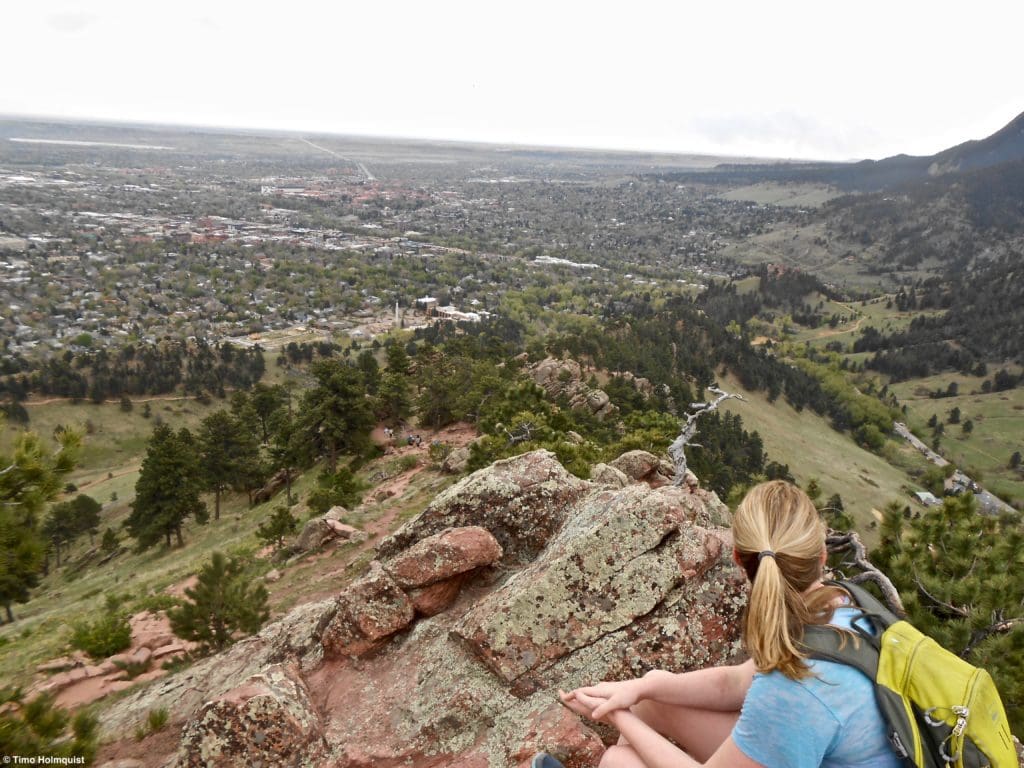
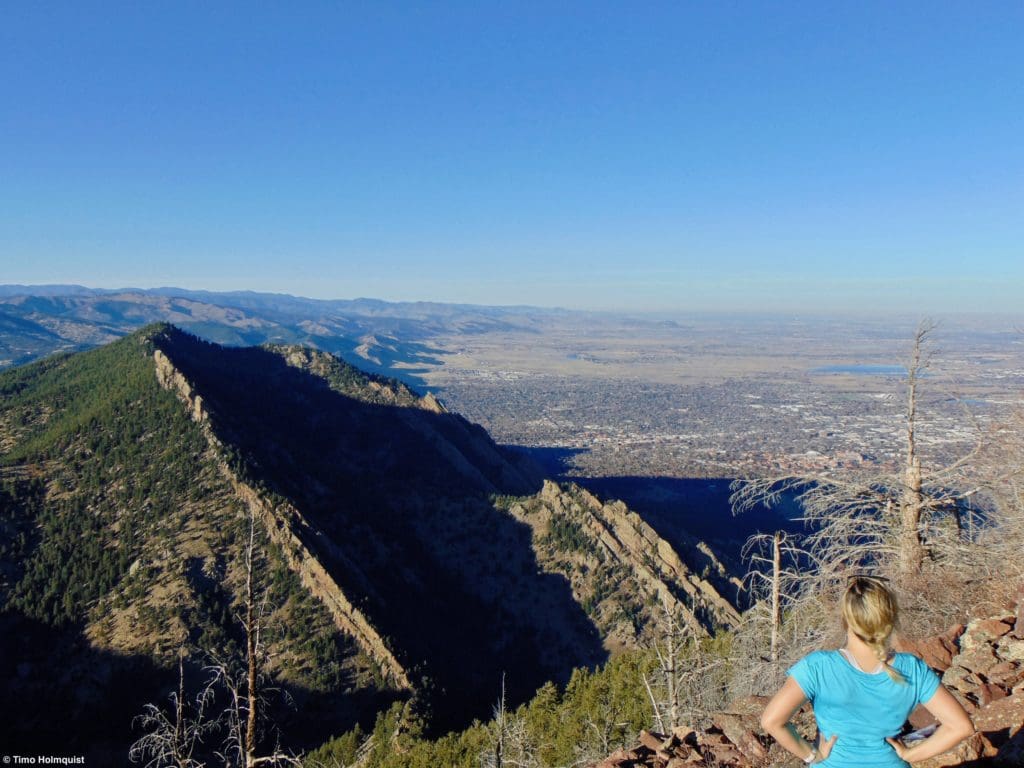
After passing the non-descript high-point, continue to where the trail meets the Sanitas Ridge Trail, take a left and bound up to an exposed rock where people generally stop. The views from this rock are great, featuring Boulder and the endless plains to the east, while offering a nice view south of the remaining peaks in your challenge.
Sanitas view south, with Boulder to the left.
There’s also a plaque and a metal road sticking out of the topmost rock, have a look if it’s interesting; otherwise, get ready for the next part of your challenge.
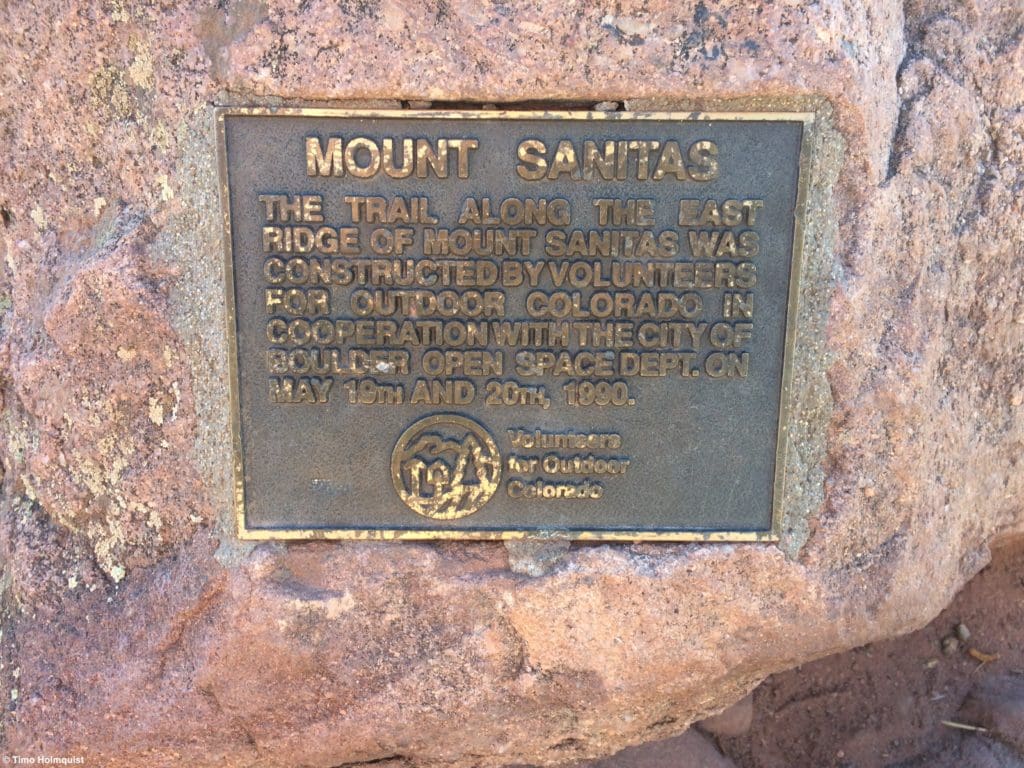
Plaque on top of Sanitas.
From the plaque, retrace your steps to the junction with Lion’s Lair and continue down the Ridge Trail. Most people use this trail to ascend Sanitas; going the other way means you won’t be stuck behind large parties making their way up. The trail is nice, following a rocky ridge down to the Centennial Parking area and offering up nice views with some impressive trail work lower down.
One of many rocky outcrops along the Ridge Trail of Sanitas.
Once you get to the bottom, cross Sunshine Canyon and continue on the Red Rocks Trail heading south. Pay attention when crossing the road; people unfamiliar with the area may be whipping by. Once you’re safely across, take the trail south as it passes, perhaps unsurprisingly, some nice red rocks.
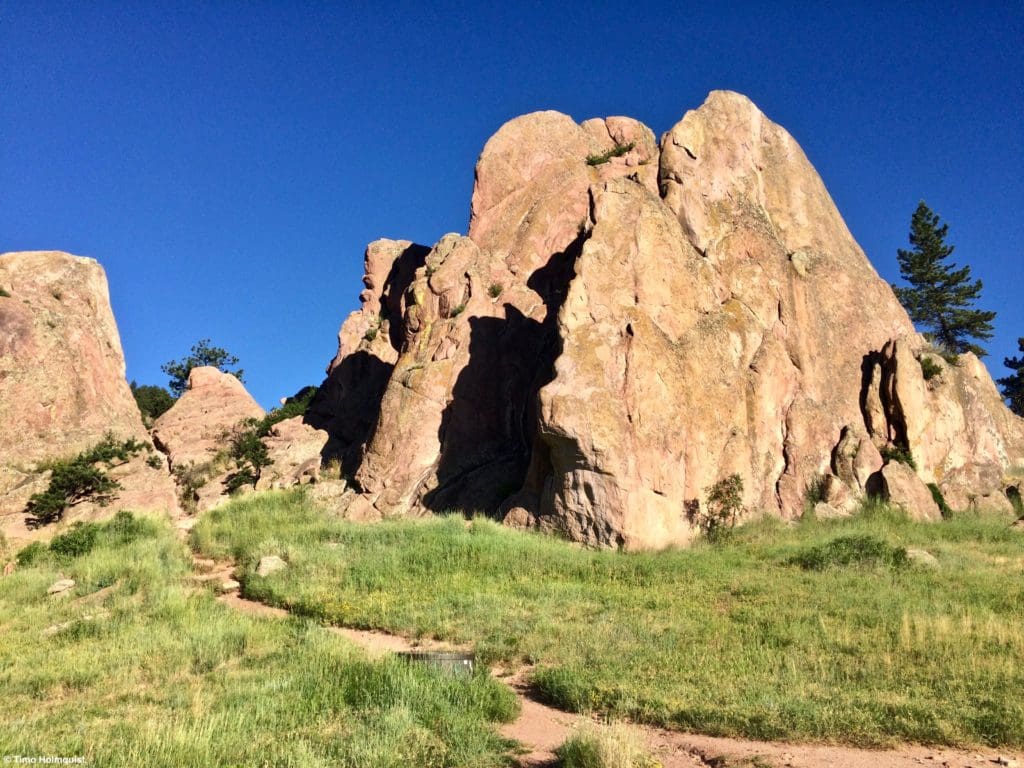
The not-as-famous-as-the-concert-venue Red Rocks of Boulder.
This part of the trail is short, less than a half-mile before you get to your second road crossing. What’s nice about this crossing is that there’s an underpass you can use; it’s mainly for cyclists, so just pay attention to bikers. Once the trail ends, take a right on the paved bike trail and take it under the road; on the other side, a bridge will take you across Boulder Creek and into Eben G. Fine Park.
This part can be a little confusing. Once you cross the creek, either travel east (left) on the Boulder Creek Path through the park to its end, or pass through the park to Arapahoe Ave and follow it left (east). At the southeast corner of the park is a roundabout between Arapahoe Ave and Viewpoint trail, which is a small dead-end road. Head down Viewpoint Trail. At the end of the road will be a small sign and a trail heading up a grassy slope. The trail has the same name as the road and is the path you want.
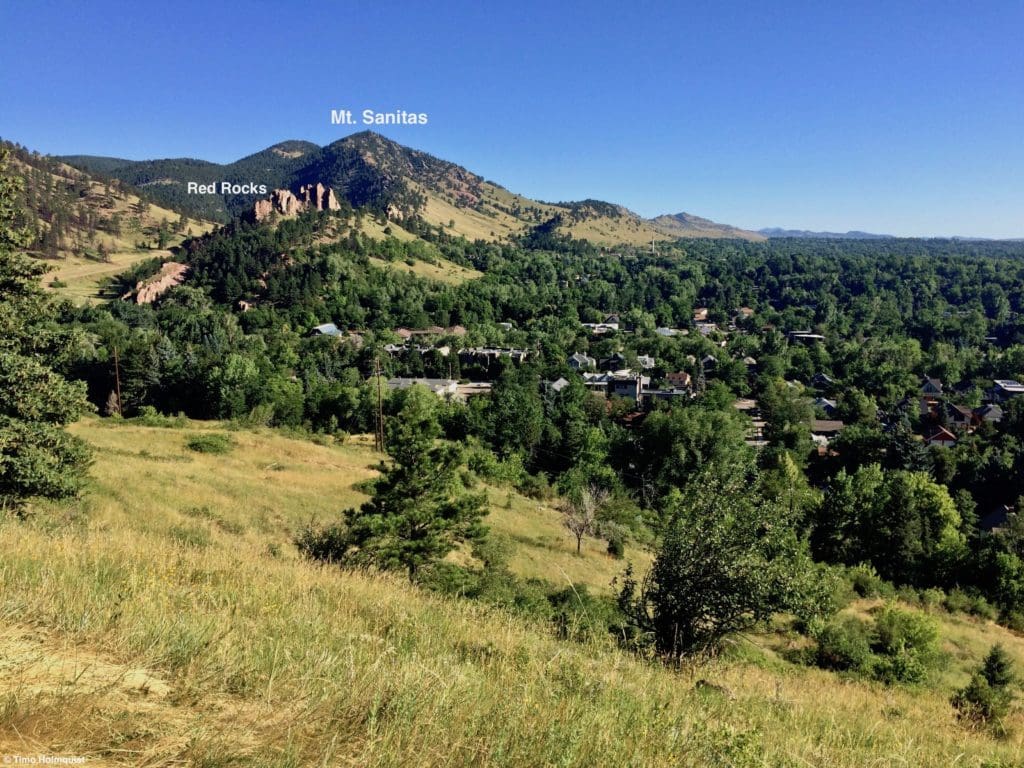
On the Viewpoint Trail, looking back north to the Red Rocks and Mt. Sanitas behind it.
Head uphill and take a right at your first intersection to keep ascending up the lower flank of Flagstaff Mt. This part of the challenge is usually quite empty, although the flank of Boulder is quite close to you. Make sure you apply sunscreen liberally for this part, it’s not terribly long, but there isn’t a lot of tree coverage.
The trail will eventually make it to Panorama Point, a very popular pullout on Flagstaff Road. You’ll cross the road here and continue uphill. This is another short section before you hang a right and cross the twisty, turny road again. The speed limit here is 25mph, but make sure to pull one earbud out to hear for cars.
The general trajectory here is to continue uphill; you’ll cross Flagstaff Road 7 times (including the summit spur road) on the way up and once more on the way down. While this part of the hike certainly isn’t a wilderness experience, it has the benefit of transporting you higher in elevation and hopefully to cooler or breezier conditions. When you cross the summit road, take a left on the Range View Trail. The true summit of Flagstaff Mt. (which is quite flat) is a raised area in the trees to the left (east) of the Range View Trail.
The highest rock on Flagstaff.
If you don’t care about a random rock in the trees off-trail, continue on the Range View Trail as it loses elevation before emerging at the intersection of Flagstaff Summit Road and Flagstaff Road. This is the 10throad crossing, with eight of them happening on Flagstaff Mt. (if anyone’s keeping track) but also the very last one.
Once you cross the larger Flagstaff Road, find an old dirt road that leads to a gate; go beyond it, and you’ll end up at a trail junction. Left will take you down Gregory Canyon, avoid that, keep straight onto the Ranger Trail.
This part of the challenge features thick tree coverage (finally) and a more out there feeling, which will be directly impacted by how many or how few people are hiking the trail. Eventually, when you reach the next junction, stay on the ranger trail (left) as it begins to climb more seriously up the slopes of Green Mountain. This is the steepest part of the challenge so far. Continue on the Ranger Trail until it dead-ends into the Green Mountain West Ridge trail. Here, take a left and scramble up the final steep portion to the top of Green Mountain.

A fun dial showing the position and elevations of mountains on the horizon.
Green Mountain is a pretty popular summit, so you’ll likely see others at the top. Take in the views, check out the geography dial and then continue on. While Green Mountain is the largest mountain you’ve hit so far, the final two are taller and have better views.
Start by going back down the West Ridge Trail, passing the Ranger Trail you came up on. The next junction (~0.8 miles later) is the one you want. Take a left on the Green Bear Trail and make your way into a deeper treed gap between Green Mountain and Bear Peak. From here until the South Mesa Trailhead (with the exception of Bear Peaks summit), you may have stretches of trail to yourself.
At the bottom of a long descent to Bear Canyon Creek, take a right onto the Bear Peak West Ridge Trail and begin climbing out of the drainage. Tree cover follows you until you crest a low shoulder, and then the damage from the 2012 Flagstaff Fire becomes apparent. This is another area where sunscreen will be your friend.
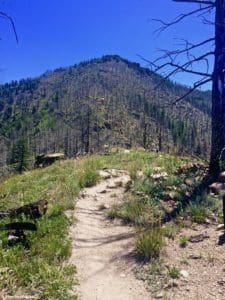
Looking up the trail to Bear Peak.
This climb will get you to the highest point so far in your trek, and as you climb, views spill out towards Boulder and the Flatirons. Take your time and enjoy this stretch of trail; while the fire damage is sad to see, it does provide a ton of visibility for long range views. Eventually, the trail reaches a junction below the crest of rocks atop Bear Peak.
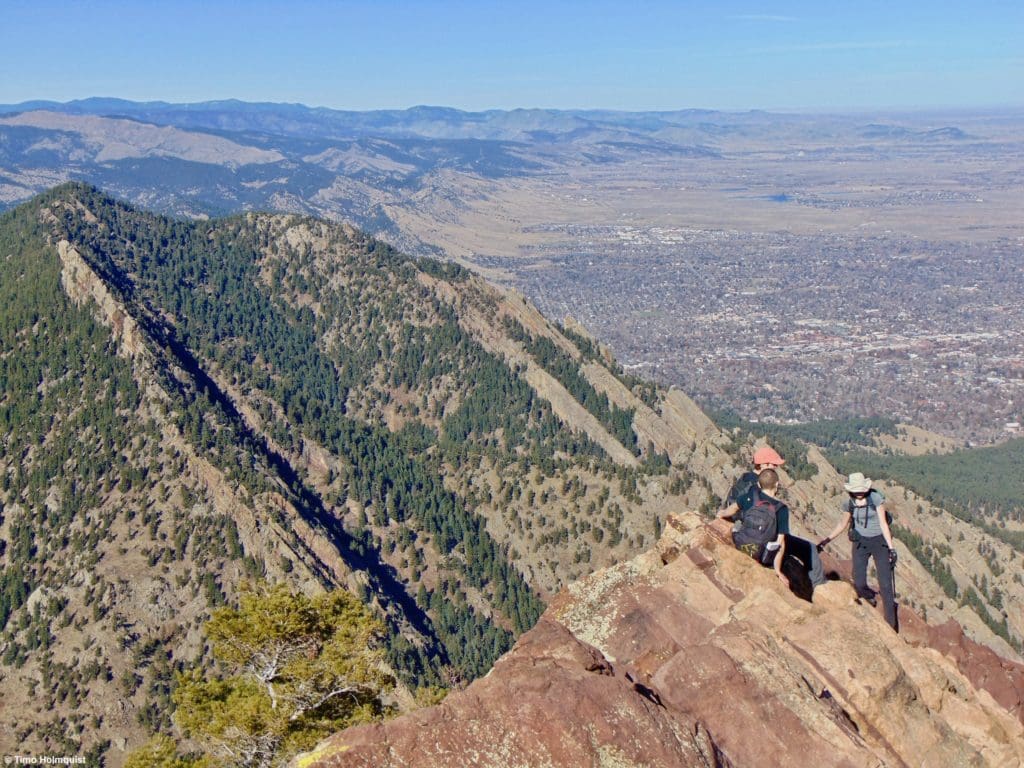
From below the summit rocks, looking north to Boulder and rest of the Front Range.
Take a left, traverse for a point of a mile, and reach your final junction. Here, you need to make a choice. The actual summit is a short Class 3 scramble atop slanted rocks to your right. It is scrambling, it is not long, but it is much more exposed than any other part of the challenge. If you’re satisfied with where you are, take in the views; if you want to scramble, the brief adventure to the very top of Bear Peak is quite enjoyable.
From the top of the scramble, looking north to Green Mountain and the edge of Boulder.
Bear Peak is a fantastic summit, but South Boulder Peak is the tallest of the bunch and still on your to-do list. After soaking in the views and recharging, head down the scramble to the trail junction. From there, take a left and traverse south along the bottom of the summit rocks. You’ll pass the junction with the trail you used to climb up, keep going south where the bare summit of South Boulder Peak (also affected by the Flagstaff fire) should be easily visible.
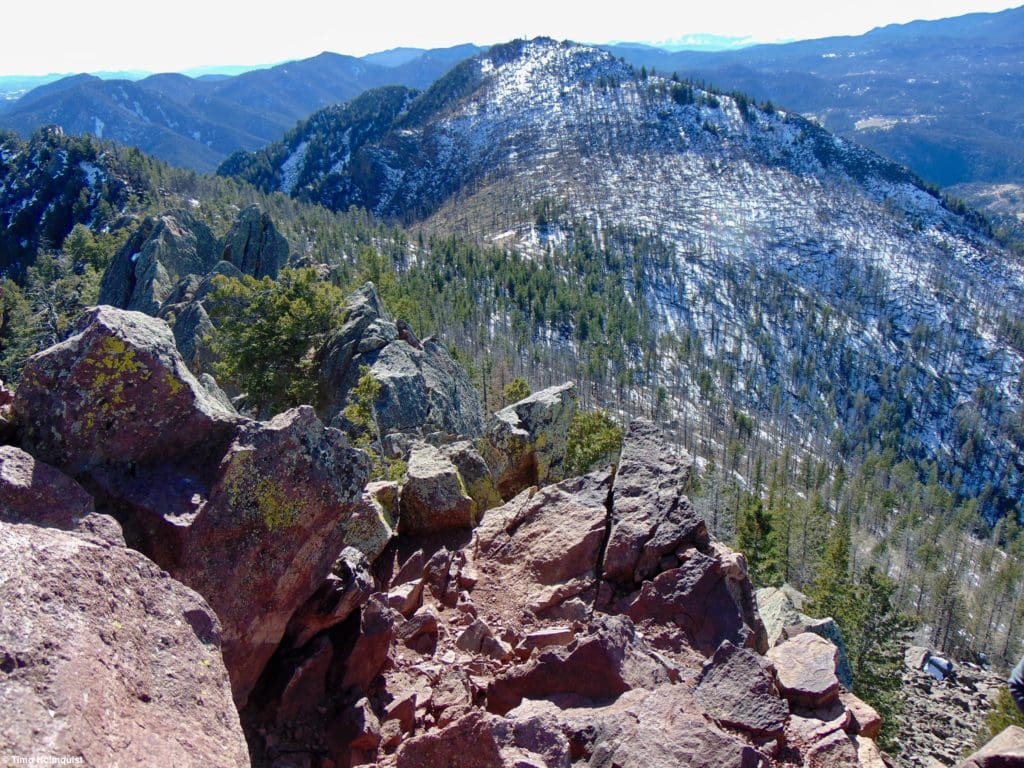
South Boulder Peak after a November snow, from the summit of Bear Pk.
The trail will descend to a broad saddle where the Shadow Canyon Trail meets it. This will be your descent route, but to tag South Boulder, continue straight and gain elevation. The trail eventually dissipates at the foot of some more slanted rocks. They are not as difficult to climb as Bear Peak but still require careful footing.
Bear Peak and Green Mountain from near the summit of South Boulder Peak.
While South Boulder isn’t as dramatic as Bear, the views are just as good. The summit ridge also extends for a while, so you can likely find your own rock outcropping to relax on.
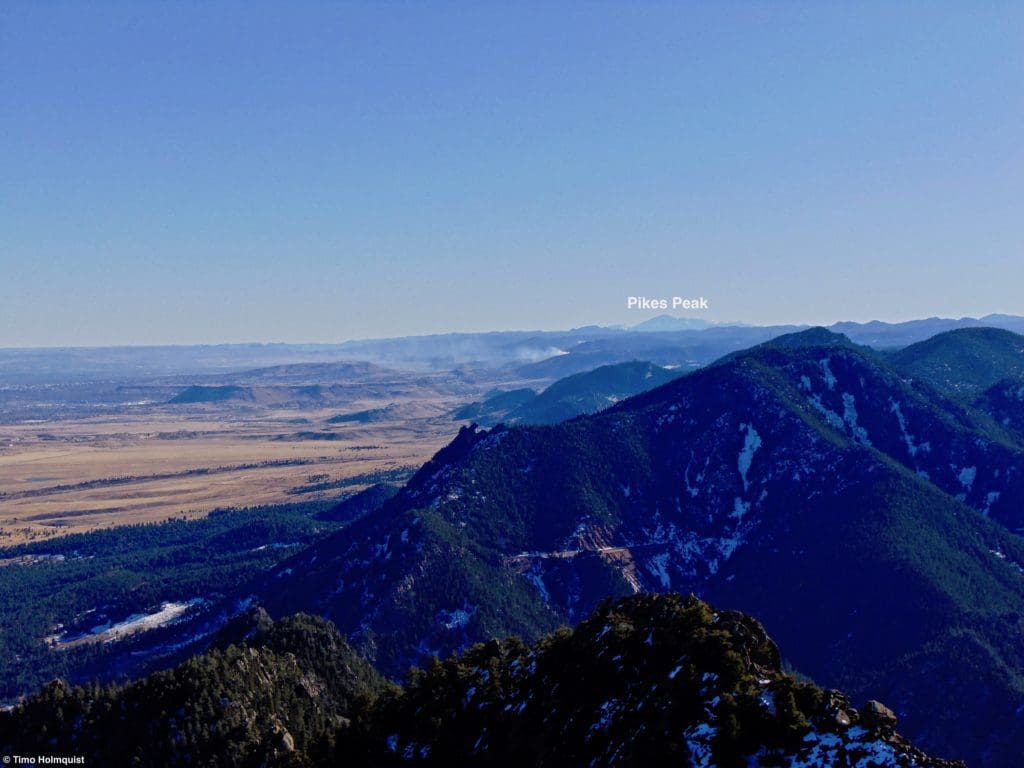
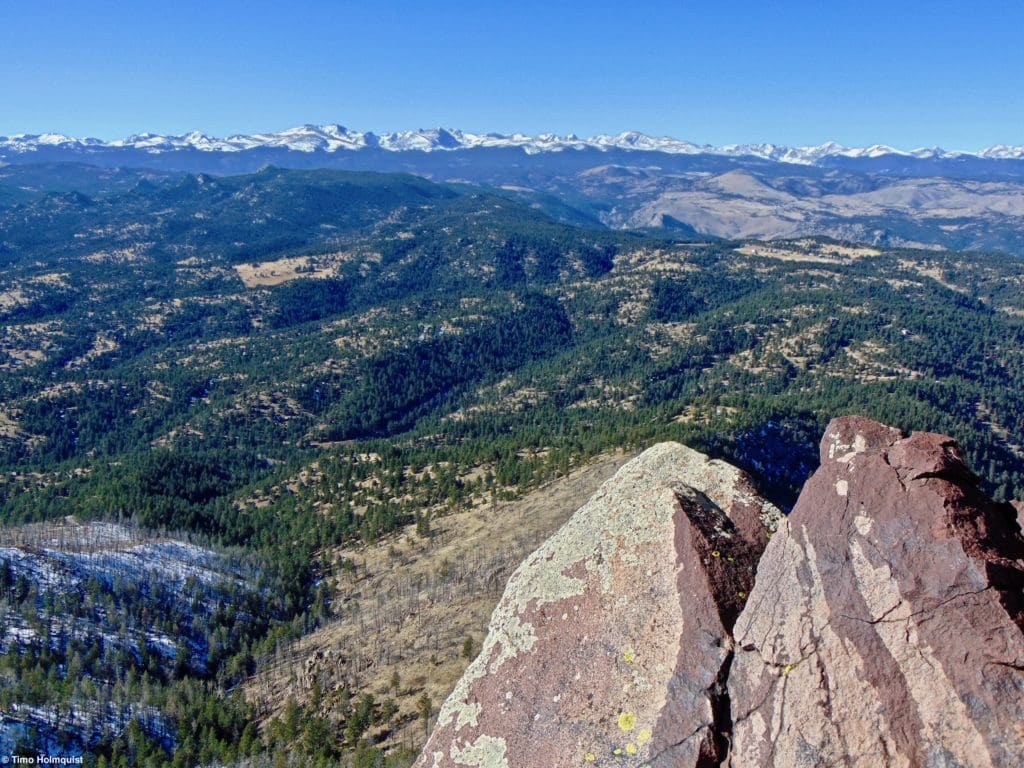
Views south, you can see the edge of the mountains and on clear days, all the way to Pikes Peak in the distance, some 120 miles away.
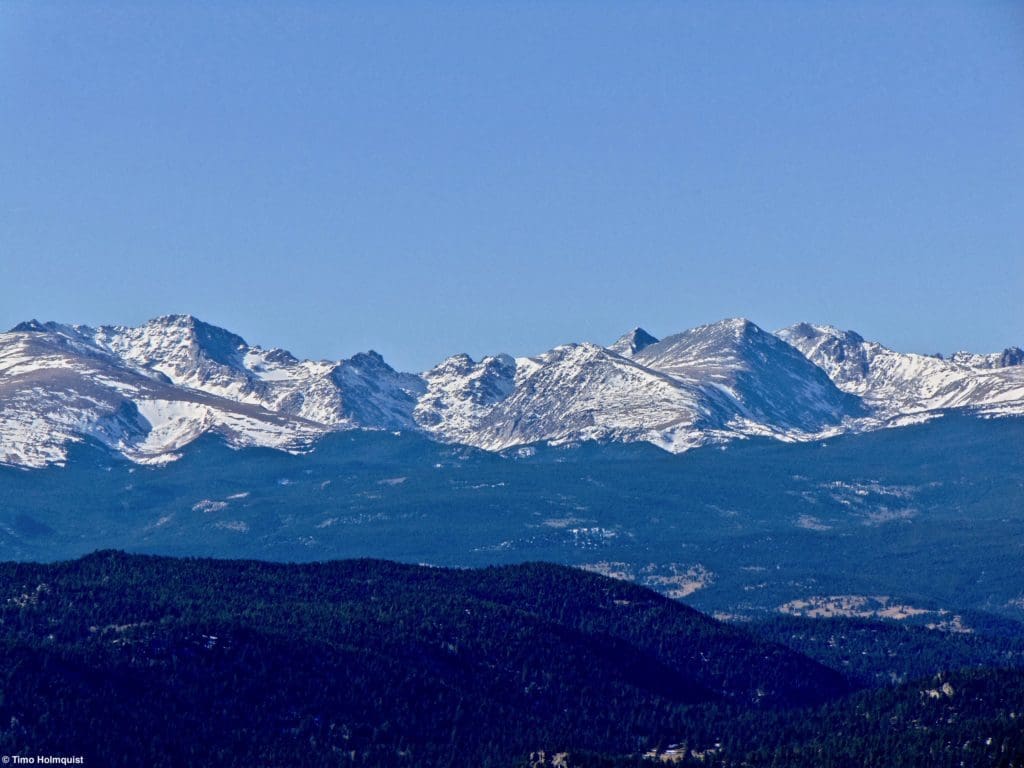
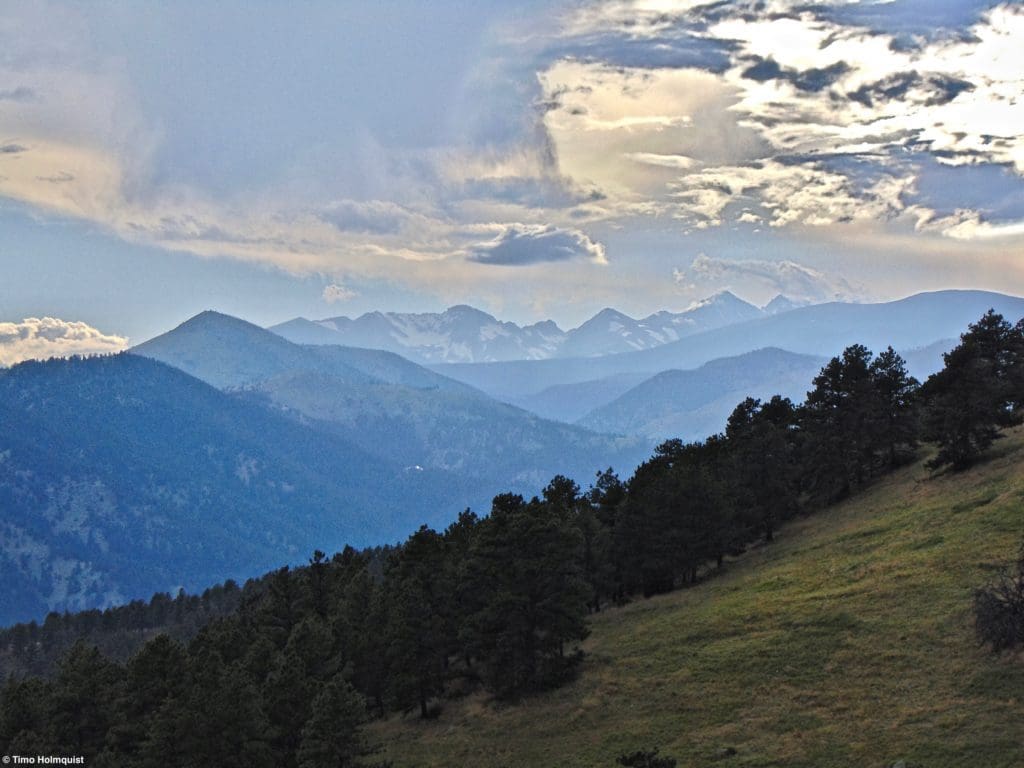
The stretch from Bear Peak to South Boulder Peak also includes some fantastic perspectives toward the high peaks of the Continental Divide.
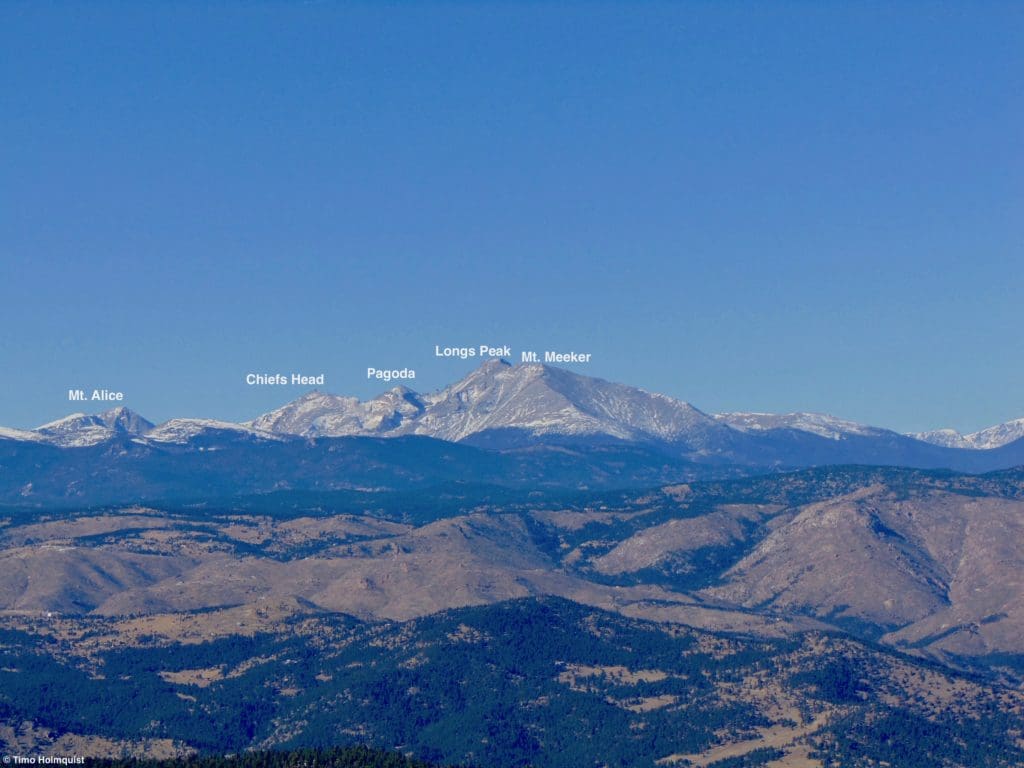
Looking to Rocky Mountain National Park from South Boulder Peak.
Hurray! You climbed all five peaks! While celebrations are in order, almost 3000 vertical feet and few miles still separate you from South Mesa Trailhead. Try to keep some energy in the tank and go easy on the knees; they’ll be felling it on the way down. Retrace your steps to the broad saddle between South Boulder and Bear Peak, then take a right onto the Shadow Canyon trail and begin your descent.
If you’re descending this trail in the late afternoon, this certainly feels like a deeper slice of wilderness than the first part of the hike. While north to south is harder, the simple serenity of descending into the arms of the hills and enjoying moments of hard-earned solitude made the challenges worth it to me. Once you finally exit the canyon and make your way to South Mesa trailhead, there are plenty of places to turn around and stare at the profile of South Boulder Peak.
Looking back at the ridgeline close to South Mesa Trailhead.
From Shadow Canyon, take Shadow Canyon South at the first junction, and continue on this trail (which joins the Mesa Trail). Follow the Mesa Trail all the way back to South Mesa Trailhead. You can also take the Homestead Trail, which adds a couple of points of a mile, but goes to the same place.
Congratulations! You’ve done the Boulder 5 Peak Challenge, aka the Skyline Traverse.
Terms of Use:
As with each guide published on SKYBLUEOVERLAND.com, should you choose to this route, do so at your own risk. Prior to setting out check current local weather, conditions, and land/road closures. While taking a trail, obey all public and private land use restrictions and rules, carry proper safety and navigational equipment, and of course, follow the #leavenotrace guidelines. The information found herein is simply a planning resource to be used as a point of inspiration in conjunction with your own due-diligence. In spite of the fact that this route, associated GPS track (GPX and maps), and all route guidelines were prepared under diligent research by the specified contributor and/or contributors, the accuracy of such and judgement of the author is not guaranteed. SKYBLUE OVERLAND LLC, its partners, associates, and contributors are in no way liable for personal injury, damage to personal property, or any other such situation that might happen to individuals following this route.


