


High Point:
13,230 ft. on top of Mt. Audubon

Total Ascent:
~4350 feet

Difficulty:
Very Difficult (Class 3-4 scrambling)

Distance:
~10.5 miles (~13 from winter gate)

Route Type:
Loop
The Blue Lake Traverse strings together 5 IPW peaks, good Class 3 scrambling, and a moderately distanced loop. Views improve as you go, and the scrambling is on solid, grippy rock – making it one of the best scrambles near Boulder, Colorado.

Overview
The Indian Peaks Wilderness is known throughout Colorado as a jagged set of mountains rivaling the beauty of its northern neighbor Rocky Mountain National Park. There are hikes, scrambles, lakes, backcountry skiing lines, and summits galore. It’s an exceptional part of the Colorado mountains and worth detailed exploration. Between iconic scrambles like Navajo Peak, Lone Eagle Peak, the Arapaho Traverse, and the Kasparov Traverse, there’s no shortage of ridges to clamber over.
Slightly less traveled but just as beautiful, the Blue Lake Traverse strings together five IPW peaks (Mt. Audubon, Paiute Peak, Mt. Toll, Pawnee Peak, & Little Pawnee Peak), good stretches of Class 3 scrambling, and allows you to complete the journey as a moderately distanced loop. The views get better the farther along you go, and the scrambling is largely on solid, grippy rock, making it one of the best multi-peak scrambles near Boulder, Colorado.

Fantastic scenery awaits on the Blue Lake Basin Scramble.
Table of Contents
Article Navigation: Click on any of the listed items in the table of contents below to jump to that section of the article. Similarly, clicking on any large, white section header will jump you back to the Table of Contents.
Best Alpine Scrambles in Colorado
Reach non-technical mountain summits while exploring low angle rock, traveling through talus and scree, crossing streams, navigating dense forest growth, and walking on snow-covered slopes.
Scales and Criteria
This article uses two metrics to calculate difficulty: overall distance and elevation gain. For winter ascents, a snow rating may be used as well, but the access road is not plowed, and that adds a substantial mileage portion to the overall trip. This review covers the basic loop during snow-free summer and autumn months, so snow shouldn’t be more of a factor than a few isolated patches up high. Seeing as there are multiple places where scrambling is required, a technical rating is also employed, which uses the Yosemite Decimal System to calculate the difficulty of the moves required.
Difficulty Ratings:
- Easy: less than 5 miles, less than 500 ft. of elevation gain
- Moderate: 5-10 miles, 500-2000 ft. of elevation gain
- Difficult: 5-15 miles, more than 2000 ft. of elevation gain
- Very Difficult: 10+ miles, more than 3,500 ft. of elevation gain
Technical Rating:
- Class 1: Established hiking trail the entire length of the adventure. Low chance for injury.
- Class 2: Typically involves cross-country navigation, possibly using hands for balance but not required, steeper than Class 1.
- Class 3: Hands and feet used to scale areas; must use hands to proceed (either for balance of to help pull you up a section), increased exposure, a fall could be fatal. Helmet recommended, along with grippy hikers.
- Class 4: Climbing on very steep terrain just shy of vertical, falls could be fatal, hands employed for grip and balance continuously, ropes advised but scalable without. Helmets are highly recommended, along with grippy hikers.
- Class 5-5.4: Vertical climbing that involves technical rock-climbing moves, exposed, falls likely to be serious or fatal, possible to scale without ropes but only for very experience veterans. Helmets, grippy hikers, and/or rock-climbing shoes necessary.
- Class 5.5 and up: Not covered as scrambling, full-on rock climbing with ropes, helmets, etc.

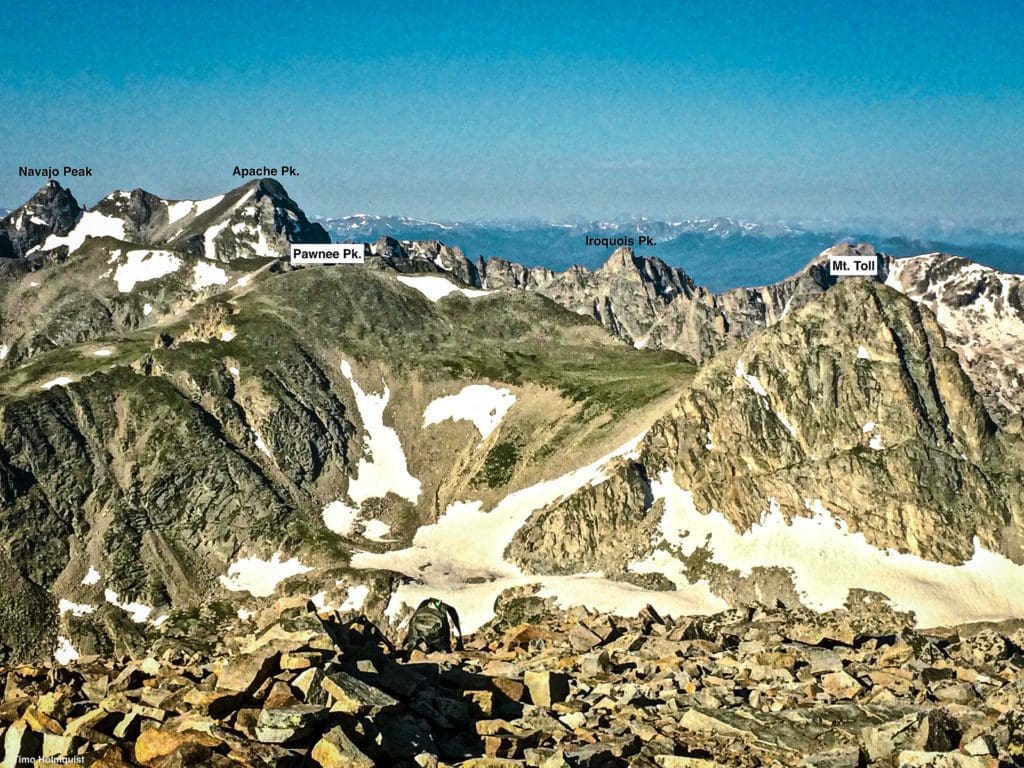
Mt. Toll and Paiute Pk. seen from the ridge between Pawnee and Little Pawnee Peaks.
The Ultimate Offline GPS Hiking & Ski Maps
See why onX Backcountry is the ultimate GPS navigation app for your outdoor pursuits. Try Today for Free. No credit card required.

Directions to Trailhead
This hike begins in the Brainard Recreation Area. From the east, you can take Boulder Canyon up to Nederland. At the first roundabout in town, take a right and head north on CO 72 (the Peak-to-Peak Highway). Near Ward, watch for signs signaling Brainard Recreation Area and take a left, climbing towards the Gateway Trailhead. You can also take Left Hand Canyon up to Ward, drive through town (slow down when signs indicate), and up to the Peak-to-Peak Highway. From that intersection, take a right (north) on the highway. Less than a minute later, take a left onto the Brainard Lake Road.
From the south, you can use Clear Creek Canyon or find the Peak-to-Peak highway after driving through Blackhawk. Once on it, drive north beyond Nederland and Ward, looking for the signs indicating when to turn left onto Brainard road. From the north, you can take Big Thompson Canyon to Estes Park and head south on the Peak-to-Peak, or head up CO7 from Lyons, take a left when signs point to Nederland (CO 72) and watch for the entrance on your right-hand side.
Once on Brainard Lake Road, continue driving until you see the entrance gates. You have to purchase a time slot for entry to get into the recreation area ahead of time on recreation.gov. In addition, you need a reservation to access the parking lot, also available online. The easiest way to get the system down is to buy an America the Beautiful Pass (~$80), which will give you year access to recreation areas and Rocky Mountain National Park, then buy the time slot online, and you’re good to go. If you enter the recreation area before the booths are staffed, you still need a reservation displayed on your dash, or you’ll be ticketed.
The reservation system is fairly new, a result of COVID, but really helps limit numbers to this fragile area. Seeing as it’s one of the most popular destinations around, a few months of unfettered tourism can decimate the local flora, so the system helps to spread out visitation. You can always park for free at Brainard Winter Gateway trailhead, but it adds an additional 5 miles to the overall hike.
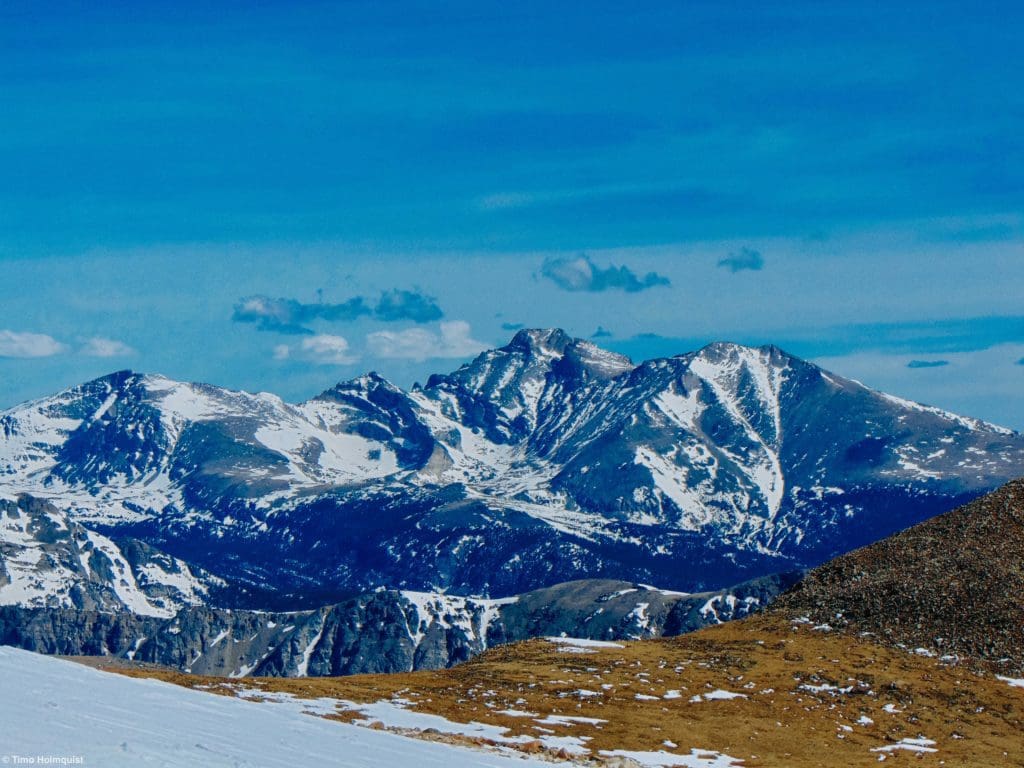
Longs Peak from the shoulder of Mt. Audubon.
The Ten Essentials: How to Equip Yourself for the Backcountry
Packing the “Ten Essentials” whenever you step into the backcountry, even on day hikes, is a good habit. When something goes awry, you’ll truly appreciate the value of carrying these items that could be essential to your survival.
Field Notes
Weather resources are important for any trip to the IPW; luckily, resources have been getting steadily better and more numerous. For starters, check the Brainard Recreation Area 7- day forecast. There are also specific mountain forecasts on Opensummit for Paiute Peak, Mount Toll, Pawnee Peak and Mt. Audubon. The full site access costs $30 a year, but it’s worth it for the wealth of mountain weather information. If you want to keep everything free, use mountain-forecast to check forecasts for Mt. Toll and Mt. Audubon. Pay special attention to temperature fluctuations, precipitation and the wind predictions; it can get pretty gusty up on the ridgelines. In the summer months, watch the skies for afternoon thunderstorms, they can be severe, and once you breach treeline, you’ll be exposed for multiple miles along the crest of the traverse.
This is also not a hike; it is a scramble. Paiute Peak requires a Class 3 scramble, the traverse around Toll is loose Class 2 with sections of 3, and Little Pawnee is solidly Class 3 with tougher options available. Make sure you’re comfortable with sustained scrambling on exposed ridges before committing to this adventure.
Global Rescue has expanded services to include local field rescue within 100 miles of home. Global Rescue is there whether you’re hiking, kayaking, snowmobiling, fishing or simply enjoying the outdoors and get ill or injured and you’re unable to get to safety on your own. Global Rescue is the red button you push in an emergency. Their team of medical and security experts come through for you when it matters most.
Journal
The best parking lot to start the hike is Mitchell Lake, you’ll end the loop at Long Lake Parking lot, but a 0.7-mile spur trail connects the two, enabling you to complete the hike. From the Mitchell Lake Parking Lot, head north for Mt. Audubon (13,230 ft.) on the Beaver Creek Trail.
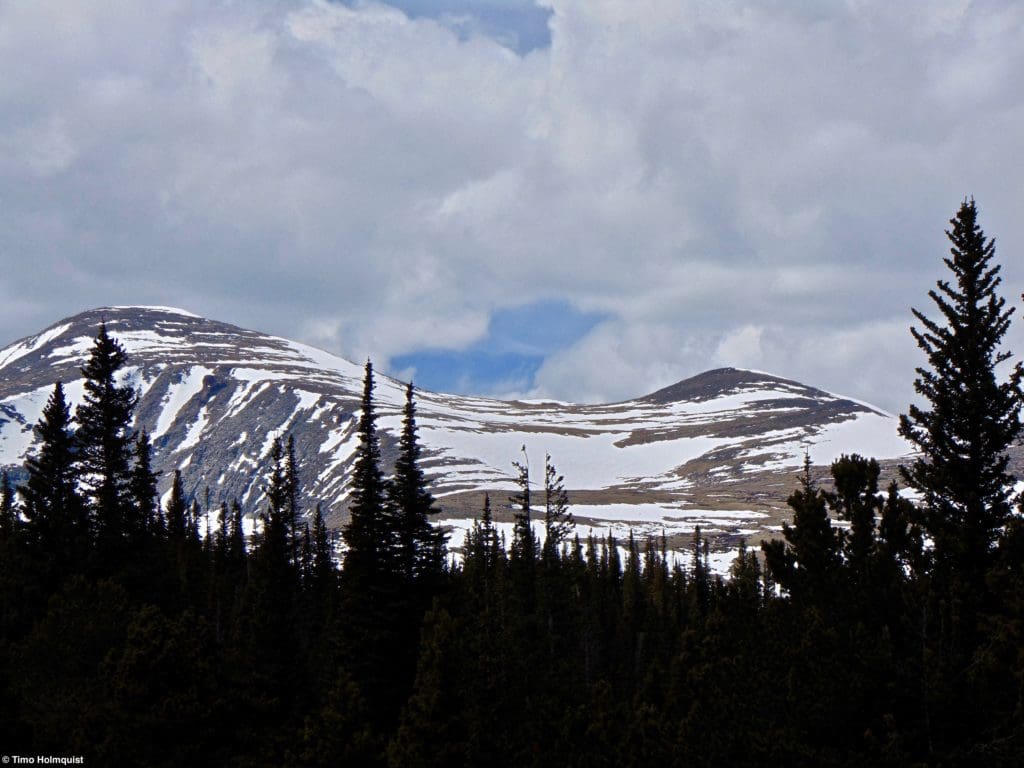
Mt. Audubon from near the Mitchell Lake Parking Area.
The trail starts off through thick woods and then threads up a steep side slope with a few talus fields. Once you ascend over the crest of the slope, the trail makes for treeline, breaching it within the first mile and a half, and by 1.7, you’ll reach a trail junction. Continuing straight will take you into the Coney Lake drainage; you want to take a left up to Audubon.
Views north to Longs Peak as you climb towards Audubon.
As you head higher, you’ll notice that the trail begins to thread toward a saddle between two high points on Audubon. Walk the path almost all the way to the ridge crest before turning left and eyeing a few sets of cairns strewn amongst the talus. This is the quickest way up Audubon. There’s no official trail to the summit of Audubon, but the route is fairly popular and easy to find without snow. Bound up to the highest rock and revel in your first (and highest) summit of the day.
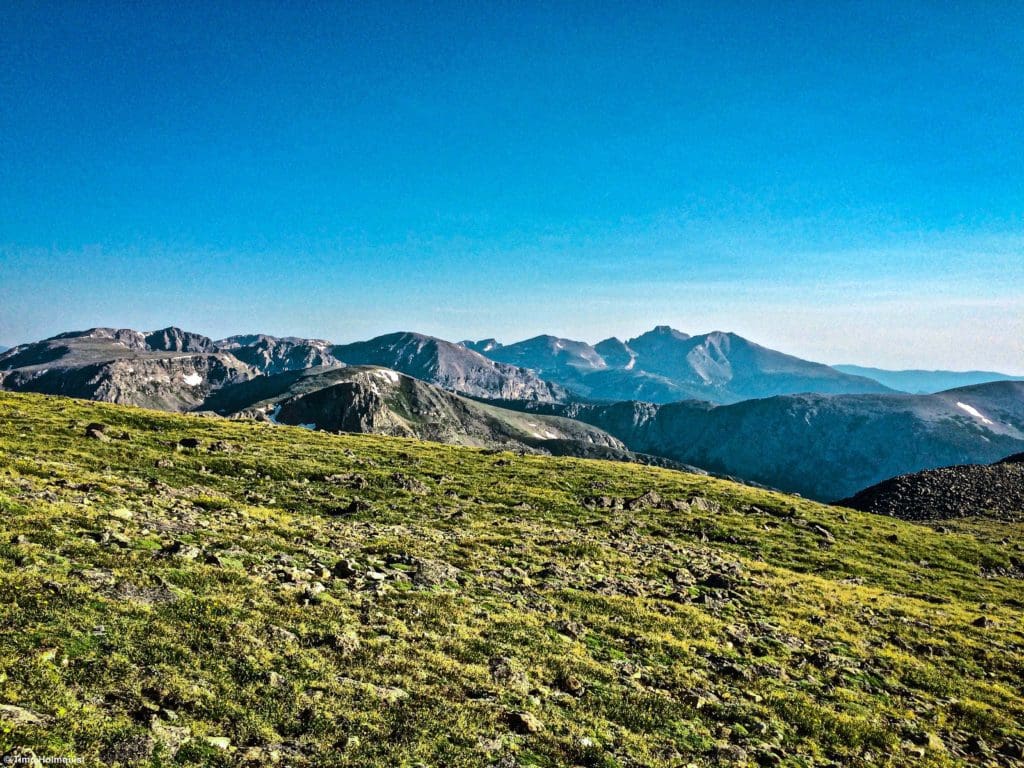
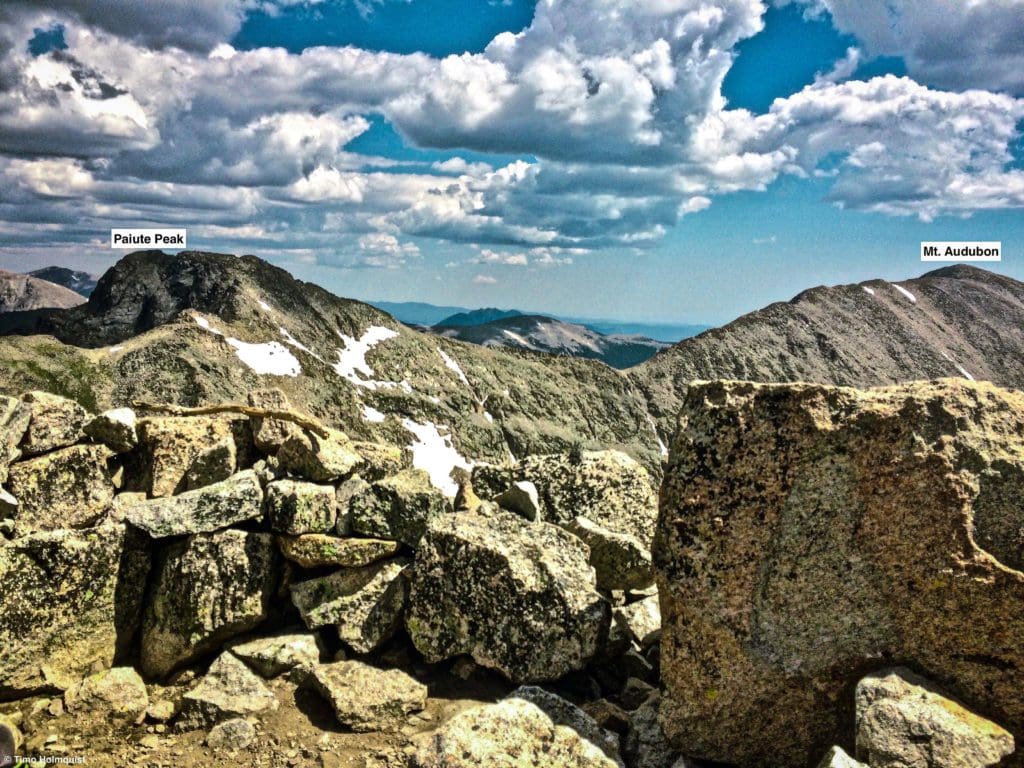
The view west from Audubon with summits marked.
From the top, you get a good sense of how the rest of the route will unfold. To the left is the Blue Lake Basin and the mountains that ring it are on your route. Take a break before heading down the ridge connecting Audubon with the slightly shorter but harder Paiute Peak (13,088 ft.).
The ridge to Paiute Pk.
The route to the saddle between the two is Class 2, meaning talus hopping without an official trail. Watch your footfalls to prevent rolled ankles, and take your time. Once you start heading up, the difficulties slowly increase but stay within the Class 2 range. Near the first summit, you have some options for Class 3 scrambling on stable rock. There are a few ways to avoid the Class 3 sections, but they make for a loose and uncomfortable traverse; it’s much quicker to find a good seam and work your way to the first summit.
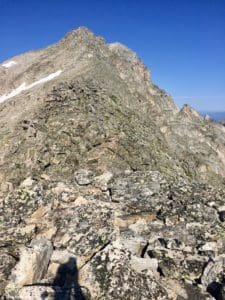
Looking up Paiute from the low point on the ridge.
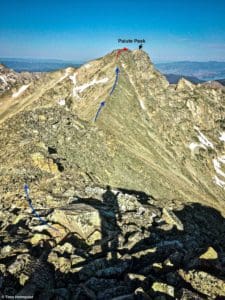
Once you clamber up to the top of the first summit, you’ll realize there is another summit further to the north and west. The distance between the two isn’t long, but the farther summit is the true top of Paiute. Employ a few more Class 3 moves to get over to it and touch the top.
From just below Paitue’s true summit, looking back at the scramble you need to take to get there.
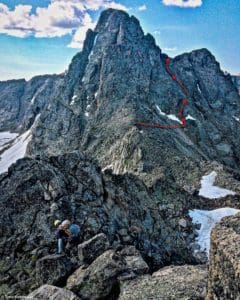
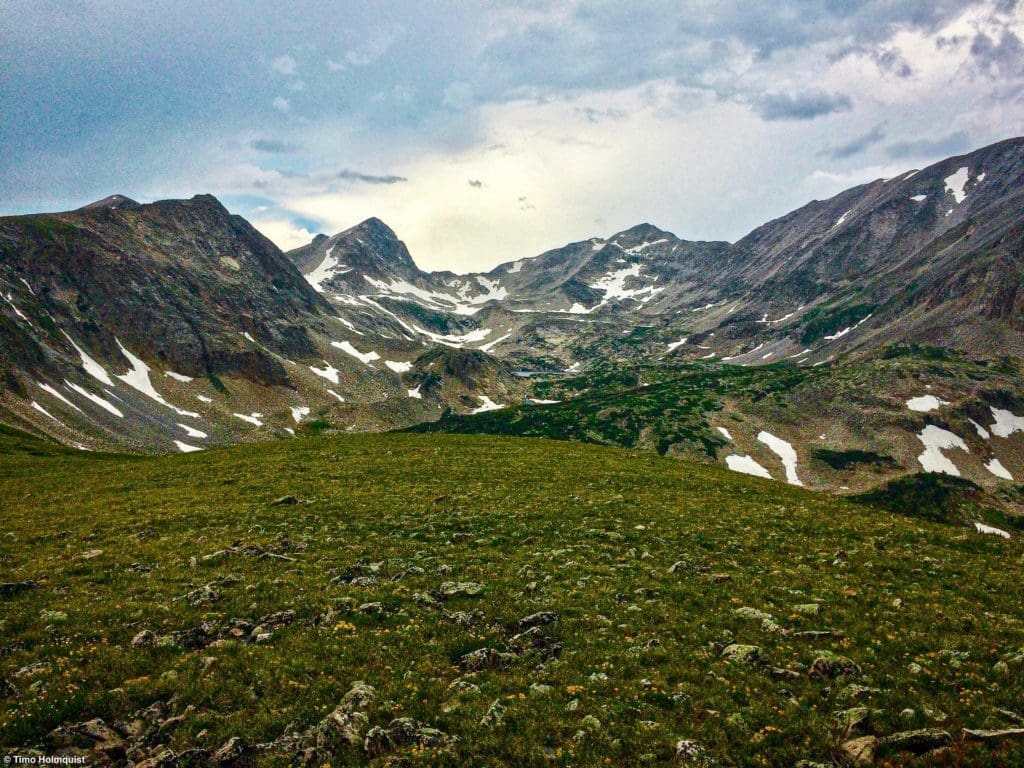
Although the scramble to get to the true summit block is decidedly Class 3, the actual summit has plenty of room to sit and stare. Once you’ve had your fill, scramble back across the gap to the first summit area and follow Paiutes southern ridge along the head of Blue Lake Basin. As you descend, the intimidating shape of Mt. Toll (12,979 ft.) steals the horizon.
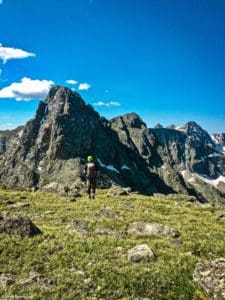
From a gentler section of Paiute’s southern slopes. Mt. Toll is dead ahead.
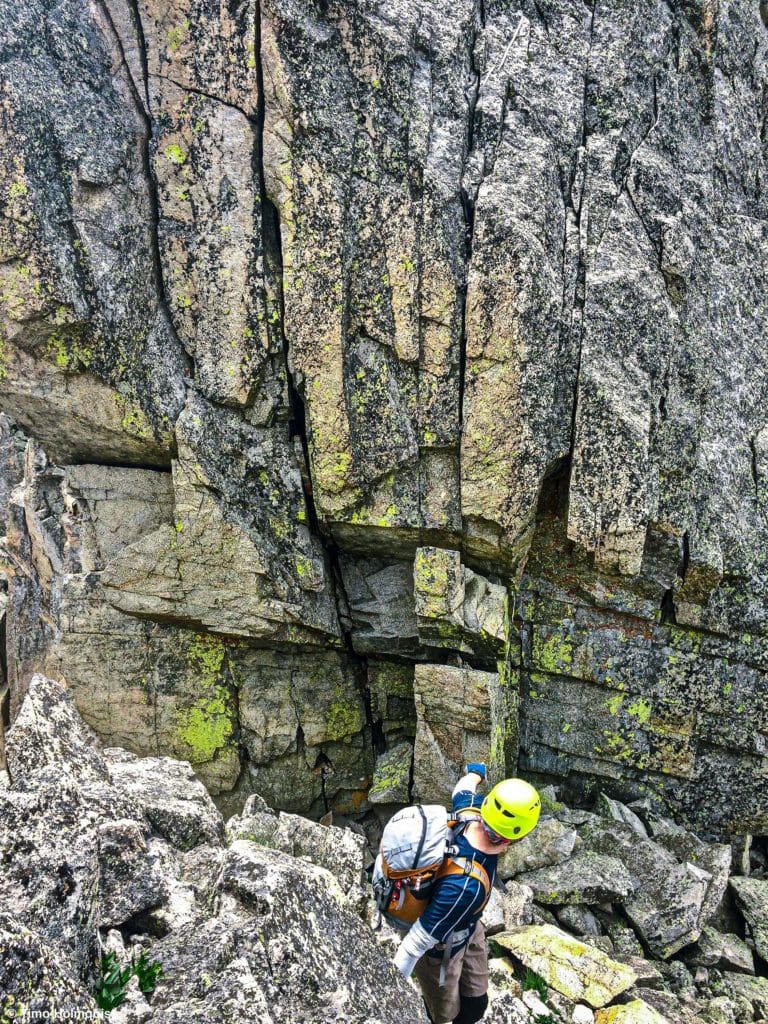
Viewed from this angle, Toll is a formidable mountain and to climb the north slope directly requires several Class 5 moves among hair raising exposure. There is a workaround, but it still involves a few short Class 3 sections, traversing, and ultimately climbing a loose gully. Do your best to find the most solid footing; it really helps if you slow down, and analyze your route every few dozen feet; nothing is gained by rushing, slipping and ending up in a basin on the opposite side of the mountains from where you started. If you take the traverse, there are cairns leading you around, but they are not always easy to see.
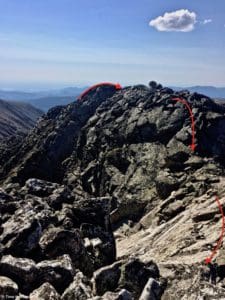
Keep in mind, as well, that the saddle between Paiute and Toll also requires some more Class 3 scrambling to get into. The initial slopes off Paiutes summit area may lull you into complacency, but once you get down lower, the grass disappears, and it’s a rock fest no matter what path you choose.
Getting towards the saddle with the approximate workaround drawn in
If you go for Toll’s North Face, there are some great trip reports online to consider, but I’d recommend this one to get you started because the pictures have labels and the discussion in the comments sheds more light on the route itself. Once you’re up there, though, best to have a regional rock-climbing guide, or you’re on your own.
For the rest of us mortals, once you carefully make your way around the north face and clamber up the slot between Toll and a smaller sub-summit, the climbing rapidly falls back into Class 2 range. Once on the ridge, double back and scamper up to the summit to tag your third peak on the day.
The summit windscreen looking north to Paiute and Audubon.
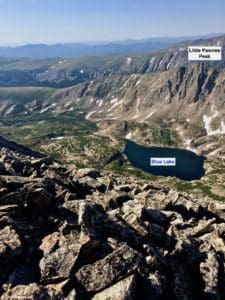
Mentally, you can think of Toll as the farthest point from the start of the trail and at the head of Blue Lake Basin, which spreads out below you to the east. You can also get a good look south to the relatively easy Class 2 down and up to Pawnee Peak (12,943 ft.).
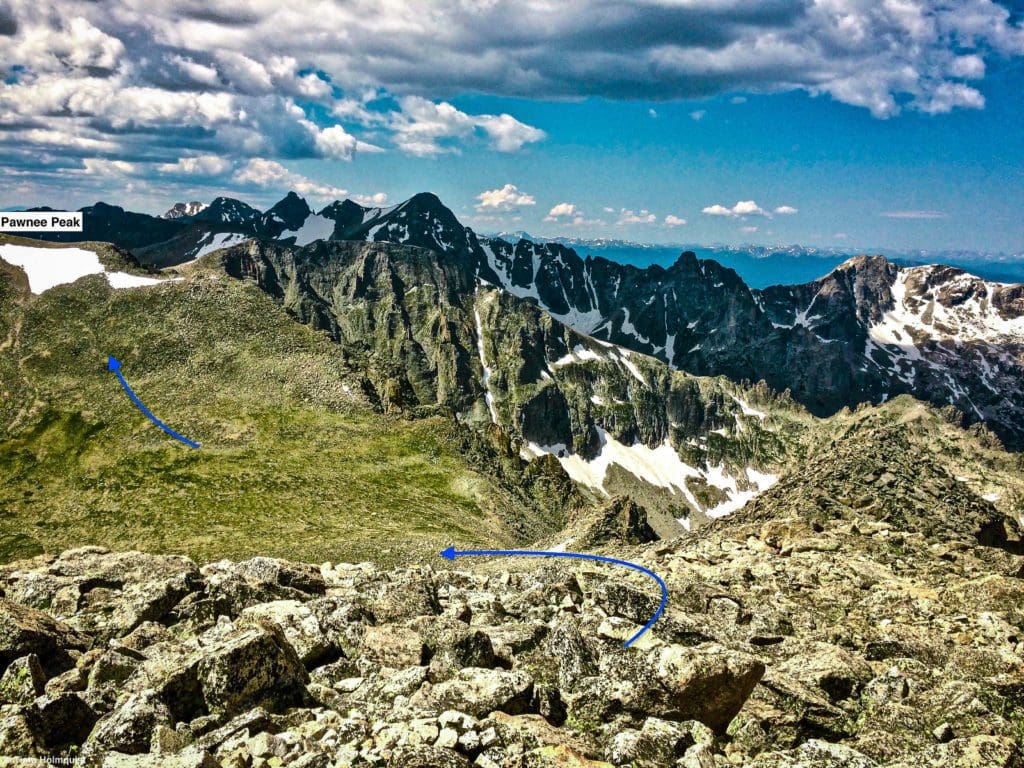
Looking south from Toll to Pawnee.
At this point, especially after all the scrambling, you may start to feel the strain of the journey. And while the route to Pawnee is straightforward and not technical, the large gap between Toll and Pawnee can zap your strength. Take breathing breaks often and slow the pace down until you’re standing atop your fourth mountain of the day.

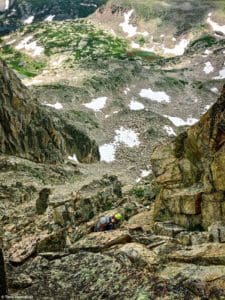
From Pawnee Pk., looking back at what you’ve already accomplished. The small red arrow indicates where the Toll workaround emerges.
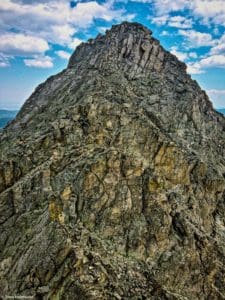
From Pawnee, you’ll take a sharp east and follow the ridge as it gradually narrows. Once you get beyond the summit area, strap in for the last and longest section of Class 3, with some Class 4 options thrown in. Although Little Pawnee is the smallest of the summits you’ll encounter today (12,466 ft.), it’s one of the hardest and is a solid Class 3 adventure no matter which way you tackle it.
Where the easy stuff ends.
If you stay along the crest, you’ll encounter a steep Class 4 downclimb to a 12-foot notch that is passable by rope but not downclimbing unless you can downclimb an undercut Class 5 feature without falling. The best method is to see when the easy ridge from Pawnee begins to harden, take a left (north), and descend 200 feet to around 12,400 before finding a traversable line back east. This keeps the difficulty at occasional Class 3 without feeling like you’re dangling off the edge of the world.
The drop off that I didn’t downclimb.
Once you’ve passed that difficulty, get ready for some route finding and a sharp set of ridge points to either climb over or traverse around.
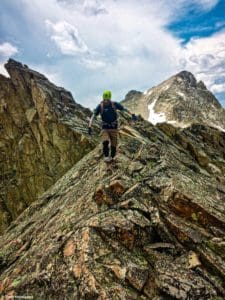
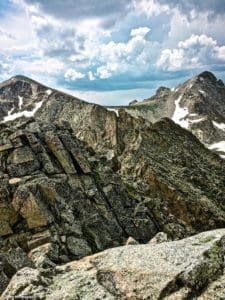
On the ridge crest with Toll in the background.
Be prepared to climb over, under and around numerous rock features along the ridge crest. This is a fun and decidedly rocky section that bumps the whole adventure back into the mountaineering category.
Working with some bypasses below the ridge crest to avoid steeper climbing.
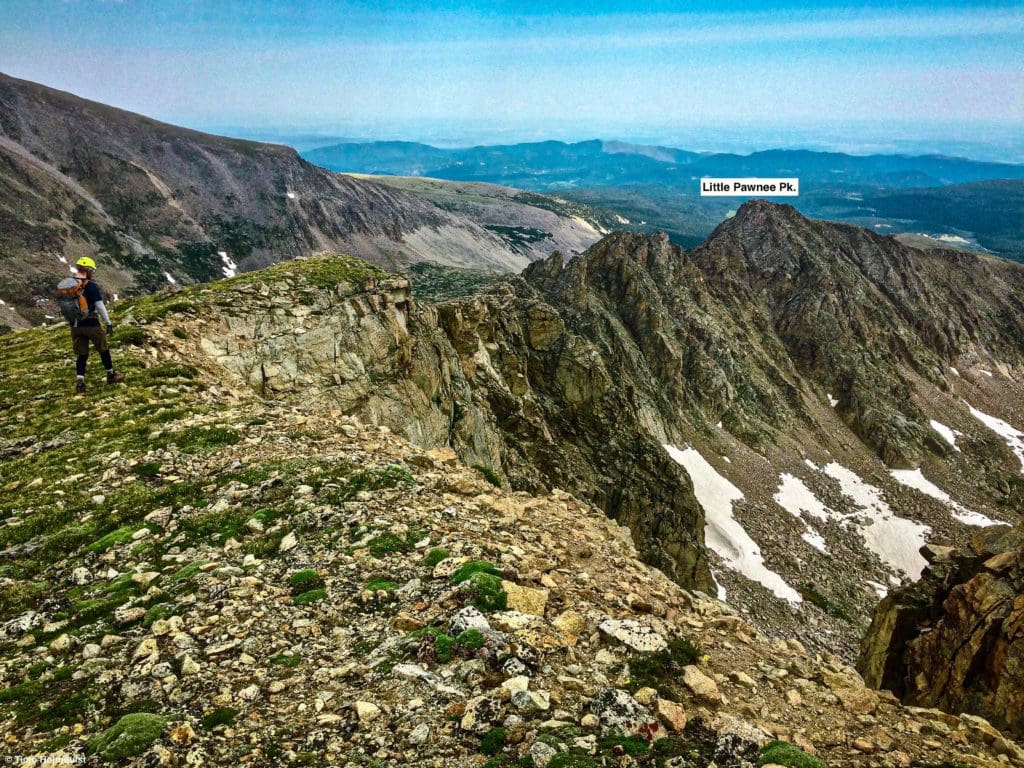
Eventually, you’ll see a ridge point higher than the last few, and a brief scramble will lead you to the top of Little Pawnee Peak. There are a few ways to get to the high point, including a few workaround options. I opted to scramble up the slabs on the ridge crest, which, depending on individual route choice, can get you a few individual Class 4 moves. Choose your own adventure, but there will be scrambling involved no matter what route you decide on, so operate within your abilities.
Little Pawnee from the west.
Similar to Niwot Ridge near Navajo Peak, Little Pawnee, despite its lower profile, exacts a price for admittance, especially on the back of all you’ve climbed so far.
Looking back at the ridge with Pawnee Pk. (left) and Toll (right) on the horizon.
There are still a few Class 3 moments on the other side of Little Pawnee’s summit, but once you finally get off the rocks, the ridgeline mellows out, and the tundra takes over.
Little Pawnee from the west.
The last part of the adventure before you rejoin maintained trails is to find a way to descend off the end of the ridge. I picked a grass saddle and descended south into the Long Lake area. There also looked to be a way to descend to Mitchell Lake, but it is a route hemmed in by stepper and looser slopes, make sure you scout it appropriately before committing. Hidden cliffs would be most unpleasant to get stuck on.
Looking back at Blue Lake Basin with Little Pawnee on the left, Pawnee Pk. poking out behind it, Toll, Paiute, and the bulk of Audubon on the right margin.
From the position of the picture above, I took a left (right if you’re facing east), and descended down a steep grass slope to the trees above Long Lake. This descent is not easy, and while there are many ways to do it, it helps to create some personal switchbacks so you don’t slip on the tundra grasses and roll down the hillside.

Storm clouds over Niwot Ridge and Navajo Peak, which should be visible to your right as you descend to the trees.
Once you make it to the trees, continue on a southern trajectory, crossing a stream on the way before running into the wide and well-maintained Long Lake Trail. From this intersection, take a left and make it back to the Long Lake Trailhead. If you parked here, your journey is over. If you parked at Mitchell Lake, like this review suggests, head to the northern edge of the parking lot (left from the end of the Long Lake Trail). There, you should find a spur trail heading east; take it. 0.4 miles later, it will cross a road before intersecting with another trail. Take a left on this new trail, and it will run you back to the Mitchell Lake Parking area and the end of a fantastic scramble in the Indian Peaks Wilderness. Alternatively, follow the road from Long Lake Trailhead back to a three-way intersection and take a left for Mitchell Lake Parking area.
Alternatives
There aren’t many ways to shorten the scramble once you’re on the ridgeline, but you can make Paiute and Audubon an out and back hike. You can also descend south on Pawnee Peak to the Pawnee Pass Trail and take that back to Long Lake Trailhead to avoid scrambling over Little Pawnee, this won’t save you much on distance, but you avoid the most concentrated area of scrambling.
Terms of Use:
As with each guide published on SKYBLUEOVERLAND.com, should you choose to this route, do so at your own risk. Prior to setting out check current local weather, conditions, and land/road closures. While taking a trail, obey all public and private land use restrictions and rules, carry proper safety and navigational equipment, and of course, follow the #leavenotrace guidelines. The information found herein is simply a planning resource to be used as a point of inspiration in conjunction with your own due-diligence. In spite of the fact that this route, associated GPS track (GPX and maps), and all route guidelines were prepared under diligent research by the specified contributor and/or contributors, the accuracy of such and judgement of the author is not guaranteed. SKYBLUE OVERLAND LLC, its partners, associates, and contributors are in no way liable for personal injury, damage to personal property, or any other such situation that might happen to individuals following this route.


