


|
Getting your Trinity Audio player ready...
|
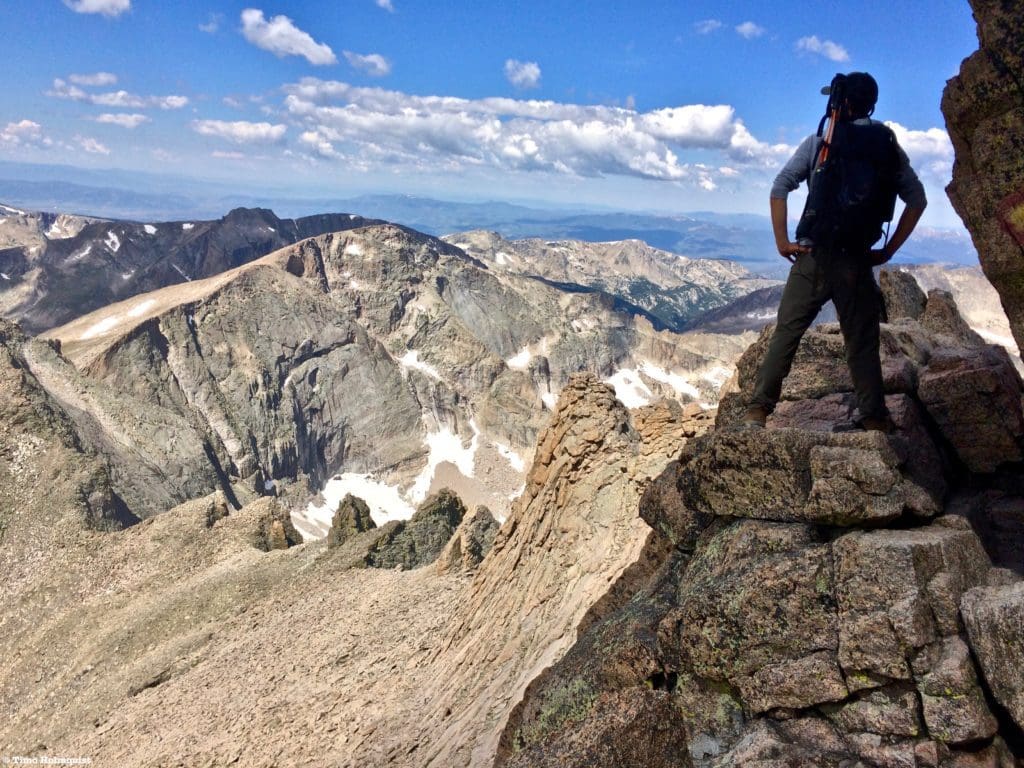
Scrambling is a general term to describe the gray area between hiking and rock climbing. In this article, we’ll review the 10 Best Alpine Scrambles in Rocky Mountain National Park, Colorado. From three introductory scrambles like to three intermediate scrambles then we finish with four pretty intense scrambles.
Overview
Rocky Mountain National Park is known for many things: crystal clear alpine lakes, stunning summits, vibrant forests, ample wildlife, and some of the best scrambling routes in all of Colorado. This quarter million-acre slice of protected land is a mecca for all things mountain and just begging to be explored. Armed with this list-driven resource, any aspiring adventurer should have the information they need to give Rocky Mountain scrambling a try. If clambering along serrated ridges in exquisite terrain sounds intriguing, read on.
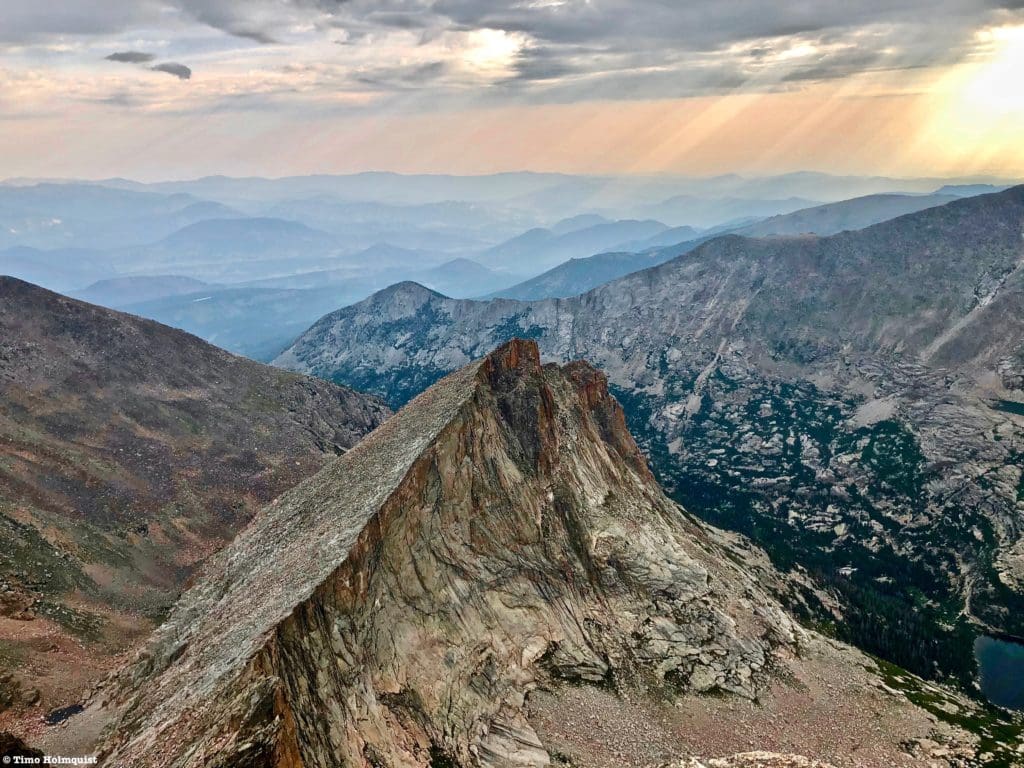
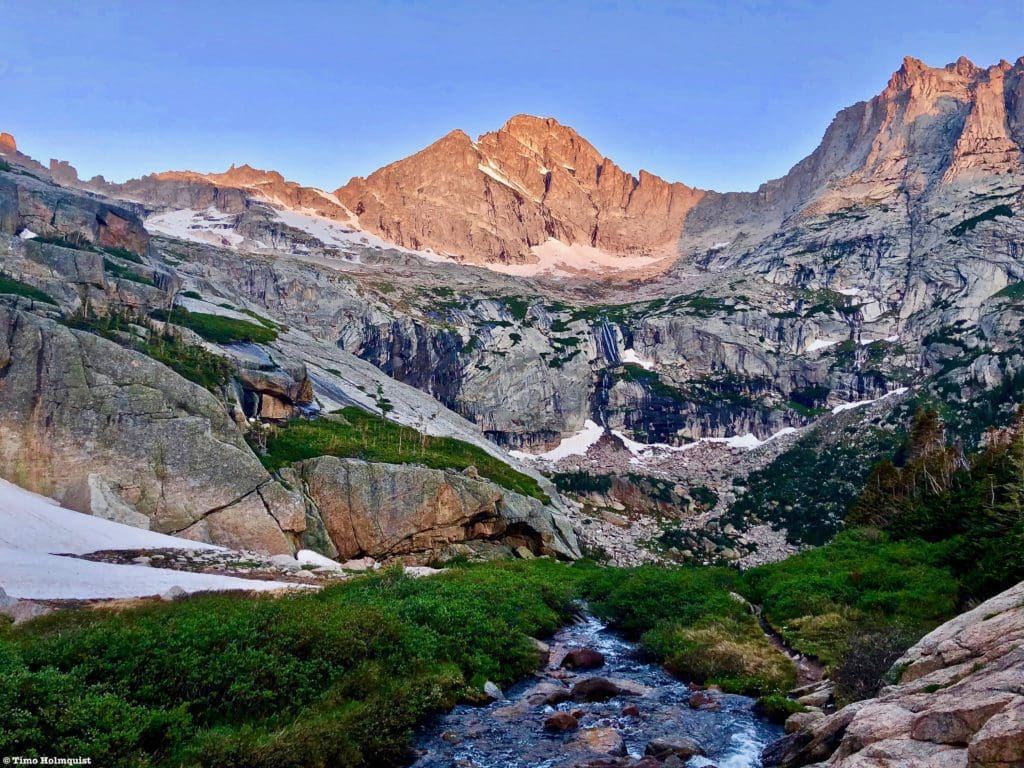
Mt. Alice and the spine of the continent from the slopes of McHenrys Peak.
Looking For An Amazing Adventure? Book A Hiking, Climbing or Backcountry Skiing Tour in Rocky Mountain National Park
Table of Contents
- What is Scrambling? And why would anyone want to do it?
- Scales and Criteria
- Field Notes
- Introductory Scrambles
- Alice via the Hourglass Ridge
- Longs Peak via the Keyhole Route
- Tanima Peak and the Cleaver
- Intermediate Scrambles
- Little Matterhorn
- GLR (Gorge Lakes Rim) Scramble
- McHenrys Peak via Stoneman Pass
- Intense Scrambles
- The Desolation Peaks
- Spearhead via the Northeast Ramps
- Lead Mt. via the East Ridge
- Horsetooth Peak via Bronco Ridge
- Final Thoughts
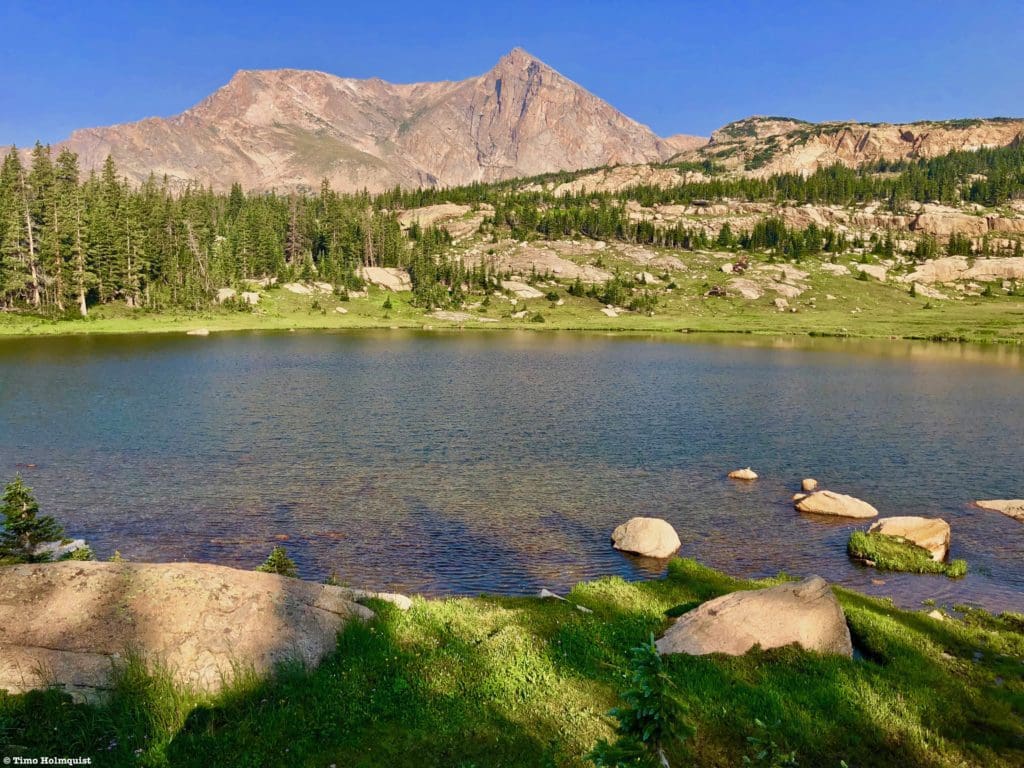
Lead Mountain and “Never Summer” Mountain from Hitchens Gulch.
Find a Hotel near Rocky Mountain National Park, Colorado.
Support Skyblue Overland by booking your hotel or cabin through one of our links.


What is scrambling? And why would anyone want to do it?
Scrambling is a general term to describe the gray area between hiking and rock climbing. The hallmarks of scrambling involve off-trail ascents, traversing rocky and exposed terrain, and employing a series of low-level rock climbing moves to get through various route sections. The attractive component of scrambling is that it’s an adrenaline shock without the rock-climbing gear. You, of course, can bring ropes with you on any scramble, but many can be done without, so it gives you a “toeing the line” sort of feeling. It’s also a type of recreation that has you hunting for things like exposed ridgelines and rock quality, as opposed to a specific overlook or lake. For the list below, I strove to include scrambles that get the heart pumping but involve stretches of superb and stable rock. That is not a guarantee that every move is solid, and any good mountaineer, scrambler, or rock climber knows to double and triple check every hand and foothold before setting their body weight on it.

The final scramble to Spearheads summit.
Now that we’ve covered what scrambling is, the next question is usually why would anyone want to do it? Well, for starters, it’s a beautiful, challenging, and different way to experience the mountains. Scrambling is also required to complete uber-popular challenges like ascending all of Colorado’s 14,000-foot mountains. As a skill, it blows the door open on experiencing some of the more interesting and hidden peaks in the state. Most people can hike a trail, but far fewer can stomach the idea of exposed scrambling. The physical and mental components are huge attractions to me personally. When your limbs are working in synch to accomplish a complex scramble, there’s an incredible feeling of independence and body freedom. Scrambling also forces your brain to acknowledge complicated situations and develop unique and often fascinating solutions to them. The combination of physical exertion, body freedom, and intellectual stimulation elevates the discipline above and beyond what you would get from an average hike.
Bronco Ridge on Horsetooth Peak.
Scales and Criteria
This article utilizes two separate rating systems: Difficulty (comprised of distance and overall elevation gain) and a Technical Rating indicating the hardest move or set of moves encountered. The technical rating employs the Yosemite Decimal System. The scrambles are divided into three sections which correspond to the scrambling portion, NOT the overall length or elevation gain of the entire adventure. The Difficulty Rating and Technical Rating are the first stats present for every selection, so that information should be easy to find for prospective scramblers.
Difficulty Ratings:
- Easy: less than 5 miles, less than 500 ft. of elevation gain
- Moderate: 5-10 miles, 500-2000 ft of elevation gain
- Hard: 5-15 miles, more than 2000 ft. of elevation gain
- Very Hard: 10+ miles, more than 3,500 ft. of elevation gain
Technical Rating:
- Class 1: Established hiking trail the entire length of the adventure. Low chance for injury.
- Class 2: Typically involves cross-country navigation, possibly using hands for balance but not required, steeper than Class 1.
- Class 3: Hands and feet used to scale areas, must use hands to proceed (either for balance or to help pull you up a section), increased exposure, a fall could be fatal. Helmet recommended, along with grippy hikers.
- Class 4: Climbing on very steep terrain just shy of vertical, falls could be fatal, hands employed for grip and balance continuously, ropes advisable but scalable without. Helmets are highly recommended, along with grippy hikers.
- Class 5-5.4: Vertical climbing that involves technical rock-climbing moves, exposed, falls likely to be serious or fatal, possible to scale without ropes but only for very experienced veterans. Helmets, grippy hikers, and/or rock-climbing shoes necessary.
- Class 5.5 and up: Not covered as scrambling, full-on rock climbing with ropes, helmets, etc.
The YDS system is widely used in North America but can be quite subjective, so it is not perfect. The biggest differences I’ve encountered between Class 3 and Class 4 sections have to do with slope angle, exposure, and putting weight and pressure on hand grips (4) instead of using hands and feet interchangeably as supporting points of contact (3). It is not possible to climb a Class 4 section without using your hands to pull up some or all of your body weight. Typically, a Class 4 section will also require some type of rock-climbing move, like stemming, where hands or feet are pressed in opposition as if climbing the inside of a chimney. If downclimbing, a key difference is that most people will descend a Class 4 section facing inward, i.e., your back faces the exposure.
Descending the Class 3 ridge on Cracktop, a part of the GLR scramble.
Field Notes
When recreating in Rocky Mountain National Park, an understanding of the various fees and passes is crucial. Before COVID, you needed an entrance pass to get into the park, that requirement is still there, but in addition, a timed entry system has been put into place. In short, without an entrance pass, you cannot get into the park. Everyone needs an entrance pass.
If you have an entrance pass but no timed entry, you cannot get into the park during normal operating hours. However, if you are an early riser or going for an alpine start, you can get into Bear Lake Road without a timed entry pass before 5 AM or any other part of the park before 9 AM. That doesn’t mean parking areas will be open; it just means you won’t get a ticket for entering early. Anyone arriving without an entrance pass will get ticketed regardless of what time of day it is. The timed entry system ends at 6 PM for Bear Lake Road and 3 PM for the rest of the park, which means you can also get into Bear Lake without a timed entry pass after 6 PM and the rest of the park after 3 PM. The biggest downside to a later entry is limited daylight and no guarantees of finding parking spots.
Springing for the timed entry pass means you can get into the popular parts of the park within a two-hour window specified by your timed entry pass. Once you’re in, you can stay for as long as you want. If you leave the park, you’ll need another timed entry pass to return.
Whittled down to its core; the 2-part system looks like this:
- Everyone needs an Entrance Pass, no entrance pass, no entry.
- If you are entering Bear Lake Road between 5 AM-6 PM, you also need a timed entry pass.
- If you are entering anywhere else in the park between 9 AM-3 PM, you also need a timed entry pass.
- If you have an entrance pass but NO timed entry pass, you have to be beyond the Bear Lake Road booth by 5 AM or enter other areas of the park before 9 AM. If you arrive after that, you’ll get a ticket or be turned around.
- For later folks, if you have an entrance pass and NO timed entry, you have to arrive AFTER 3 PM or after 6 PM for Bear Lake Road.
The system has been in place to prevent overcrowding and limit human interaction during a pandemic. According to the park website, the timed entry system will end seasonally after October 11. The National Park has been a bit mum on whether or not the system will continue for the summer of 2022, but this article will be updated as that information becomes available. Click here for all the details, including information on how to obtain passes.
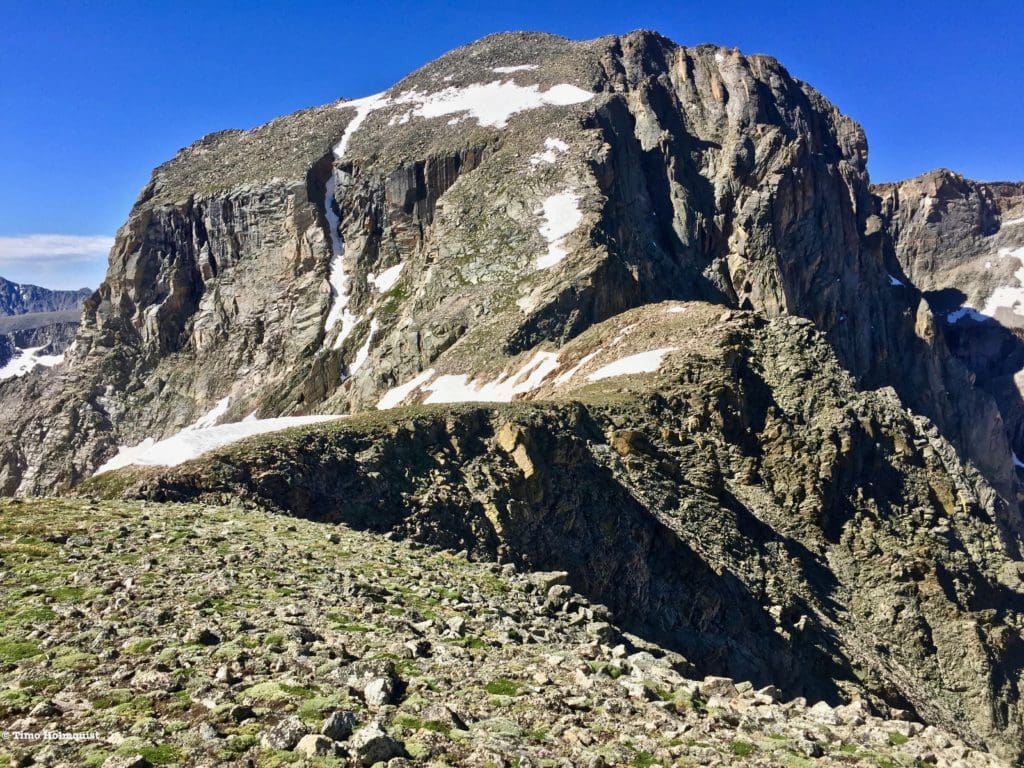
The views of Arrowhead from McHenrys Peak are some of the best in the park.
As you’re navigating the entrance system, it’s also important to check weather forecasts. Each numbered scramble below has a link to a full trail review with multiple weather forecasts. Some general forecasts are also listed below for ease of access. Do not go into the backcountry without an accurate assessment of the weather; you do not want to get caught in an alpine thunderstorm with nothing to hide behind.
- Trail Ridge Forecast
- Estes Park Weather
- Grand Lake Weather
- Longs Peak Weather
- Alice Weather
- Allenspark Weather
- Ypsilon Weather
Another component to consider is altitude. The highest scramble in this article will have you ascending over 14,000 feet. It is imperative that you understand the signs and symptoms of altitude sickness and what to do about it. The alpine is a dangerous environment, and many of these scrambles have a higher risk rating than most trails in the state. Make sure you understand what will be demanded of your body before committing. Recreating in the outdoors always comes with risk.
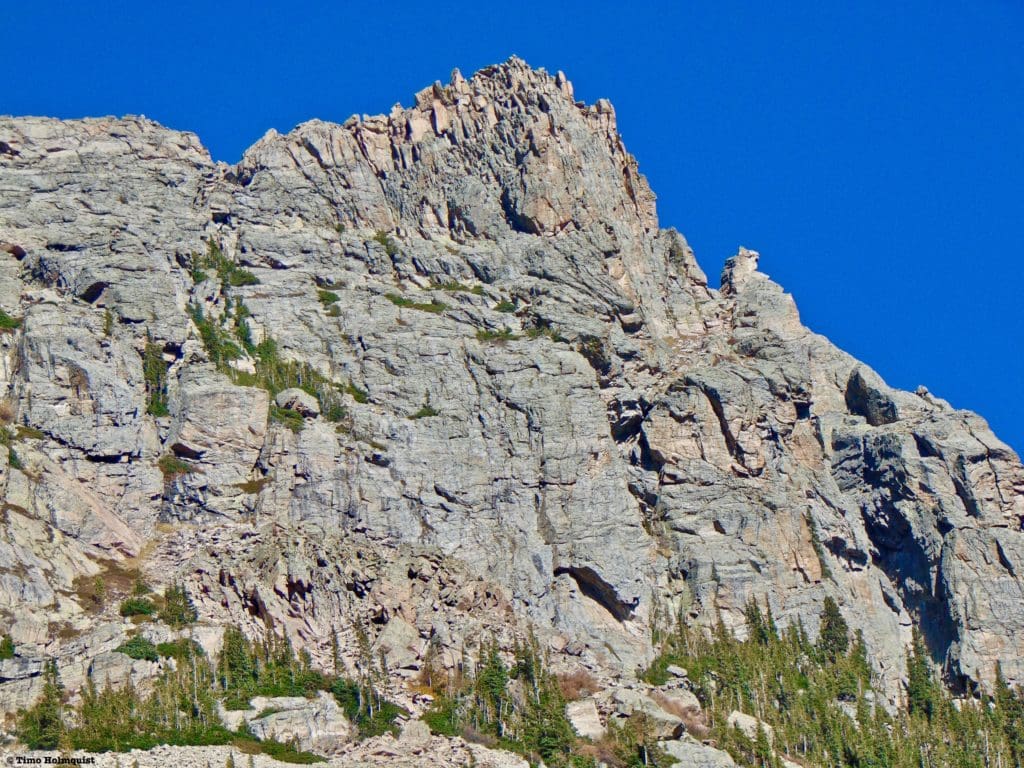
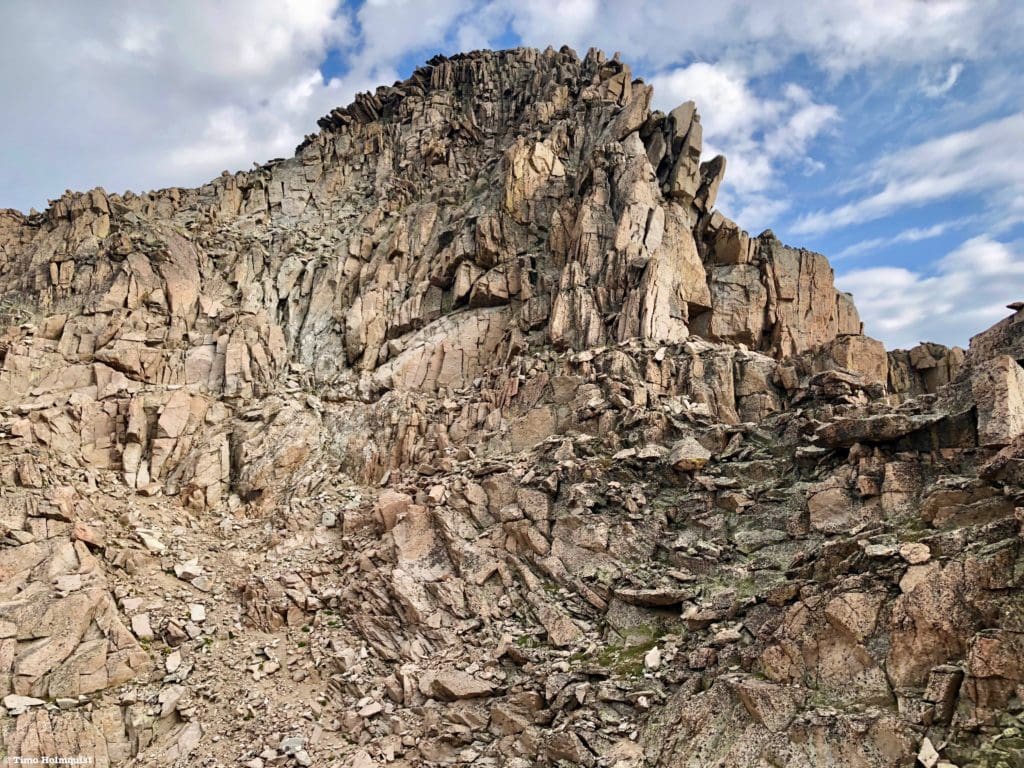
The summit cliffs of Little Matterhorn.
Introduction Level:
These scrambles are enough to get the blood pumping but look worse than they really are. The distances, however, are nothing to scoff at; come prepared for a lot of hiking on top of the scrambling sections.
Hourglass Ridge on Mt. Alice.
No. 1: Alice via the Hourglass Ridge
-
- Difficulty: Very Hard
- Overall Distance: 17 miles
- Elevation Gain: ~4,810 ft.
- Scramble Rating:
- Standard Hourglass route: 2+
- Hourglass Right: 3
- Description: Despite the massive mileage you need to put into this loop, Mt. Alice is my pick for the best intro to scrambling in Rocky Mountain National Park. It’s also just a stellar route with jaw-dropping, national-park-worthy views. Along the way, you pass five alpine lakes, stroll on the Continental Divide and get to tackle the Hourglass Ridge. The ridge is way less intimidating than it first appears (a great case study of how different perspectives can warp the appearance of a particular route) and can be managed at a Class 2+ by sticking to the central portion of the ridge. The best and most solid rock is located on the bottom right side of the ridge and makes for some fun mid-Class 3 scrambling before both routes combine higher up. For the full loop and description, click here. To complete the loop, hike north from the summit to Boulder-Grand Pass and descend back down to Thunder Lake. From there, follow the main trail down.
- Difficulty: Very Hard
Mt. Alice from the shores of Lion Lake #1.
No. 2: Longs Peak via the Keyhole Route
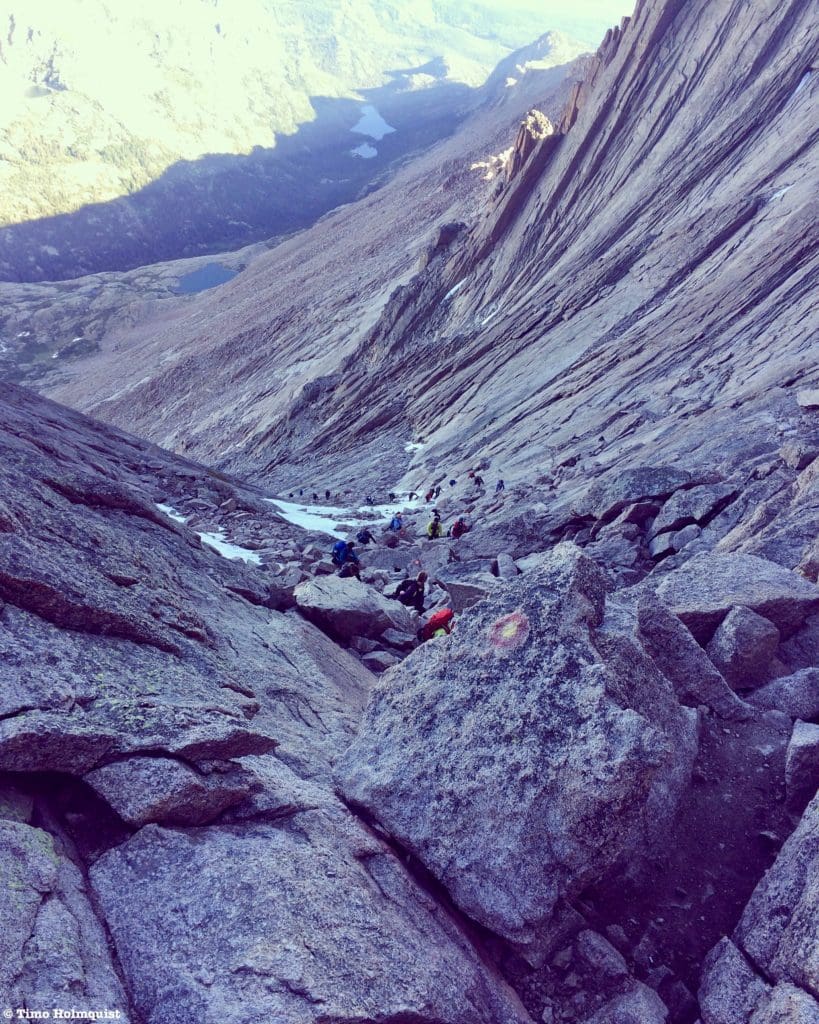
Looking down the crowded trough section of the Keyhole Route.
-
- Difficulty: Very Hard
- Overall Distance: ~14 miles.
- Elevation Gain: ~5,125 ft.
- Scramble Rating:
- Keyhole Route: Class 3
- Description: The Keyhole route is arguably the most well-known route in the National Park, but this description comes with a warning: Longs Peak is deadly, with more than 70 recorded fatalities on its slopes. The scrambling is not nearly as difficult as some other entries in this article, but if you’re new to hiking, Longs Peak is not the first peak you should try. Scrambling sections include The Keyhole, The Ledges, The Trough, The Narrows, and The Homestretch. Taken together, they make for a superb scramble; however, The Trough and Homestretch are mega chokepoints on crowded days, and if the easiest lines are blocked, you may be forced to wait or climb up a much tougher section than originally planned. Avoid weekends like the plague, check out this NPS brochure to make sure you’re ready, and start very, very early. The popularity aside, Longs Peak is one of the best mountains in Colorado and contains at least two more suitable scrambling routes to the top (The Loft and Keyboard of the Winds), but they all combine near the top so trying to avoid people on this mountain is probably a lost cause unless you’re climbing it in the dead of winter.
- Difficulty: Very Hard
The ledges section on the Keyhole Route.
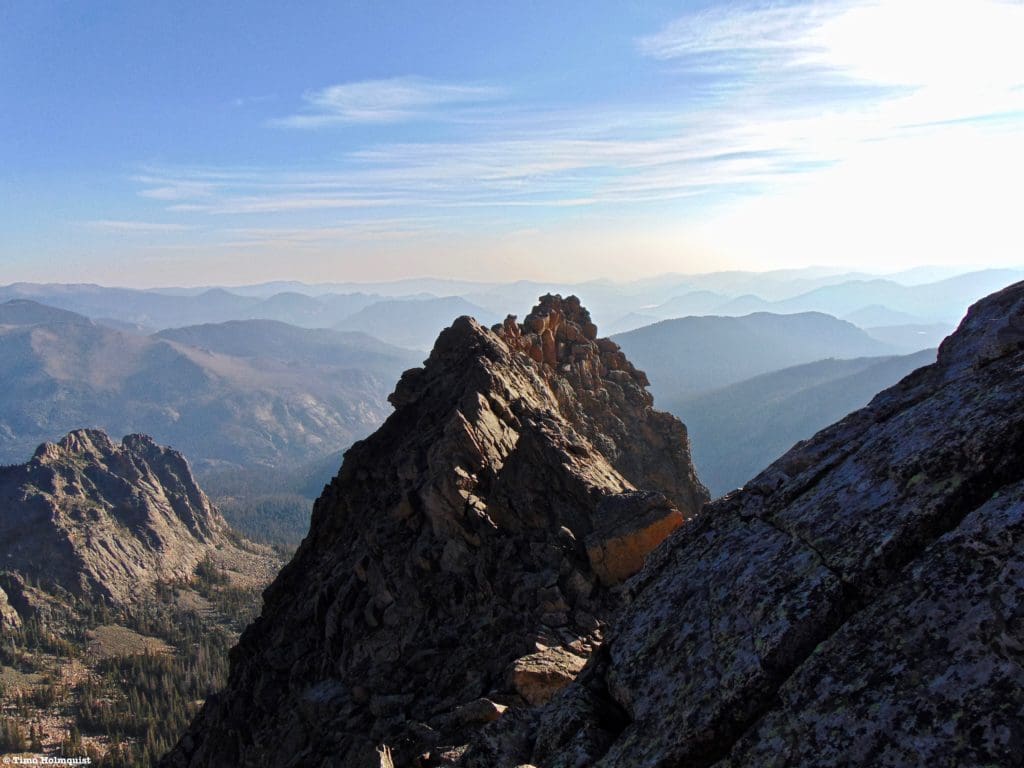
No. 3: Tanima Peak & The Cleaver
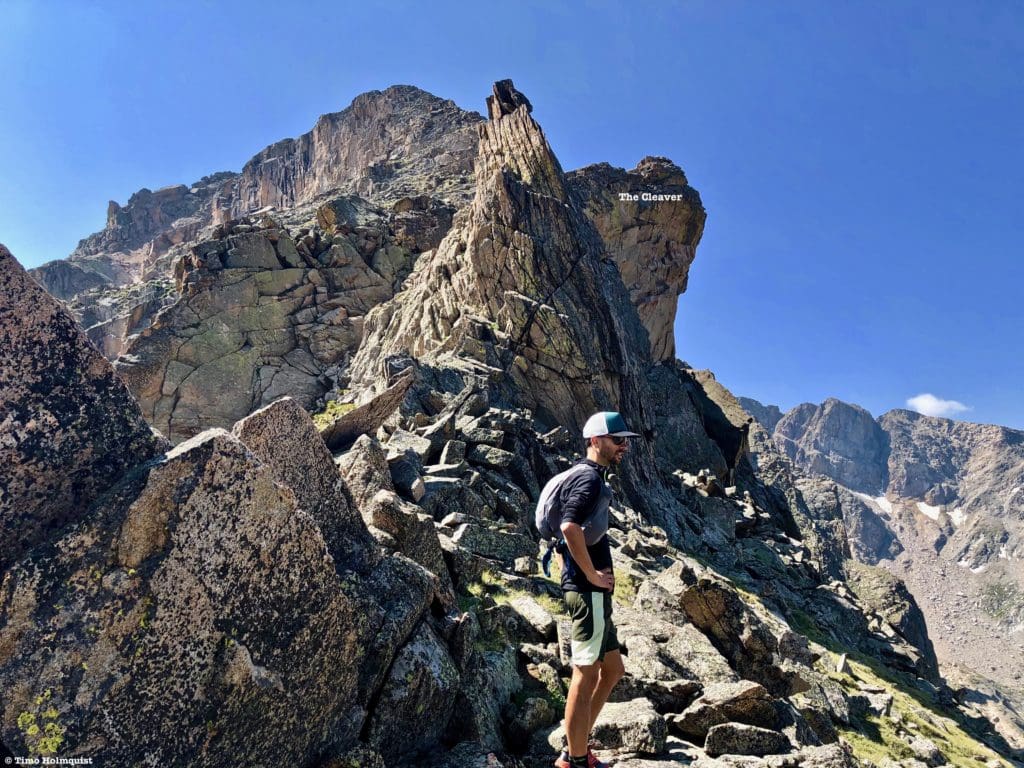
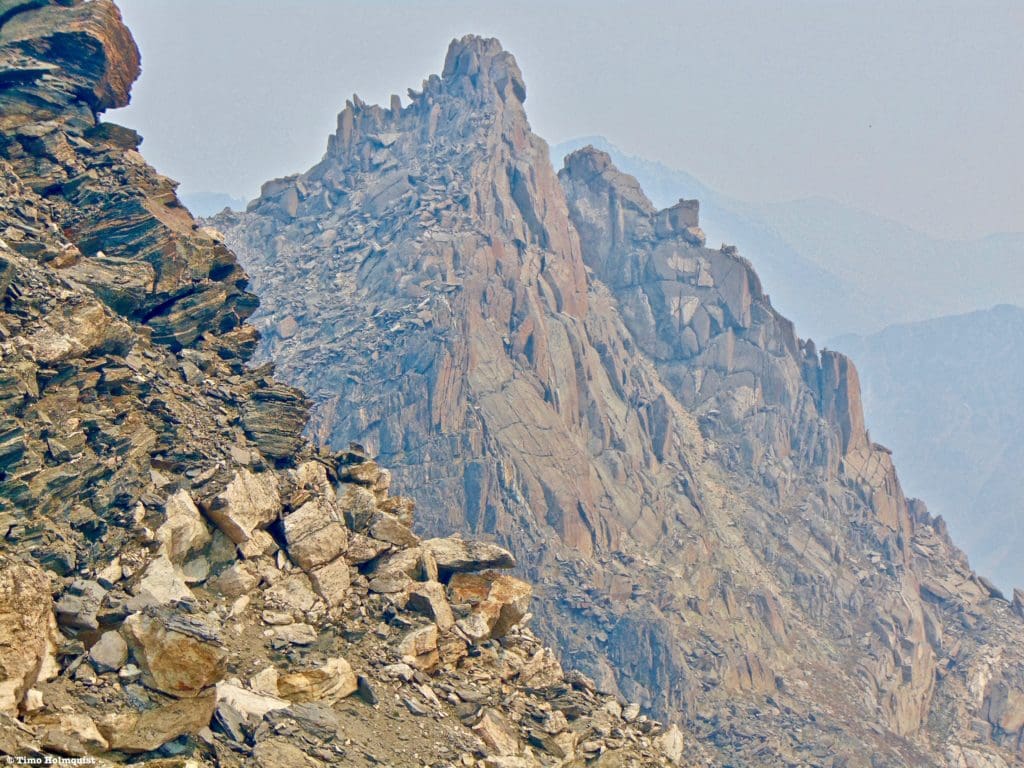
The Cleaver, labeled, as you approach on the Continental Divide.
-
- Difficulty: Very Hard
- Overall Distance: ~16 miles
- Elevation Gain: ~4,500 ft.
- Scramble Rating:
- Tanima Peak: Class 2+
- The Cleaver: Class 3 (isolated Class 3+ moves)
- Description: This combination is not only a scintillating Wild Basin tour but a perfect way to test your scrambling mettle. Tanima Peak can be approached by crossing the outflow stream from Thunder Lake and ascending to the ridgeline. Once on the ridgeline, pick a line (near the crest offers the best scrambling) and rise to the top. If that’s about as much as you can handle, from the summit, proceed down to a flat alpine area and peel right to Boulder-Grand Pass, which you can descend to get back to Thunder Lake. Try this one in mid-July, after Boulder-Grand Pass is free of snow. By itself, Tanima Peak is easier than the Keyhole Route, but combining with the Cleaver elevates the adventure. To continue to the Cleaver, proceed west from Tanima’s summit and then south along the serrated Continental Divide until reaching the peculiar Cleaver rock formation, which is the last notable point before the north ridge of Isolation Peak blocks anymore ridge traversing. The scrambling is all mid-Class 3, with an occasional harder move, a lot of fun, and keeps the exposure low unless you want to peer over the edge of the Cleavers summit, which is overhung. For a full review with route descriptions and pictures, click here.
- Difficulty: Very Hard

The Cleaver from just below the North Ridge of Isolation Peak.
Intermediate Level:
The scrambling takes a big step up here and involves some critical route choices. Some of the distances are not substantial and may give a false impression of the commitment necessary to complete the routes; proceed with caution. The overall popularity of these peaks is also low, so tell people exactly where you are going and when you expect to be back.
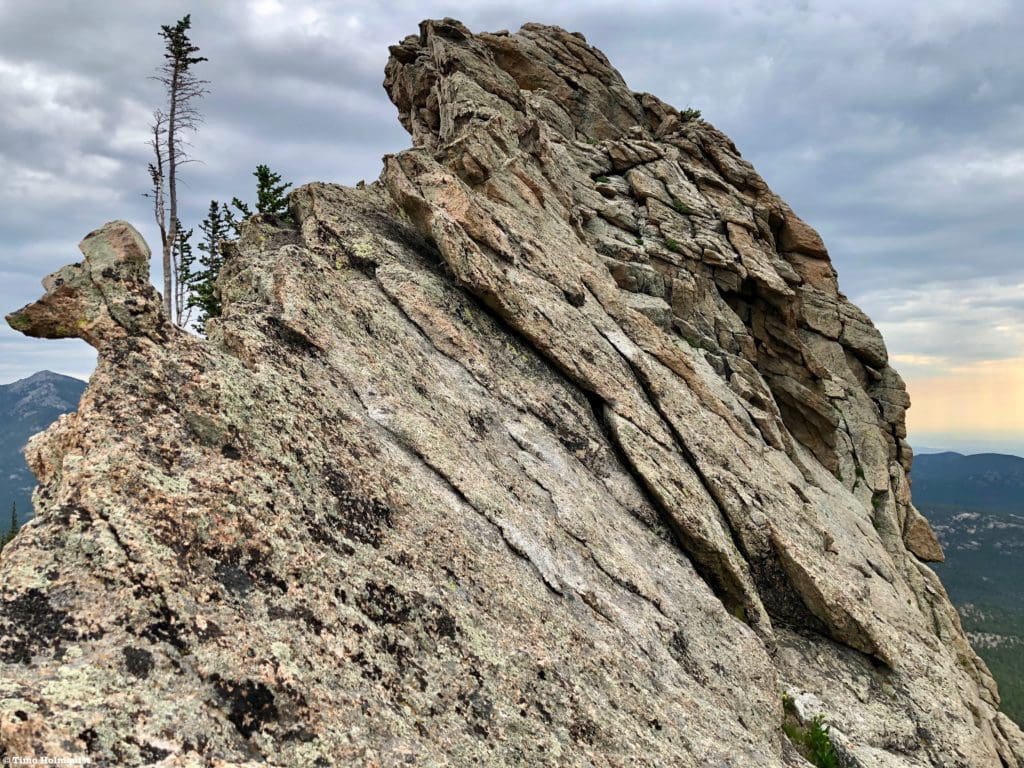
Morning light on Little Matterhorn.
No. 4: Little Matterhorn
-
- Difficulty: Hard
- Overall Distance: ~9 miles
- Elevation Gain: 2,660 ft.
- Scramble Rating:
- Little Matterhorn: Class 3+
- East Summit: Class 4
- Description: This scramble is nice because the overall length means it can be done in half a day; it is, however, a fairly committing route with a good amount of exposure. You’ll start from the Bear Lake Parking area and begin a counterclockwise loop around the lake. Less than five minutes after beginning the loop, you’ll see a sign for Flattop Mountain Trail; take a right. At the next junction, take a left and then stay straight at the third intersection, following signs for Odessa Lake. The trail will pass by Lake Helene, where an unsigned trail junction exists; take a left here. There are multiple braids around the lake, but you’ll take one that descends into the head of the basin near the bottom of Notchtop. After crossing a large stream, you’ll ascend off-trail and make your way to the ridgeline on the right. Little Matterhorn is the endcap of the ridge and does not have enough prominence to be its own summit, but don’t let that fool you. Once you get to the ridgeline, take a right and enjoy the complex terrain. The crux involves sidestepping around a precipitous ridge section with massive exposure beneath you, so bring an iron stomach. There are two summits, the main top and a harder east summit requiring a few Class 4 moves to reach. For a full route description with pictures, click here.
- Difficulty: Hard
The final sections of the Little Matterhorn scramble are airy and fun.
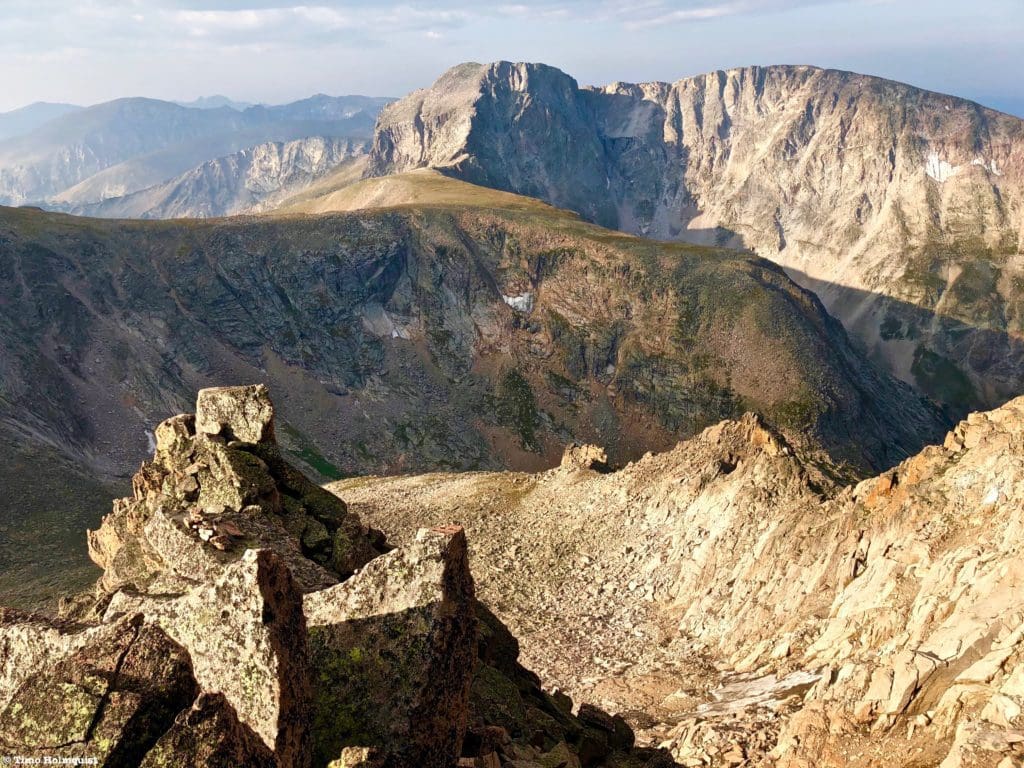
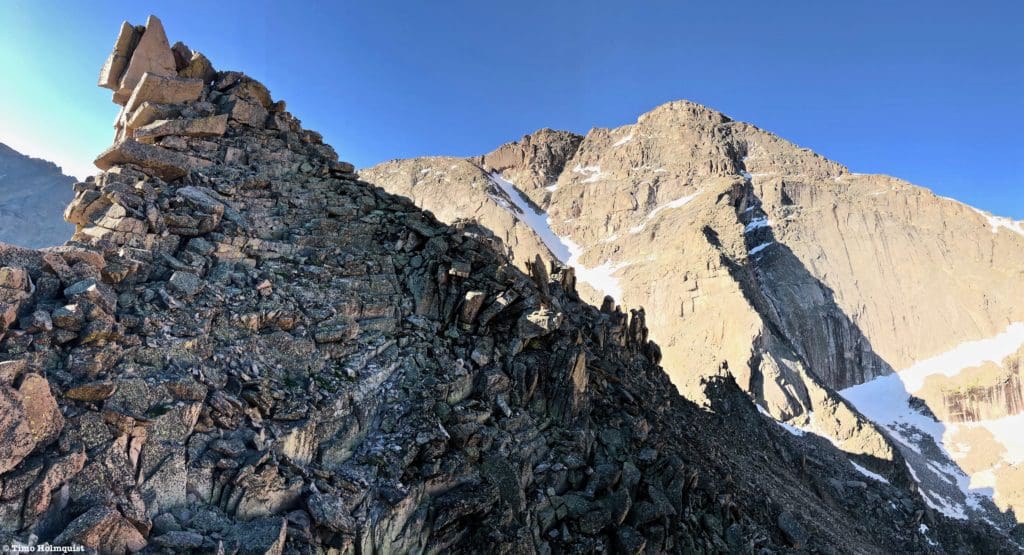
No. 5: GLR (Gorge Lakes Rim) Scramble
The scramble up and down Cracktop is the crux of the route.
-
- Difficulty: Very Hard
- Overall Distance: 13.5 miles (14.7 if adding Terra Tomah)
- Elevation Gain: ~5,000 ft.
- Scramble Rating:
- Mt. Ida: Class 1
- Chief Cheley: Class 2+
- Cracktop: Class 3+
- Mt. Julian: Class 2+
- Description: This is not only a tough scramble if you commit to Cracktop, but a long day in general. Most people who ascend into this area only attempt Ida, which is a nice hike by itself and offers long stretches of alpine travel. For a review of Ida, click here. Once you tackle the rest of the cirque, the character of the adventure changes quickly. The scrambling begins on Chief Cheley and continues in fits and starts until you reach the summit of Cracktop. In a unique twist, the hardest scrambling is off the backside of Cracktop as you descend to the saddle between it and Mt. Julian. This is remote and challenging terrain where workarounds demand coherent route choices. If you elect to stay on the ridgeline directly, the scrambling quickly gets into Class 5 territory. For the very fittest among us, you can continue to Terra Tomah on the other side of Julian for a five-summit day. Keep in mind; however, you’ll need to turn around and head back the way you came, which means going through the Class 3+ scrambling section on Cracktop again. The vast majority of this hike is above treeline so bring sun protection. For a full review of the scramble, click here.
- Difficulty: Very Hard
Mt Julian looms large over the Class 3 Cracktop descent.
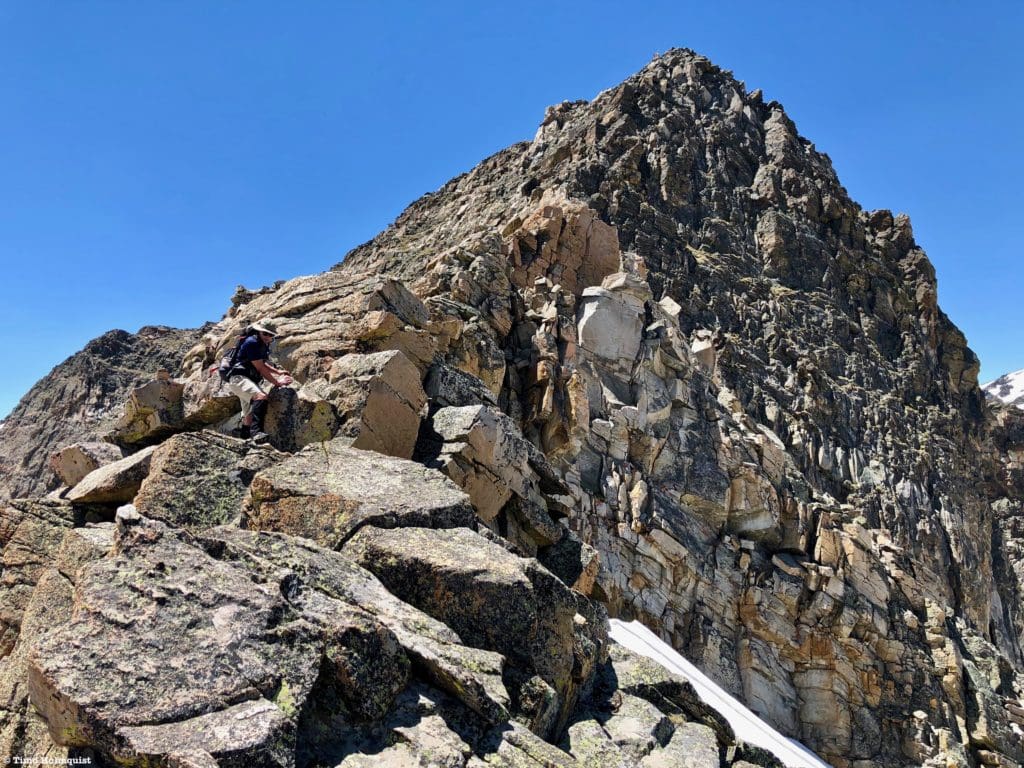
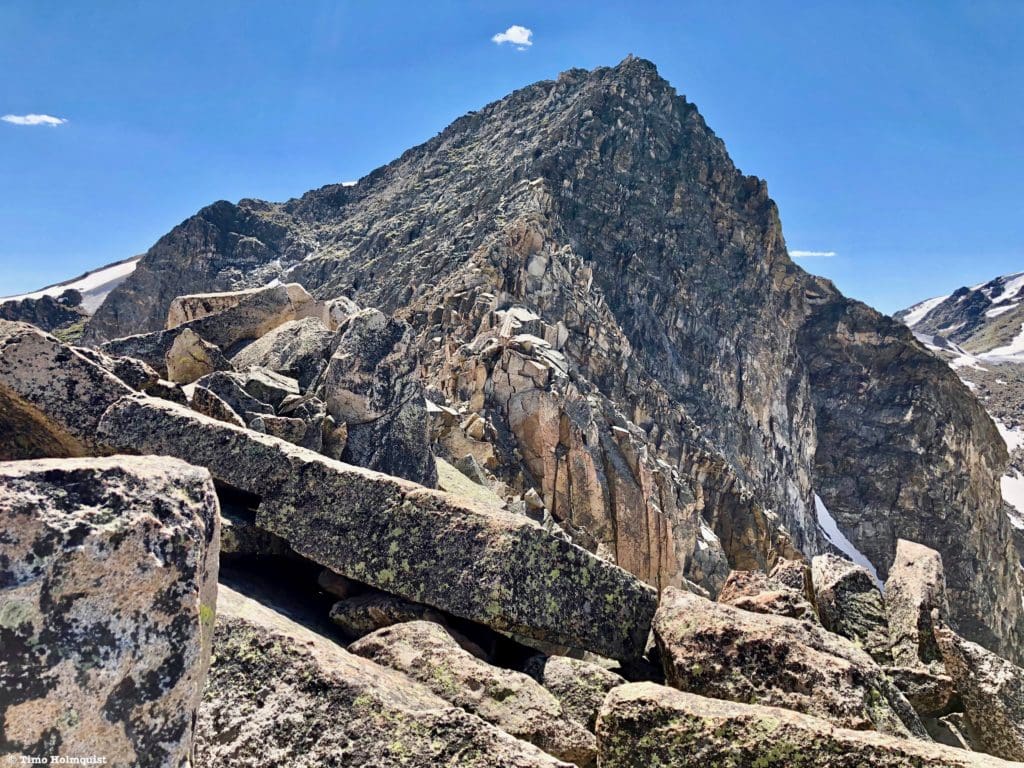
No. 6: McHenrys Peak via Stoneman Pass
McHenrys Peak from a few hundred feet above Black Lake.
-
- Difficulty: Very Hard
- Overall Distance: ~14 miles.
- Elevation Gain: ~4,450 ft.
- Scramble Rating: Class 3 (multiple options for Class 4 and Class 5)
- Description: This may be the single best summit scramble in the park. It has all the iconic splendor of the Keyhole Route with far fewer people and a delightfully remote feeling. The scrambling is complicated and involves an initial section up the Stoneman Pass and a longer section as you negotiate the upper difficulties of the peak. Cairns are present in many places, but options to increase the scrambling exist as well. Take your time and have fun on this route; it’s worth the accolades. You’ll start at Glacier Gorge Parking lot and make your way into the Upper Glacier Gorge before making your way to Stoneman Pass. Once on the pass, head north along the ridge, scramble your way up and over a series of gullies and rock ribs to find the abrupt summit. For a full review of this scramble click here.
- Difficulty: Very Hard
Some of the upper difficulties on the way to McHenrys Peak.
Intense:
This category involves scrambling in remote settings, on highly exposed ridges, and in areas where coherent route choices are a must. Some of the overall distances are fairly reasonable, which gives them a lower difficulty ranking, but your adrenaline will be spiking, and the actual scrambling is very demanding. They routes are all spectacular for various reasons but require full concentration for long sections to avoid tragic consequences.
East Desolations dramatic summit poking out from behind West Desolation.
No. 7: East and West Desolation Peaks
-
- Difficulty: Hard
- Overall Distance: ~10 miles
- Elevation Gain: 2,904 ft.
- Scramble Rating:
- West Desolation: Class 3
- East Desolation: Class 4 (Class 3+ with cave sneak)
- Description: These mountains are true hidden gems. While the trailhead is fairly popular for those hiking the summits of Chapin, Chiquita, and Ypsilon (click here for that trail review), the Desolations themselves exist off the main Mummy Range crest and seldom see any traffic. They are complex piles of rocks with high rockfall danger, excellent scrambling, challenging route finding, and a true sense of scrambling splendor. Even though the first half is off-trail, orientation is fairly simple once you recognize the shape and profile of the peaks. Make sure to make it about 100-150 feet above the saddle between Chiquita and Ypsilon before traversing north towards the peaks. This additional rise will help you avoid a loose and steep traverse. Once you connect with the side of West Desolation, strap in for long sections of Class 2+ and 3 scrambling, with multiple options to increase the difficulty. The rise up East Desolation is definitely Class 4 unless you manage to find and squeeze into a cave sneak, which may not be suitable for larger hikers. If you love scrambling on crazy-looking summits, these peaks should be high on the list. Click here for a full and in-depth review of the Desolation Peaks scramble.
- Difficulty: Hard
Both peaks from the shoulder of Mt. Ypsilon.
No. 8: The Spearhead via NE Ramps
The upper NE Ramp, which traverses across a thousand-foot drop.
-
- Difficulty: Hard
- Overall Distance: ~12.5 miles
- Elevation Gain: ~4,050 ft.
- Scramble Rating: Class 3+, 4
- Description: The Spearhead is a rock-climbing mecca and attracts hundreds of aspiring climbers to its dramatic walls. There are two ways to scramble up it without ropes, though the standard way isn’t all that exciting and involves a lot of loose scree. The NE Ramps stand supreme. From Green Lake in Upper Glacier Gorge, find a steep ramp that breaks up the enormous east wall of the Spearhead. Take this challenging ramp (Class 3+,4) until the walls to the right begin to break. You can take a more direct line up the breaks at Class 4 or continue on the ramp until the terrain to the right lessens back to Class 3. Ascend and then double back, now on a higher ramp. This ramp isn’t all that hard, but it splits the rock-climbing wall, and if you’re brave enough, you can stare straight down the vertigo-inducing cliffs. After the second ramp, double back once more and scramble up to the summit rib, which involves another section of Class 3+,4 scrambling. The ultimate summit rock is massively overhung and one of the most dramatic/terrifying positions to be in the whole park. For a full description and a review of the rest of Upper Glacier Gorge, click here.
- Difficulty: Hard
The interesting and overhung rock summit of Spearhead with Chiefs Head behind it.
No. 9: Lead Mt. via East Ridge
Steepening ridge as the Class 3 difficulties begin.
-
- Difficulty: Very Hard
- Overall Distance: 17 miles (~18.2 if adding Howard Mt.)
- Elevation Gain: ~5,250 ft. (~5750 if adding Howard Mt.)
- Scrambling Rating: Class 3+ (Class 4 chimney option)
- Description: This is an excellent ridge scramble deep in the park. There is no easy way to reach it, and if you’re hustling, the scrambling takes only 45 minutes, so many wouldn’t consider it worth the effort to reach. Well, they’re wrong. Lead Mountain is not the tallest peak around and is difficult to spot from far away, but unlike the crumbly southern part of the Never Summers, Lead has arguably the best rock of the whole range. The East Ridge scrambling begins with low third class and quickly elevates to 3+ on the nose of the ridge. At the crux, there is an exposed Class 3+ scrambling route or a low Class 4 chimney option with less exposure to choose from. The summit offers fantastic views and highlights why 12ers are just as impressive as 13ers and 14ers. Since it is so far back there, an East Ridge ascent is best made into a lollipop loop by combining Hart Ridge and a descent to Lake of the Clouds. Be careful getting down to the lake as snow lingers off the ridgelines well into July/early August. For a full route description, click here.
- Difficulty: Very Hard

Just before the hardest sections on the East Ridge.
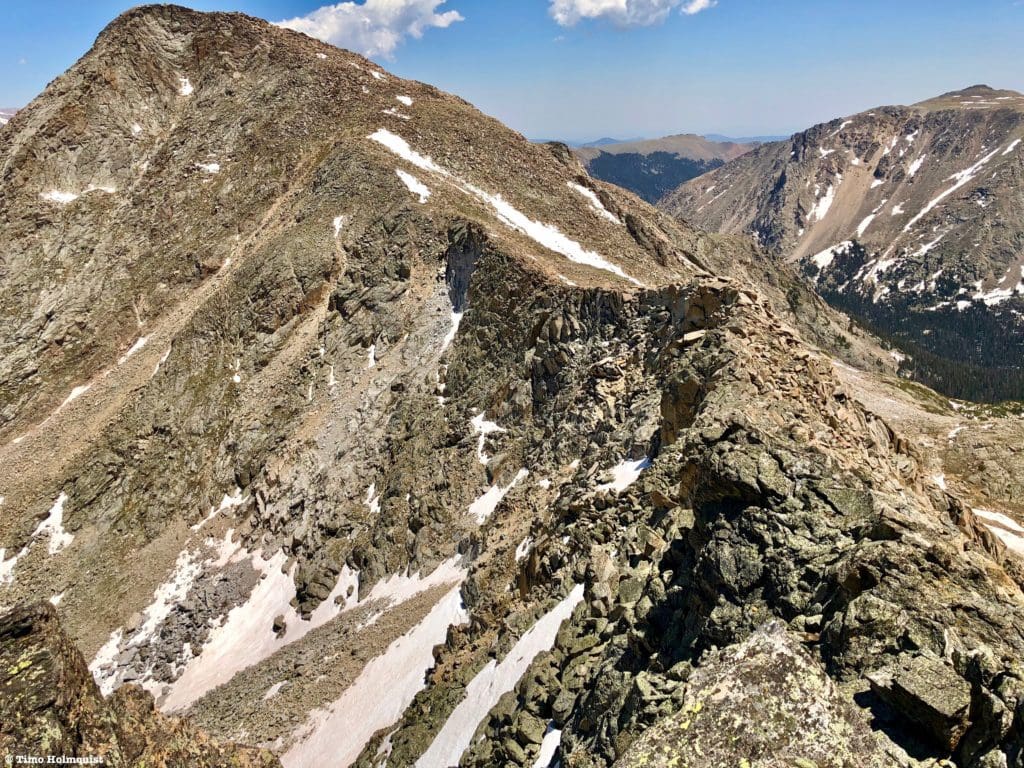
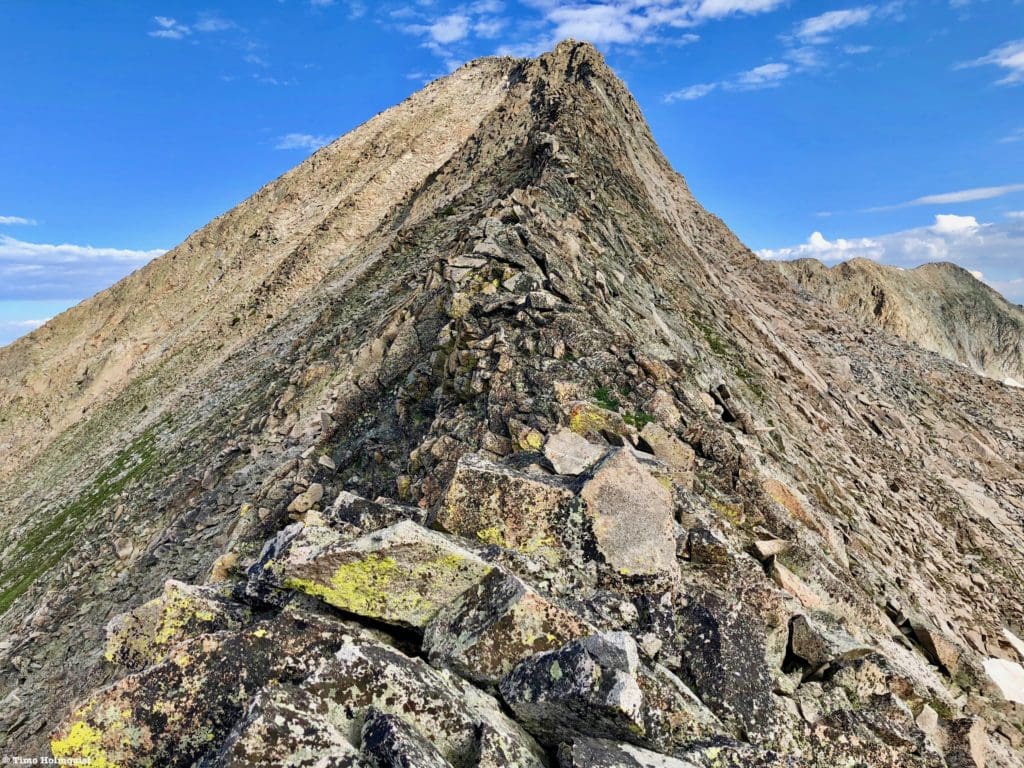
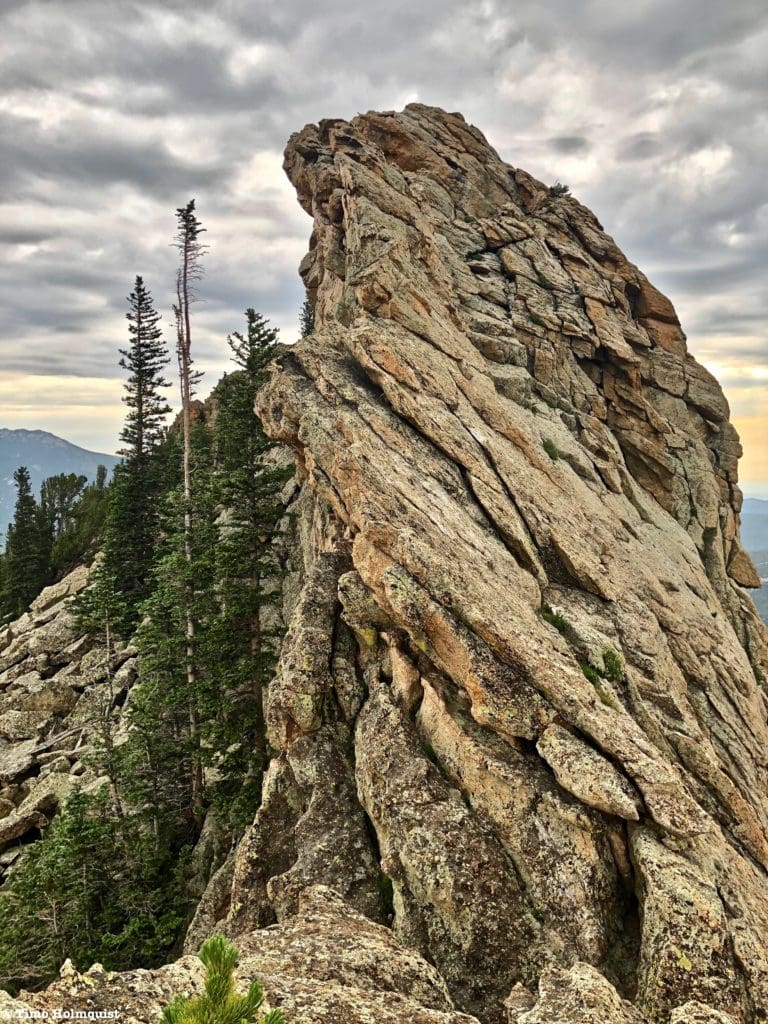
No. 10: Horsetooth Peak via Bronco Ridge
Don’t let the small profile of Horsetooth fool you, climbing up the spine of the rocks is no easy feat.
-
- Difficulty: Moderate
- Overall Distance: 4.6 miles (~6 miles if including Lookout Mt.)
- Elevation Gain: ~1,660 ft. (~2,015 ft. if including Lookout Mt.)
- Scramble Rating:
- Bronco Ridge: Class 4
- Standard Route: Class 2+
- Lookout Mt.: Class 4 (brief)
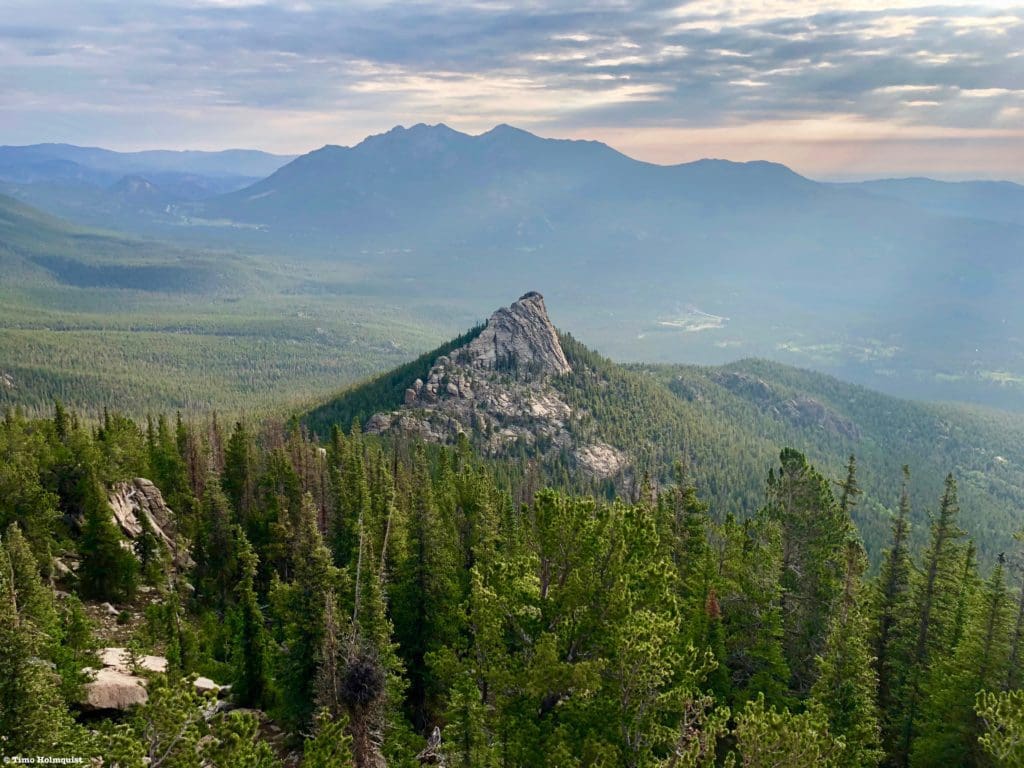
- Description: This scramble can be combined with nearby Lookout Mountain to create a scintillating, half-day scramble fest. To clarify, there is a Class 2+ way to attain Horsteooths summit, but that is not the best way to scramble up this surprisingly complex set of rocks. The spine of Horsetooth Peak (Bronco Ridge) is the real treasure. The ridge begins from the saddle with Lookout and contains numerous towers and optional walls before the ridge narrows, and the seriousness jumps to Class 4 for a few harrowing and exciting sections. The exposure is severe but doesn’t feel as bad as some other mountains because the peak is lower, and trees come up close to the base of the rocks. In a national park with dozens of peaks over 13,000 feet, no one is going to bother you on one that only breaks 10,000 feet. Enjoy this scramble for all its worth and revel in the views of Estes Cone, Twin Sisters, and the massive Mount Meeker from the gnarled and rocky summit. For a full review of the scramble and all the alternative ways of reaching the summit, click here.
- Difficulty: Moderate
Bronco Ridge in all its glory, the best line is right up the crest.
Final Thoughts:
Despite my best efforts to be objective, any list involving mountains has a fair degree of personal preference thrown in. You may like some options in the list and dislike others; that’s par for the course. The idea is to allow you, the reader, to explore areas that may escape the fair-weather adventurer. Due to the hundreds of named features in the National Park, many worthy scrambles did not make the list, so keep your eyes open for a volume 2 in the near future. Thanks for reading!
Views westward from the Narrows Section of the Keyhole Route on Longs Peak.
Global Rescue Membership
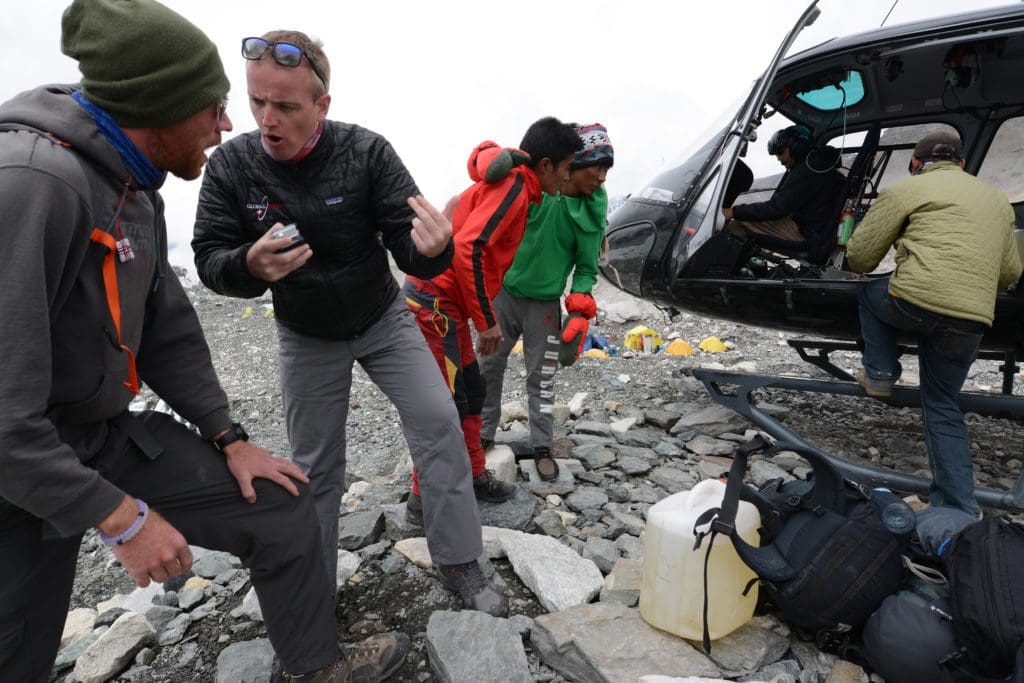 A Global Rescue EMT and helicopter pilot evacuates an injured climber from Mount Everest Base Camp in Nepal. Global Rescue is the leader in travel risk, crisis management and response. Global Rescue employs former Navy Seals, Army Rangers, and Defense Intelligence Agency analysts to pluck people from precarious situations worldwide. Photo courtesy of Global Rescue.
Skyblue Overland Strongly Recommends That You Enroll With Global Rescue Prior To Embarking On Your Next Adventure.
With more people outside now more than ever, Global Rescue expanded services to include field rescue within 100 miles of home. With Local Field Rescue — automatically included in any travel protection services membership — Global Rescue is there whether you’re hiking, kayaking, snowmobiling, fishing or simply enjoying the outdoors and get ill or injured and you’re unable to get to safety on your own. Purchase a Global Rescue membership for your next adventure and travel with peace of mind. Single trip, annual and family options are available.
Memberships start at $119.


