


High Point:
12,880 feet

Total Ascent:
2,635 feet

Difficulty:
Hard

Distance:
9.5 miles

Waypoints:
40.43135, -105.81297

Route Type:
Out and back
Mount Ida is a 9-mile hike along the Continental Divide, offering beautiful alpine views of Rocky Mountain National Park — minus the crowds. With limited shade, it’s a tough climb but the summit rewards with breathtaking vistas of the park and Northern Colorado Mountains.
Overview
Mt. Ida is a gentle giant along the Continental Divide that provides relief from crowds and supplies fantastic views of the less traveled western portion of Rocky Mountain National Park. The more than nine-mile hike features nearly 8 miles of alpine walking, which while gorgeous, means there is little to no cover from the sun. Definitely bring sunscreen on this hike and if storms are threatening, know that it will take some time until you are successfully back into the trees.
Ida and her neighbors are most commonly accessed from Milner Pass, where Trail Ridge Road crosses the Continental Divide. Despite the nearly 12 miles of alpine that Trail Ridge traverses, it isn’t until you drop down to the western side that the Divide actually crosses the road. There is a decent-sized parking area here, and because it takes a significant drive to reach the trailhead, Ida doesn’t usually suffer from the overcrowding problems common along Bear Lake Road.
Officially there is no trail to the summit, but well-established hiking paths make the journey relatively straightforward. Be aware that many cairns and social trails begin to spindle off the main route near the summit, which can frustrate navigation. However, since you’re above treeline, it shouldn’t be hard to piece together the final part of the route. To avoid any confusion on the way down, stick with the route you took on the way up.

A Marmot at the summit.
Table of Contents:
Article Navigation: Click on any of the listed items in the table of contents below to jump to that section of the article. Similarly, clicking on any large, white section header will jump you back to the Table of Contents.
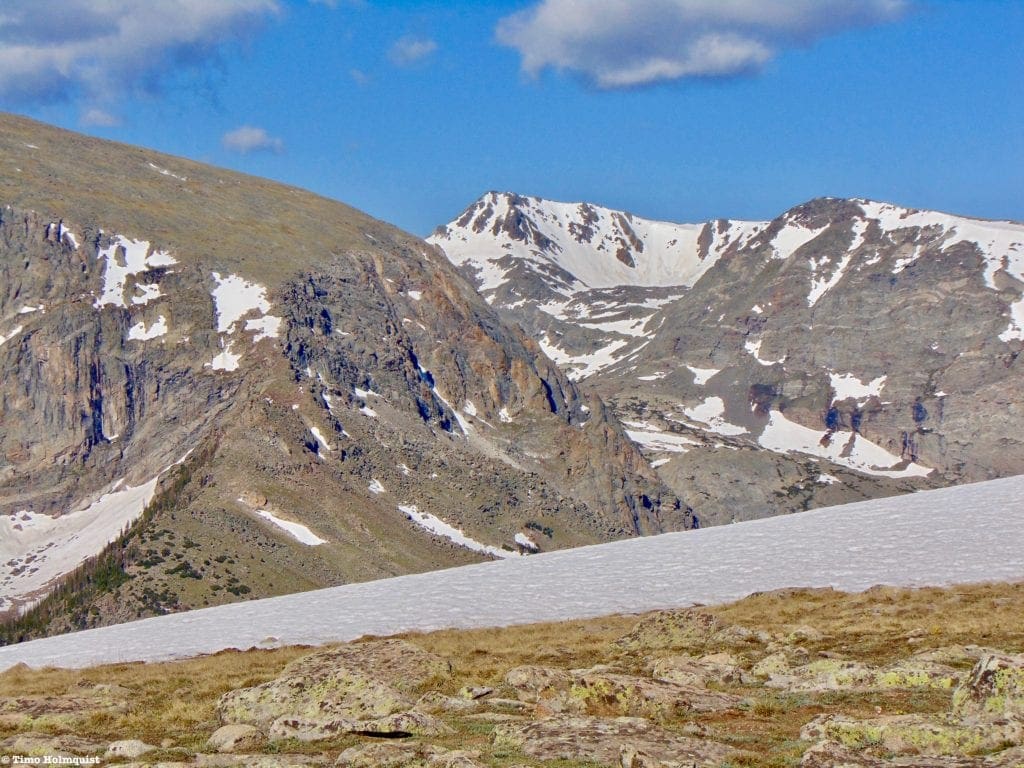
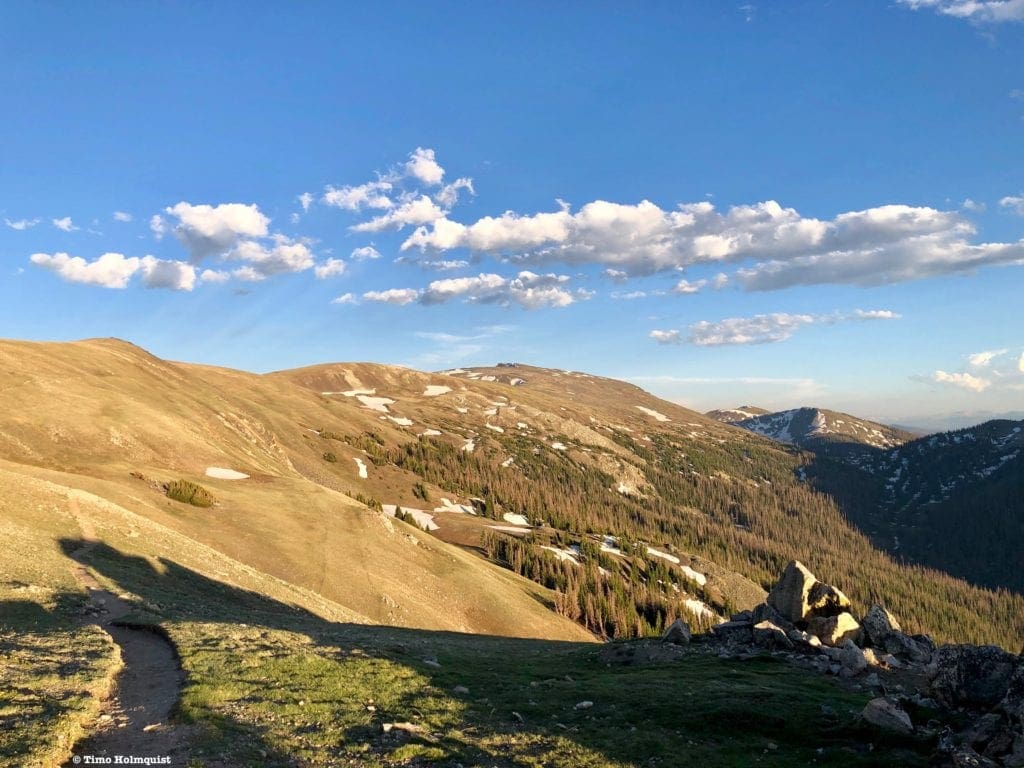
Mt Ida from Trail Ridge in mid-June.
The Ultimate Offline GPS Hiking & Ski Maps
See why onX Backcountry is the ultimate GPS navigation app for your outdoor pursuits. Try Today for Free. No credit card required.
Directions to Trailhead
From the east, enter Rocky Mountain National Park via US 34 or US 36 and drive Trail Ridge Road. You’ll end up traversing the alpine portion of the road and passing the Alpine Visitor Center before the road drops back down into the trees. Milner Pass is a fairly obvious area with a few small ponds, a parking lot on the left, and a large sign showing where the Continental Divide runs across the road. There are pit toilets at the trailhead.
From the west, enter the park north of Grand Lake and drive up the Kawuneeche Valley. Once the road begins switchbacking away from the valley, keep an eye out for the trailhead to Lake Irene. From there, Milner Pass will be the next place to pull off the road. Take a right into a parking slot and locate the trail near a large kiosk on the north side of the lot.
Since this trail takes off from a national park, there are fees and passes to consider. For the 2021 season, the park service requires two separate passes for each visitor: an entrance pass and a time slot. An entrance pass is always required, and the prices for one can be found here. The time slot is necessary if entering Trail Ridge between 9 AM and 3 PM. For early starters (recommended), you can enter the park on Trail Ridge before 9 AM. If you do, you only need an entrance pass. Bear Lake Road has its own time slot issue, so it’s best to avoid that area entirely. The eastern entrance via US 34 by Old Fall River Road is generally less busy than Beaver Meadows.
Field Notes:
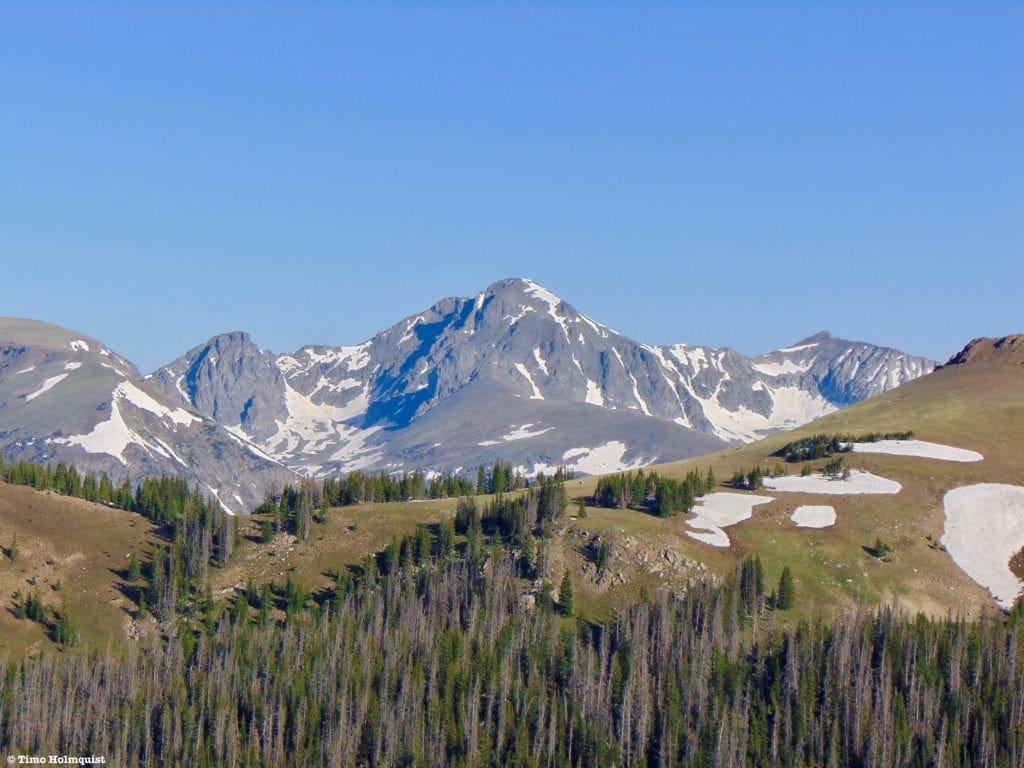
Ida is a relatively obscure mountain from the west, featuring more of a rolling alpine look than many of the serrated peaks near Glacier Gorge and Longs Peak. It is invisible from the east but can be seen from the north at both the Forest Canyon Overlook and the Rock Cut along Trail Ridge. The basin it occupies with neighbors Chief Cheley, Cracktop, Julian, and Terra Tomah is one of the most photographed in the park due to the easily obtained views from Trail Ridge, but much fewer people take the time to climb it. The mountain is also quite visible from the south, especially as you drive next to Lake Granby.
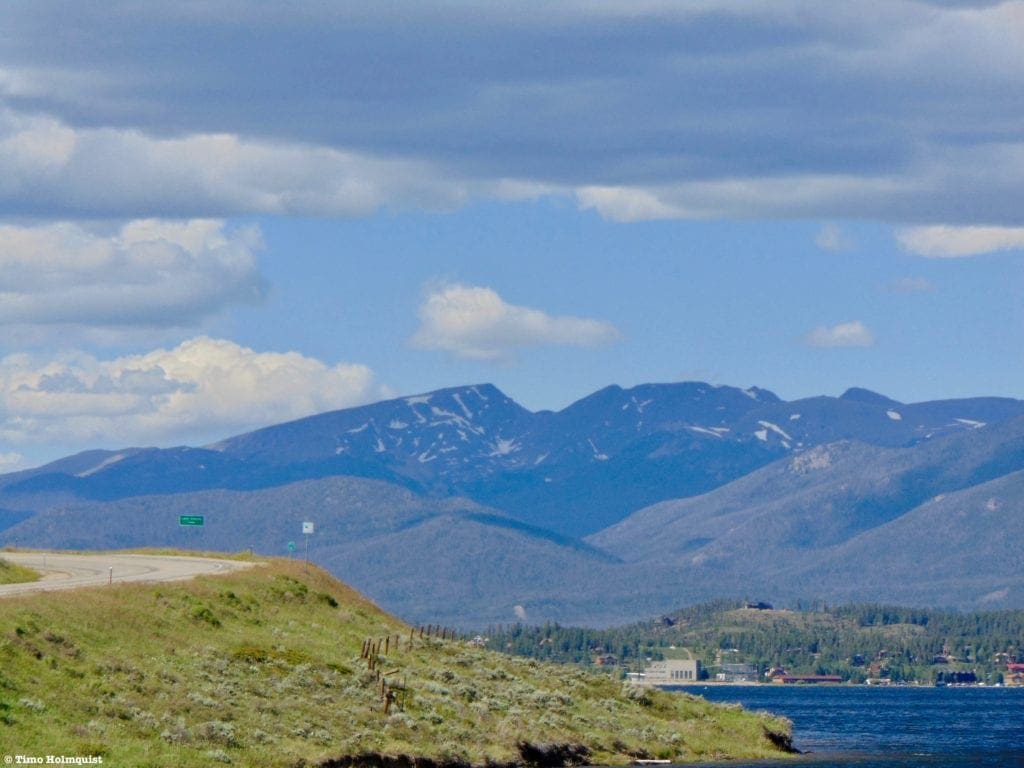
Mt. Ida from the shores of Lake Granby with its long west side leading up to the sharper summit.
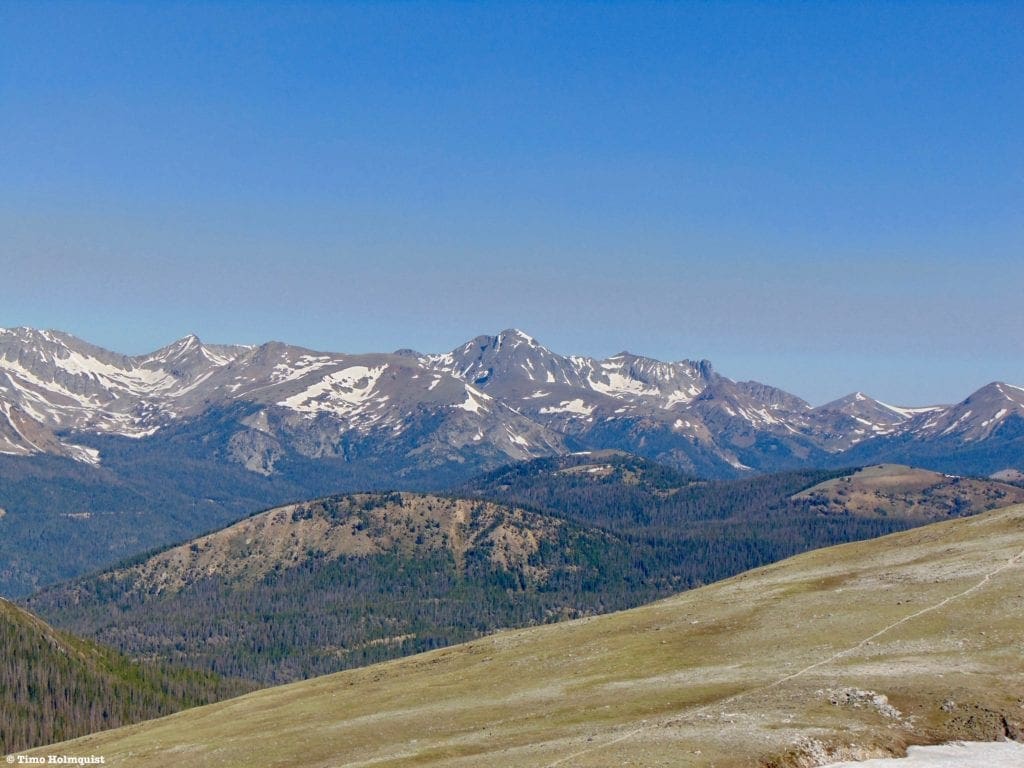
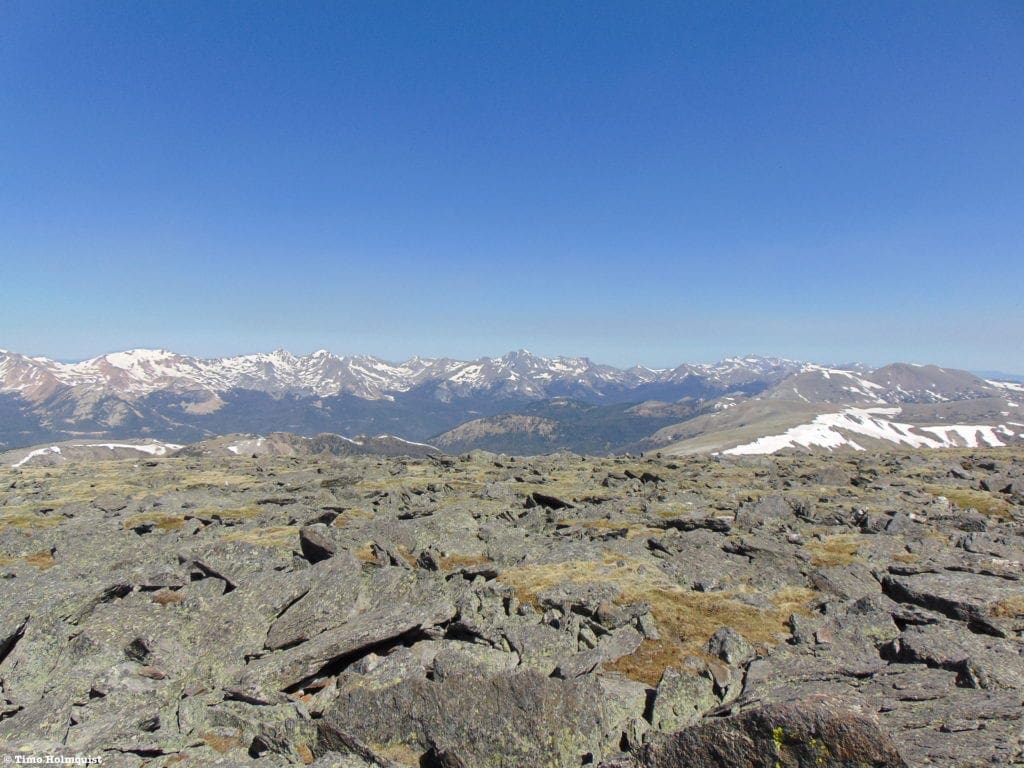
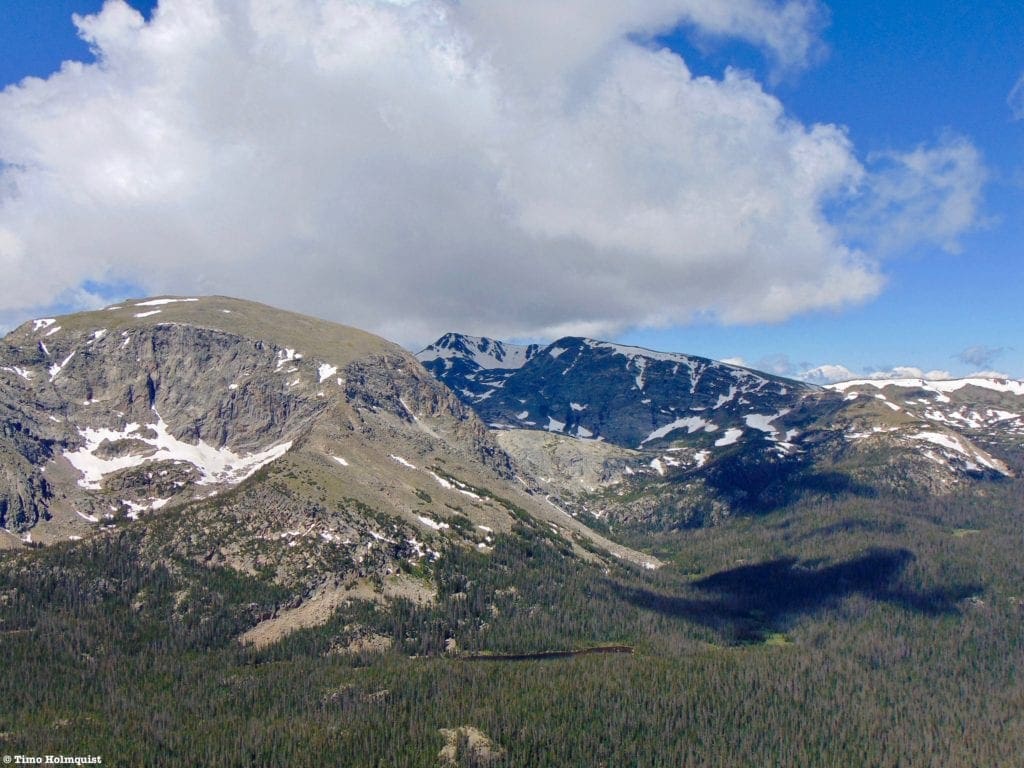
While it lies short of 13,000 feet, the views from Ida offer a commanding perspective of the more remote sections of the park. For much of the ascent, you have the sturdy wall of the Never Summers visible behind you, and from the summit, you can see the East Inlet peaks, the Glacier Gorge mountains, Longs Peak, the Continental Divide, the Mummy Range, Indian Peaks, parts of the Medicine Bow range, and all the way to the Gore Range. Shadow Mountain Lake and Lake Granby are also obvious from the top.
There are a few things to keep in mind when scaling Ida: time spent above treeline, sun exposure, water, thunderstorms, and snowmelt. The trail is usually free of snow by mid-late June; however, the first section is in the shade and can support snow patches much longer than the rest of the trail. Navigation can be an issue if snow covers part of the trail, so check conditions with the Park Service or a hiking site like Alltrails. Once the snow melts, navigation is not difficult. Clearly marked signs start you off on the Ute Trail, and another obvious sign indicates when the Ida extension breaks off. The Ida extension is only maintained until just after treeline, but as previously mentioned, a strong hikers trail continues into the alpine.
Because so much of the hike is spent above treeline, Ida is not a place you want to be when the weather is threatening. If afternoon thunderstorms are forecast, start no later than dawn to make sure you’re not only off the summit but completely out of the alpine by the time it starts getting dicey. For your forecasting needs, I’d start with the forecast for Trail Ridge, which is measured at the Alpine Visitor Center. If you want a more specific forecast, click here. I’ve had good luck with mountain-forecast.com because they measure weather at a couple of different elevation gradients and provide a good wind forecast. Nothing can ruin a hike faster than 30-40 mph winds brutalizing the alpine. Forecasting can help substantially, but at the end of the day, nature does what it wants. Gather enough information to make an executive decision and time your hike to take advantage of the calmest part of the day.
Even though Ida does not break 13k, you’ll be above 10,750 feet the entire hike, so altitude sickness is a possibility. It helps to familiarize yourself with the signs and symptoms. The summit of Ida is far from medical help should you need it.
Hats, sunscreen, and more water than you usually carry are all good things to have. There is little to no shade above treeline, and the trail does not pass any water once you climb out of Milner Pass. The only reprieve is potentially melting snow if you start in early-mid June, but then you may have to deal with snow-covered trails and navigation issues. I’d recommend bringing at least four liters of water with you.
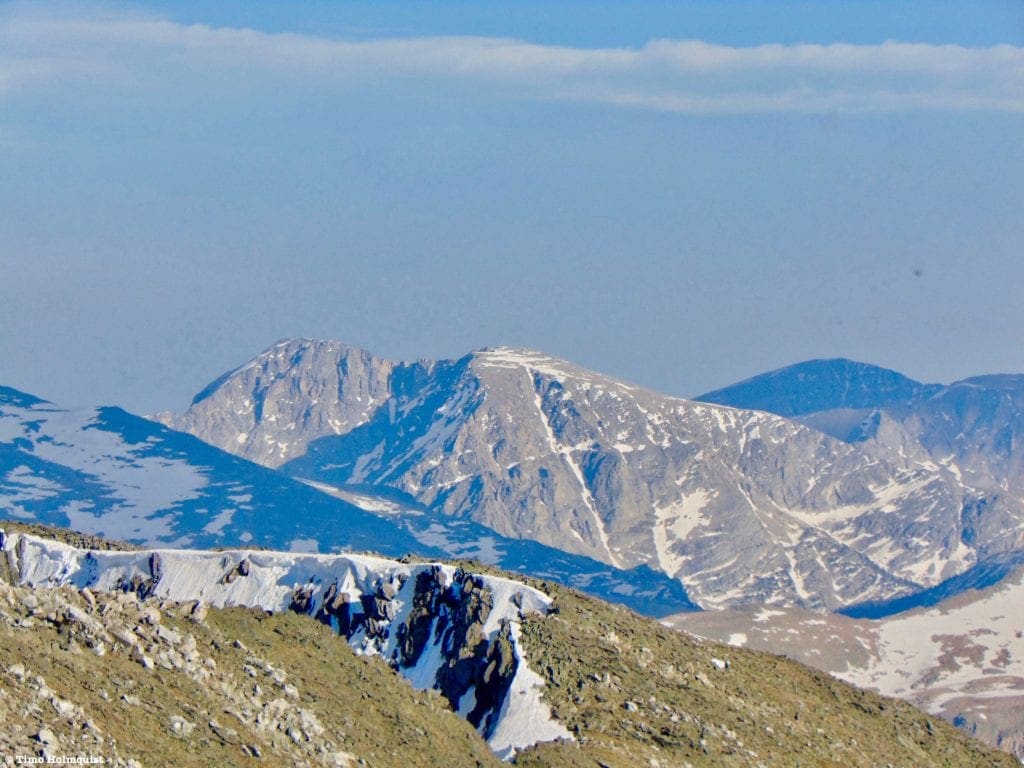
A rare view of Mt. Alice’s West Couloir from Ida’s summit, one of the most remote ski mountaineering destinations in the park.
Places to Stay
Camping near Rocky Mountain National Park will cost you. The options for free area camping are limited. On a positive note, there are plenty of options, and the National Park is within driving distance of Fort Collins, Boulder, and Denver.
- Estes Park: Known as the gateway to Rocky Mountain National Park, Estes sees nearly 80% of park traffic as opposed to the much quieter western entrance near Grand Lake. The town has a ton of lodging options.
- Grand Lake: Located near the sleepier western entrance, Grand Lake sits on the edge of the deepest natural lake in Colorado and within half an hour of two more lakes (Shadow Mountain and Lake Granby).
- Rocky Mountain National Park Camping
- Moraine Park Campground: $30 per site. $20 in winter. Established campground with perks, facilities, campfire grate, wood for sale in summer, and bear boxes to store food. Only loop B is open in the winter, and it’s first-come, first-serve.
- For summer, a reservation is needed way in advance to secure a spot.
- Glacier Basin Campground: $30 per site. Established campground with the same perks as Moraine Park. Reservation required.
- Backcountry Campsites: Rocky Mountain National Park has backcountry sites that you could book in advance. There is no open camping in the backcountry; it must be at designated backcountry sites. Please check the park website for more details. Backcountry sites require an overnight permit of $30.
- Camping near Estes Park
- Estes Park Campground at Mary’s Lake: Established campground, pricey $45-55. Good backup if other campgrounds are full.
- Hermit Park Open Space: $30 for a tent site, price increases if towing a trailer or for group spots.
- Estes Park Koa: Rates dependent on what you’re bringing with you but will run more than $50 a night in the busy season.
- Free or close to free: but a little farther (if you’re willing to drive)
- Ceran St. Vrain Trail Dispersed Camping ($1)
- County Road 47. Users have reported trash and ATV noise at this location, but it is free.
Journal:
From the parking lot, make your way to the north end of the lot and the large kiosk there.
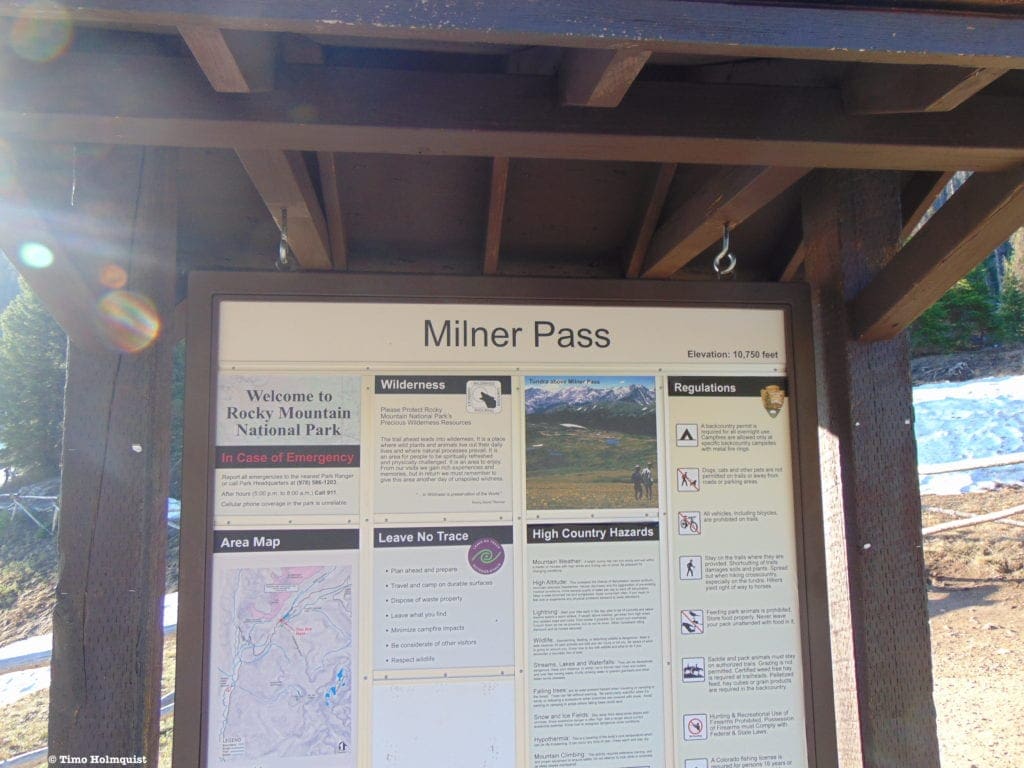
The Milner Pass trailhead kiosk.
The hike will start right behind the kiosk on the Ute Trail. As you approach Poudre Lake (the shallow start to the Cache La Poudre River), the trail will break to the right, passing by a set of interesting rock formations.
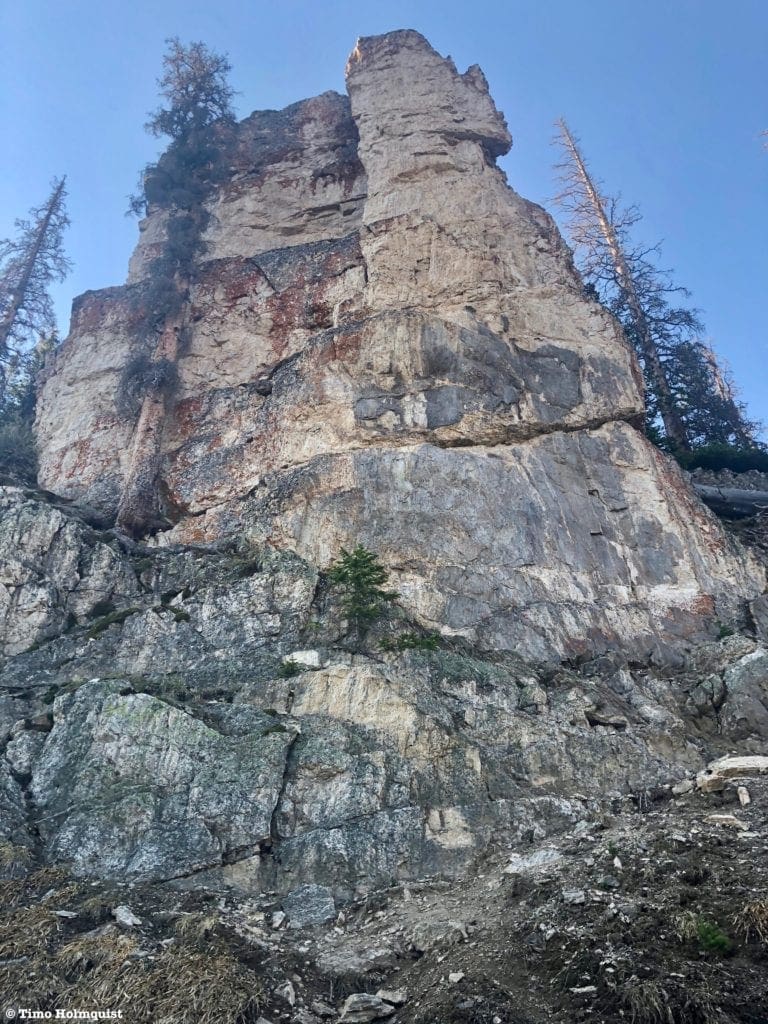
Rock cliffs along the trail.
The trail will traverse south amongst the trees, where patchy snow may be encountered early in the summer. If navigation isn’t an issue, roughly 15-20 minutes into the hike, you’ll see a National Park sign indicating the way to Ida.
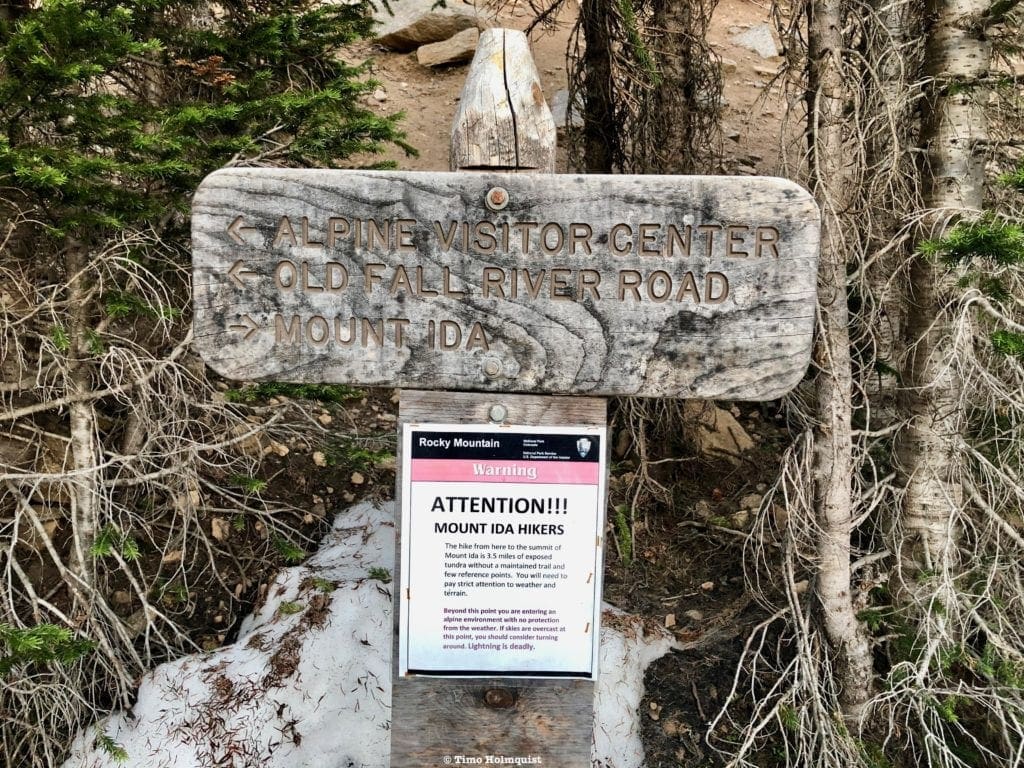
Trail sign with a snow warning in mid-June.
After continuing along the hillside and gaining elevation for some time, the trees will break, and you’ll ascend into the alpine. The views will begin to open up, but shade will be hard to find from here on out.
Looking west towards Mt. Richtofen in the Never Summer Mountains.
The trail will continue to rise while hugging the western side of the broad Continental Divide. Marmots are common along this part of the trail and will often get close if they smell food. Make sure you aren’t feeding the wildlife.
Once you gain enough elevation, you’ll be able to see the summit of Ida, which still seems frustratingly far.
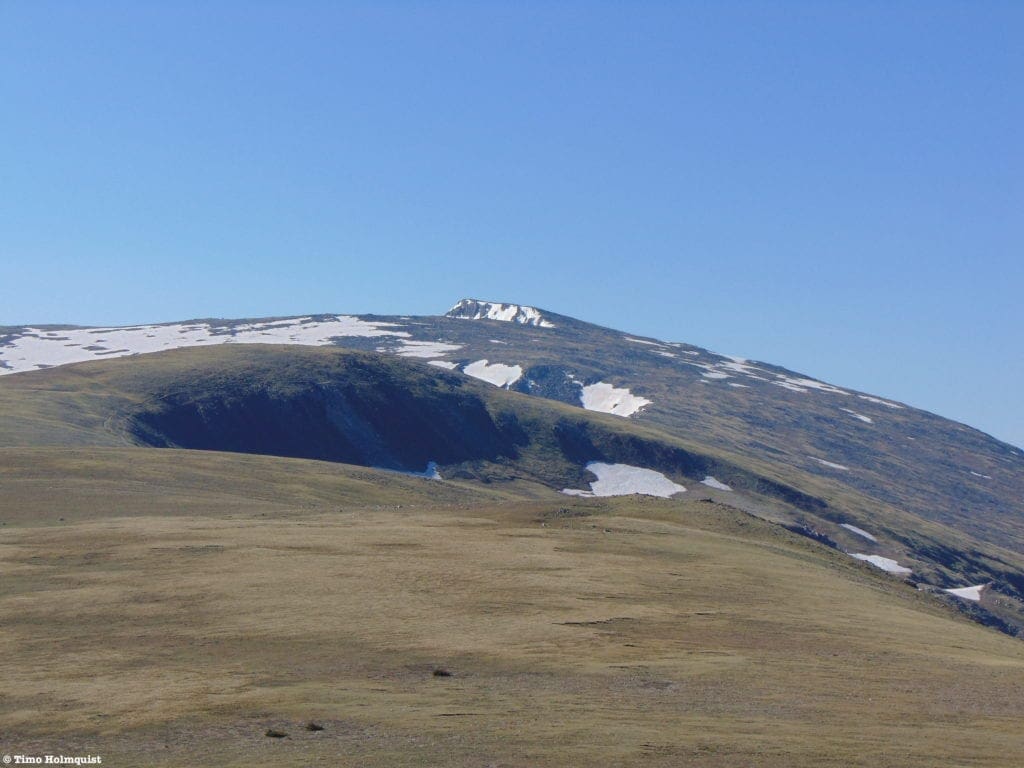
Mount Ida lurking in the background.
At this point, there is only one hiker trail, so you can stride out and put a little distance between you and the trailhead.
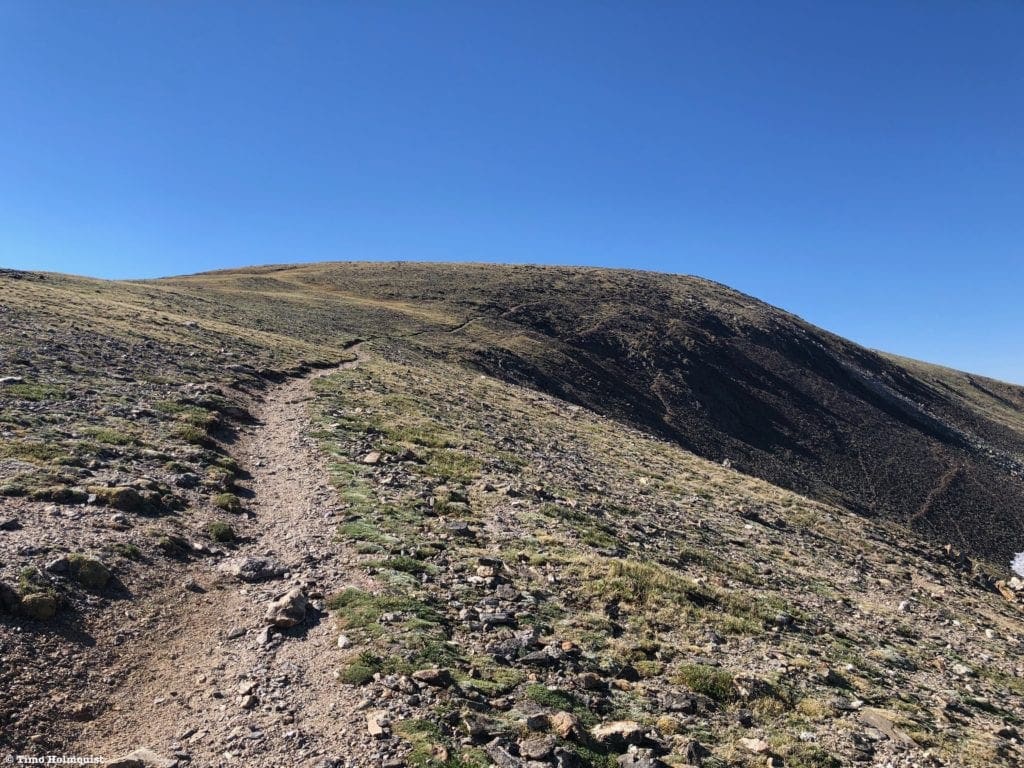
The trail as it attacks the side of a ridge highpoint.
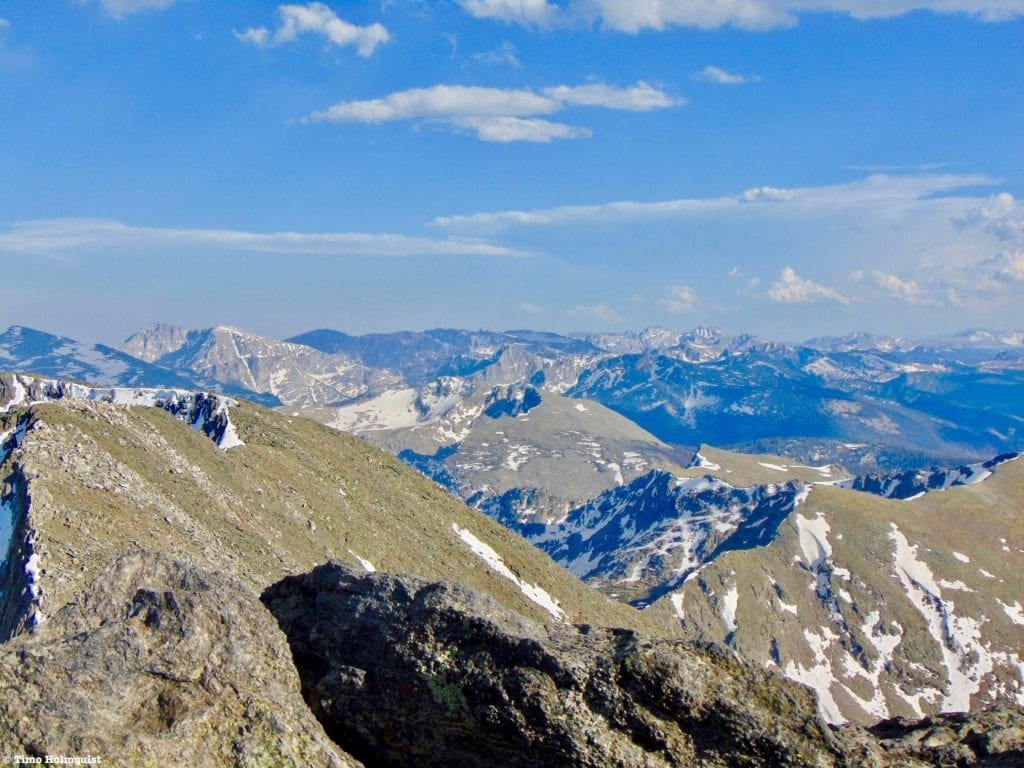
Once you top out near a subsequent highpoint, the first of a few trail braids will appear. The most heavily used path stays to the right of the ridge crest. As you continue to ascend, the views continue to improve.
Looking back at the trail with the Never Summers behind.
Even though the hike gains over 2600 feet, the average pitch of the trail is quite low, which can help you maintain a consistent hiking pace.
Before the trail heads up to the final summit block, there’s a great set of rocks on the ridgeline to the left that makes for a nice break spot.
Looking up at a much steeper profile of Mount Ida.
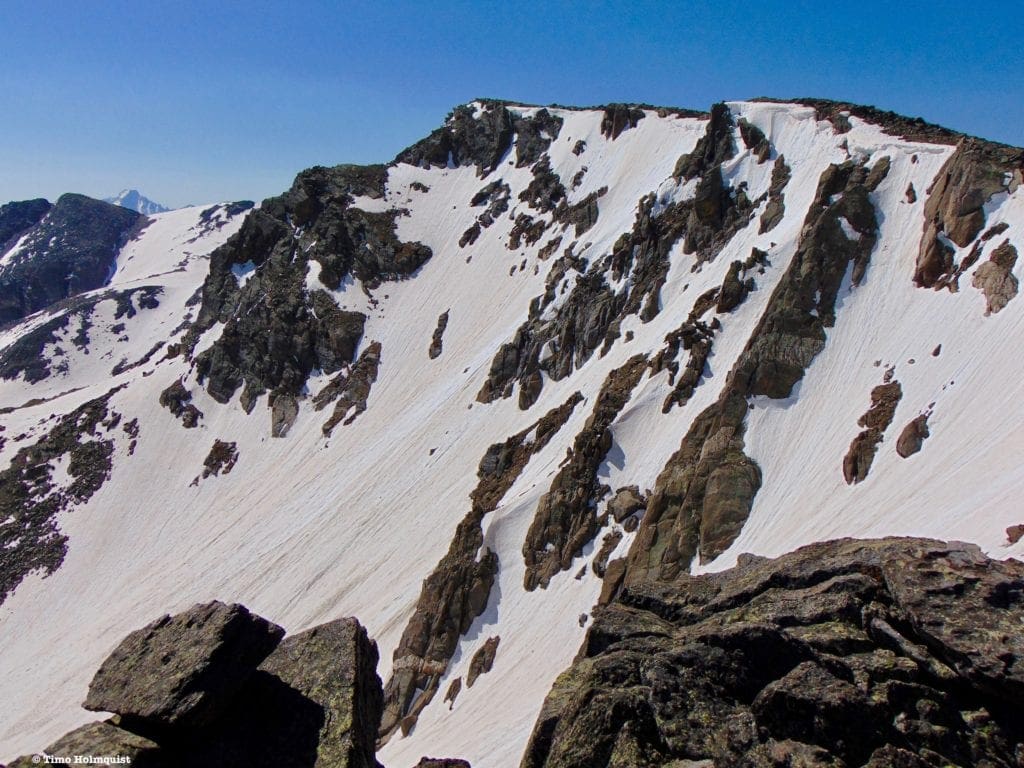
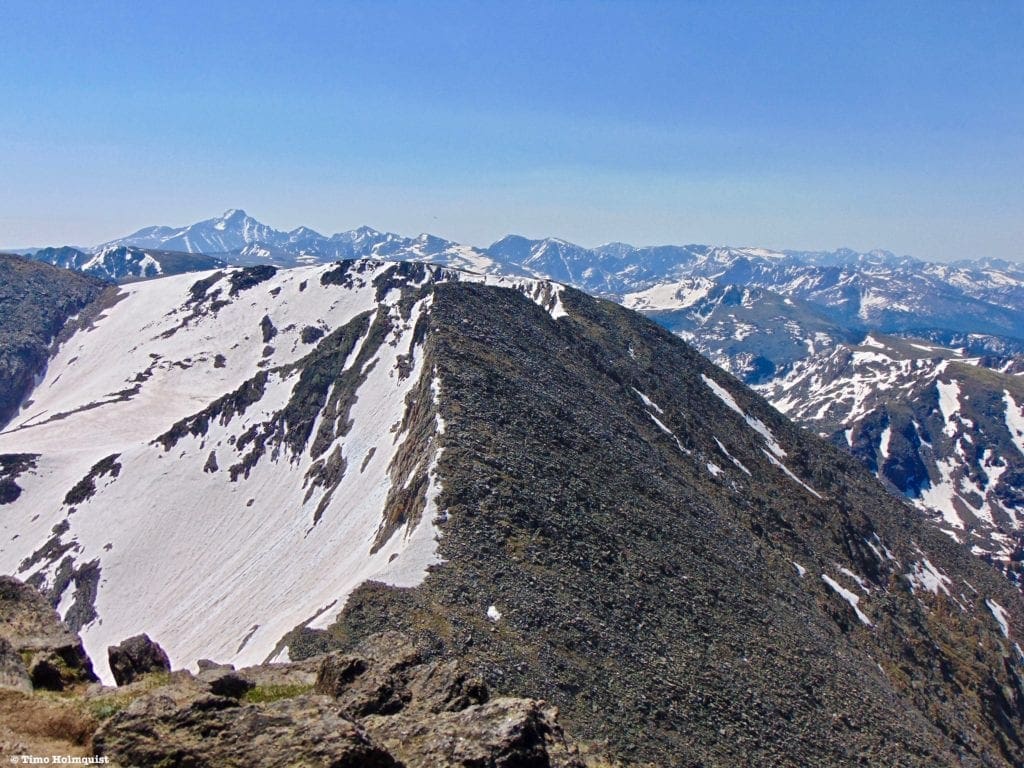
Snow in the basin on the north side of Ida tends to stick around all year. Don’t worry though, the hiker trail follows the path of least resistance and doesn’t deal with any of the snow slopes to the north.
From the ridge, looking north towards the Mummy Range.
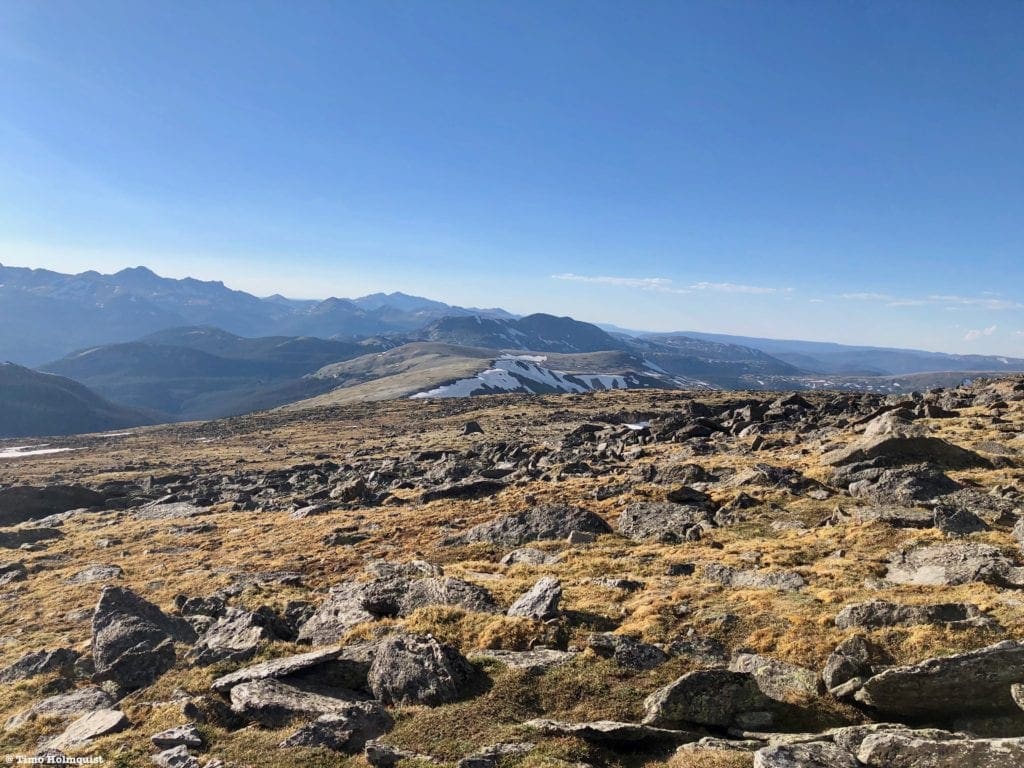
The final summit push is difficult only because the trail begins to splinter into a ton of different paths. Talus also begins to dot the alpine, making it harder to see how the trail winds through rocky sections. Directionally, the easiest method is to stick close to the ridgeline, knowing that it will eventually rise to the summit itself.
Alpine vegetation growing amongst talus on the final push to the top.
Ida’s summit is quite pretty, with a couple of large rocks to sit on and a surprisingly precipitous east side leading to Chief Cheley Peak.

Mount Ida’s summit from Chief Cheley Peak.
A particularly interesting perspective is southeast, toward one of the emptier corners of the park.
Ridges upon ridges.
Longs Peak is also visible from the summit; its dramatic summit hundreds of feet higher than the mountains around it.
Longs Peak towering over the neighboring mountains.
To the south, you’ll be able to see both Shadow Mountain Lake and Lake Granby, along with a sobering reminder of the absolute destruction wrought by the East Troublesome Fire late in 2020.
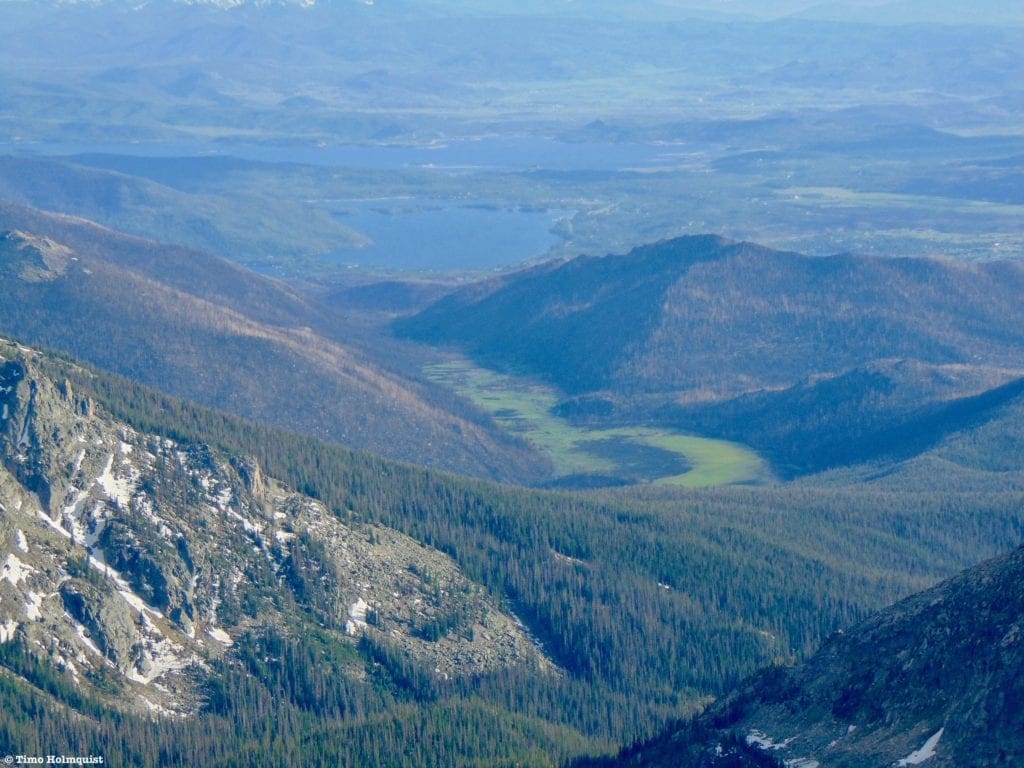
The lakes in Grand county and a swath of burned forest.
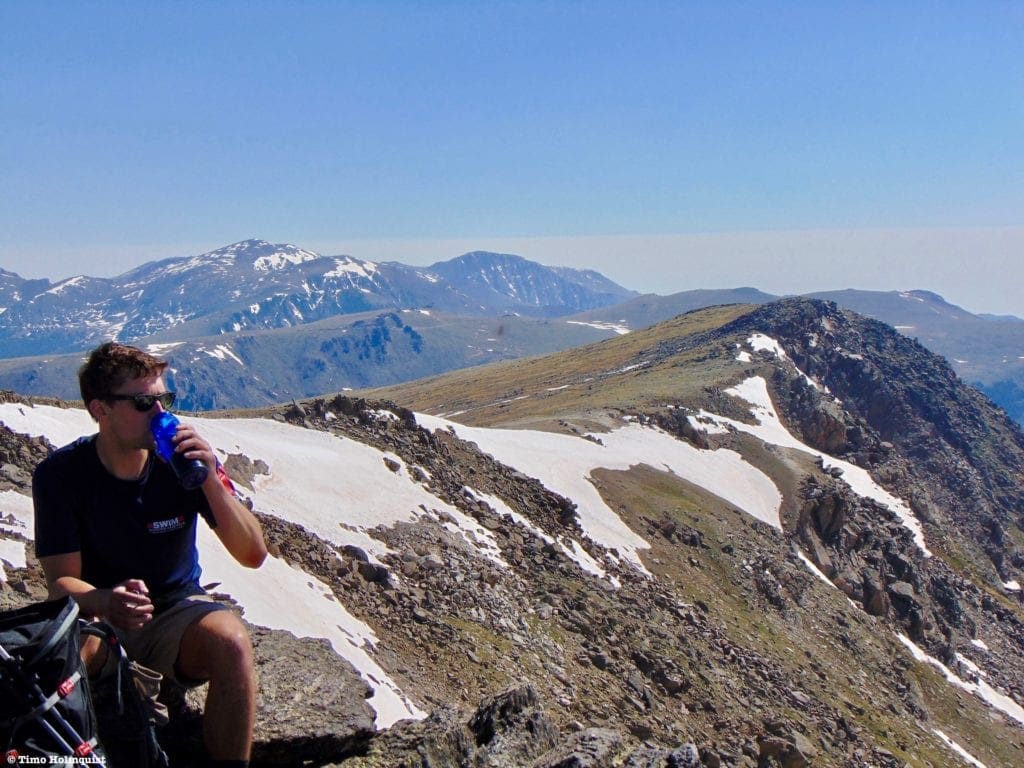
While it’s tempting to relax at the summit, use the opportunity to scour the skies for errant thunderclouds. If it’s clear, enjoy your time atop Ida; if it’s questionable, turn on the afterburners and start heading back. There are still three and a half miles separating you from treeline.
If the day is beautiful, you can also take a look at Ida’s neighbors to the east, Chief Cheley, Cracktop, Julian, and Terra Tomah. There is a sizable scramble that runs the cirque between them all but, again, you need a fantastically clear day to give that a try. From Ida to Chief Cheley and Cracktop, the route is a straightforward Class 2+ scramble with some snow to deal with through June. If adding Julian, be warned, the ridge between Cracktop and Julian is decidedly Class 3 with multiple optional Class 5 pitches and dramatic exposure.

Looking at the next three mountains east of Mount Ida.
Once you’re ready, turn around and try to follow your ascent route down. Again, there are many trail braids and many cairns in the area, which can cause unnecessary confusion. Use geography to your advantage; the ridgeline to the right (if descending) is an obvious marker and provides a great visual tool.
Still miles to go before treeline.
Once you’ve honed in on the correct trail, continue descending off the summit block. There will be a short section where the trail will rise again, but it isn’t long. Continue towards treeline, making sure to cast a few looks back to Ida.
Mount Ida and the long alpine ridge up to it from near treeline.
Once back into the trees, you’ve got about a mile to go until reaching the trailhead.
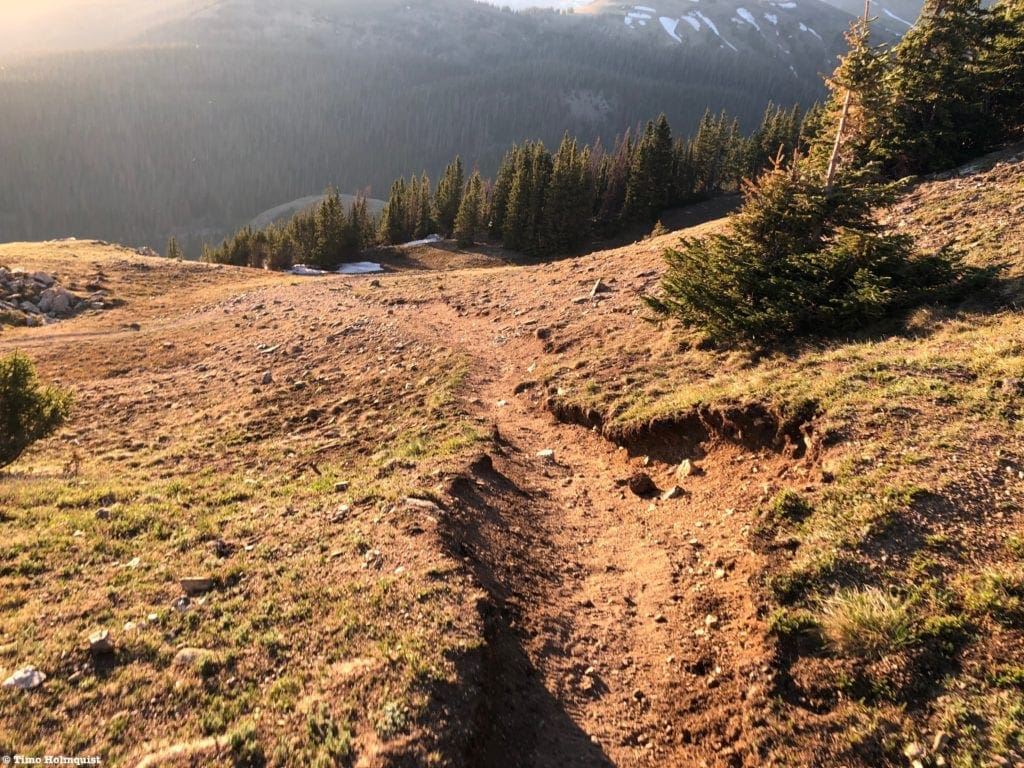
The trail as it finally nears the trees.
Look for the wooden park sign as you reconnect with the Ute Trail and make your way back to Milner Pass.
Final Thoughts:
Mount Ida, while tough, is a great way to shake a lot of the National Park crowd and spend hours walking above the trees. Be careful playing with the weather in such an exposed environment, and remember to bring a ton of water, a hat, layers, and sunscreen. For the rest, enjoy this high elevation hike ending at a beautiful summit with expansive views of the rest of the National Park and the Northern Colorado Mountains.
Another view of Mount Ida (center with snow) and Terra Tomah (let) from Trail Ridge.

Enroll With Global Rescue Prior To Embarking On Your Next Adventure.
When a travel emergency arises, traditional travel insurance may not come to your aid, and a medical evacuation can cost up to $300,000.
The cost when you have a Global Rescue membership? $0. That’s why when the unexpected happens, you want the leader in rescue, evacuation and medical advisory behind you. You want Global Rescue.
Terms of Use:
As with each guide published on SKYBLUEOVERLAND.com, should you choose to this route, do so at your own risk. Prior to setting out check current local weather, conditions, and land/road closures. While taking a trail, obey all public and private land use restrictions and rules, carry proper safety and navigational equipment, and of course, follow the #leavenotrace guidelines. The information found herein is simply a planning resource to be used as a point of inspiration in conjunction with your own due-diligence. In spite of the fact that this route, associated GPS track (GPX and maps), and all route guidelines were prepared under diligent research by the specified contributor and/or contributors, the accuracy of such and judgement of the author is not guaranteed. SKYBLUE OVERLAND LLC, its partners, associates, and contributors are in no way liable for personal injury, damage to personal property, or any other such situation that might happen to individuals following this route.


