


High Point:
13,957 feet

Total Ascent:
4,350 feet

Difficulty:
Very Difficult (Class 3 scrambling)

Distance:
10 miles

Route Type:
Loop
Pacific Peak, west of Frisco on I-70, is a beautiful mountain near 14,000 ft. Multiple climbing routes are available including a loop with Mohawk Valley, Crystal Peak, Father-Dyer Peak, and Pacific Tarn (the highest body of water in Colorado).
The peak provides some of the best introductory Class 3 scrambling you’re going to find in Colorado.
Overview
Pacific Peak is a fantastic looking mountain. If you’re driving on I-70 west of Frisco, pay attention as you near Copper Mountain. You should be able to see the stunning profile of the steep, almost conical mountain and its obvious cleft. Not only is it a show-stopper to look at, the mountain is only fortyish feet shy of being a 14er.
There are multiple ways to climb Pacific Peak but creating a loop with other standout features in the area like Mohawk Valley, Crystal Peak, Father-Dyer Peak, and Pacific Tarn (the highest body of water in Colorado) is a fine way to have an adventure. Father-Dyer is also a high 13er and, via its East Ridge, provides some of the best introductory 3rd Class scrambling you’re going to find in Colorado.
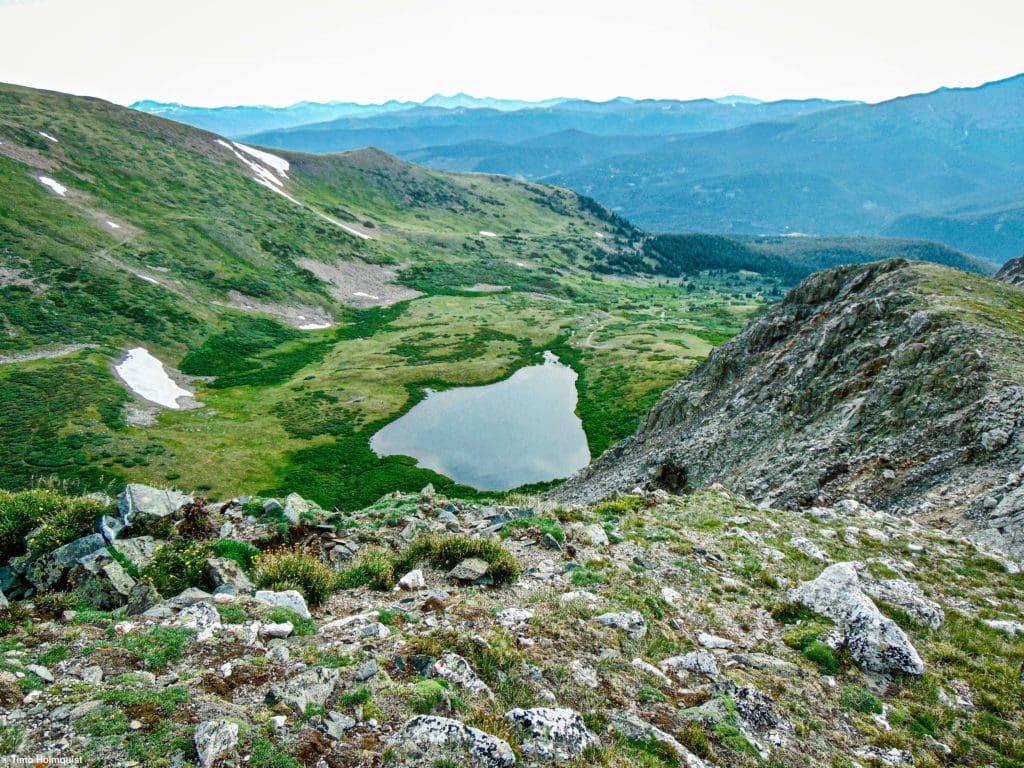
Mohawk Valley from above, another standout section of the hike.
Table of Contents
Article Navigation: Click on any of the listed items in the table of contents below to jump to that section of the article. Similarly, clicking on any large, white section header will jump you back to the Table of Contents.
The magnificent Pacific Peak from the slopes of Crystal Peak.
Best Alpine Scrambles in Colorado
Reach non-technical mountain summits while exploring low angle rock, traveling through talus and scree, crossing streams, navigating dense forest growth, and walking on snow-covered slopes.
Scales and Criteria
This article uses two metrics to calculate difficulty: overall distance and elevation gain. For winter ascents, a snow rating may be used, but this review covers the basic loop during snow-free summer and autumn months, so snow shouldn’t be more of a factor than a few isolated patches up high. Seeing as there are multiple places where scrambling is required, a technical rating is also employed, which uses the Yosemite Decimal System to calculate the difficulty of the moves required.
Difficulty Ratings:
- Easy: less than 5 miles, less than 500 ft. of elevation gain
- Moderate: 5-10 miles, 500-2000 ft. of elevation gain
- Difficult: 5-15 miles, more than 2000 ft. of elevation gain
- Very Difficult: 10+ miles, more than 3,500 ft. of elevation gain
Technical Rating:
- Class 1: Established hiking trail the entire length of the adventure. Low chance for injury.
- Class 2: Typically involves cross-country navigation, possibly using hands for balance but not required, steeper than Class 1.
- Class 3: Hands and feet used to scale areas; must use hands to proceed (either for balance of to help pull you up a section), increased exposure, a fall could be fatal. Helmet recommended, along with grippy hikers.
- Class 4: Climbing on very steep terrain just shy of vertical, falls could be fatal, hands employed for grip and balance continuously, ropes advised but scalable without. Helmets are highly recommended, along with grippy hikers.
- Class 5-5.4: Vertical climbing that involves technical rock-climbing moves, exposed, falls likely to be serious or fatal, possible to scale without ropes but only for very experience veterans. Helmets, grippy hikers, and/or rock-climbing shoes necessary.
- Class 5.5 and up: Not covered as scrambling, full-on rock climbing with ropes, helmets, etc.
Pacific Peak from Mohawk Valley.
The Ultimate Offline GPS Hiking & Ski Maps
See why onX Backcountry is the ultimate GPS navigation app for your outdoor pursuits. Try Today for Free. No credit card required.

Directions to Trailhead
This loop hike is located in the Tenmile Range, home to excellent scrambles and hikes, including the Peak 1-5 scramble, Quandary and a host of other summits. It is also a very popular range due to its proximity to Breckenridge. So, while you may not have the whole loop to yourself (especially in the Mohawk Valley), the popularity guarantees easy access.
To get there from the northern Front Range (most of Denver, Boulder, Fort Collins etc.), travel west on I-70 to exit 203 and take US 9 south to Breckenridge. To get there from the southern Denver suburbs, you can take US-285 over Kenosha Pass and then US 9 north over Hoosier Pass. From Colorado Springs, its easiest to take US24 west to US 9, then north through Fairplay and up over Hoosier Pass.
The road you’re looking for is Spruce Creek Road, which is well-signed and located 8 miles north of Hoosier Pass or 4 miles south of Breckenridge. Take the road through some neighborhoods as it switches to dirt and find a well-marked parking area. This is the best spot to park a 2wd car. For 4wd, you can continue up the road, take a right at the first big Y-split and make it up the valley as far as your rig will let you.
Alternatively, you can continue beyond the parking lot, take a left at the y-split, and continue on spruce creek road for about a mile. You’ll then see another split, take a right and park close to (but not blocking) the gate. This is called the aqueduct road and a convenient place to start and end the loop hike.
From there, continue on the road beyond the gate for ~50 yards, and pick up the Wheeler Trail on the left. Take this trail (north) until you intersect with the 4wd road. From there, take a left to continue towards Lower Crystal Lake and Father-Dyer Peak.
Another shot of the iconic peak and its surrounding environment.
The Ten Essentials: How to Equip Yourself for the Backcountry
Packing the “Ten Essentials” whenever you step into the backcountry, even on day hikes, is a good habit. When something goes awry, you’ll truly appreciate the value of carrying these items that could be essential to your survival.
Field Notes
This is a high elevation 3-summit kind of day so bring lots of water, sunscreen and nutrition. Also, be aware of afternoon thunderstorms as there aren’t a lot of places to hide above treeline. Note signs of altitude sickness (nausea, lack of appetite, persistent headaches) and treat with NSAID’s (non-steroidal anti-inflammatory drugs) or go back down in elevation if symptoms aren’t going away.
For forecasting, use the Blue River 7-day, which is the town nearest to the trailhead. Opensummit has a forecast for Pacific Peak, you have to pay to unlock all the features, but you can get a free forecast the day before. There’s also a free Crystal Peak forecast, which is on part of the loop as well.
Father-Dyer has a Class 3 ridge, but you can avoid most, if not all, of the scrambling. The whole idea is to try some of the moves out to see if scrambling is something you’d be interested in, since it’s such a forgiving test-piece. Crystal Peak is a Class 2 talus hop but can also be avoided by traversing around the summit and continuing on to Pacific. Pacific is a 2+ light scramble with some loose rocks but not bad. Stay aware on the descent to Mohawk Lakes; while the terrain is only Class 2, the line you take is important on loose terrain, and the easiest gully down often has snow in it through July. When descending, create zig-zags and never descend directly above or underneath someone. Although the chances are rare, one loose rock can hit someone or start a bigger slide.
Keep in mind that along the ridges between Crystal Pk., Pacific Pk. and Mohawk Valley, there may be snowfields through July. A pair of gaiters and/or spike aren’t bad tools to have in your arsenal.
Looking back at part of your circuit with the Mohawk Valley spread below.
Global Rescue has expanded services to include local field rescue within 100 miles of home. Global Rescue is there whether you’re hiking, kayaking, snowmobiling, fishing or simply enjoying the outdoors and get ill or injured and you’re unable to get to safety on your own. Global Rescue is the red button you push in an emergency. Their team of medical and security experts come through for you when it matters most.
Interesting History
Father-Dyer Peak has an interesting name and an even more interesting origin story. John Lewis Dyer was a midwestern man who turned to religion and walked most of the distance to Colorado from Wisconsin in 1859. When he got there, he preached to miners and saloon goers, trying to rouse the Christian spirit. He was a regular mountain goat and regularly skied over 13,000-foot passes to preach to remote mining towns, who he felt needed more religion in their lives since the life of a miner is rooted in excavation, gambling and drinking.
He didn’t make much money preaching to the brigands, so he began carrying mail between Alma and Leadville by traveling over Mosquito Pass in brutal conditions. Because of his dogged efforts, he was widely liked and given the nickname Father-Dyer. His plaque is not only atop the peak but atop Mosquito Pass. He died at the ripe age of 89 and wrote a book called The Snow-Shoe Itinerant.
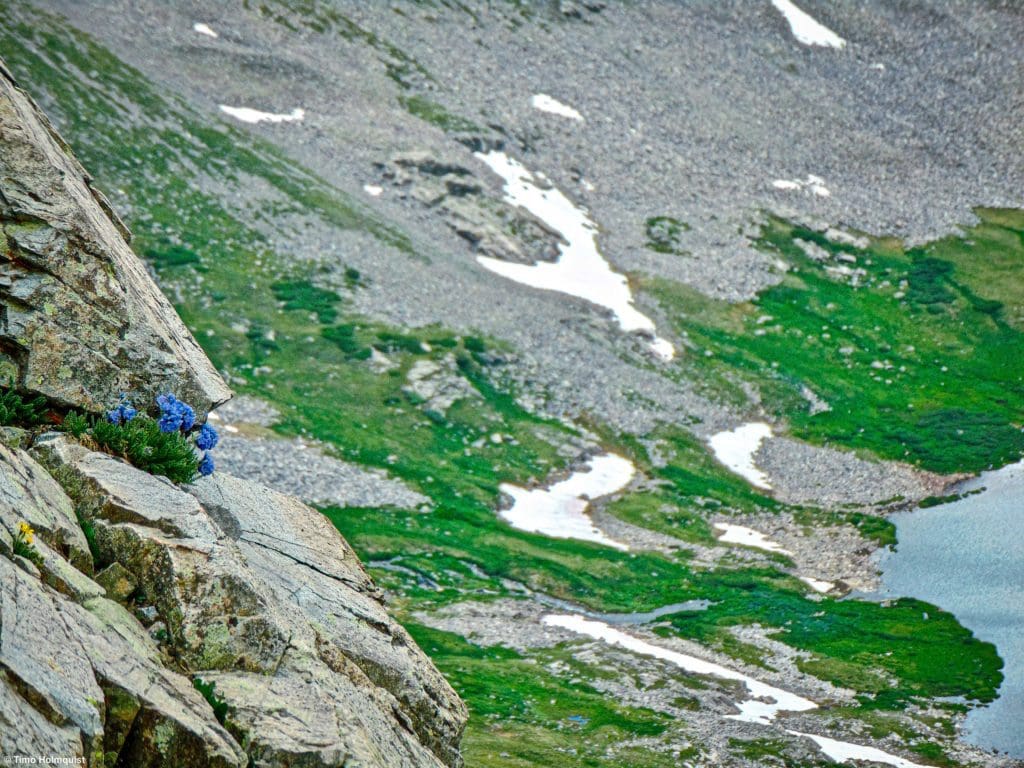
A hardy Skypilot grows on a cliff face between Crystal and Pacific Peaks.
Journal:
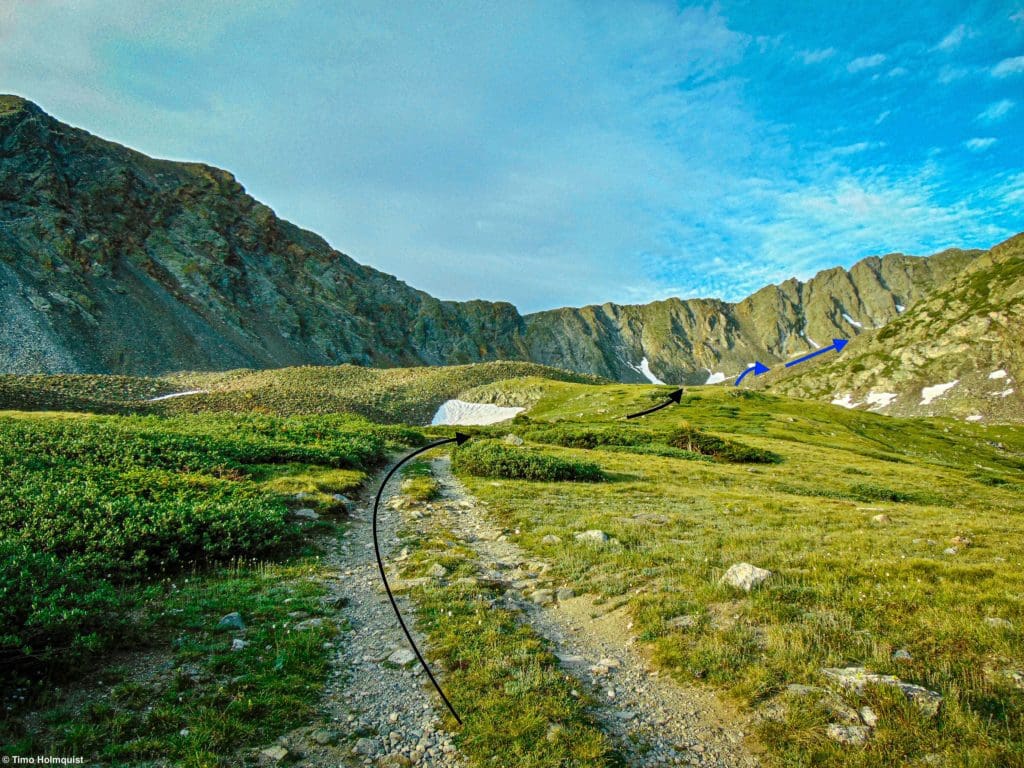
After parking at whatever lot you choose (the 2wd lot on Spruce Creek, as high as your 4wd will get you, or by the gate on the aqueduct road), your first goal is to find the east ridge of Father-Dyer Peak. If you started lower on Spruce Creek, navigation is easy. Follow the road up and above treeline until you see Lower Crystal Lake. If you parked by the aqueduct gate, continue north about 50 years, find the Wheeler Trail on the lefthand side and take it north until you run into Spruce Creek Road. Take a left on the road and follow it up into the alpine.
The road gradually diminishes, but it retains at least two very definable ruts all the way up to and past lower Crystal Lake.
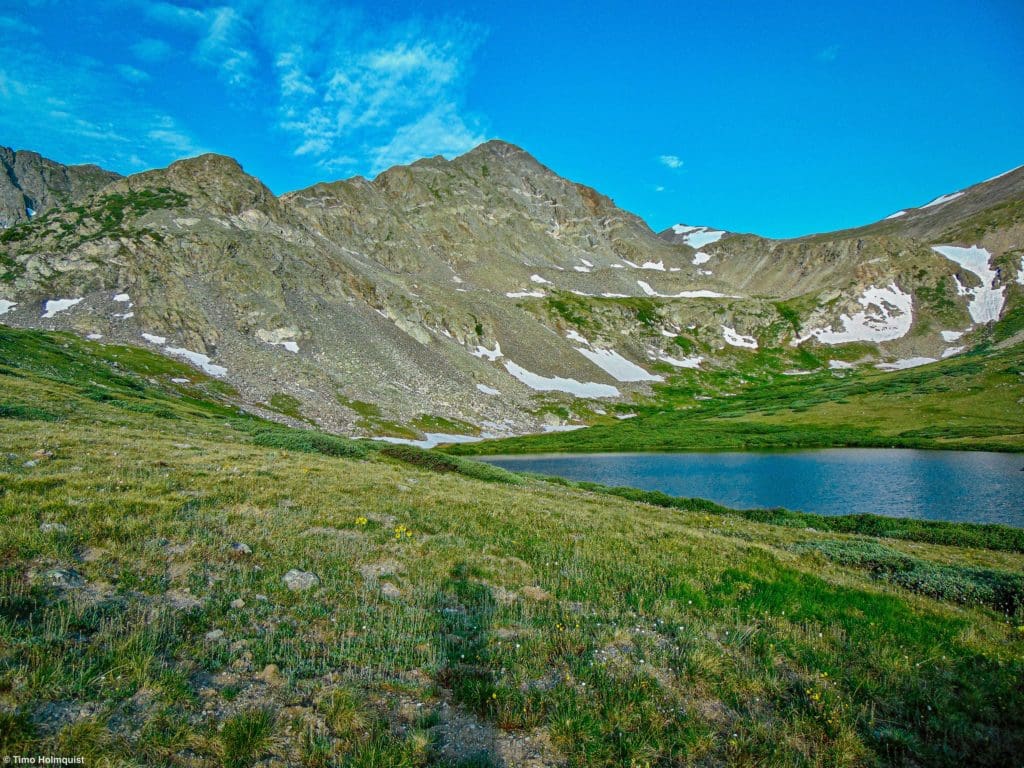
Lower Crystal Lake and Father-Dyer Peak from the Spruce Creek Road.
Once you reach the shores of the lake, the road turns and heads up a shoulder to the south of the lake. Before heading up this way, look across the lake and spot Father-Dyer Peak with its notched East Ridge, extending down to meet the road. This is also a good place for a quick break, as the road will quickly vanish into a sea of talus that you need to cross.
The road as it peels away from the lake, along with your approximate route.
Once the road hits the talus and begins to curl left (east) towards a spot at the base of Mt. Helen’s cliffs, you want to veer away from the road. Find a path of least resistance through a talus field until you can gain some elevation along the bottom of Father-Dyers East Ridge. Once you break from the talus, the going becomes a little steeper but a little easier on the knees.
Looking back down to the lake just after you summit the first of multiple ridge highpoints.
Head higher, connecting grass patches until you crest the first highpoint after employing some light Class 2 moves. This is a prominent rise but doesn’t contain any of the difficulties that are still farther on the ridge. The views begin to take shape around you, including some dramatic cliffs on the higher Helen/Father-Dyer Ridge to your south.
Gnarly alpine ridges to the south.
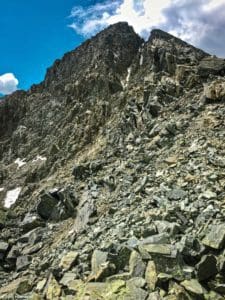
Continue gaining elevation, passing a series of smaller ridge tops with increasingly tougher moves. There are workarounds, but it’s fun to stick to the ridge crest and dabble in some Class 3 scrambling. Effort-wise, it’s much easier to go for the crest of the ridge. If you get to an area that looks like I won’t let you pass, slow down, scout both sides of the obstacle and find the alternative route.
One of the early Class 3 sections. Take your time and find the solid ledges and handholds available to you.
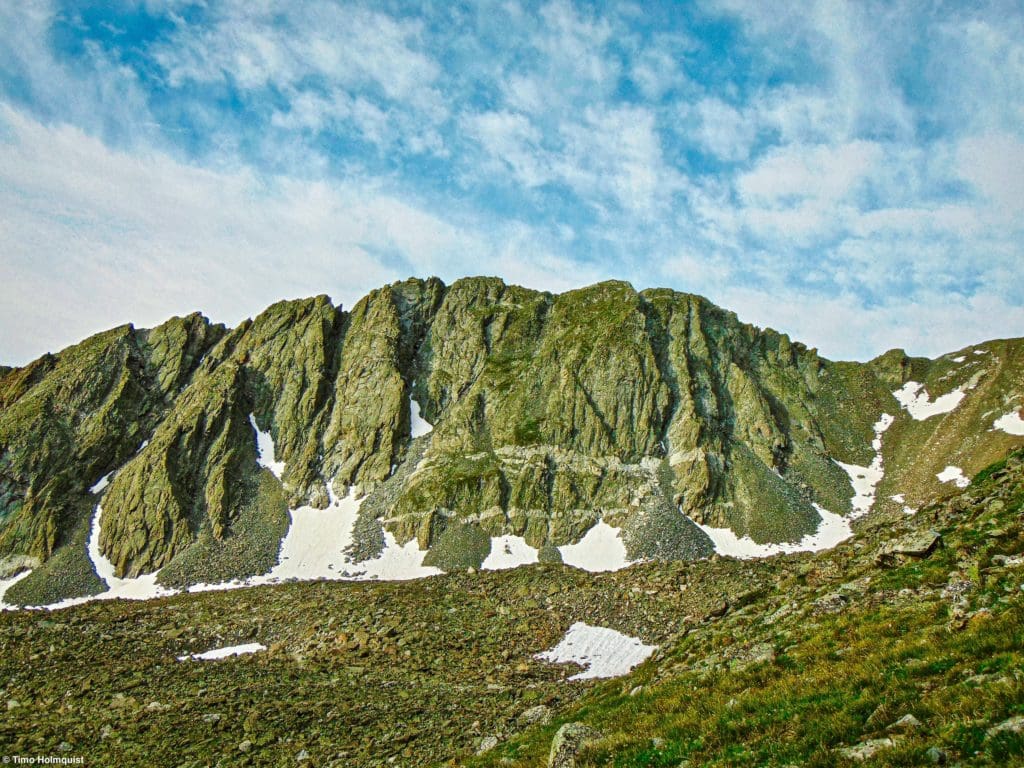
Once you pass the first Class 3 sections, there is a small dirt col and some good sitting rocks, from which you can stare at the upper ridge difficulties. From here on out, the ridge rises much more dramatically. Don’t let the view dishearten you, though; there are still plenty of ways around seemingly difficult sections.
What the rest of the ridge looks like.
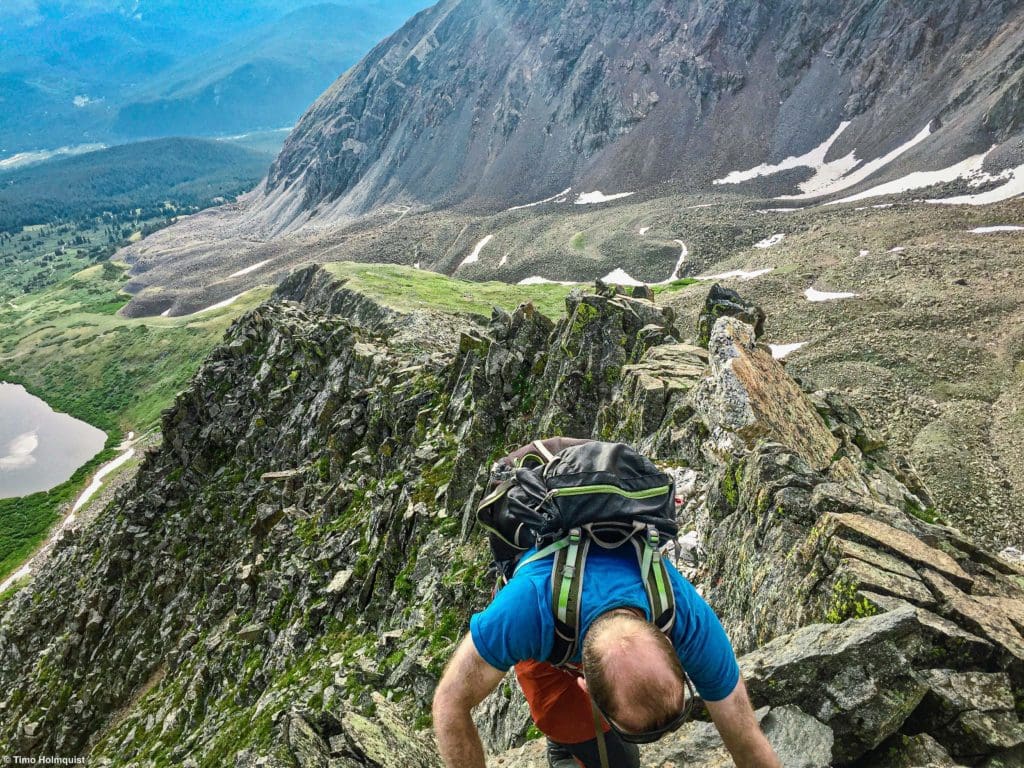
From this vantage point, the summit is not visible, so while the ridge in front of you has a lot of prominence, it isn’t the true summit. Continue scrambling at your own pace, sticking closer to the ridge for harder variations, or venturing left (south) to find easier alternatives. There are occasional sections where it’s beneficial to veer to the right. If you’re unsure, scout all sides before proceeding.

My buddy Ethan on another Class 3 section as you continue rising.
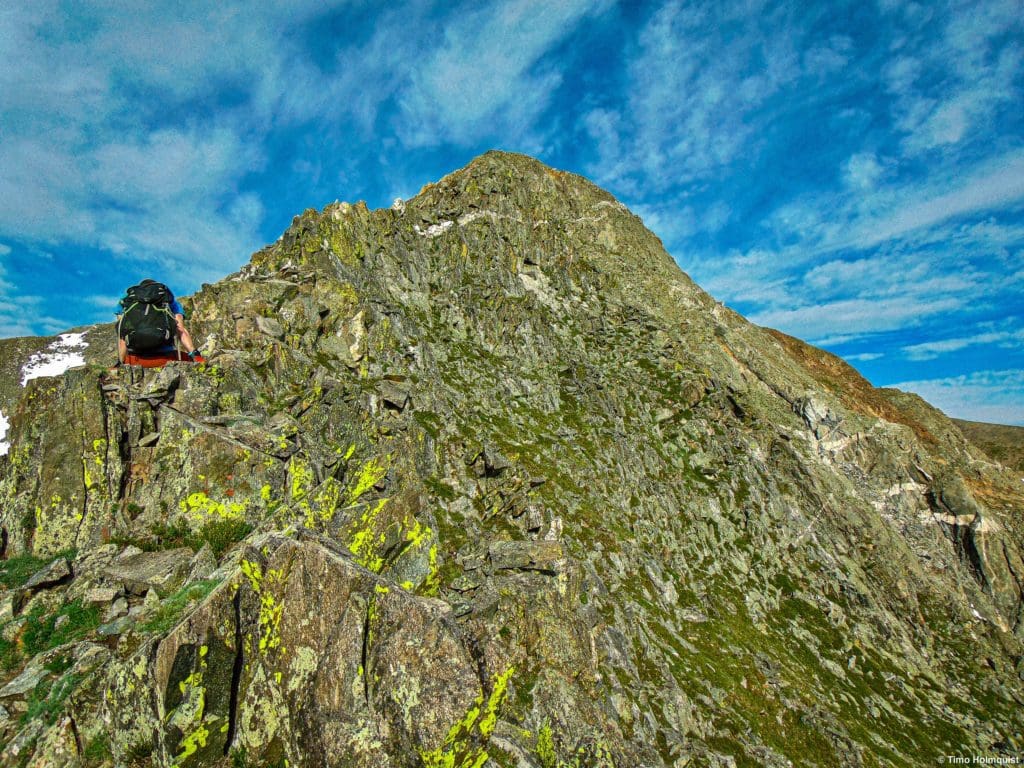
Eventually, you pass a prominent fin of rock along the crest that signals your proximity to the top of the scrambling section.

Getting to the top of the scrambling parts.
From here, top out on the east ridge with some more scrambling moves and set your sights on the true summit, which is down an easy Class 2 ridge to the west.
Zoomed in photo of Father-Dyers summit (left) and Pacific Peak rising up behind it.
This is a good vantage point to get your bearings. Father-Dyer and Pacific Peak are to the west, Quandary Pk. is to the south, and Crystal Peak, along with Upper Crystal Lake, lie to the north. Take your time along the Class 2 ridge and summit Father-Dyer for your first of three peaks on the day.
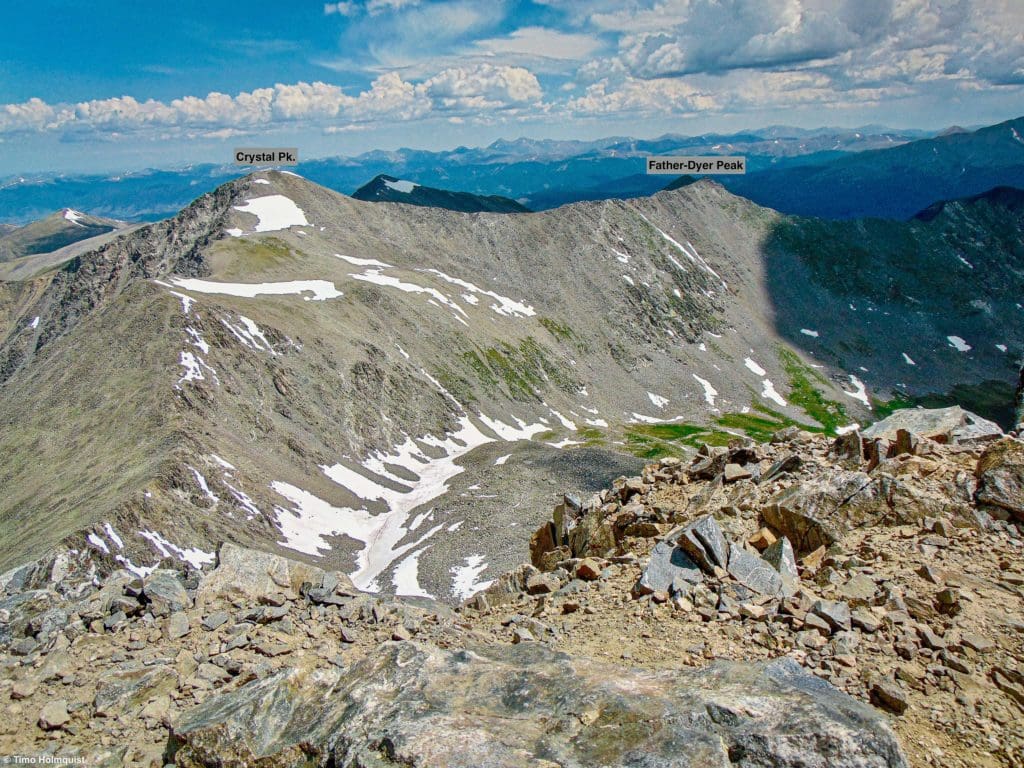
Looking west northwest to Crystal Peak and Upper Crystal Lake far below.
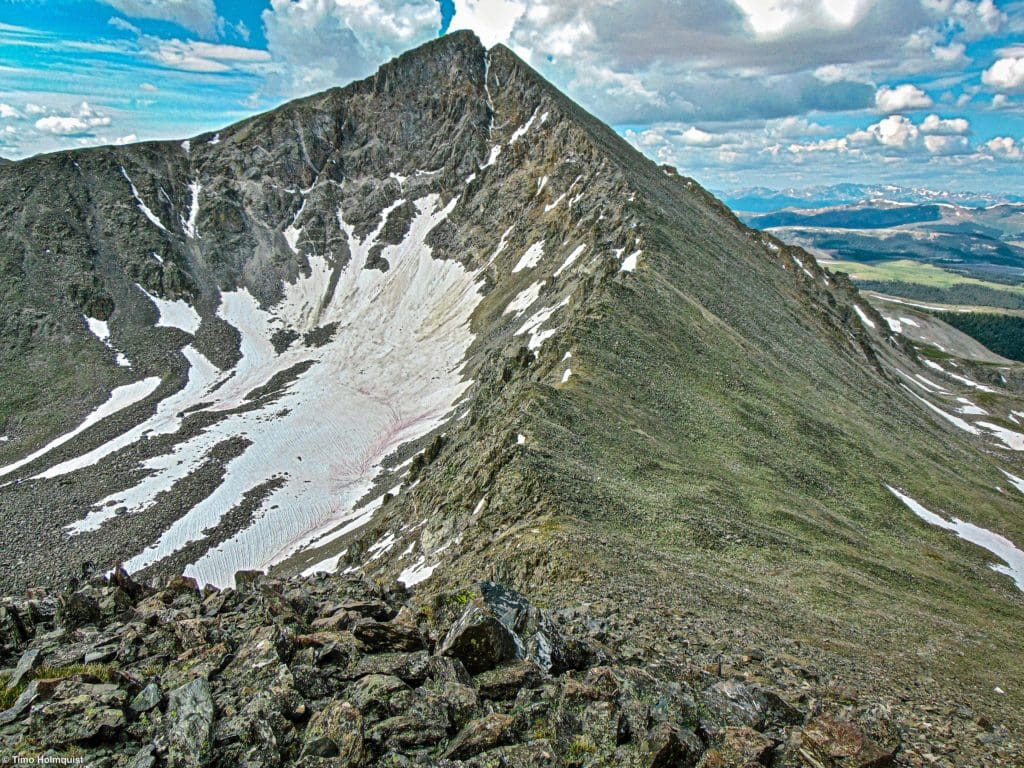
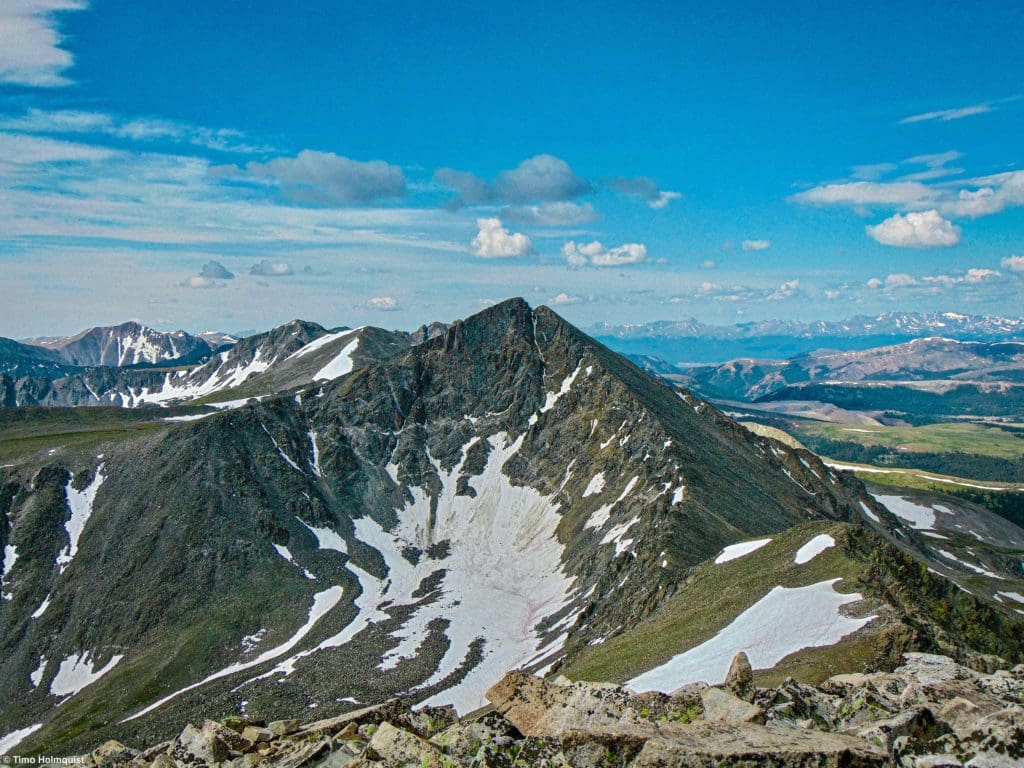
Father-Dyers summit is a great place to consider all the ridges, peaks, and alpine around you. It also provides some great looks at your eventual goal, Pacific Peak. In fact, Pacific Peak, from this angle, is one of the best visual examples of what a driving force of change erosion can be.
For me, it was always hard to visualize what erosion was or meant because its effects are usually only obvious long after one human lifetime is spent. However, if you look at Pacific Peak, you’ll see an odd, teardrop-shaped heap of talus and scree below the steeper parts of the peak.
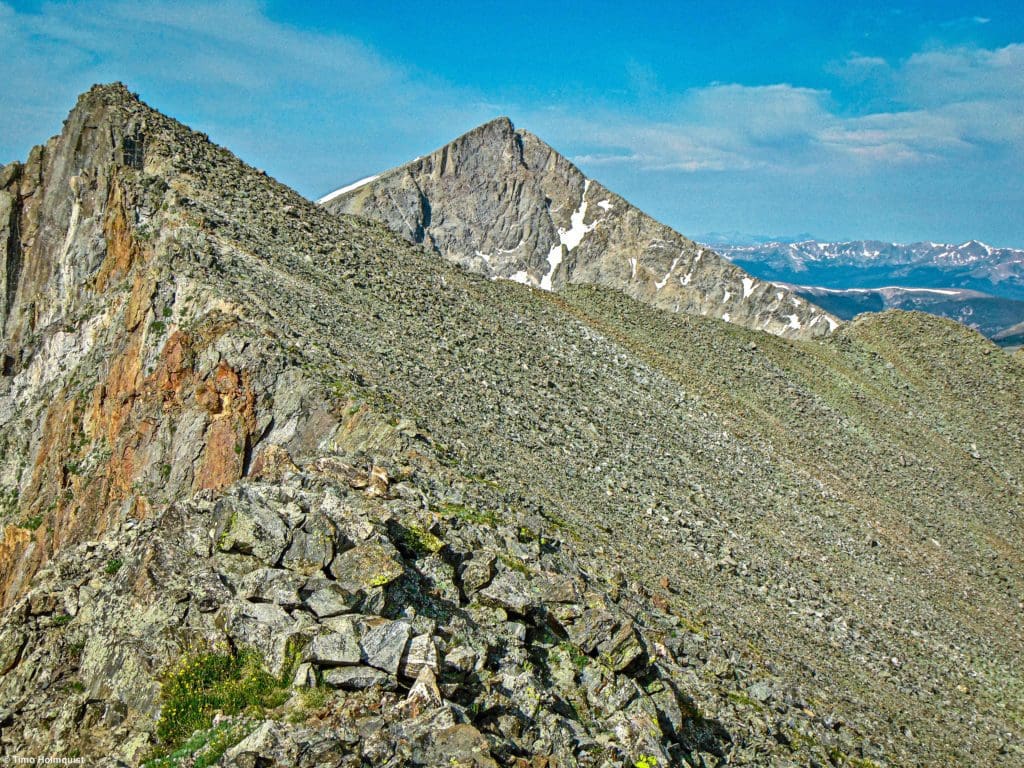
Pacific Peak from Father-Dyer.
All of that teardrop-shaped debris used to be attached to Pacific Peak. Over time, or perhaps in one great earthly sneeze, that mass was let go, falling to its current resting place. The teardrop shape, to me, furthers the idea of erosion as a series of almost liquid-like movements as the Rockies slowly decay.
Pacific peak and its debris.
Once you’ve taken a nice break on top of Father-Dyer, prepare for the next phase of the hike. This is a long Class 2 affair, either to the top of Crystal or traversing around it to connect with the ridge of Pacific Peak.
Crystal Peak is often the target of a loop involving Crystal Lake or Father-Dyer and is a tall 13er as well. If you’re really doggin it after Father-Dyer, you can opt to summit Crystal and take the trail back to the lakes. So many wonderful perspectives still exist on the way to and down from Pacific, so if you have the gas, keep going.
The connecting ridge to Crystal from Father-Dyer.
From the low point of the ridge to the top of Crystal Peak is another 382ish feet. While not a substantial amount, at these elevations, you’re going to be breathing hard. In fact, once you cross 13,000 feet on Father-Dyers east ridge, you don’t dip below that elevation line until you’re descending from Pacific Tarn down to Mohawk Valley, some 2.75 miles away. On paper, that isn’t long-distance, but in the trailless alpine, it might feel more like 10 miles.
Mohawk Valley and Lakes from the connecting ridge. Quandary Peak looms behind.
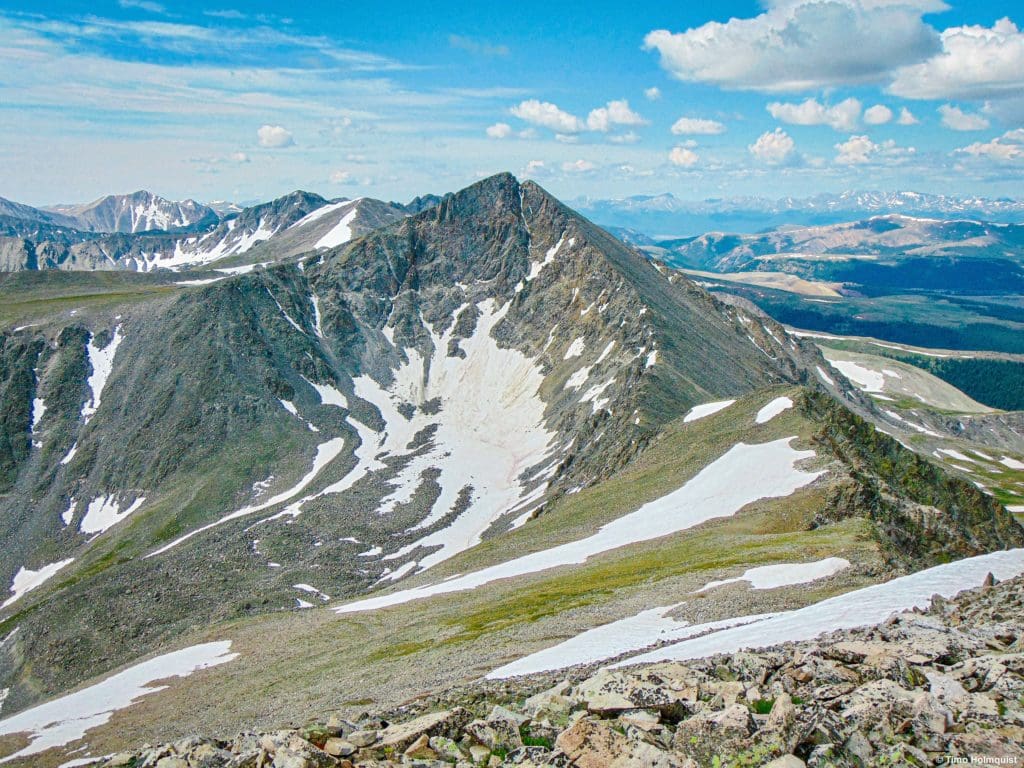
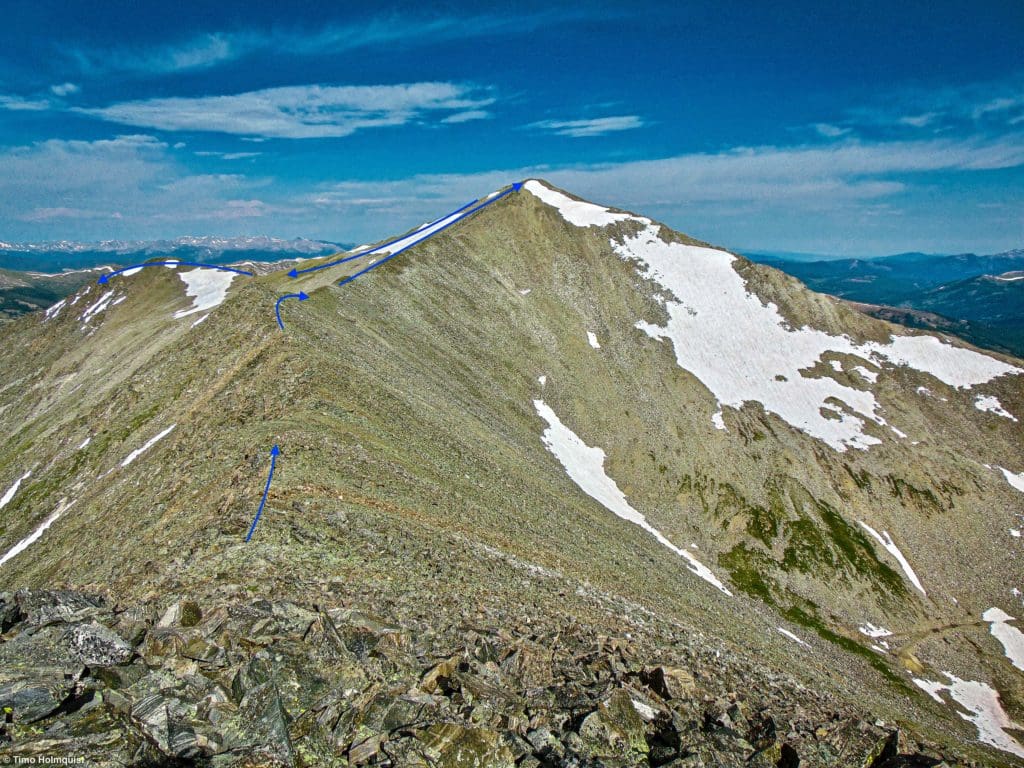
Once you top out on Crystal and enjoy the fantastic views, begin descending down the ridge that connects with Pacific Peak. From the top of Crystal down the first few hundred feet, Pacific Peak doesn’t look like all that much because of a gentle plateau to its east and an aesthetic slope to the west.
Pacific Peak to the south.
Once you make it down to the saddle between Crystal and Pacific, your next target starts to look a bit more intimidating.
Looking up to the summit.
For the rise, you’re mostly to the right (west) of the ridgeline with better footing, although the mountain is decidedly loose. Check hand and footholds before committing pressure to either, and work your way up the ridge slowly. The elevation gain here is fairly significant, from a low point just above 13,200 to 13,950 (+750 ft.).

Making our way up the ridge with Crystal Pk. in the background.
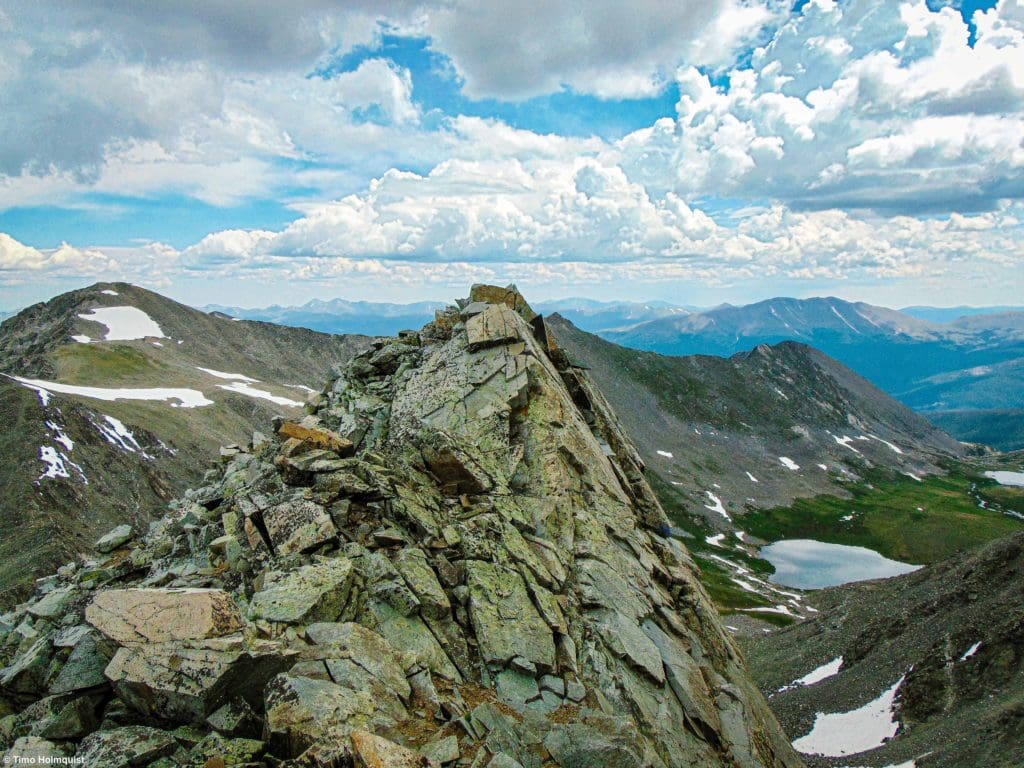
Eventually, you’ll near the iconic cleft between the lower western summit and the higher eastern one.

Looking at the higher summit across the cleft.
For the scrambling inclined, if you stay close to the cleft, and scramble diagonally to the summit, a smattering of loose Class 3 and 4 moves await. For the rest, find easier Class 2+ options on the north side of the summit. Once you find the highest rock, touch it and celebrate your third and final summit of the day.
From the summit rock, looking back to Crystal and Father-Dyer Peaks.
Turning the other way, you’ll be able to see Quandary Peak looming over Pacific Tarn. Some of the Decalibron set of 14ers are also visible a little farther south. This is a great summit to relax on (weather permitting) and relish the substantial accomplishment of getting here.
When ready, begin descending east on broken talus (Class 2) down to the large plateau holding Pacific Tarn. If you have the weather window, consider touching a toe or getting your whole body into the highest continuous body of water in Colorado.

Quandary looming behind Pacific Tarn.
If that isn’t of much interest, continue east on the plateau as it begins to narrow back down into a formidable ridge.
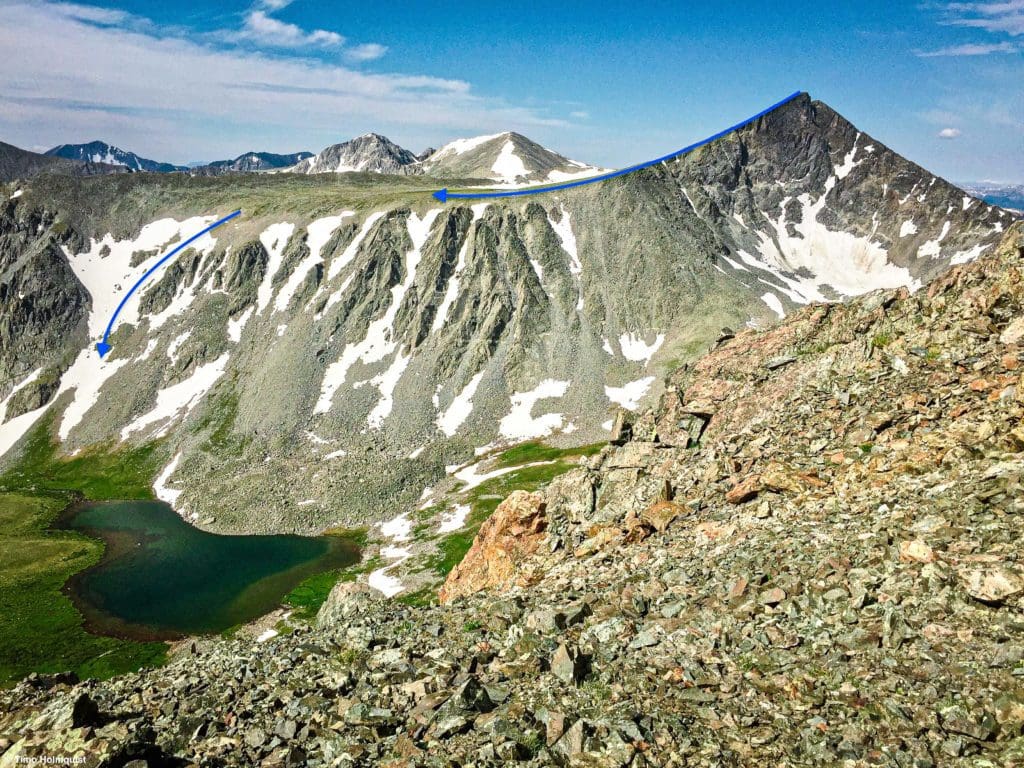
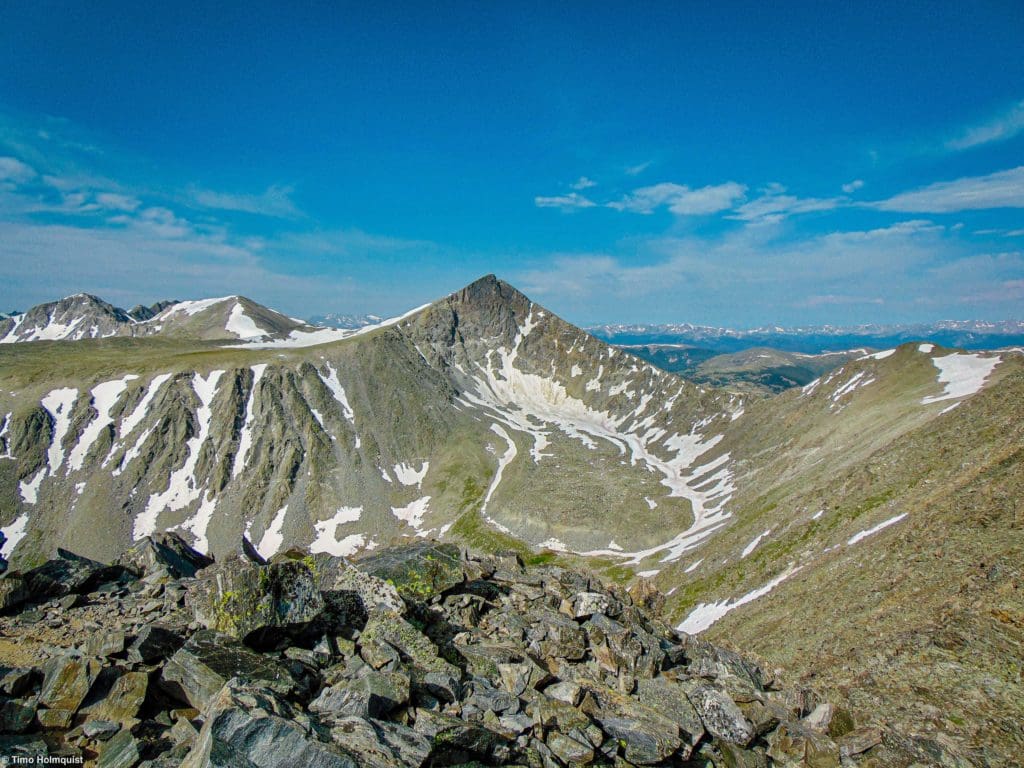
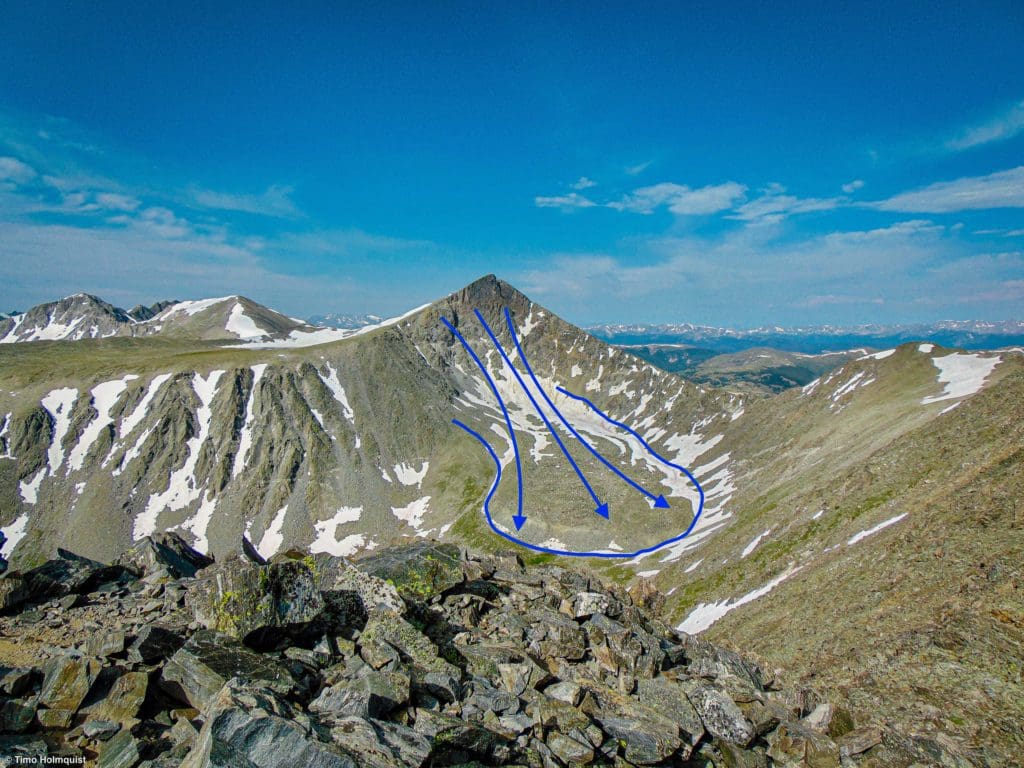
The approximate route of your decent, seen from near Father-Dyer.
The easiest way to get down is to find a broad slope heading into the Mohawk Valley. It will likely have some snow in it through July. Despite the presence of the snow, you can use a combination of plunge steps (sink your heel into every step to get traction) or spikes to ease the descent. There is a part of the ridge that sheds the snow earlier, but the slope angle is much steeper, and the rockfall danger is much higher.
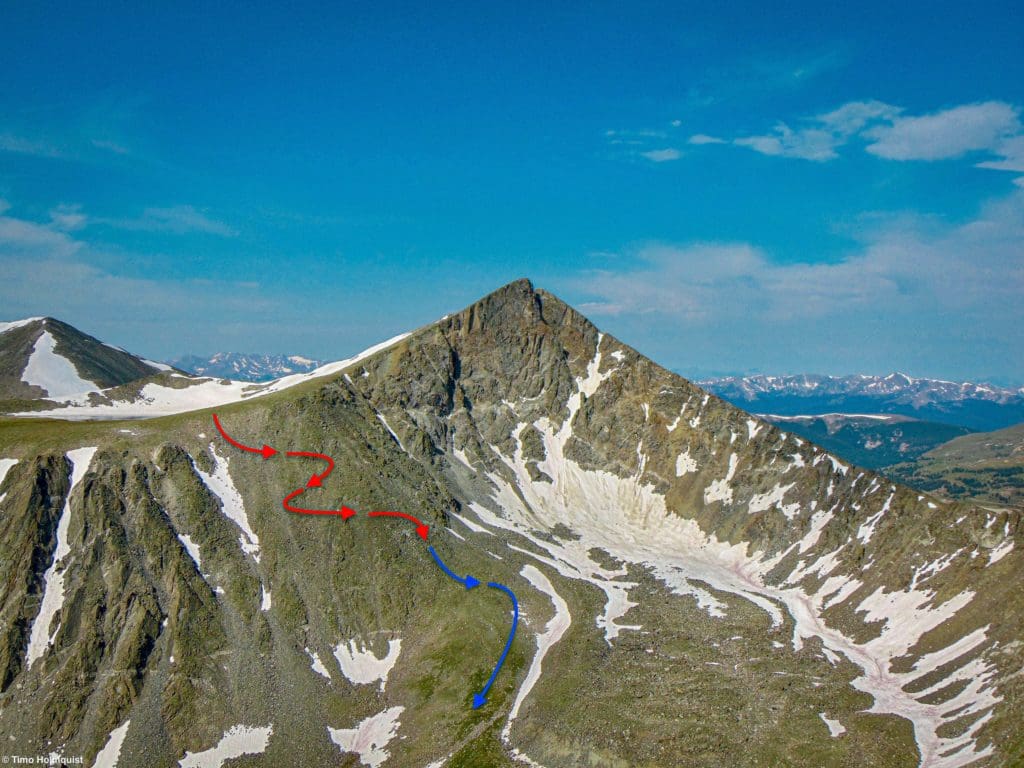
Snow-free alternative, but much, much harder. Lots of loose rock; do not descend directly below or above someone.
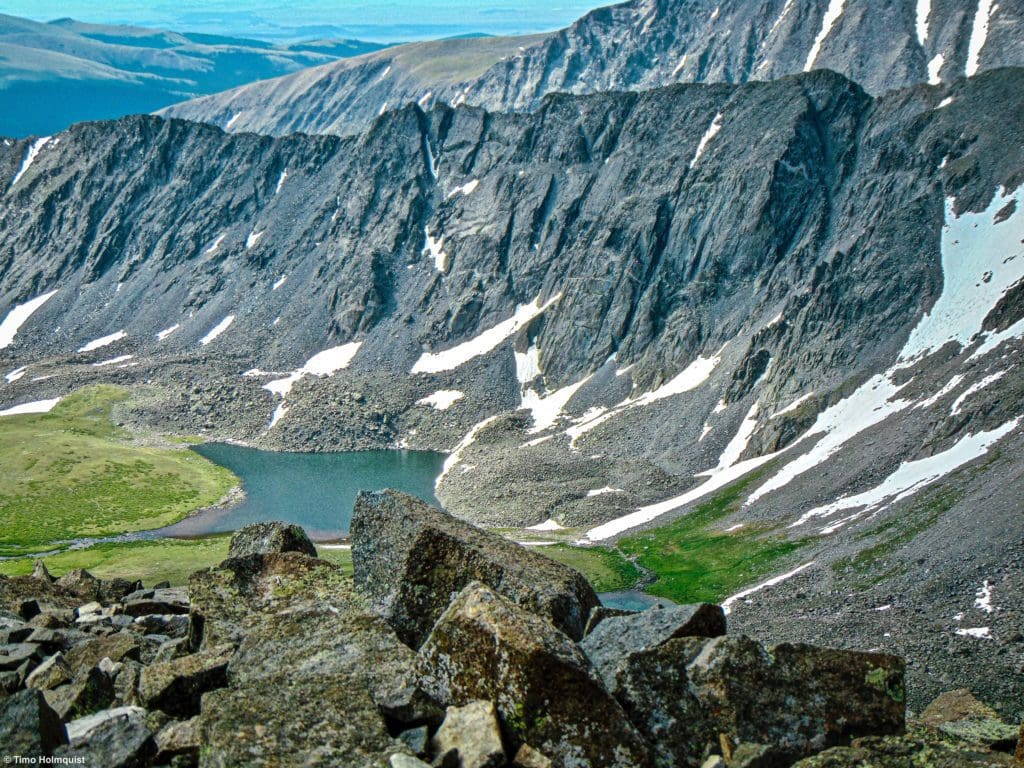
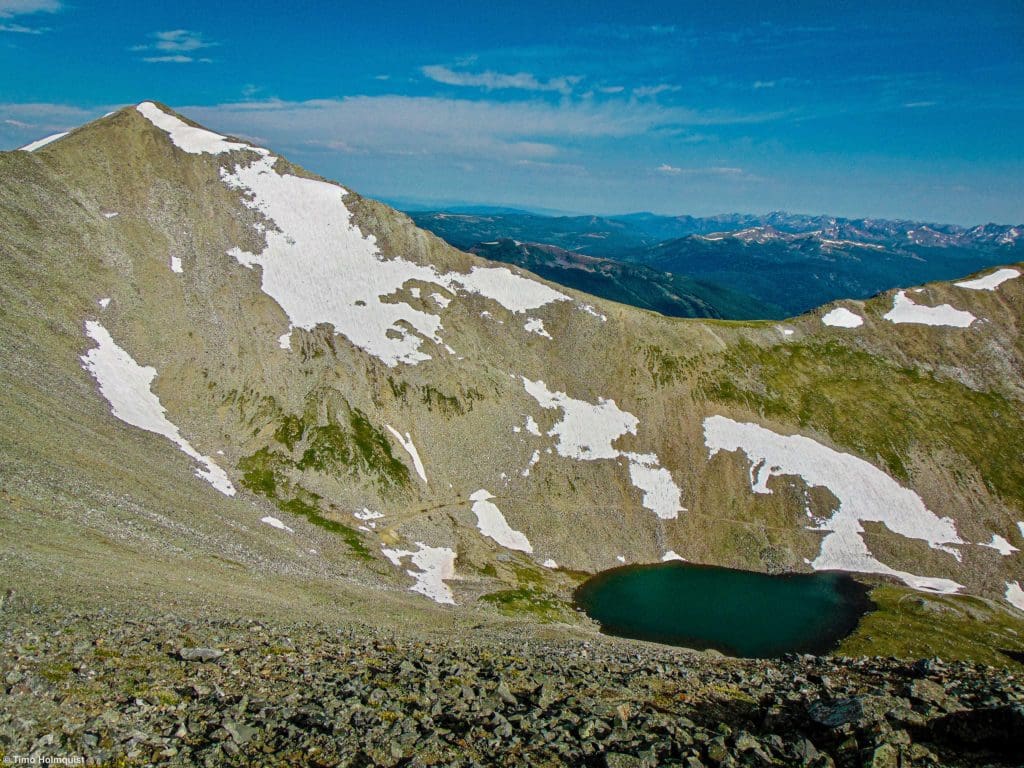
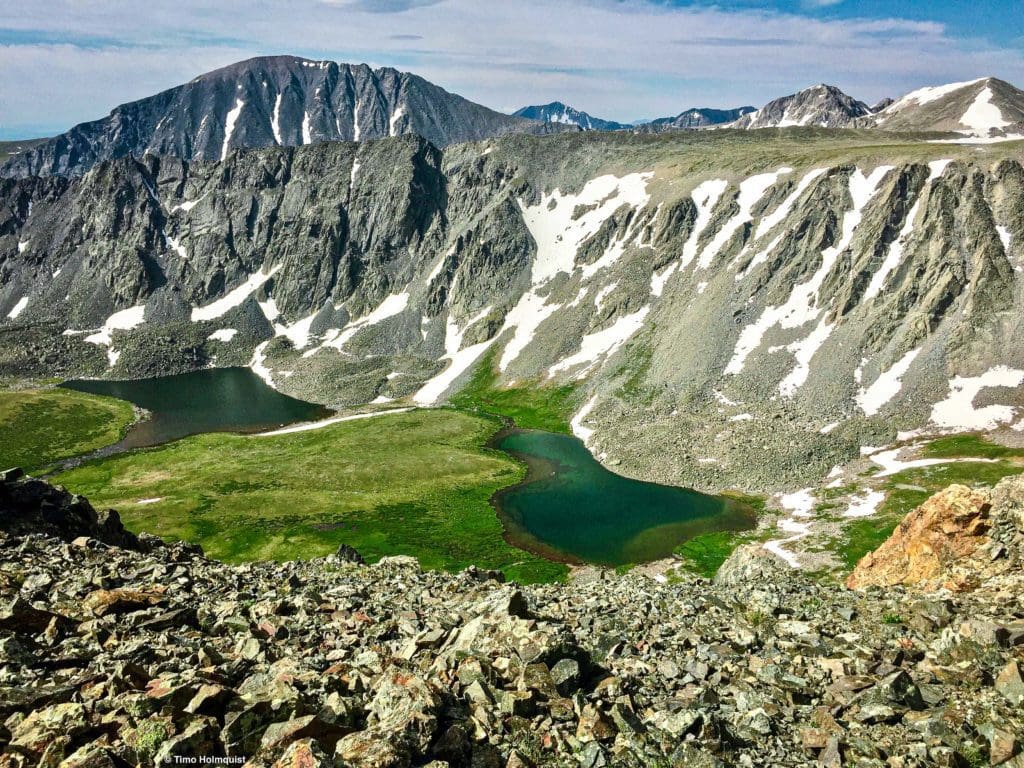
Once you are safely down into the Mohawk Valley, the character of the hike changes once more. The upper part of this valley is gorgeous, dotted with fields of beautiful wildflowers and a series of alpine lake. It is a very satisfying place to be.
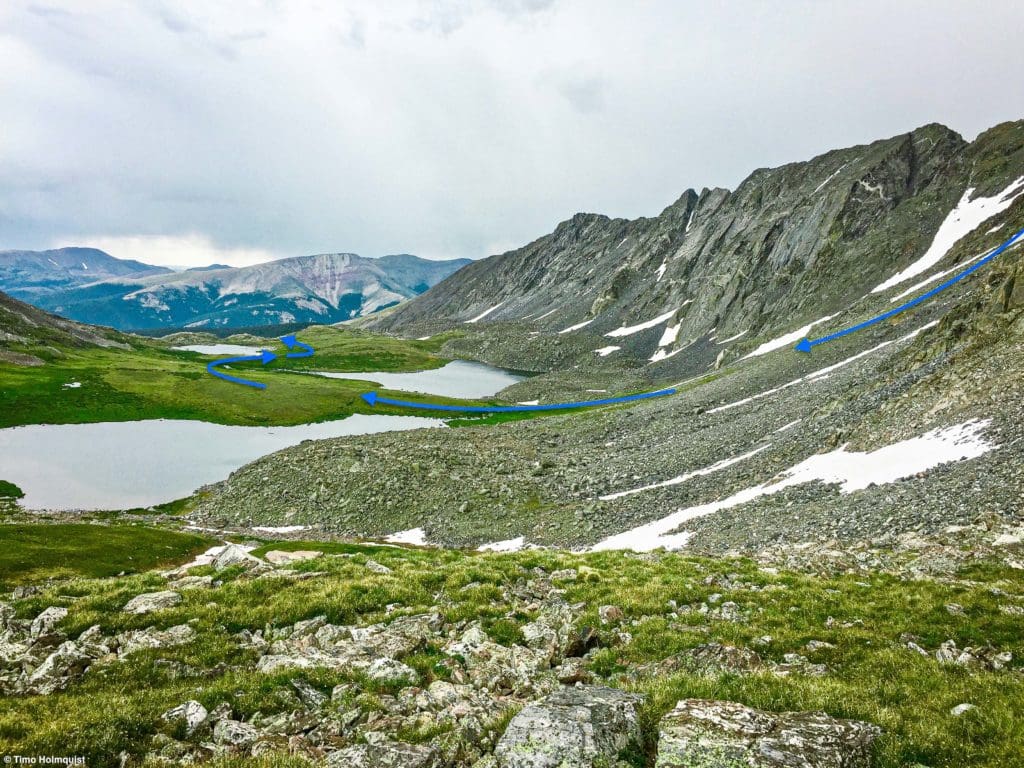
Overview of where you drop down into the valley, taken from a subsequent exploration of the area.
Once you cross between the two lakes below you, you’ll be able to pick up a rough trail heading east and lower into the basin. Make sure to take some time to marvel at the impressive cliffs along the southern edge of the valley.

Cliffs down ridge from where you descended.
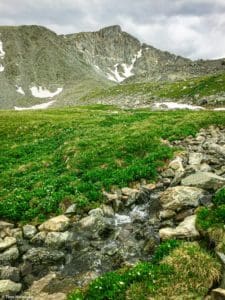
Depending on the time of year, you’ll also be able to catch exquisite wildflower displays dotting the valley.
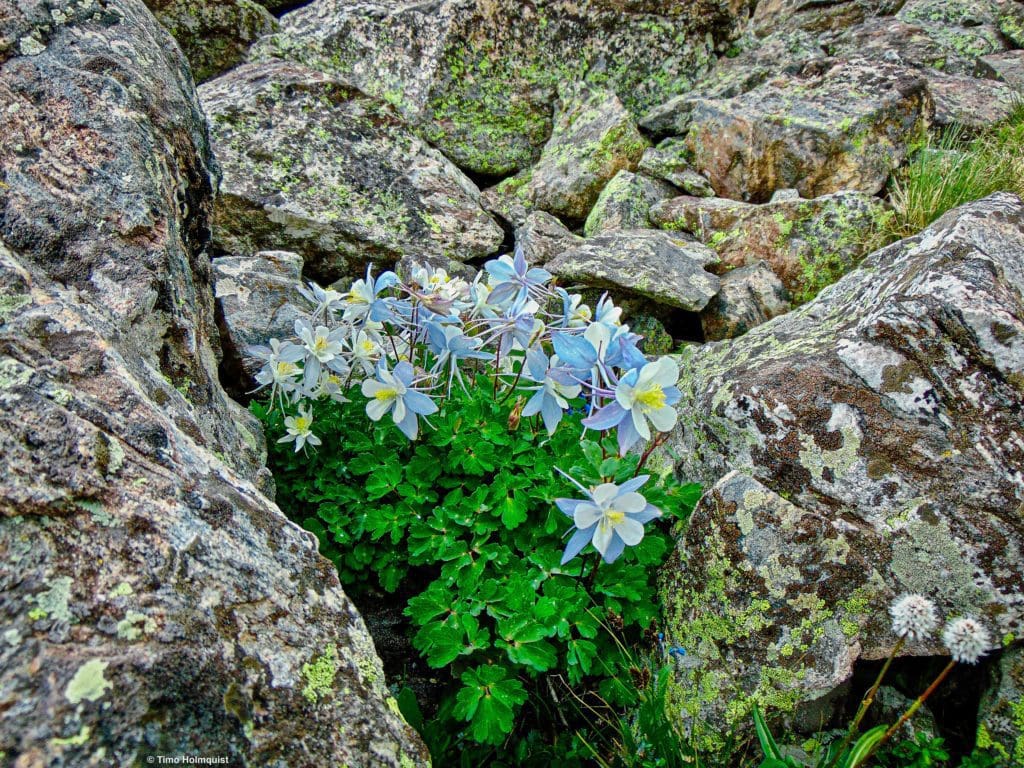
A batch of alpine Columbine.
Once you reconnect with the trail, things move a lot quicker. You’ll drop off a bench and down to Mohawk Lake. From there, you’ll drop down to another half bench and find Lower Mohawk Lake before descending another step toward treeline. This last stretch will have people on it and features strewn mining equipment on each side of the trail, which makes for interesting viewing.
Once you drop beyond an old cabin alongside the trail, take the Spruce Creek Trail east. Alternatively, you could head up to Mayflower Lake and traverse north from there to reconnect with your car. This option does require regaining a bit of elevation, and will cost you a little more than a mile.
Pikas on top of Pacific Peak.
The much simpler method, with tons of signs and marked trails, is to simply continue east on the Spruce Creek Trail until intersecting with the Wheeler Recreation Trail; then, take a left and hike the trail. Eventually, the trail will intersect Spruce Creek Road and continue along the aqueduct road until you reach your car. From the start of the Spruce Creek Trail, this option is 1.4 miles.
Now, if you parked at the official Spruce Creek Trailhead (the 2WD lot that doesn’t utilize the aqueduct option), the best move is to continue all the way east on Spruce Creek Trail for 2.2 miles from its intersection with the Mohawk Lake Trail, and it’ll dump you out right where the parking lot is.


