


High Point:
11,754 feet

Total Ascent:
~3,500 feet

Difficulty:
Very Difficult (Class 2+ scrambling)

Distance:
~9.3 miles

Waypoints:
40.1294, -105.7642

Route Type:
Out and Back
As part of our support of 1% For The Planet, a portion of our giving is provided in support of the National Forest Foundation.
Table of Contents
Article Navigation: Click on any of the listed items in the table of contents below to jump to that section of the article. Similarly, clicking on any large, white section header will jump you back to the Table of Contents.
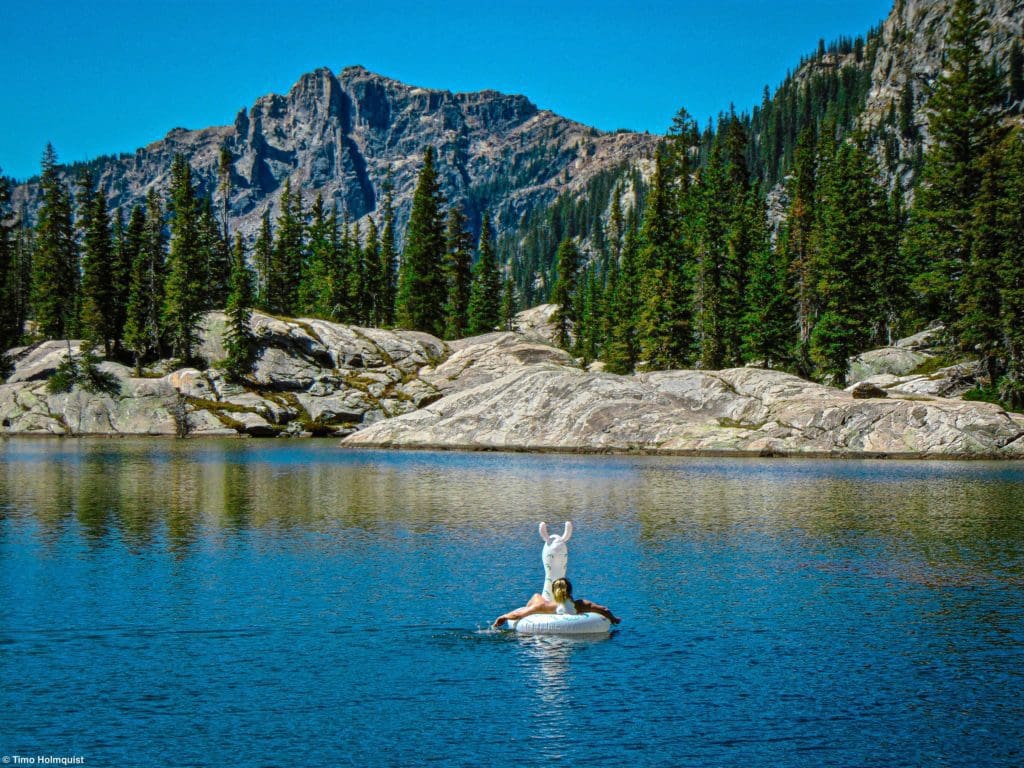
The steep eastern cliffs of Irving Hale from Stone Lake.
Overview
You’d be forgiven for not knowing where Mt. Irving Hale is, or that it even exists. The mountain is hidden amongst a sea of others that make up the margins of Grand County. Its elevation, a lowly 11,754 ft, doesn’t get a lot of attention except amongst the most dedicated outdoor folk of the region. Yet, Mt. Irving Hale is unique for a few reasons. Despite its lower elevation, it still gets above treeline, and because it sits back from the main ridges of the Indian Peaks, its summit views are outstanding. Irving Hale is also one of the first peaks on the western side of the wilderness to see the sun, making it a long but fantastic option for mountain sunrises. On the other hand, the expansive views to the west also make it a great candidate for sunsets.
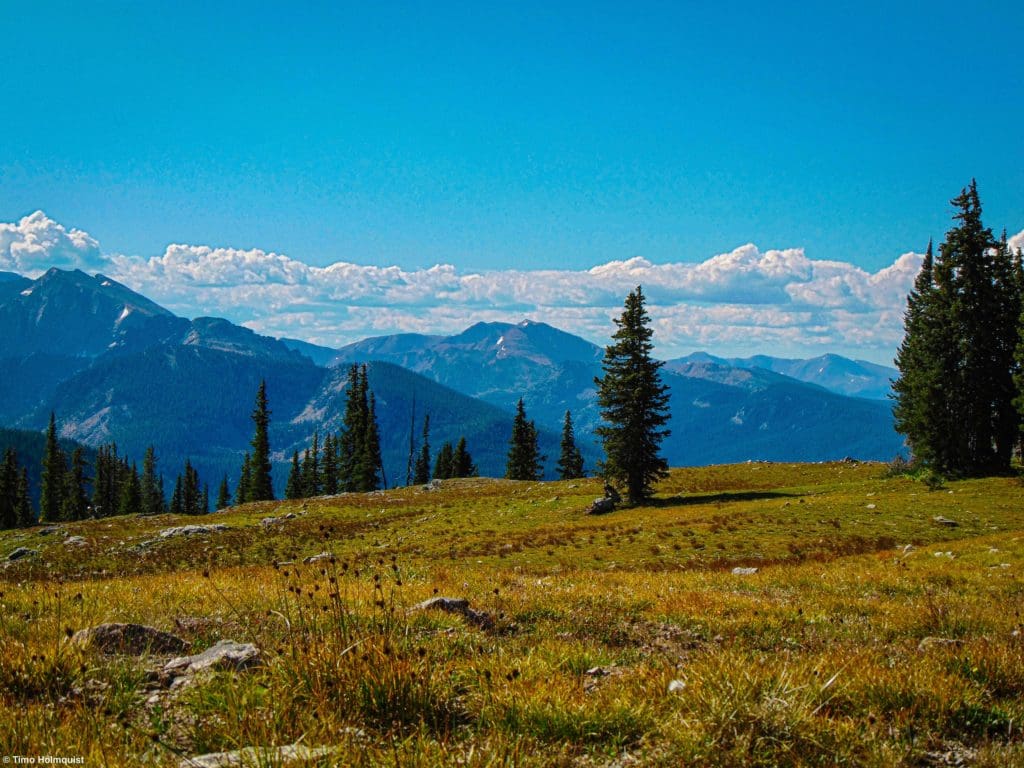
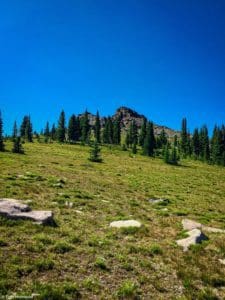
Gorgeous meadows below Irving Hale.
Scales and Criteria
This article uses two metrics to calculate difficulty: overall distance and elevation gain. For winter ascents, a snow rating may be used, but this review covers the out and back hike during snow-free summer and autumn months, so snow shouldn’t be more of a factor than a few isolated patches up high. Seeing as there are multiple places where scrambling is required, a technical rating is also employed, using the Yosemite Decimal System to calculate difficulty.
Difficulty Ratings:
- Easy: less than 5 miles, less than 500 ft. of elevation gain
- Moderate: 5-10 miles, 500-2000 ft. of elevation gain
- Difficult: 5-15 miles, more than 2000 ft. of elevation gain
- Very Difficult: 10+ miles, more than 3,500 ft. of elevation gain
Technical Rating:
- Class 1: Established hiking trail the entire length of the adventure. Low chance for injury.
- Class 2: Typically involves cross-country navigation, possibly using hands for balance but not required, steeper than Class 1.
- Class 3: Hands and feet used to scale areas; must use hands to proceed (either for balance or to help pull you up a section), increased exposure, a fall could be fatal. Helmet recommended, along with grippy hikers.
- Class 4: Climbing on very steep terrain just shy of vertical, falls could be fatal, hands employed for grip and balance continuously, ropes advised but scalable without. Helmets are highly recommended, along with grippy hikers.
- Class 5-5.4: Vertical climbing that involves technical rock-climbing moves, exposed, falls likely to be serious or fatal, possible to scale without ropes but only for very experienced veterans. Helmets, grippy hikers, and/or rock-climbing shoes are necessary.
- Class 5.5 and up: Not covered as scrambling, full-on rock climbing with ropes, helmets, etc.
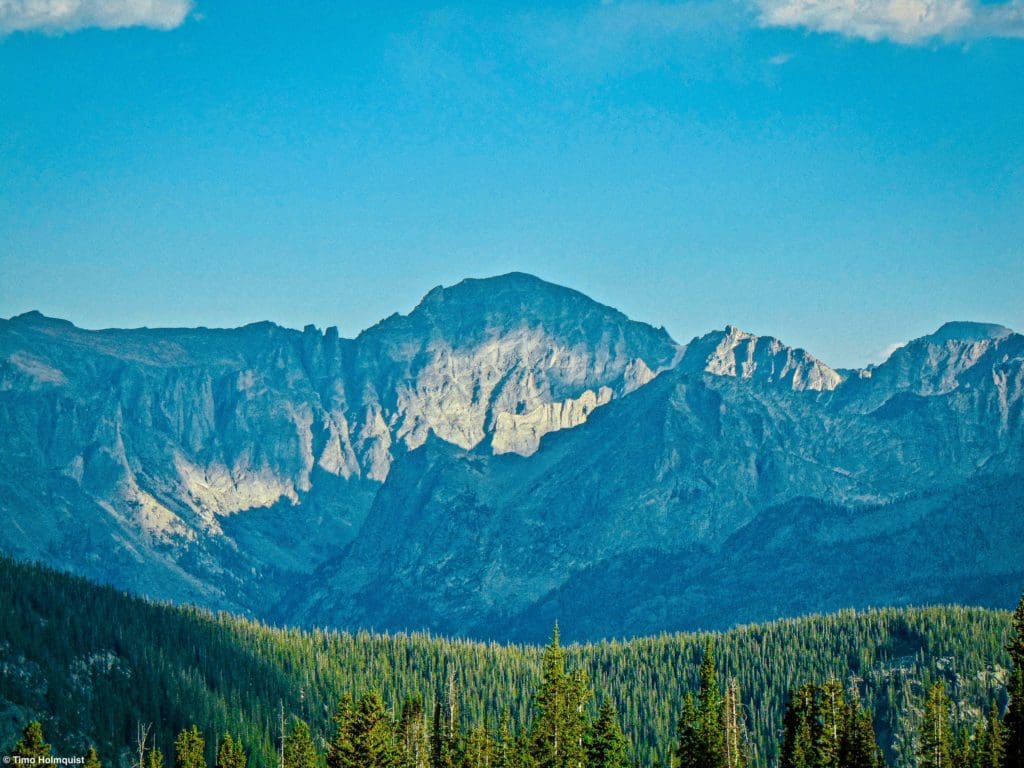
A zoomed-in photo of the Crater Lake Area from the meadows below Irving Hale. Lone Eagle Peak is visible in the sun as the very end point of the ridge.
Directions to Trailhead
Mt. Irving Hale is best approached from the Roaring Fork Trailhead near the eastern end of Lake Granby and the Arapaho Bay Campground. This is pretty far from the Front Range, but there are two main ways to get there once Trail Ridge opens up.
The first is to take I-70 to exit 232 toward Winter Park on US 40. The road will pass through the small town of Empire before winding its way up and over Berthoud Pass. Drive down the other side and pass through the towns of Winter Park, Frasier, and Tabernash. When you get to the town of Granby, take a right on US 34 to continue north toward Lake Granby. The turn-off for Monarch lake is at the end of a quick rise and right before you get your first views of the lake. If you start to pass the shoreline of Lake Granby, you’ve gone too far.
The road you want is Colorado 6; it passes along the southern shoreline of Lake Granby and turns to dirt after a minute. You’ll pass over a few dams and the picturesque shore of Lake Granby until crossing the lake at its eastern mouth. There will be a three-way intersection. Take a left to head to Roaring Fork Trailhead and Arapaho Bay Campground. Keep going straight will take you to the Monarch Lake Parking Area. The approximate time from Denver is anywhere from 2 hours and 15 minutes to nearly 3 hours, depending on traffic.
If Trail Ridge is open (US 34) and you have a Rocky Mountain Pass (plus a time slot), you can take that over the divide and pop down to the Monarch Lake Trailhead. Once you get into the park, take US 34 over the divide, get into Grand County and continue south until sighting Colorado 6 on your left. If you go over Trail Ridge, you’ll continue through Rocky Mountain National Park and pass by Grand Lake, Shadow Mountain Lake, and Lake Granby before finding the turnoff at the very edge of the lake. Fort Collins to the Roaring Fork over Trail Ridge takes approximately three to three and a half hours.
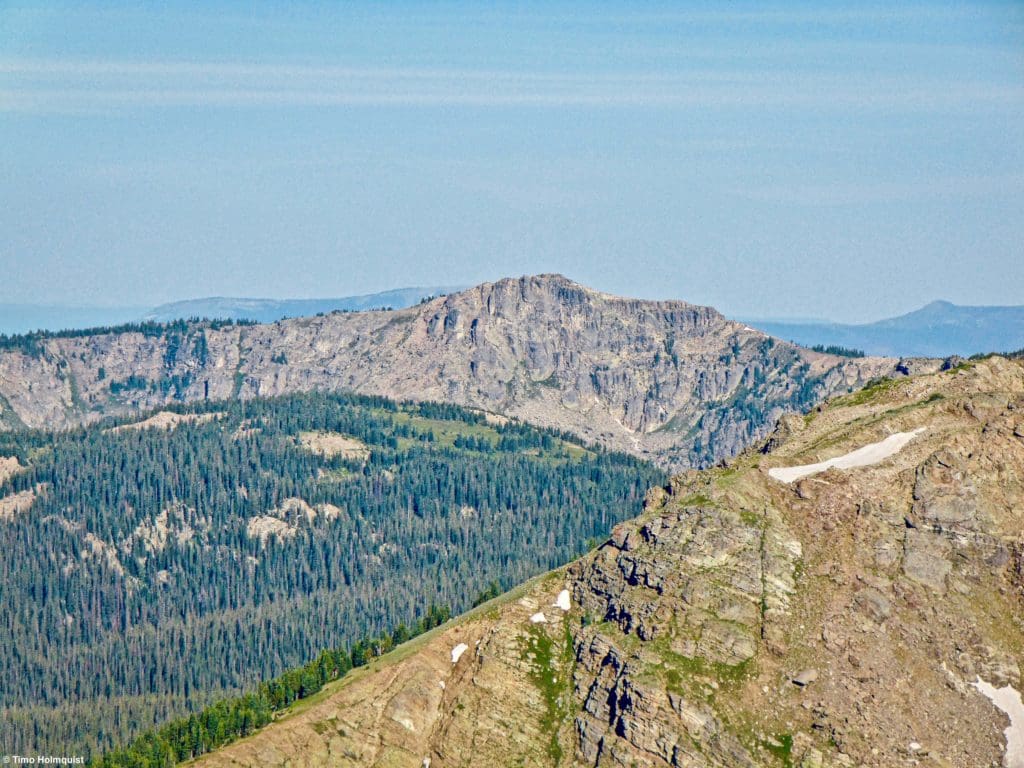
Mt. Irving Hale, seen from Buchanan Pass.
Field Notes
This is a pretty remote part of the Indian Peaks. Make sure you know where you’re going, what trails to follow, and what to do if you get lost. A stocked first aid kit is a good thing to have.
For your weather needs, start with the Granby 7-Day Forecast. If you subscribe to Opensummit, use their Sawtooth mountain forecast page. You can get a free forecast up to two days in advance, but you need to sign up to get the details like precipitation, winds, and lightning chances. Even with a few resources at hand, remember that mountain weather is wild. Things can change very quickly.
The best advice for summers when afternoon thunderstorms are in play is to start early and finish early. Often, this may have you at the trailhead at dawn or before. In the case of long hikes with views, like this one, factor in some time at the top for views, resting and taking pictures.

The western IPW from Irving Hale’s summit.
Journal
This underutilized hike begins at the Roaring Fork Trailhead near the eastern terminus of Lake Granby. Once you’re parked, take the only signed trail as it begins to wind through a section of new growth. This area was affected by previous burns and can get really hot if the afternoon sun is beaming down on you.
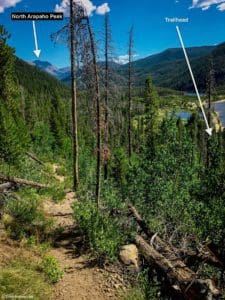
Looking down the first sustained elevation gain from the trailhead.
As you climb up the first sustained pitch, the trees will gradually begin to circle back in over the trail, but not before offering fleeting glances down to the shimmering waters of Lake Granby.
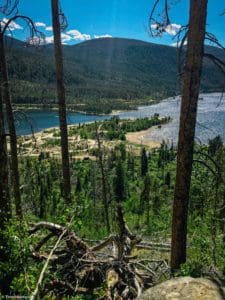
The lake and Arapaho Bay Campground below the trail.
Once you bend away from the lake and begin paralleling the Roaring Fork, things mellow out. The trail will cross the stream at a lovely spot with large trees and continue to parallel the mountain waterway as you thread higher. There aren’t many long-distance views to be had in this section, but the sound of the cascading water is lovely, and the trail is quite manageable. Occasionally, you’ll see a set of cliffs and ridgelines to the right. You need to travel beyond them before reaching the next trail junction, roughly 2.6 miles into your journey. You’ll re-cross the Roaring Fork, so you’re on its eastern side and then come upon the junction.
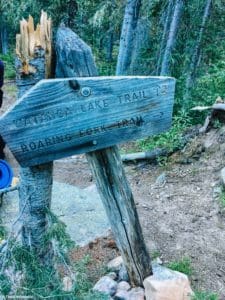
The junction with an old USFS sign.
Take a right to follow the Roaring Fork Trail and begin your biggest climb of the day. If you’re trail running or just out day hiking, this isn’t a bad climb, but it is continuous. If you’re backpacking, take breaks often and slow the pace down. The ascent can be split into a few sections, with the bottom third being the steepest. You then crest a roll of land and meander through an open forest (section 2) before sighting some small meadows.
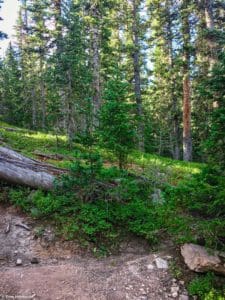
Typical terrain in the middle third of the climb.
The last section is walking alongside the meadows. At first, they are sporadic, but soon the meadows increase in frequency.
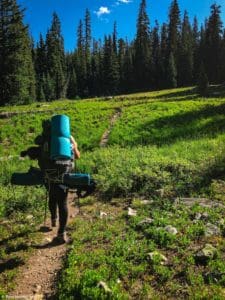
Continuing to ascend as the meadows begin to open up.
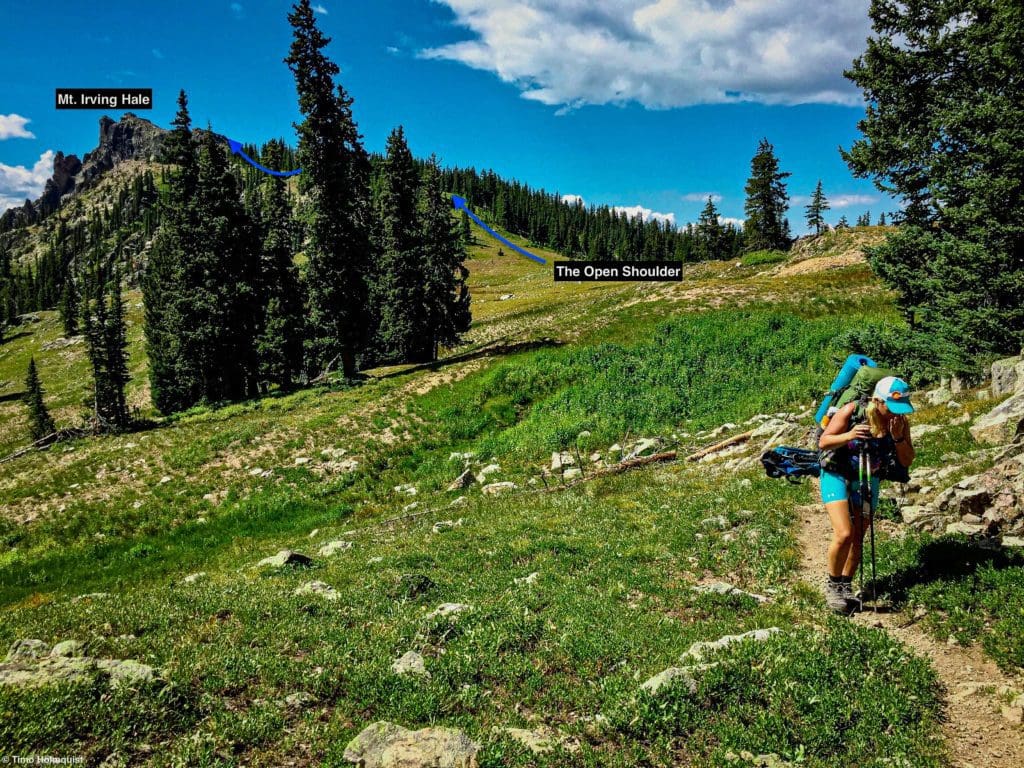
Eventually, the trees peel back to reveal an open shoulder with stupendous views. This is the high point of the trailed portion but take heart. The off-trail scramble to Irving hale is only a half hour to the south and up an easy-to-follow slope.
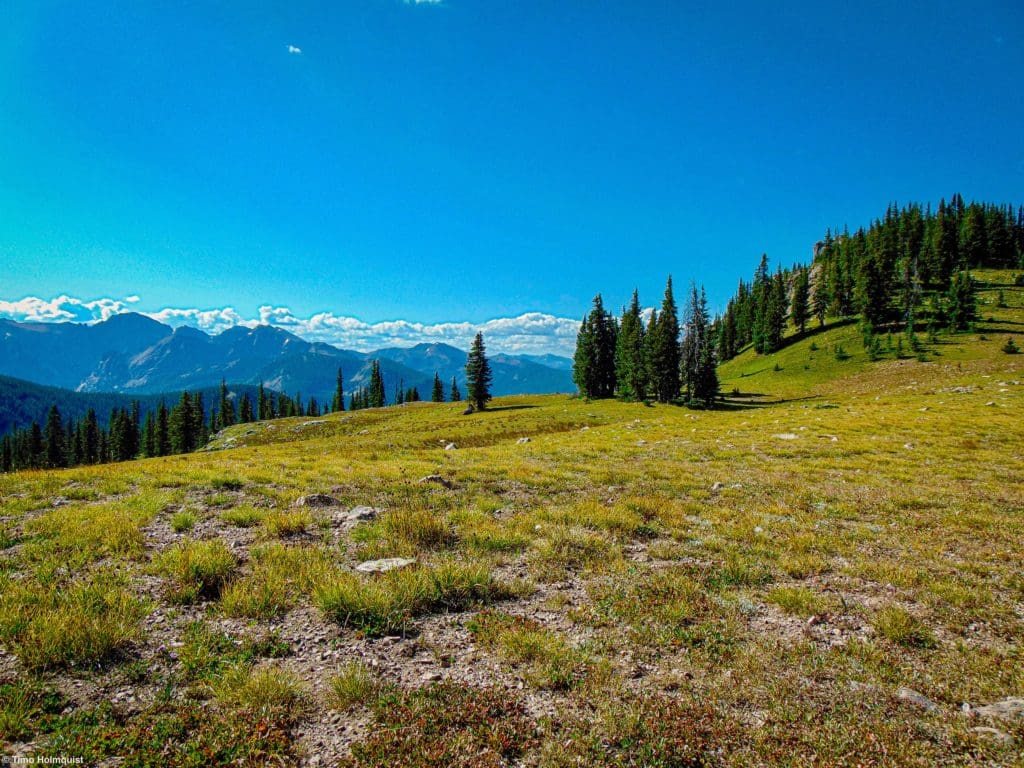
The meadowed shoulder and craggy IPW peaks in the distance.
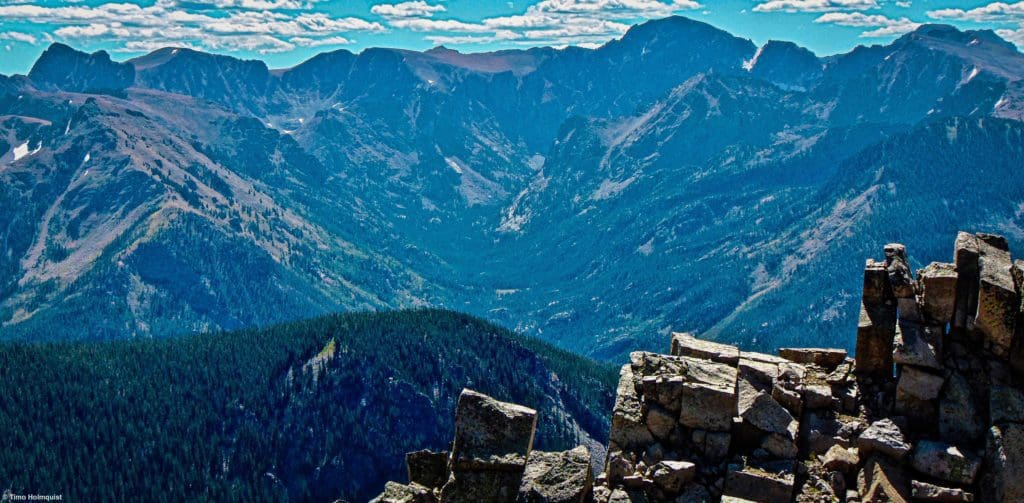
This open shoulder is a great place to take in some Colorado mountain magic. Because Irving Hale blocks views to the southwest, you can’t see any civilization. All the mountains in front of you, to the left and to the right, belong to the Indian Peaks Wilderness.
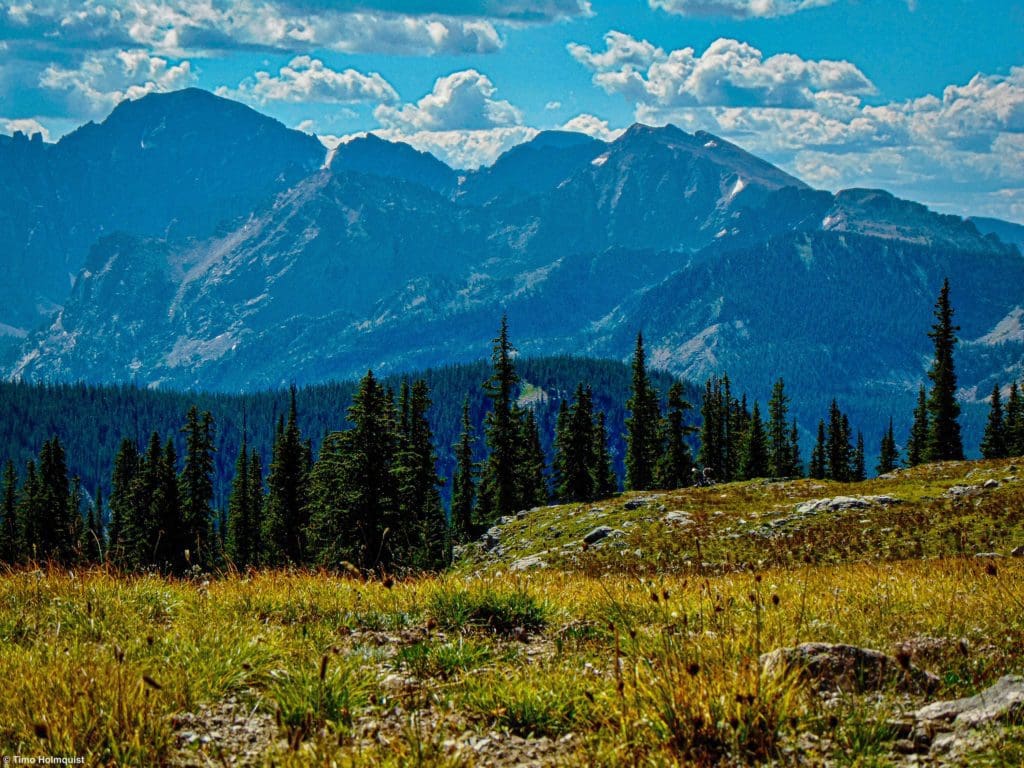
Looking toward the Crater Lake Basin.
After you’ve taken some time to inhale your accomplishment so far, get ready for a brief but fun scramble.
From the meadow, you want to head south (right) and hang by the ridge crest as you climb through oscillating fields and stands of pine trees. The surprisingly complex and cliffy east face of Irving Hale slowly reveals itself. If you go to or come back from Stone Lake (by continuing on the trail), you’ll get great vantage points of the mountain.
Mt. Irving Hale from a little farther east on the trail.
Back to the scramble, once you pass through some tree groves, which can be surprisingly thick, you’ll be able to zero in on your target.
Approaching the scrambling portion.
Once you break through the final trees and reach the broken rocks near the top, the views will start to open up again. Now, there are plenty of scrambling options up the rocks on Irving Hale.

The blocky summit of Irving Hale as the scrambling options kick-off.
Generally, there are third class and a few 4th class variations the closer you stay to the crest. The easiest routes are to the right and circle around the major difficulties. Even if you decide to skip the ridgeline, it’s fun to peer over it and stare at the full extent of the dramatic cliffs.
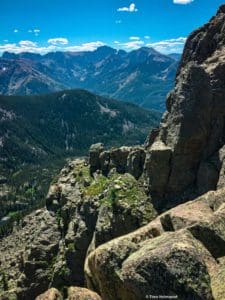
Looking down the cliffs with Hell Canyon far below.
There are two summit blocks, although the first one you reach is taller. If you have the urge to explore, there are numerous creative scrambling routes and sub-summits to play around on. Just be mindful of those eastern-facing cliffs; they are big.
On the summit!
The drop-off down to the trail-less wilderness of lower Hell Canyon is particularly interesting.
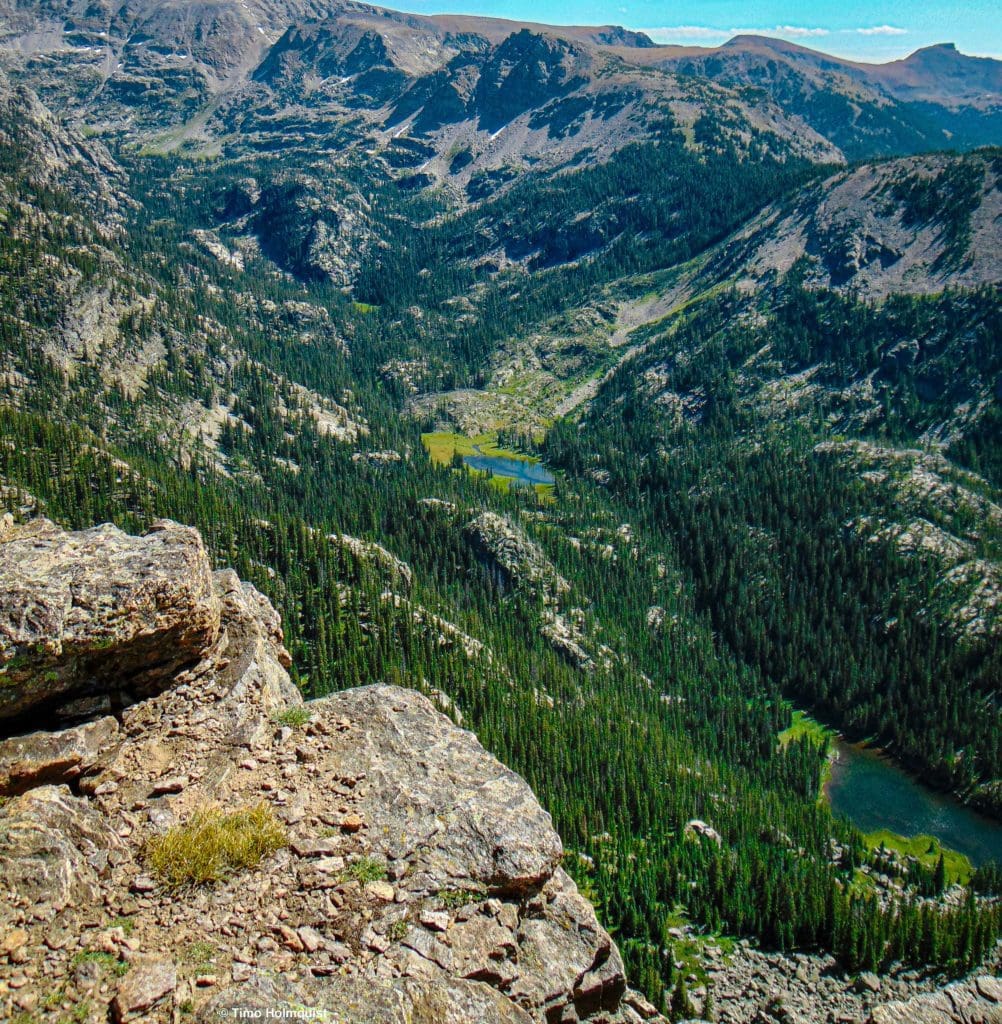
Lower Hell Canyon. The two lakes shown are Crawford Lake and Long Lake.
Another great perspective is to look northwest to the corner of Lake Granby and follow the rise of the land as it changes from tree-laden to alpine heath.
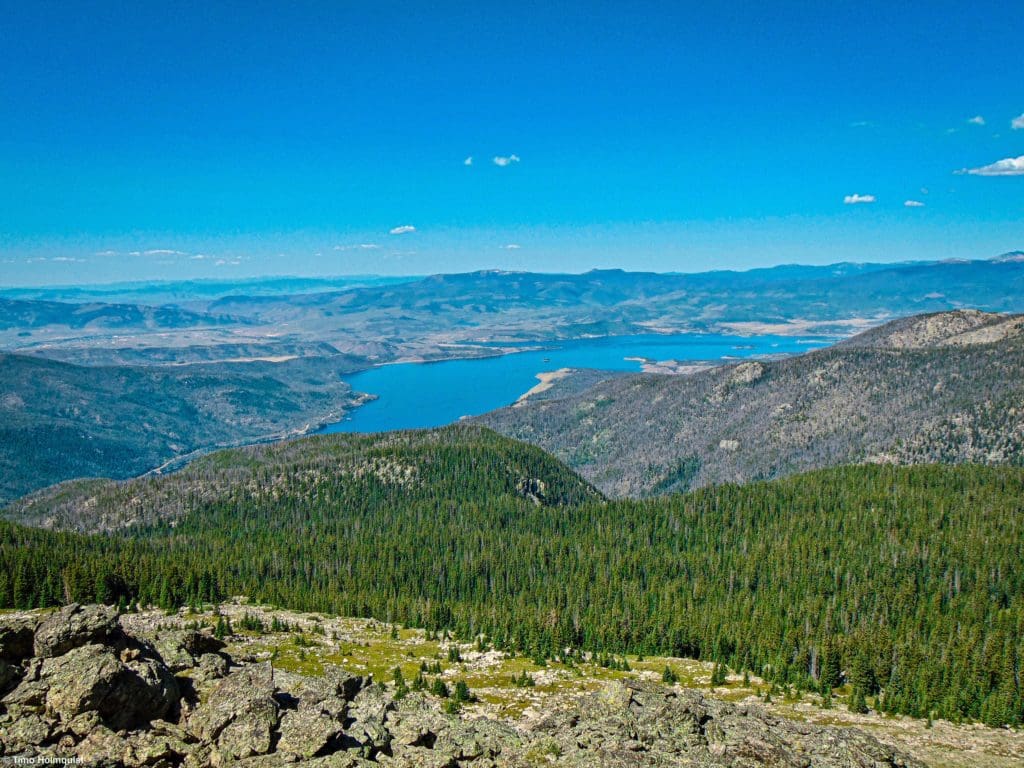
The view of Lake Granby from the top of Irving Hale.
To the southwest, you have fantastic long-range views across the low ridges that make up the middle of Grand County. On clear days, you can even out to the Gore Range.
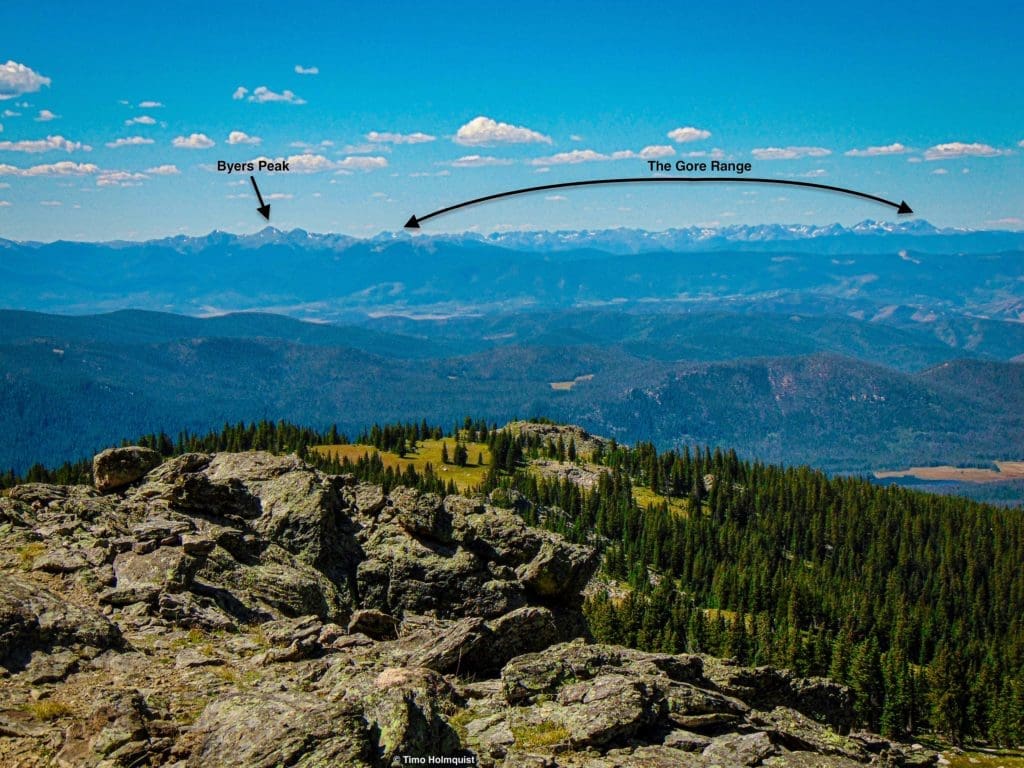
Grand county and the Gore Range in the distance.
When you’ve had your fill of the views, make your way back to the shouldered meadow. From there, it should be easy to reconnect with the Roaring Fork Trail. The journey back is all trailed and shouldn’t be too difficult as it’s almost entirely downhill. Nevertheless, watch your footfalls, especially if it’s after dark, to prevent slips and trips.
You’ll know you’re close when you begin to see the shores of Lake Granby below you.
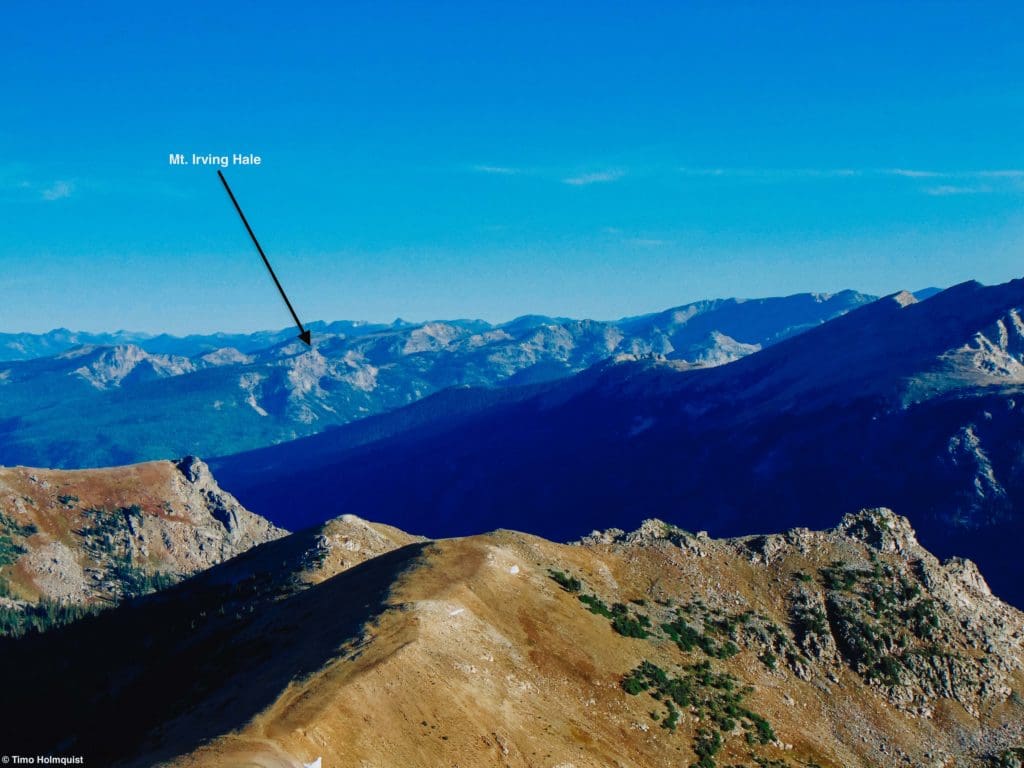
Mt. Irving Hale, amongst a sea of peaks. This perspective is from Mt. Neva. You can read about the scrambling route up Mt. Neva here.


