


High Point:
10,630 feet

Total Ascent:
~1,400 feet

Difficulty:
Hard

Distance:
9.6 miles

Waypoints:
40.310517, -105.640278

Route Type:
Out and Back
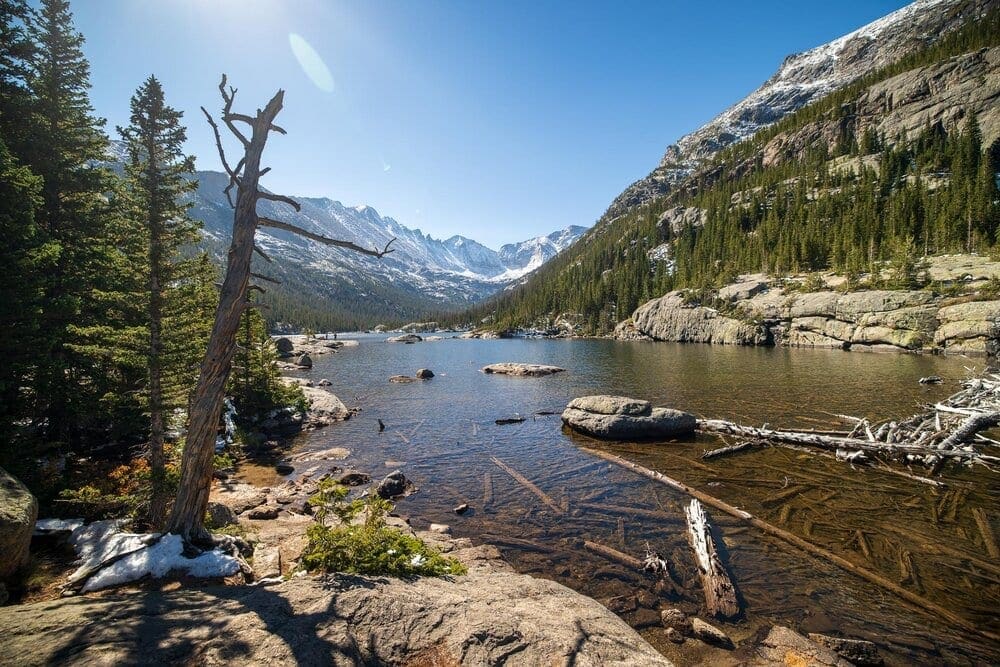
Tucked away in Glacier Gorge at Rocky Mountain National Park, Black Lake lies in the center of a deep cirque, with breathtaking views of McHenry’s Peak, The Spearhead, and Arrowhead. The roundtrip journey to get there is roughly 10 miles.
Field Notes:
Black Lake is located in the impressive Glacier Gorge area of Rocky Mountain National Park. The roundtrip distance of nearly 10 miles helps the destination stay less crowded than nearby lakes, but you likely won’t find solitude here unless hiking during the winter or early spring. On the way to Black Lake, you’ll pass Alberta Falls, Mills Lake, Jewel Lake, and Ribbon Falls.
The lake itself is located in a steep cirque with picturesque views of McHenry’s Peak, The Spearhead, and Arrowhead. Along the hike, you’ll pass a few named features whose names harken back to the early days of exploration in the area. The first is Alberta Falls, named for Alberta Sprague, wife of Abner Sprague, one of the original settlers of Estes Park. Mills Lake, the largest body of water along the route, is named after Enos Mills, “the father of Rocky Mountain National Park”. Mr. Mills spent years lobbying Congress and drumming up support for the eventual protection of Rocky Mountain in 1915.
Weather in Rocky Mountain can be unpredictable; make sure to check conditions and forecasts before heading out. Some of the more relevant area forecasts include Estes Park, Storm Peak Weather, Longs Peak Weather, and the Alpine Center Forecast. If entering the park from the Westside, the Grand Lake Forecast is useful as well.
The Ultimate Offline GPS Hiking & Ski Maps
See why onX Backcountry is the ultimate GPS navigation app for your outdoor pursuits. Try Today for Free. No credit card required.
Directions To Trailhead:
Black Lake is located southwest of Estes Park and can be accessed via Bear Lake Road. If arriving from the east, make your way to Estes Park, enter Rocky Mountain National Park on US 36, and take a left onto Bear Lake Road, located only a minute or two past the entrance booths. From the west, approach Rocky Mountain National Park and enter on US34, which becomes Trail Ridge as it climbs over the divide and drops down to the eastern portion of the park. Locate Bear Lake Road before reaching the edge of the park and take a right.
Once on Bear Lake Road, continue driving for a little more than eight miles as the road climbs higher. Glacier Gorge Junction Trailhead will be on your left-hand side and is well-marked. The absolute end of the road is at Bear Lake Parking Area, only a mile farther. The trailhead is exceptionally popular, so arrive early. There is additional parking along Bear Lake Road and at Bear Lake Parking Area, but these spots also fill up quickly. Alternatively, head down to the Park and Ride lot near Glacier Gorge Campground and take a free shuttle to the trailhead. The shuttle service is seasonal and usually begins in May.
Since the trail is in Rocky Mountain National Park, you’ll need to pay to enter. The fee is $25 per car, or $15 if entering the park on foot. For frequent visitors, there is an $80 annual pass. Please check with RMNP’s website to stay up to date with current pass rules and regulations.
Campgrounds:
Camping near Rocky Mountain National Park will cost you. The options for free area camping are limited. On a positive note, there are plenty of options, and the National Park is within easy driving distance of Fort Collins, Boulder, and Denver.
Estes Park: Known as the gateway to Rocky Mountain National Park, Estes sees nearly 80% of park traffic, as opposed to the much quieter western entrance near Grand Lake. The town has a ton of lodging nearby, ranging from cheap motels to the Stanley, a beautiful and historic hotel that served as the inspiration for Steven King’s: The Shining.
Rocky Mountain National Park Camping
Moraine Park Campground: $30 per site. $20 in winter. Established campground with perks, facilities, campfire grate, wood for sale in summer, and bear boxes to store food. Only loop B is open in the winter, and it’s first-come, first-serve. For summer, a reservation is needed way in advance to secure a spot.
Glacier Basin Campground: $30 per site. Established campground with the same perks as Moraine Park. Reservation required.
Backcountry Campsites: There are a few backcountry sites nearby that you could use, the best being the Glacier Gorge Campsites. There is no open camping in the backcountry; it must be at designated backcountry sites. Please check the Park website for more details. Backcountry sites require an overnight permit of $30. Rangers regularly patrol the area.
Camping near Estes Park
Estes Park Campground at Mary’s Lake: Established campground, pricey $45-55. Good backup if other campgrounds are full.
Hermit Park Open Space: $30 for a tent site, price increases if towing a trailer or for group-spots.
Estes Park Koa: Rates dependent on what you’re bringing with you but will run more than $50 a night in the busy season.
Free or close to free: but a little farther (if you’re willing to drive)
Ceran St. Vrain Trail Dispersed Camping ($1)
County Road 47. Users have reported trash and ATV noise at this location, but it is free.
Journal:
From the Glacier Gorge trailhead, walk a quarter-mile south-southwest until the trail converges with the Glacier Creek Trail. The convergence is brief; you’ll head west, following signs to Alberta Falls, until the Glacier Creek Trail splits to head up to Bear Lake. At this junction, take a left. If coming down from Bear Lake Parking Area, you’ll make your way to the head of the parking lot, take a left on the Alberta Falls Connector Trail, followed by a right at the junction with the Glacier Creek Trail. Your next destination will be Alberta Falls.
<img src=”https://www.skyblueoverland.com/wp-content/uploads/2021/02/20200912-050A3013.jpg” alt=”20200912-050A3013.jpg” />
View of Alberta Falls on the Glacier Gorge Trail.
<br data-mce-bogus=”1″><br data-mce-bogus=”1″><img src=”https://www.skyblueoverland.com/wp-content/uploads/2021/02/20200912-050A3012.jpg” alt=”(Pic 6: Zoomed in on Alberta Falls) ” />

Zoomed in view of Alberta Falls.
Once you pass the popular Falls, the tourist crowd should slim down somewhat. Continue past Alberta Falls on the well-established trail, ultimately coming across a junction with North Longs Peak trail at roughly 1.6 miles in
<img src=”https://www.skyblueoverland.com/wp-content/uploads/2021/02/20200912-050A3037.jpg” alt=”(Pic 20: Junction with North Longs Peak Trail).” />
Junction with the North Longs Peak Trail.
Take a right at the Junction with North Longs Peak Trail, following the sign for Mills Lake. After another half mile, you’ll reach Mills Junction
<img src=”https://www.skyblueoverland.com/wp-content/uploads/2021/02/20200912-050A3042.jpg” alt=”(Pic 23: Approaching Mills Junction) ” />

Approaching Mills Trail Junction.
<img src=”https://www.skyblueoverland.com/wp-content/uploads/2021/02/20200912-050A3047.jpg” alt=”(Pic 28: Mill Junction Sign).” />
Mills Trail Junction.
At this junction, take a left deeper into Glacier Gorge, following the sign for Black Lake. Shortly after the junction, you’ll cross Vale Brook and then cross over Glacier Creek.
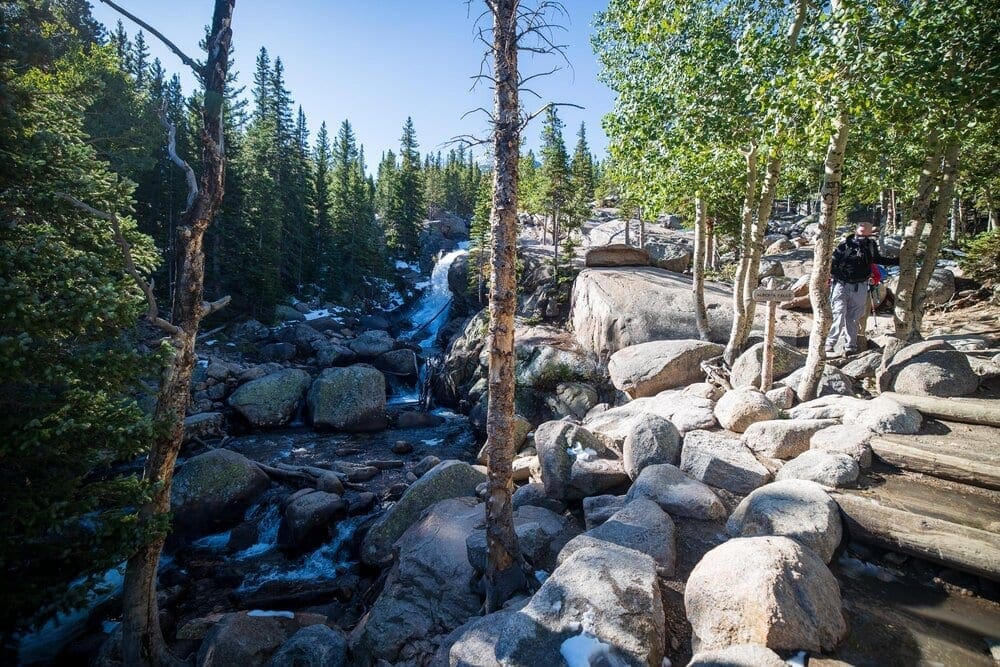
<img src=”https://www.skyblueoverland.com/wp-content/uploads/2021/02/20200912-050A3063.jpg” alt=”(Pic 36: Crossing Glacier Creek).” />
Crossing Glacier Creek.
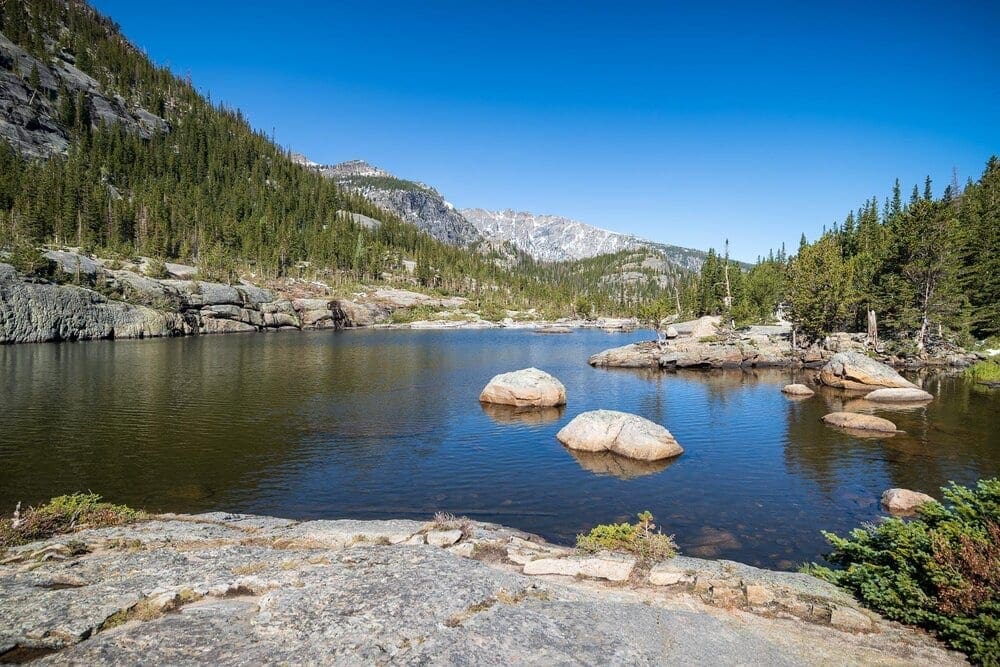
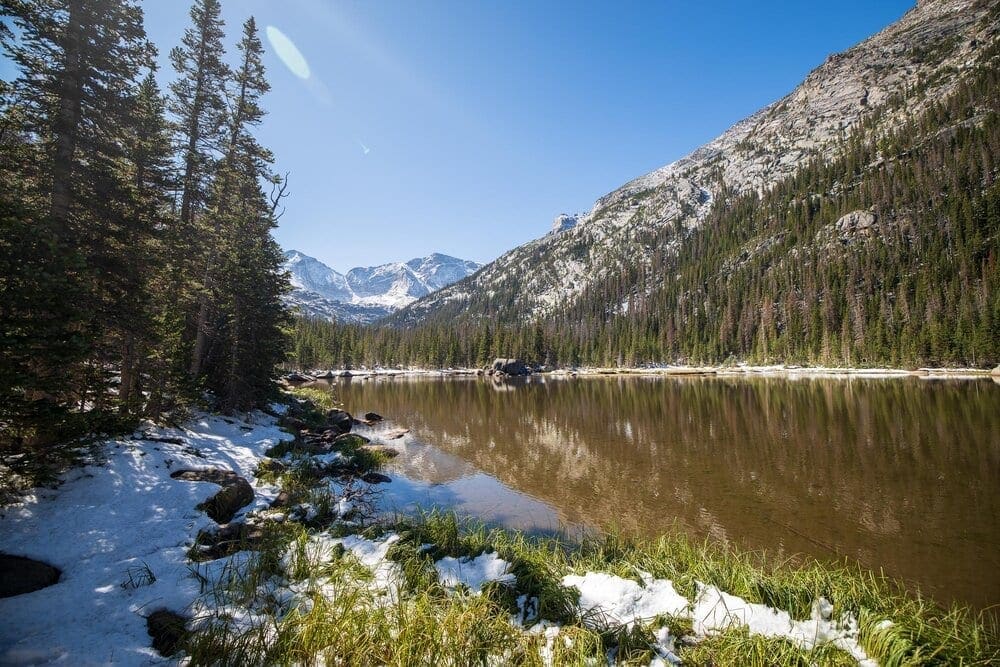
After a couple of points of a mile, you’ll reach the first large body of water, Mills Lake.
<img src=”https://www.skyblueoverland.com/wp-content/uploads/2021/02/20200912-050A3077.jpg” alt=”(Pic 47: Mills Lake)” />
View of the beautiful Mills Lake.
<img src=”https://www.skyblueoverland.com/wp-content/uploads/2021/02/20200912-050A3089.jpg” alt=”(Pic 54: Brian at Mills Lake looking up Glacier Gorge) ” />
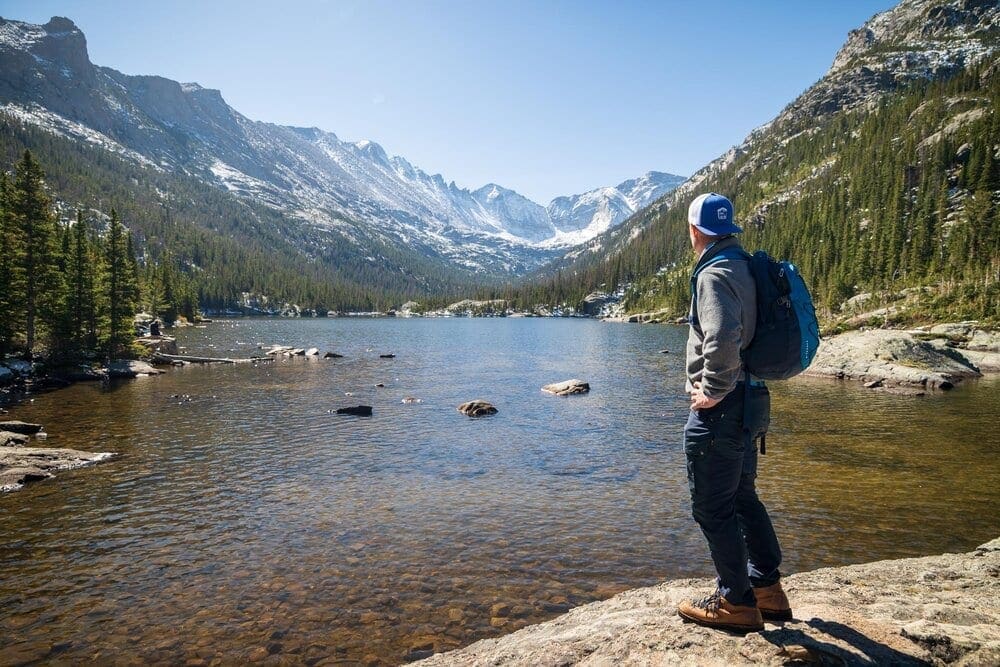
Brian Hamilton at Mills Lake looking up Glacier Gorge.
<img src=”https://www.skyblueoverland.com/wp-content/uploads/2021/02/20200912-050A3092.jpg” alt=”(Pic 56: Looking back down Glacier Gorge towards the flank of Flattop Mt).” />
Looking back down Glacier Gorge towards the flank of Flattop Mountain.
Take in the stunning walls of Glacier Gorge on either side of this linear lake. The trail skirts around the eastern shore with ample photo opportunities and large rocks to sit on
<img src=”https://www.skyblueoverland.com/wp-content/uploads/2021/02/20200912-050A3105.jpg” alt=”(Pic 66: Along the shoreline, looking south with Pagoda Pk. (L.) And Chiefs Head (R.) visible).” />
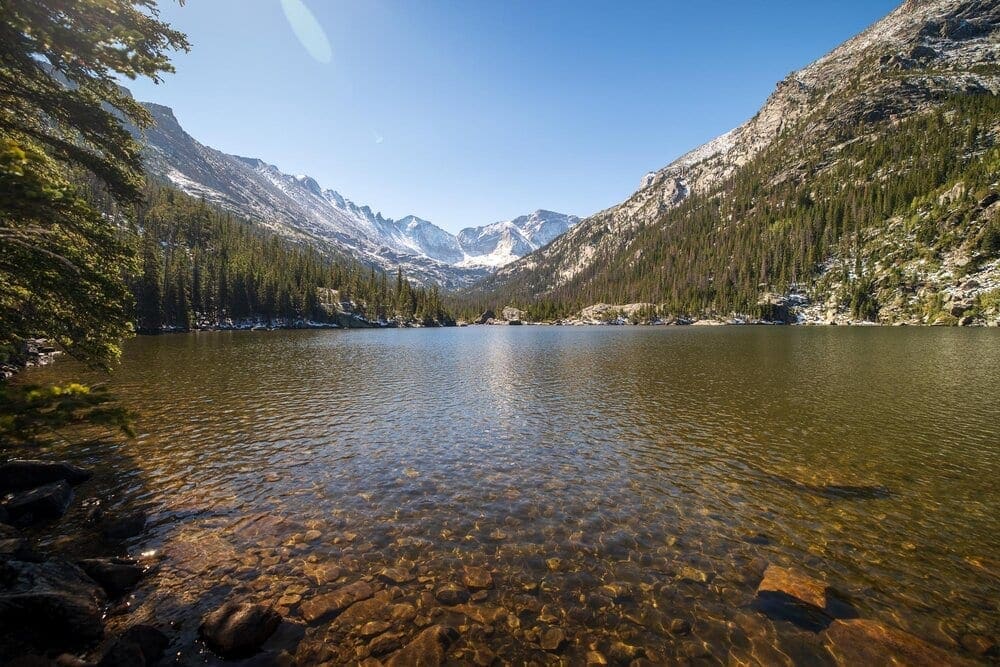
View along the Mills Lake shoreline, looking south towards Pagoda Peak (L.) and Chiefs Head (R.).
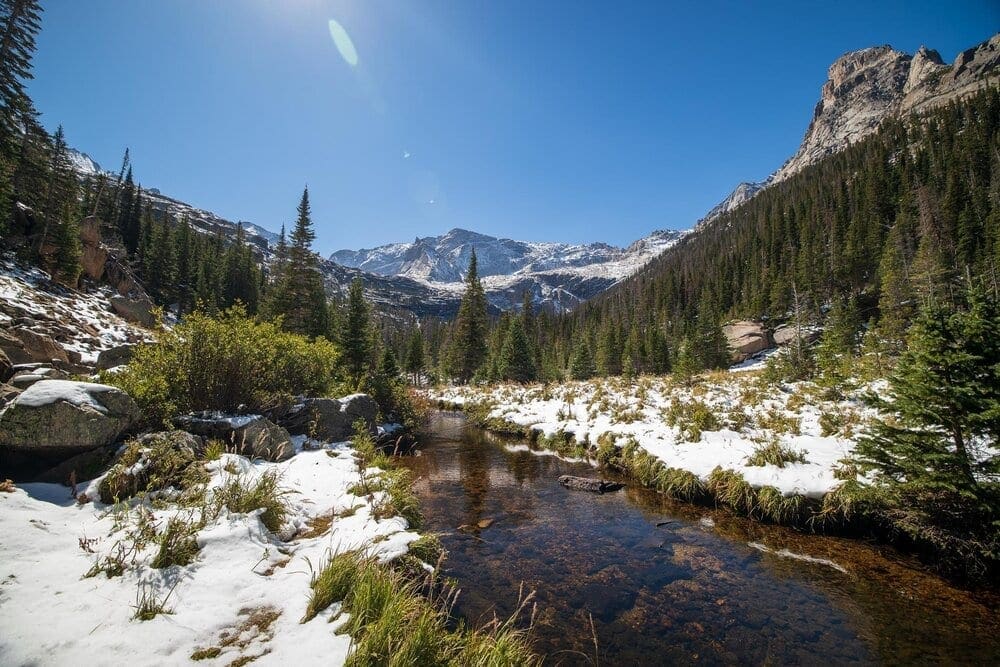
Roughly a half-mile later, you’ll pass alongside the eastern shore of Jewel Lake.
<img src=”https://www.skyblueoverland.com/wp-content/uploads/2021/02/20200912-050A3126.jpg” alt=”(Pic 77: Jewel Lake and the high country beyond).” />
View of Jewel Lake and the high country beyond.
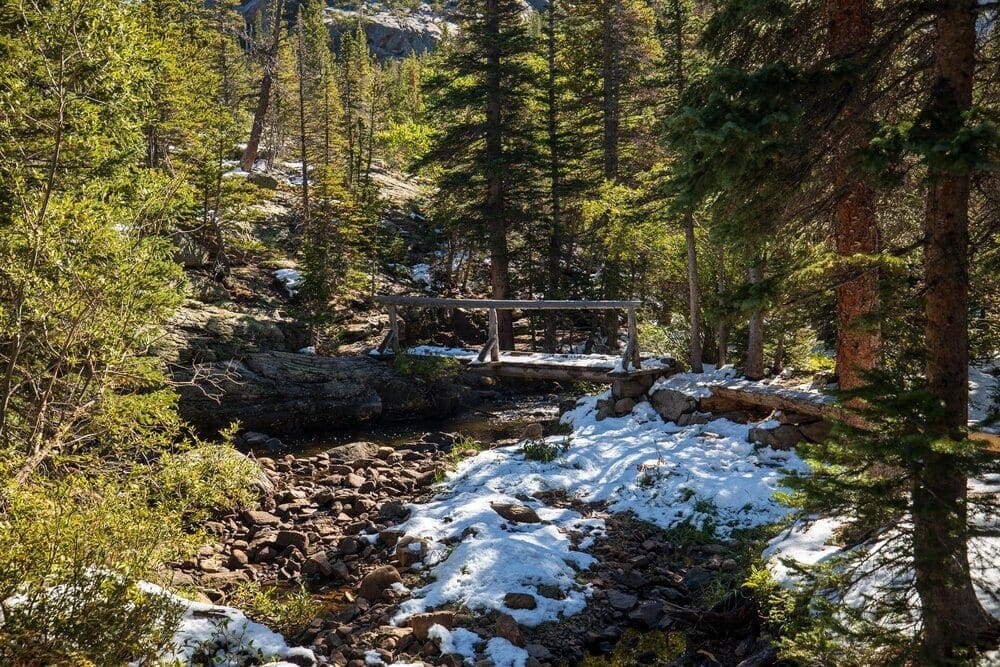
Below and above Jewel Lake, the trail will thread through a lush, marshy area using a long series of boardwalks.
<img src=”https://www.skyblueoverland.com/wp-content/uploads/2021/02/20200912-050A3128.jpg” alt=”(Pic 78: Boardwalk in snow) ” />
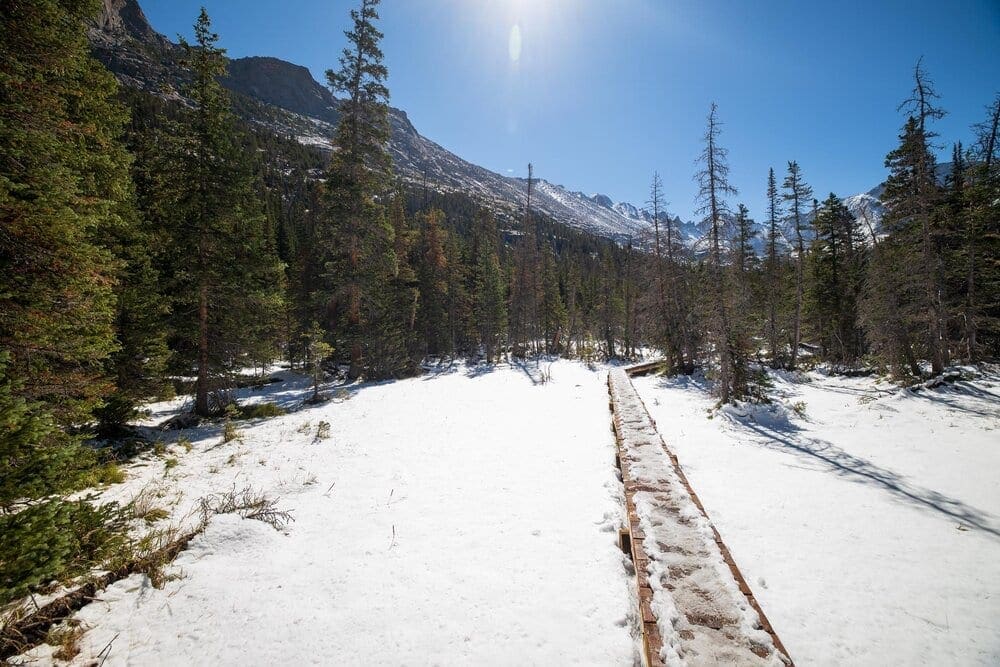
Boardwalk on the trail in snow.
<img src=”https://www.skyblueoverland.com/wp-content/uploads/2021/02/20200912-050A3130.jpg” alt=”(Pic 80: Boardwalk after rock section).” />
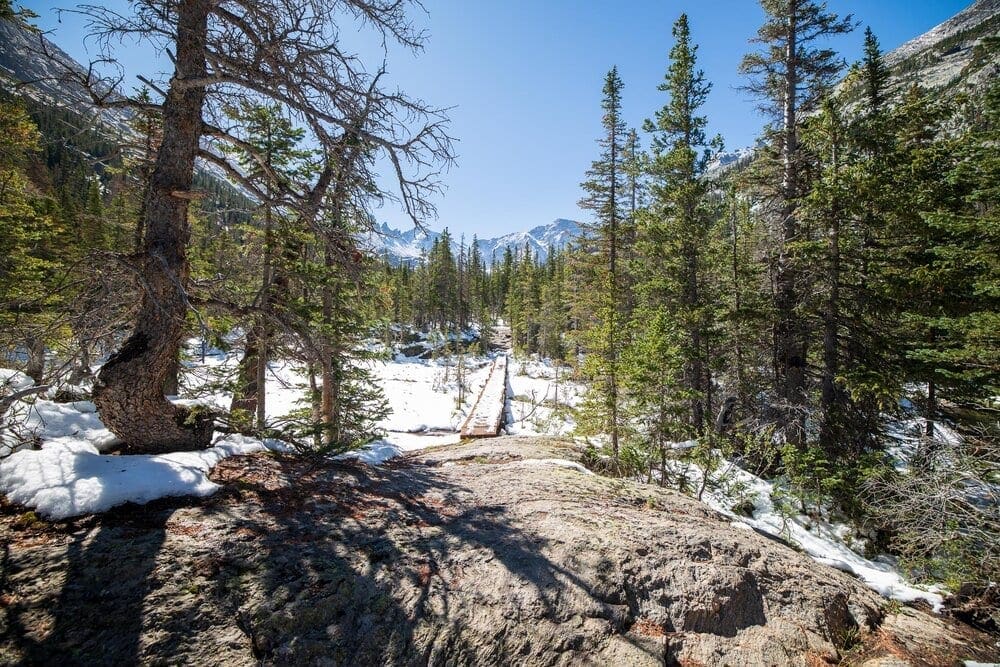
Another boardwalk after a rock section.
Once you pass through the marshy areas, the trail begins climbing at a moderate grade. On this section of trail, you’ll pass the Glacier Gorge Backcountry Campsites.
<img src=”https://www.skyblueoverland.com/wp-content/uploads/2021/02/20200912-050A3142.jpg” alt=”(Pic 82: Sign for Glacier Gorge Wilderness Campground and Black Lake). ” />
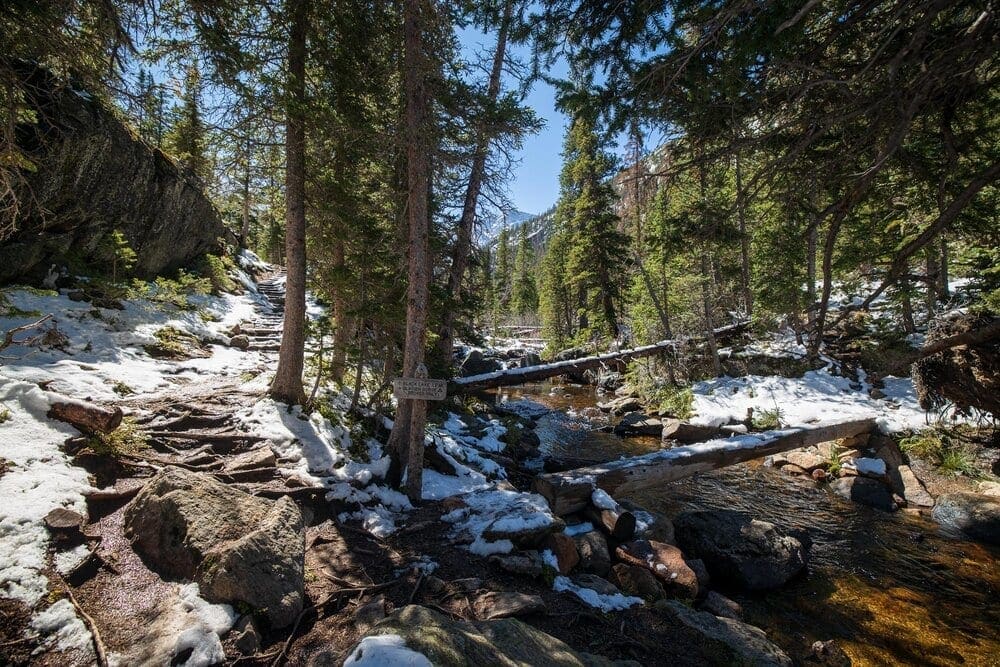
Sign for Glacier Gorge Wilderness Campground on the Black Lake Trail.
<img src=”https://www.skyblueoverland.com/wp-content/uploads/2021/02/20200912-050A3167.jpg” alt=”(Pic 91: Looking up to Chiefs Head (C.) and Arrowhead (R.))” />
Looking up to Chiefs Head (C.) and Arrowhead (R.)
<img src=”https://www.skyblueoverland.com/wp-content/uploads/2021/02/20200912-050A3184.jpg” alt=”Before the last pitch up to Black Lake, you’ll pass the impressive Ribbon Falls, which flows out of the lake. The trail climbs up the left (East) side of the falls (Pic 98: The ascent near Ribbon Falls, McHenry Pk (C. behind) and Arrowhead (R.)). Black Lake appears quickly above the falls. ” />
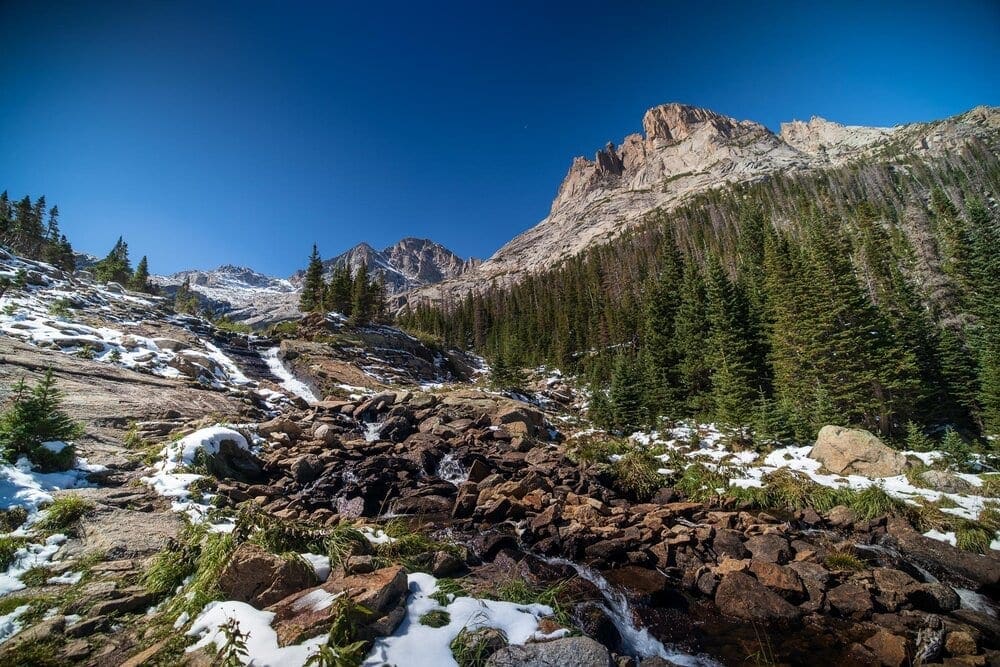
Before the last pitch up to Black Lake, you’ll pass the impressive Ribbon Falls, which flows out of the lake. The trail climbs up the left (East) side of the falls.
Before the last pitch up to Black Lake, you’ll pass the impressive Ribbon Falls, which flows out of the lake. The trail climbs up the left (East) side of the falls (Pic 98: The ascent near Ribbon Falls, McHenry Pk (C. behind) and Arrowhead (R.)). Black Lake appears quickly above the falls.
<img src=”https://www.skyblueoverland.com/wp-content/uploads/2021/02/20200912-050A3193.jpg” alt=”(Pic 99: Black Lake with The Spearhead rising behind it)” />
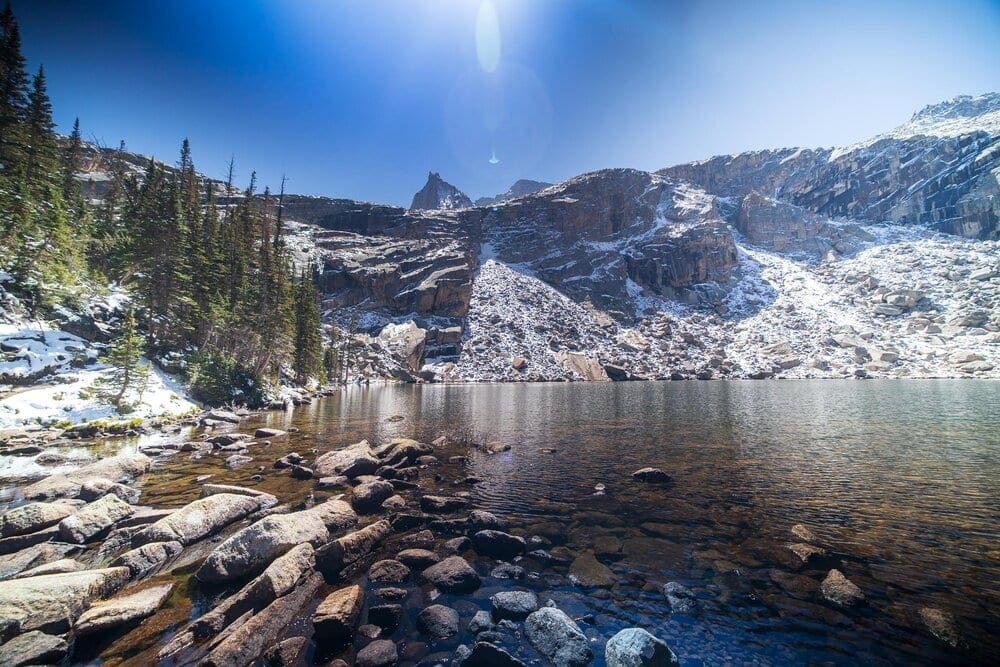
View of Black Lake with The Spearhead rising behind it.
<img src=”https://www.skyblueoverland.com/wp-content/uploads/2021/02/20200912-050A3203.jpg” alt=”(Pic 101: Black Lake with McHenrys Peak and Arrowhead). ” />
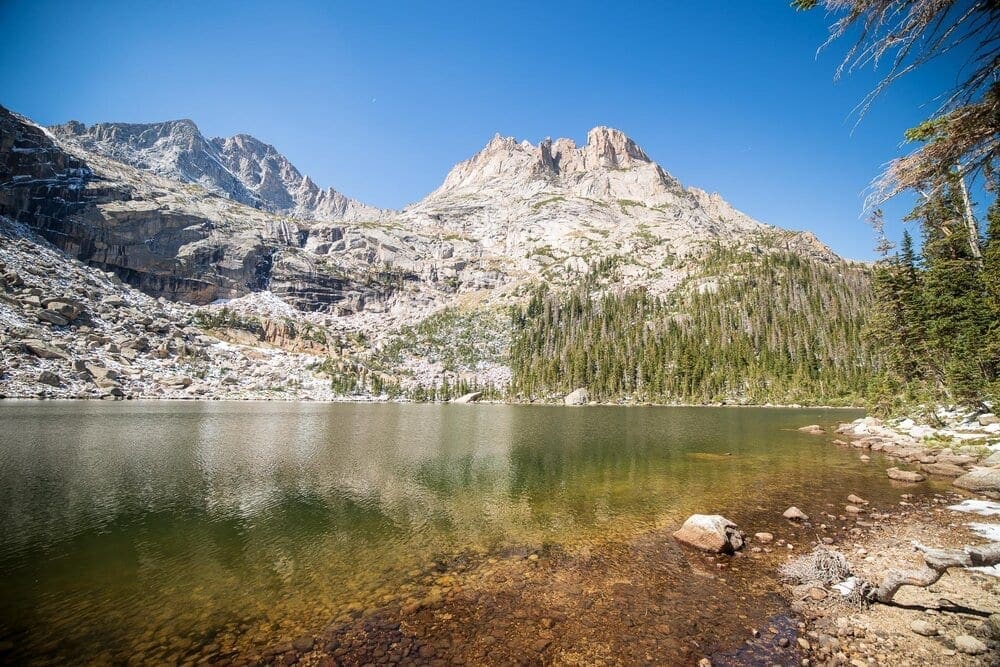
View of Black Lake with McHenrys Peak and Arrowhead.
<img src=”https://www.skyblueoverland.com/wp-content/uploads/2021/02/20200912-050A3205.jpg” alt=”(Pic 103: Black Lake with McHenrys Pk. centered behind it).” />
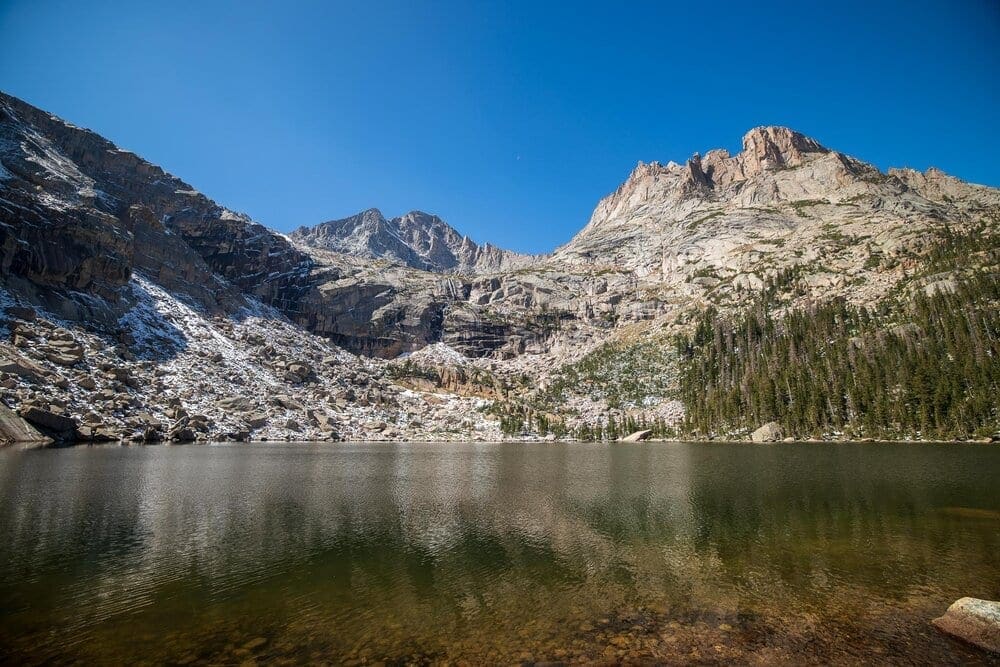
View of Black Lake with McHenrys Pk. centered behind it.
This stunning area is well worth the effort, and the views command respect. Once you’ve had your fill, double back to head down.On the descent, make sure to take a right at the first junction after Mills Lake. Then, take a left towards Alberta Falls at the next junction. From there, navigation back down to Glacier Gorge Parking Area should be simple.
Final Thoughts:
I’ve hiked up to Black Lake several times. The photos in this article were taken on September 12, 2020, just after a late summer snow storm. I arrived at the trailhead at 7:30 AM after camping at the Glacier Basin Campground. Parking at Glacier Gorge Junction was completely full and parking at Bear Lake was roughly 90% full. This trailhead serves many different trails, hence the nearly full parking. The trail to Mills Lake was relatively quiet and easy. Continuing past Mills Lake to Black Lake was a bit steeper and we rarely encountered anyone. I didn’t come across any wildlife but did see some mountain lion tracks in certain places. Both lakes were amazing! Return trip was very busy and difficult to social distance in some places. Great hike to do in RMNP! One of my favorites…
Terms of Use: As with each guide published on SKYBLUEOVERLAND.com, should you choose to this route, do so at your own risk. Prior to setting out check current local weather, conditions, and land/road closures. While taking a trail, obey all public and private land use restrictions and rules, carry proper safety and navigational equipment, and of course, follow the #leavenotrace guidelines. The information found herein is simply a planning resource to be used as a point of inspiration in conjunction with your own due-diligence. In spite of the fact that this route, associated GPS track (GPX and maps), and all route guidelines were prepared under diligent research by the specified contributor and/or contributors, the accuracy of such and judgement of the author is not guaranteed. SKYBLUE OVERLAND LLC, its partners, associates, and contributors are in no way liable for personal injury, damage to personal property, or any other such situation that might happen to individuals following this route.


