


|
Getting your Trinity Audio player ready...
|
- With an elevation of 19,347 ft (5,897m) Cotopaxi is one of the largest active volcanoes in the world.
- In this guide, Conrad Lucas lays the groundwork for a successful trip to Cotopaxi, based on his first-hand experience, and the lessons he learned the hard way.
- Get ready with international travel tips, acclimatization plans and more, for your 19,000-foot peak—giving you the highest odds of success!
Mountaineering is one of the most difficult sports to get into for newbies. It’s expensive, requires tons of training, and it can be dangerous if approached the wrong way. For newcomers, this combination of challenges can be daunting. If you want to start climbing high elevation, glaciated peaks, where do you even begin?
The short answer is Ecuador. Ecuador is home to a very dense cluster of high elevation summits that are, for the most part, very straightforward climbs. This includes a summit that, by an interesting technicality, is the “tallest” mountain on earth.
But the peak that most aspiring high altitude alpinists come to Ecuador for is Cotopaxi. Towering at just over 19,000 feet and covered in glaciers, Cotopaxi is the third tallest in Ecuador. But the nature of the route, the region’s weather, and the peak’s accessibility make it a great stepping stone for anyone who wants a crash course in high elevation climbing.
In this guide, I’ll lay the groundwork for a successful trip to Cotopaxi. What you read here is based on first-hand experience, learned the hard way. Everything from international travel tips to acclimatization plans is right here, so you have the highest odds possible of summiting your first high altitude peak.
Support Skyblue Overland™ on Patreon!
If you’d like to support our efforts for a few dollars a month, please subscribe to our Patreon page. Every donation energizes our team to keep writing detailed trail reviews, gear reviews and adventure guides. Thank you!
Why Go to Ecuador?
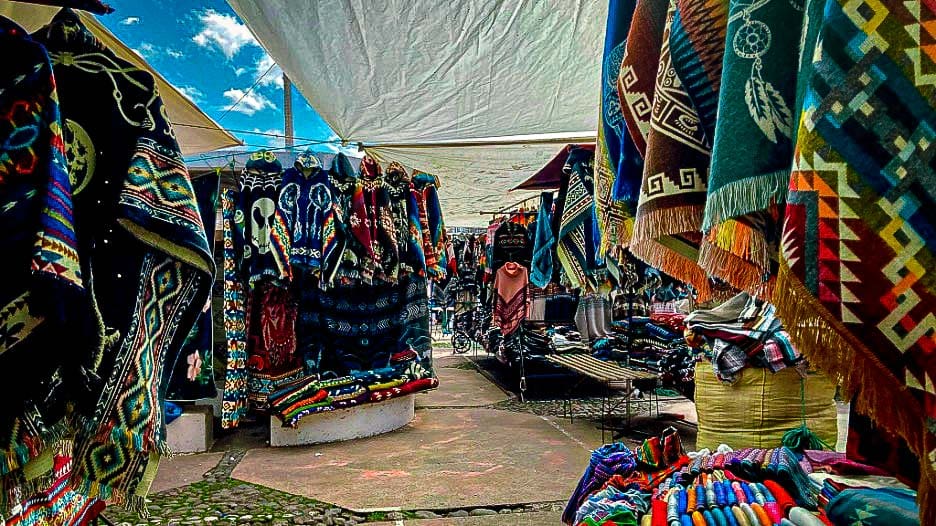
Ecuador is a hub of indigenous Andean culture, food, music, and clothing. Photo by Conrad Lucas.
If you’ve never considered Ecuador, either as a traveler or a climber, it might seem a little unexpected. Many American travelers completely overlook the smallest country in the Andes. In fact, during my six weeks there, I met fewer than ten other Americans in total.
But there’s a lot to love about the land of páramo. The people are warm and welcoming, the wildernesses are vast, and the food is great. Airline tickets are very cheap (I flew from Salt Lake City to Quito for about $600 round trip, not the cheapest or most expensive fare). And compared with other developing nations, it’s a very safe place to travel.
Most importantly (for our purposes, anyway), the amount of access is very impressive. There are tons of day hikes to elevations way above what’s possible in the Continental US. Even major routes usually have straightforward approaches.
This makes Ecuador an ideal training ground for newbies to get into the high country on a budget. With a little insider beta, you could get yourself acclimatized for Cotopaxi inside a little over a week. Then, once you’re ready, you can hire a guide for around $350, which includes all the rental gear you need to summit.
On the flip side, if you want to take your time, you could bag a bunch of peaks in the upper teens to lower twenty-thousand foot range, all within less than a day’s bus ride of each other. And because they sit on the equator (guess what “Ecuador” means in Spanish?), the Ecuadorian Andes are blessed with suitable climbing weather almost year-round.
Traveling in Ecuador: General Tips
But before you pack your bags, take heed. Ecuador may be comparatively safe, but that doesn’t mean you can’t get yourself in trouble. Just like when traveling anywhere else in Latin America, you’ll need to learn to identify sketchy situations on the fly. Here are some tips for safe travel.
Be Mindful of Your Surroundings
The golden rule in any foreign country is to be observant. Watch what people around you are doing. If something feels sketchy, it often is. Listen to your gut and pay attention.
Speak Spanish!
This one should be glaringly obvious. If you want to not only be safe, but be a respectful guest in a foreign country, you should learn as much of the local language as you can. Ecuadorians are very accommodating, but don’t expect them to roll out the red carpet for you.
Whether you’re taking a cab, checking into a hostel, hiring a guide, buying a bus ticket, or just buying lunch requires the ability to communicate. And the less you stick out as a foreigner, the more self-assured you look, the safer you will be. So be a good houseguest, do your homework, and learn some survival Spanish before you go.
Know When to Haggle
It’s common practice for locals to charge foreigners a “gringo tax” on goods and services. Sometimes this will equate to an extra fifty cents for a beer. Sometimes it means a taxi driver trying to charge you double his normal rate. In my experience, some of these battles are worth fighting, some aren’t.
In most cases, if someone is making you an offer that seems ridiculous, it’s better to just find another taxi driver, fruit vendor, or whatever, to do business with. I’ve found that one of the best negotiating tactics is just to show whoever you’re dealing with that you can take your “rich foreigner dollars” elsewhere. Oftentimes prices will drop immediately once you start to lose interest.
Take The Bus
The public transit system in Ecuador is great! You can cross the entire country for under $10 using public buses. Every bus I rode in Ecuador was far superior to any Greyhound in the US, and taking public transit allows you to sit back and enjoy the scenery. Buses run along just about every major road 24 hours a day.
Gear Essentials
Never, ever forget your rain shell. Photo by Conrad Lucas.
Of the gear I brought to Ecuador, some items were practically useless while others were indispensable. I never once used my hammock, for example. But my rain shell, Patagonia R1, water purifier, Goal Zero’s Nomad 10 solar panel and Flip 24 power bank, and travel bidet (that’s right, I said travel bidet) got daily use. I highly recommend bringing all of the above if you’re planning a trip of any length.
Seasons and Timing: What to Expect
Ecuador has two seasons: hot and rainy. The hot seasons are summer and winter, the rainy seasons are spring and fall. Despite being on the equator, you’ll be surprised at how cold it gets once you’re above nine or 10,000 feet. Be prepared for anything. In the mountains, my R1 saved my skin more than once. In the jungle, anything other than shorts and sandals would have been unbearable.
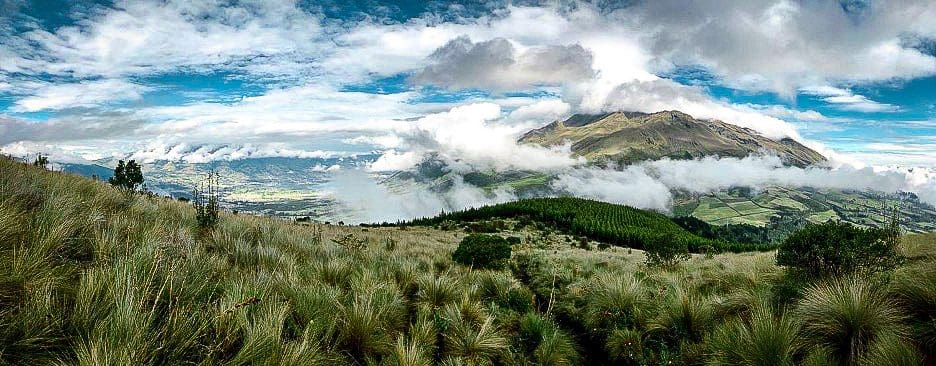
Weather on the equator is famously fickle. A half hour before this photo, the summit of Rucu Pichincha was in the sun. An hour later, it started snowing on the flanks. Photo by Conrad Lucas.
Cotopaxi gets the largest number of suitable summit days in the Andes. The roughest weather is typically during the fall. September is typically the worst for winds, and April is typically the rainiest. The local saying goes, “Abril, aguas mil,” or “a thousand waters in April.” I visited during the spring, and had a wild mix of weather conditions, including getting snowed on while on Rucu Pichincha. If you can, plan to climb in either the summer or winter months for the best odds.
Best High Elevation Day Hikes in Ecuador
As I mentioned already, Ecuador is full of high points that are well above the ceiling of the continental US. These are some of the best hikes you can do in a single day across the country. All of them are worth your time, and all of them would be great acclimatization/practice for bigger peaks like Cotopaxi.
Rucu Pichincha/Guagua Pichincha
Rucu Pichincha is always the first and foremost hike talked about when you research Ecuador, and for good reason. It’s the most prominent peak above the capitol city of Quito and the first thing you’ll notice when you step off the plane.
Its summit, a stately 15,413’, is nothing to scoff at. But in Ecuador, it’s barely noteworthy. If you want to take it on right after arriving in the country, it’s advised you take a few days to adjust to Quito (which itself sits at over 9,000’) before trying it. This is the trail where I was introduced to coca leaves, an almost magical (though completely scientific) aid for exercising at altitude.
The route itself is easy to get to and easier to navigate. You can take a taxi in town to the Teleferiqo, a gondola which will transport you to just under 13,000’ for $8. From here, the trail is well-marked with maps every mile or so.
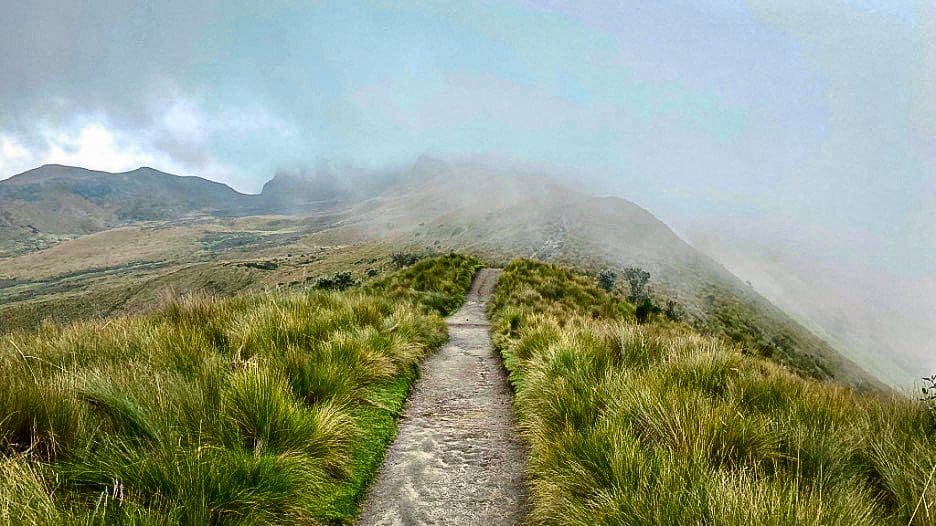
The trail itself is a convex slope that ascends a narrow ridge through tall grass. As you proceed, the vegetation changes to Ecuador’s charismatic páramo community, and eventually, to sand and rocks. Be careful. The last stretch involves a steep, sandy trail.
If you choose, you can continue past the first summit (Rucu) to another, slightly taller peak called Guagua Pichincha (15,696’). This tacks on another two or so miles and a lot more scrambling.
Because of its proximity to Quito, this trail has historically been the site of petty crime like mugging. Bring a partner, start early, and stay alert on the trail.
Cerro Imbabura
The flanks of Cerro Imbabura, viewed from the southeast. Photo by Conrad Lucas.
North of Quito is the lively, indigenous city of Otavalo. For lovers of culture, it’s a must. But the peaks that surround Otavalo are just as incredible as the city’s inhabitants.
The first of these (I’ll be discussing a few here) is Cerro Imbabura, a rounded behemoth volcano topping out just over 15,000’. It can be approached from Otavalo, but is more easily done from the north aspect.
For this approach, you can take a bus to the town of La Esperanza. I highly recommend the Refugio Terra Esperanza for accommodations there. From La Esperanza, it’s a short taxi to the trailhead.
The northern route is very straightforward, ascending in a more-or-less straight line. There is some rotten rock to watch out for near the top, just be sure to test your holds while scrambling. The trail includes two summits, both of which offer spectacular views of the surrounding country and peaks.
Fuya Fuya/Cerro Negro
Also frequented from Otavalo is the Fuya Fuya/Cerro Negro trails. These both originate at a high caldera and lake. Both are relatively short, and top out over 14,000’. Getting there can take a little while from town. You’ll need to hire a taxi to Laguna Mojando and possibly negotiate to have your driver wait for you while you hike.
Some visitors avoid this by camping at the lake. During the busy season, it’s not as much trouble to find a ride back. Once at the lake, the trails are easy to see and well-cut, but can be slippery if there has been any precipitation.
Both Fuya Fuya and Cerro Negro are steep dirt trails that meander upward through tall grass and páramo. Excellent views of Laguna Mojanda and the caldera, which is pretty spectacular.
Lago Cuicocha Loop

Lago Cuicocha is considered a holy place by the indigenous people of the region. Not hard to imagine why. Photo by Conrad Lucas.
Lago Cuicocha is another destination just a half hour or so from Otavalo. From town, you can take a bus toward Cotacachi. Get off the bus in Quiroga and hire a taxi for another $5 or so. The taxi will take you east into Cuicocha National Reserve. The lake itself is set in a crater at the foot of Cotacachi a technical summit that is rarely climbed.
In the Reserve, you can hike the perimeter of the lake, a 7.6-mile loop that maxes out around 11,350’. It’s a much less intense hike than anything else in the Otavalo area, and very scenic throughout. I recommend this hike to anyone wanting a mellow day with some added elevation. While at the lake, you can take a boat ride around the two islands that sit in the middle of the crater.
Iliniza Norte
The Ilinizas made big news in 2011 when Edward Hudziak, a Polish climber in a party of 15, fell from the peak’s flanks and died. This event changed climbing laws in Ecuador forever. Now, climbers must be accompanied by a registered guide when climbing any glaciated peak in the country, plus Iliniza Norte, which is not glaciated.
Iliniza Norte is the only peak in this list that you will need to hire a guide for. There are a lot of guiding services online, or, if you’re staying in nearby Latacunga, your hostel may have connections. I recommend Hostal Adventure Climbers in Latacunga. They have lockers where you can keep non-essential gear while climbing and lots of local connections to guides.
Because it isn’t glaciated, Iliniza Norte is by far the easier of the two, although there is a good deal of loose rock on the peak that can be dangerous. I recommend staying at Refugio Nuevos Horizontes, which you may get entirely to yourself, depending on the time of year. From the refuge, you’re lined up to head directly up the southeast ridge (Normal Route). The peak sits at 16,818’ and includes some class III scrambling. Some parties will want to rope up, depending on conditions.
Volcán Tungurahua
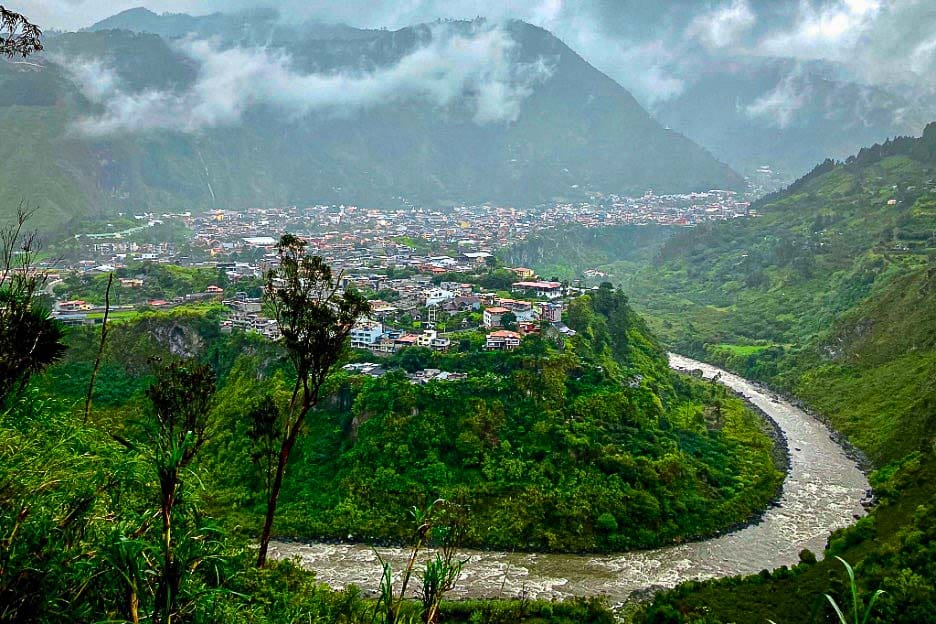
The beautiful city of Baños de Agua Santa sits in the cradle of Tungurahua’s arms. The volcano is well-known for erupting in 1999, evacuating the town below. Both the city and the peak are spectacular to behold. And while Baños is full of outdoorsy stuff to do (including Class IV rafting on the Rio Pastaza), Tungurahua is one of the biggest adventures you can get yourself into in the area.
Tungurahua (literally, “burning throat” in Kichwa) is Ecuador’s 10th highest peak, and is usually dry. Like most of the conical peaks in Ecuador, the trail is a fairly straight out-and-back. You’ll begin in Baños, following dirt roads up the cliffs above the city to a refuge.
You can register at the refuge, and stay the night there. Baños sits at just under 6,000’, the refuge at 9,000’, and the summit at just over 18,000’. To avoid getting sick, stay the night before proceeding up. From there, the trail is very well marked and meanders due south about 4 miles to the summit. Be prepared for some serious gain. But the hiking is good, the trail is mostly bare rock and gravel, and it’s very hard to get lost.
The Quilotoa Lake Loop
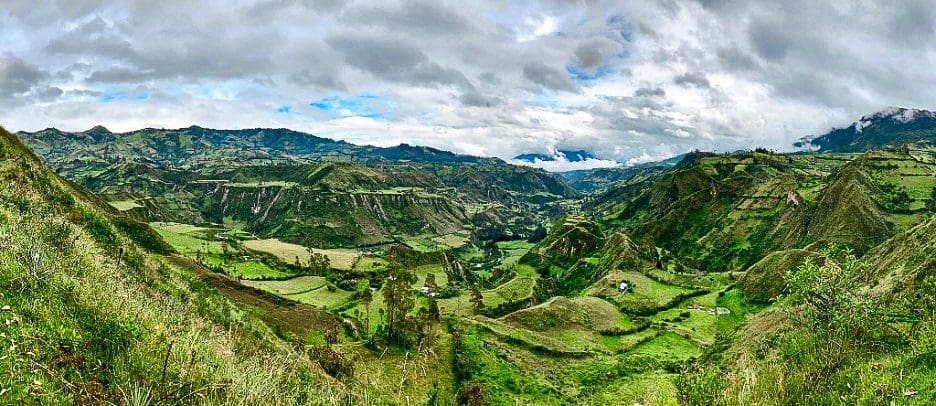
The Quilotoa Loop is a seemingly-endless rolling landscape of greenery, fields, and rivers. Photo by Conrad Lucas.
Whether or not you intend to climb Cotopaxi, the Lago Quilotoa Loop is a must for everyone who visits Ecuador. But if you are trying to get acclimatized, this is a fantastic way of doing it. In many ways, it’s the ultimate backpacking trip.
The mileage isn’t colossal, but it’s not weak either. And the payoff is tremendous. In addition to the trail, you have the benefit of being able to stay in a hostel every night. Hostels along the Quilotoa trail all offer dinner after you arrive and breakfast in the morning, and some will even give you a sack lunch to go. There is no one who wouldn’t immediately fall in love with through-hiking after this trail.
The trail begins and ends with a bus ride to/from Latacunga. You can do the loop either way, but I recommend heading to Sigchos on the first day. From here, you can choose to do the trail in two days, or tack on some extra distance and do three.
I strongly recommend taking the three-day route if you have the time. Not only does it mean more time at elevation, but the views on the three-day route are unmatched. For the two day route, head from Sigchos to Chugchilan. The trail follows roads, most of which are marked. You’ll probably even get passed by buses and taxis.
For the full three-day experience, slightly further east to the town of Isinlivi. I stayed at Hostal Taita Cristobal there and was very pleased with the accommodations. Day two, you’ll head over a small peak and into a broad valley and through the sleepy hamlet of Itualo.
From here, there are two trails: one which leads west up a draw and another which leads further south through the Cañon del Toachi. There is some minor route finding involved, but the trail in the Cañon del Toachi was by far my favorite part of the trip. It’s a stunning trail cut into the side of a cliff overlooking a winding river.
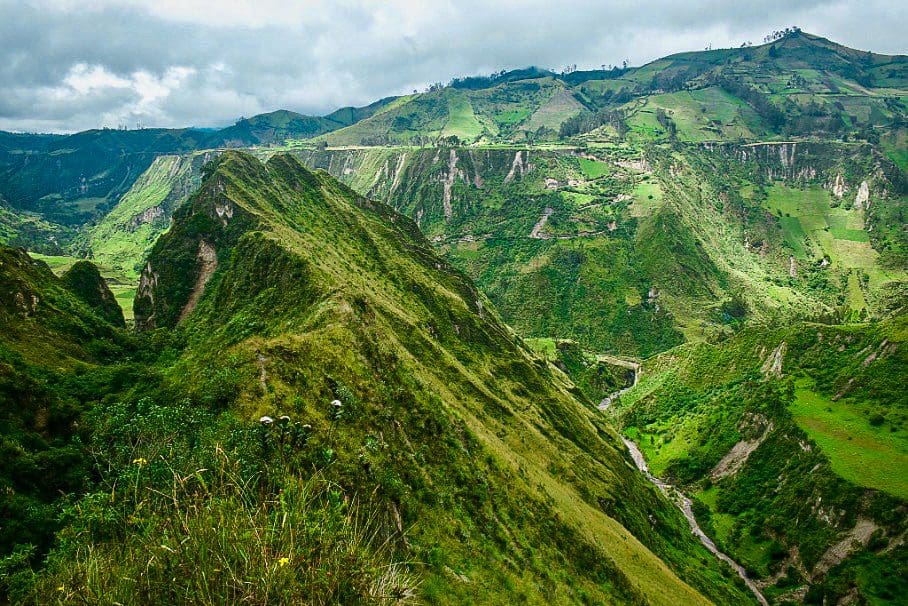
The Cañon del Toachi is some of the best trail hiking I’ve ever done. The trail traverses a steep ridge over a thousand feet above the river. Photo by Conrad Lucas.
End of day two you will find yourself in the town of Chugchilan. I stayed at the Hotel Lagoon in town. Day three is where the two-day and three-day routes join back up. This part of the route is the steepest and most taxing by far. Watch out for the semi-stray farm dogs you’ll encounter along the way. There are also roving “guides” who will try to convince you to follow them and then bother you for money. Whether this is worth your money is your call.
The trail ascends the steep sides of the volcano to the rim overlooking Lago Quilotoa. This is the big payoff. Quilotoa is a little like Crater Lake in Oregon, but on a completely different scale. The trail circles part of the rim to a town on the far side with lots of lodging and food.
Bonus points if you find yourself some canelazo in town. This warm, mildly alcoholic drink is a specialty of the Ecuadorian highlands and just the thing to wind down after killing 26 total miles and a cumulative 9,000 feet of elevation gain.
Putting it All Together
Between all of these hikes, there are easily 20 different ways you could get warmed up for Cotopaxi. Here are some ideas to get your brain moving on it, starting with a fast track acclimatization plan and ending with a longer trip that could bag you X high points in Y days.
Acclimatization Plan 1: Ten Days
Day one: Arrive in Quito. If you’re coming from sea level, you might want to take this day to acclimatize to the city.
Day two: Take a taxi from your hostel to the Teleferico. This is a gondola that runs from 9:30 AM to 6 PM weekdays and 8 AM to 7 PM weekends. Go early. The taxi will run you around $5 USD and the ride up the gondola is $8.50 for adults. At the top of the gondola, you’ll be just under 13,000’ above sea level. Depending on where you’re at, you could spend the day here or start up the trail to Rucu Pichincha.
Day three: Rucu Pichincha. Time to bag a 15-er. If you didn’t the day before, take the Teleferico to the foot of the Rucu, and then follow the instructions above to the summit. You can buy coca leaves at just about any market in Quito if you need an altitude boost. Coca leaf tea has been shown to increase your performance at altitude, and I can attest to this personally.
Day four: Take a taxi to Terminal Quitumbe, the south bus station. Take a bus to Latacunga.
Day five: Begin either Iliniza Norte or Sur (16,818’ and 17,208’, respectively). The law dictates you get a guide for either. Ask at your hostel, most places in Latacunga have local connections. Better yet, have something organized before you get there. Get an early start, take your bus, hike to the refugio, sleep.
Day six: Iliniza summit day. Working with your guide, make an attempt on either peak. Back to the refugio.
Day seven: Wake up in the refugio, hike down to the base. Hire a taxi to Macachi and find yourself a hostel. The Secret Garden Cotopaxi will put you in a good place to head for the refuge.
Day eight: Rest day, if you need it. If not, you could venture into the park and do a day hike. Organize your guide with the hostel (or, if you’re like me and don’t like doing things last minute, you’ll already have one set up.)
Day nine: Take a taxi into the park and begin the long slog to Refugio Jose F. Rivas. This is the main starting point for the Normal Route and the alternate Rompe Corazones (Heartbreaker).
Day ten: Depending on how you feel, weather windows, etc. You may start the climb this day, or you may take a day at the refuge to catch your breath before attempting the next day.
Acclimatization Plan 2: Two Weeks
With two weeks, you could fit much more action into your trip (and maybe even take some down time to experience the culture of Ecuador). Here’s a rough outline of how to spend your time.
Days 1-3: Arrive in Quito. Take the Teleferico, climb Rucu Pichincha. See the historic center of the city.
Days 3-7: Quilotoa Loop (three-day). Leave Quito, head to Latacunga. Take a bus from the Terminal Terrestre Latacunga to Sigchos. They leave every hour. If you start early, you can take the bus and hike to Isinlívi in one day. Finish the loop in Quilotoa, then bus it to Latacunga. Then, bus it to Baños.
Days 7-9: Baños and Tungarahua. See Baños. Be sure to try the cuy at the market! Hike Tungarahua from town (be prepared for a big day).
Days 9-12: Iliniza Norte. Early start, bus to Aloasi. Hike to the refuge. Summit day, back to the refuge.
Days 13-14: To Refugio Jose F. Rivas. Take a rest day. Then, taxi from Aloasi to the park and hike to the refuge.
Acclimatization Plan 3: Ecuadorian High Points Tour (three weeks plus)
Ecuador is your oyster. More high points, more rest time, more llapingachos.
Week one: Head directly from Quito to Otavalo. I recommend Flying Donkey Hostal in town. Experience South America’s oldest and largest open-air market. Haggle with the locals. Drink in the indigenous culture. Hike Imbabura, Fuya Fuya, Cerro Negro. Or, if you’re ready for more of a challenge, hire a guide and take on Volcan Cayambe.
Week two: Head south. See Quito for a few days, bag Rucu Pichincha. Continue south to Latacunga, complete the Quilotoa Loop.
Week three: Ilinizas and Baños. Bag one (or both) of the Ilinizas. Head to Baños, hike Tungarahua. If this is all your time, circle back to Cotopaxi and make your way to the refuge. After all this time at elevation, getting to 19,000’ will be a cinch.
Guided Alpine Climbing Cotopaxi with a local guide
This active volcano in Ecuador is a favorite among outdoor enthusiasts of all skill levels and experience. It is less technical than many other summits, making it perfect for anyone new to climbing, but due to its activity and spectacular vistas, it is also ideal for climbers who like adrenaline and adventure! Don’t let that intimidate you — your experienced and professional guide will always put your safety first and help you perfect your climbing skills before the summit. Cotopaxi will definitely challenge you, but the feeling of conquering the world’s fifth highest active volcano will make it all worth it!
Book your adventure!

Enroll With Global Rescue Prior To Embarking On Your Next Adventure.
When a travel emergency arises, traditional travel insurance may not come to your aid, and a medical evacuation can cost up to $300,000.
The cost when you have a Global Rescue membership? $0. That’s why when the unexpected happens, you want the leader in rescue, evacuation and medical advisory behind you. You want Global Rescue.


