


|
Getting your Trinity Audio player ready...
|
Many people shy away from planning. But lack of preparation in the backcountry can lead to disaster. Understanding the necessity of a good plan is the first step. We have created a guide for backcountry skiers who are ready to plan their next adventure, including all the essential information needed to get out in the backcountry.
Overview
Ok, so you’ve thought about backcountry skiing for a while now. Every time you ski at your favorite resort, you catch yourself looking beyond the boundaries to the untapped potential beyond. The possibilities begin to grow in your mind. You’ve been patient, purchasing appropriate gear as you can and even tackling some side country runs outside ski resort boundaries to test your mettle.
On top of that, you have a dedicated crew ready to follow you into the wild white yonder. The pieces are falling into place, but one critical component has eluded you. In a season as extreme as winter, where weather forecasts are often wrong and ground conditions change by the hour, how do you even plan a backcountry ski adventure?
Before we get into the Guide to Planning a Backcountry Ski Adventure, make sure you have the gear necessary to head out.
- Skis/Helmet/Gloves
- Winter Clothing: waterproof shells, thick ski socks, layers, puffy, beanie, hand warmers, etc.
- Skins
- AT Bindings (Frame or Tech)
- Avalanche preparedness: Beacon, Shovel, Probe, and Radio
- Backcountry ski pack
- Food/Water/First-Aid Kit
- For multi-day adventures: 4-season tent, winter rated sleeping bag, avalanche airbag, orientation equipment, batteries/rechargeable batteries
Table of Contents:
Article Navigation: Click on any of the listed items in the table of contents below to jump to that section of the article. Similarly, clicking on any large, white section header will jump you back to the Table of Contents.
- Overview
- Pre-Planning
- Long-Term Planning
- Short-Term Planning
- On-site Planning
- Post-Planning
- Conclusion
- Additional Resources
Warning: This article part of our series on backcountry skiing and only deals with backcountry ski planning. For a gear guide and introduction to all essential backcountry skiing items, please visit our Backcountry Ski Gear Article. For ANYONE traveling into avalanche territory, consider enrolling in an Avalanche training course by AIARE; it absolutely save lives.
Pre-Planning
It’s amazing how quickly people get turned off by the idea of planning. To some, it’s antithetical to ski culture. To be fair, there is a fun and exciting element to the spontaneity involved with embracing ski culture. Realistically, however, all ski culture needs to thrive is a resort to ski at. With armies of ski patrollers and employees working to keep the resort safe, you can be reasonably spontaneous and not have to worry about the harsh winter elements hemming you into an uncomfortable situation.
Once you take your craft outside the resort, unfettered spontaneity can spell disaster for the unprepared. The first step to planning any backcountry ski adventure is understanding the NECESSITY of a solid plan.
Pre-planning? You bet. This category encompasses the unconscious steps that’ll take you right up to the edge of backcountry glory. It isn’t as rigid of a category as others listed below, but if you handle the lead right, it’ll make getting into the details of a trip an enjoyable experience instead of anxiety-inducing.
Ok, so what do I mean by that?
Learn how to Ski at an EXPERT level
It should go without saying that to ski backcountry, you need to know how to ski. Not only that, but you also need to ski at an expert level within a given resort to be able to declare yourself backcountry capable. This stage can take anywhere from a few years to a decade for the more casual recreationist.
Take your time and hone your craft. It is incredibly helpful to demo skis in all shapes and sizes to get you comfortable with the wide variety of options out there. Not all skis ski the same.
A thin, racing ski will sink under a few inches of powder, while a floppy powder ski will not give you the sharp edge control needed in tough freeze/thaw conditions.
Don’t know where to start? Head to your nearest gear shop with a list of questions in mind and have at it. If there’s anything ski professionals love talking about more than their own skiing exploits, it’s gear.
If you can’t ski black diamonds, moguls, or tree runs in full parallel, you’re not ready to take it to the wild.
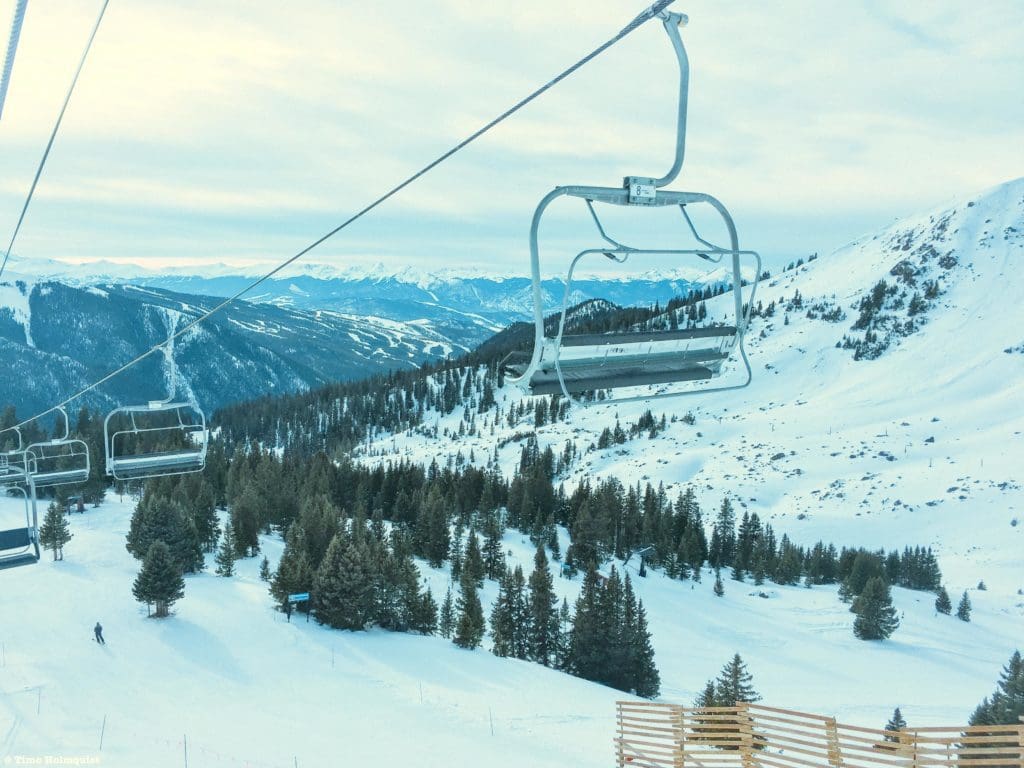
Early season conditions in A-Basin’s Montezuma Bowl.
Find a squad
Once you can confidently ski all the best runs at a big resort comfortably AND deal with variable snow conditions, the dream of backcountry starts to become more of a tangible goal. Keep practicing and find people of a similar skillset who are also interested in backcountry skiing. This step can be difficult, especially if people in your circle aren’t interested.
In that case, find online skier forums for your area, use a guide service if you have enough cash, see if local clubs offer backcountry lessons or tips, go to a local skier watering hole, and most importantly, ask questions. No one is born on this earth with all the answers, and the ones who get answers are the ones who ask. Get in there. If you want backcountry knowledge, seek it out. Networking is key because whoever you take with you into the backcountry needs to have your total confidence.
Play around with ski options and standard ski gear
Once you’re skiing at an expert level with a consistent group alongside, start zeroing in on the gear component.
As mentioned in our other article, gear purchases can be expensive; however, there is opportunity here as well. If you’re not married to a single distributor or outdoor apparel company, keep an eye out for local ski swaps and off-season deals that will dramatically reduce your bottom line. Come mid-January, most backcountry gear is either sold out or backlogged, get ahead of the game and start hunting in the late spring or early summer.
It is also important to practice using the gear you buy. Just because you own it, doesn’t mean you know how to use it. Be honest about your skill level and practice until you feel comfortable deploying avalanche gear, using skins, and adjusting bindings. (see our Backcountry Ski Gear Guide).
Hone your craft
If you have the gear, the skill, and the friends, it’s time to get in shape.
Most major ski resorts allow uphill access, which is exactly what it sounds like. You slap some skins on your skis and climb up a ski slope to ski down. This is a perfect way to build and maintain the critical muscles needed to get you out there. It’s also a great way to test out your gear. Most bindings come with at least two separate risers you can implement to tackle steeper slopes. Play around with the settings to get comfortable with them.
Additionally, look out for unique opportunities like Bluebird Backcountry, a human-powered resort offering avalanche mitigated terrain and established routes to try. Another way to get some practice is to look for side-country runs. Unlike backcountry, side country is skiable terrain outside a resort but accessed from within it.
It often alleviates the uphill component if you want it to and allows you to get some lines in without relying on what the resort has done to maintain its trails. As always, do the research before heading outside the resort.
Throughout this phase, the underlying goal is the same; practice, practice, practice.
Long Term Planning
Once you’ve got your squad, a coherent set of ski skills, and the necessary backcountry gear, it’s time to get into long term planning.
Geographic Reduction
During this stage, start big and work your way down. By big, I mean decide what mountain range you want to ski in, and start your reduction from there. For example, the US has four major mountain ranges: The Appalachians, Continental Rockies, Sierra Nevada, and the Cascades. Once you break down the US into more comprehensive physiological regions, that number balloons into the hundreds. For simplicity, let’s pick on Colorado.
Colorado is the roof of the Southern Rockies: a major physiological region beginning in New Mexico and traveling north through Colorado before ending in southern Wyoming. It is separated from the Central Rockies by an area of (relatively) low elevation around the I-80 corridor. As a unique region, the topography, weather, and snowpack differ from others and has to factor into your backcountry skiing calculus.
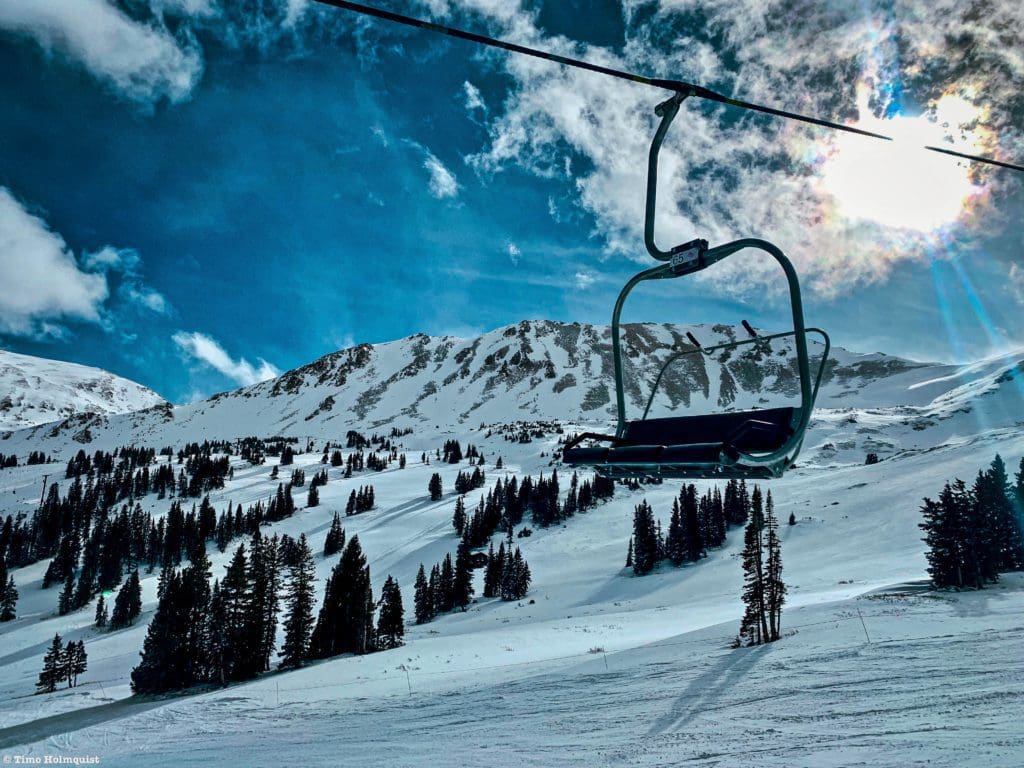
Blue sky moments at Loveland Ski Area.
Snowpack and general winter considerations
Colorado sports an average of 300 days of sunshine a year, affecting how and where snow builds up.
Weather generally comes into the state from the West, meaning the western mountains like the Flattops, Park Range, The Grand Mesa, Western Elks, and Western San Juans (like the San Miguel and La Plata subranges) tend to see snow first. Colorado is also situated at a famous weather crossroads and is affected by global weather patterns like El Niño and La Niña.
Very generally, a La Niña weather pattern tends to split the jet stream into a northern and southern stream. In this situation, the southern mountains (San Juans, Southern San Juans, and Sangre De Cristos) often get slammed with snow. The northern split tends to overload the pacific northwest and British Columbia, Canada.
El Niño, on the other hand, tends to deliver more consistently to the resorts and ranges in the northern half of the state like the Gore Range, 10-Mile, Indian Peaks, Rocky Mountain National Park, and the Medicine Bow.
Knowing what global weather patterns are in play can help you narrow down where you want to explore. As always, these are general trend discussions. Each winter is different, and while general trends help, they have to be supplemented with specific factors affecting each individual winter to be helpful.
Timing is also an important contributing factor.
Even in bountiful snow years, the continental snowpack doesn’t usually stabilize until March. Often, we think of avalanches happening when too much snow overloads a slope. While true, it doesn’t mean avalanches can’t happen during a wimpy winter. If it is cold and icy beforehand and then a foot of snow falls on an unstable slope, the chances for all that mass to slide is high. To that end, checking avalanche forecasts is a MUST.
Luckily, there are various resources out there to sink your teeth into.
For Colorado, make it a non-negotiable habit to check Colorado Avalanche Information Center (CAIC) for generalized avalanche forecasts and then zero in on your region before heading out. If you’re toggling between multiple regions, use Avalanche.org to look at the western US at large.
Remember, in Colorado especially, most backcountry skiing is done after snowpack consolidation, so mid-March and beyond. Skiing during the height of the winter ratchets up the risk factor. You can always check the Colorado Basin Snowpack Maps to figure out what basins are collecting more snow than others.
Good To Know: For a deeper dive into the Colorado snowpack, see our Colorado Snow Guide, where we dive into the various elements that must align for a successful Colorado winter. We will also discuss long-term patterns and offer insight into what can be expected in the future.
Area Specific Research
So, let’s say you’ve found a region, checked the snowpack stability, and made sure it’s during a low avalanche risk timeframe. Then, it’s time to get into the details of your adventure. Are you going for an afternoon? A full day? Multiple days? Each option comes with unique challenges, and it’s incumbent upon you to reiterate those challenges to your party as clearly as you can. As far as resources go, there are a TON of websites and forums that can shed light on certain lines to shred.
One of the better sites is PowderProject, which does a great job of providing line details and an easy to use map feature. The catch is that the lines are user-created, so not all existing lines are on the project. Books are also great and can be hauled into the backcountry without the risk of your phone dying. For Colorado, oodles of resources exist depending on what range you’re skiing in, from statewide guides like Backcountry Ski and Snowboard Routes: Colorado, by Frank & Brittany Konsella, to specific sites like Front Range Ski Mountaineering.
Don’t underestimate the power of maps. If you’re old school, make sure your map has appropriate shade relief and clear topographical lines so you can calculate slope angle accurately. If you lean more towards technology, websites like CalTopo and GAIA GPS can build and track potential ski lines with a map overlay.
Research can take time, be patient
Once you have a good idea of what you want, start crunching the numbers. How far is the nearest access road? Is it consistently plowed in the winter? How far do you have to skin to get to the line? How much do you have to climb to reach the top of the line? Is it sufficiently steep enough to warrant crampons on the way up? What’s the angle of descent? During your practice phase, time yourself. How long does it take you to skin a certain distance? The devil’s in the details. It’d be a real shame if you picked an epic adventure but lacked the stamina and energy to get it done.
Once you’ve target locked a ski line, figure out a little more about the area you’ll be skiing in. Where is the nearest town? What county/state/province are you skiing in? Do you have the sheriff’s number in case you need to call a rescue? If skiing on US national forest land, do you have the local USFS office number? While not generally considered part of standard avalanche gear, consider getting a Satellite Phone if venturing into areas without cell reception.
Remember: the rating system for backcountry skiing is not the same as resort skiing. Look for the descent angle and whether or not there are well-known obstacles during the descent. If you’re skiing a couloir, is there a cornice to deal with? A bergschrund? Get to know the line you’re about to ski like it’s your best friend. It’s always better to know than go in blind, especially during your first forays into backcountry.
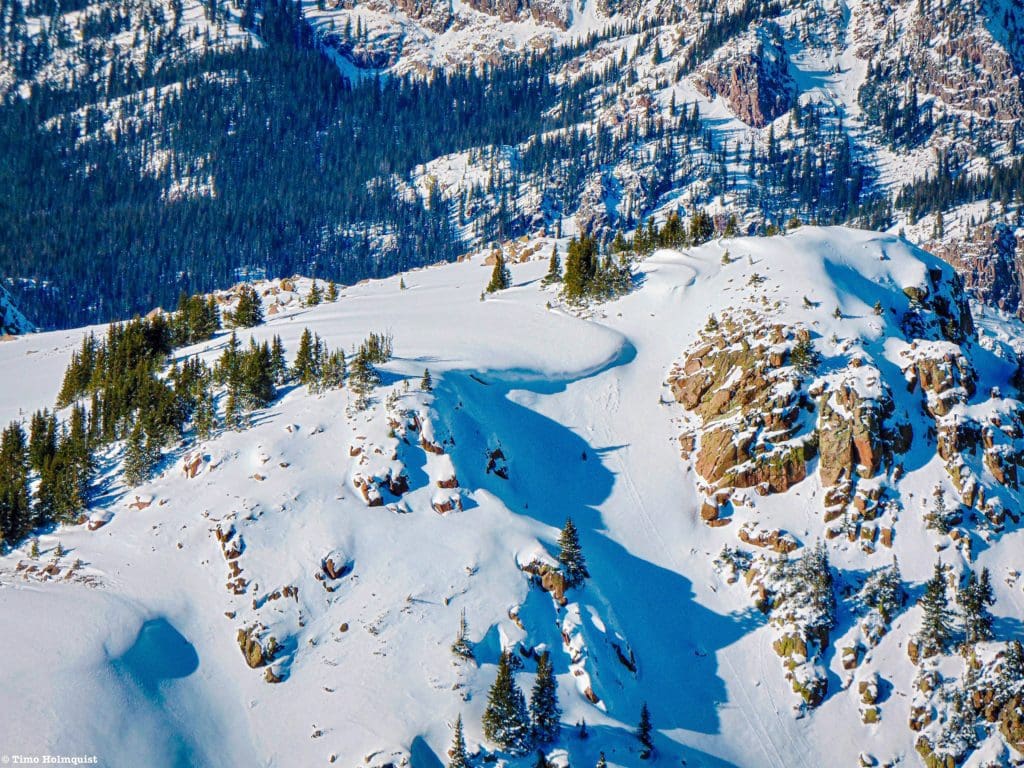
Sneaky cornices forming in early December.
Short-Term Planning
Managing Expectations
The day is almost upon you, and the stoke level is high. Roughly a week ahead of the date, and really up until you leave for the adventure, check the local weather reports. Use multiple forecast models and websites to get the best and most accurate description of what the sky is going to be doing when you start skinning. A bluebird day doesn’t mean there won’t be 50 mph wind gusts. The central features to any short-range backcountry forecast are precipitation, wind, temperature, sunrise/sunset times, and cloud cover. Check forecasts religiously before heading out, things can change quickly, and the most accurate forecast you’ll see is the last one you check before heading out.
As you’re checking weather, give the avalanche conditions and snowpack a daily look as well. It’s better to have all the knowledge you can get at your disposal than feel like you’re missing something and realizing it’s too late to check.
Popularity is one of those considerations we don’t really think about but is also a crucial factor in considering where and when to go. Backcountry skiing is growing, and in areas near population centers, that translates to traffic. Waiting in line to climb a skinny couloir on a crowded Saturday morning is really going to tank your drive. If possible, plan your trip to give you the best chance to spread out and enjoy the area you end up in. Having said that, if this is your first time planning a backcountry trip, always pick a highly documented and well-trafficked area to build confidence.
Perhaps the most important short-term planning component is telling people where you and your squad are going. Leave a detailed plan with at least 2-3 separate people so they can alert authorities if you don’t come back home on time. It doesn’t take long and, if you need an evacuation, you’ll know you have people ready to spring into action on your behalf.
Other Planning Considerations
Coinciding with short-term planning, it’s always advisable to have a back-up plan. S^*% happens. Maybe you don’t have enough time to get to where you want, or conditions look a lot better in another area. It’s never a bad idea to build in some contingency plans. One of those contingencies has to be a bail-out option. Don’t push something when factors start lining up against you. The mountains will be there tomorrow, ease up on the throttle and make calm, realistic decisions that balance the risk and reward of any outdoor adventure.
Make sure at least one of your party (preferably more than one) has medical training. It’s not only avalanches that can impact travel; repetitive use injuries can crop up, hypothermia is always a risk if the weather is cold enough, and altitude sickness can strike without much warning. When prevention is impossible, having people around you with combined medical knowledge can help stop a situation from devolving into one where rescue may be necessary.
As indicated, a lot of things go into a successful plan, and it can all come undone if people in your party aren’t on the same page. ALWAYS meet at least once with your squad before embarking on any outdoor adventure. During any plan discussion, check for understanding and field EVERY question that comes up. What may be irritating in the moment could shed light on a factor you hadn’t considered before. Collaboration and acknowledgment win the day. Withholding or ignoring crucial information is a bad idea in any scenario. Be upfront and honest.
Packing
Packing considerations are almost ubiquitous with more demanding outdoor adventures. If you spent the proper time researching and buying the right gear, it helps to practice with it. How and where does your avalanche gear fit into your pack? Have you packed enough food and water? Do you have a mechanism to melt snow for water if you packed light?
Not only do you want everything to fit, but you also want it to be accessible. Nothing is worse than fumbling through a stuffed-to-the-gills backpack when one of your party is in danger. Before you leave for your adventure, make sure you’ve packed and repacked your supplies in the most efficient way possible. When going with friends, have them check your supplies beforehand while you check their’s.
On-site planning
What do you see?
The planning doesn’t end when you head out for your ski adventure, especially if this is your first time to a particular area. On-site planning will help you mitigate challenges as you encounter them. Keep your head on a swivel and check your surroundings.
Some of these challenges include things like tree-wells. If any part of the line you’re skiing has trees, know how they’ll impact your experience. A tree-well is an area of snow around a tree that isn’t as compacted as the slope around it. If you ski or fall into a well, the snow will give under your weight and pull you under. Tree-wells can be avoided with a little careful on-site planning, but they have been known to ensnare unsuspecting skiers; do not take them for granted.
Avalanches can occur for little to no reason, but there are signs that a slope is more avalanche prone than others. Look for previous indications of sliding (debris and a rough area of snow in an otherwise uniform slope). Pay special attention to cornices. Cornices are large, sometimes overhung areas of snow that form on steep and abrupt slopes. Given enough snow weight or warm temperatures, cornices can collapse and create the mechanism for avalanches.
If skinning up to a particularly good-looking line, watch for other people. You do not want to be climbing up a skinny couloir when others are skiing down the same thing. Similarly, if snow cover is fairly uniform, try to ascend using a series of ridges instead of the deeper bowls between them. Avalanches impact ridgelines, but the majority of the snow will slide along the fall-line or line of least gravitational resistance. A smart ascent route can avoid the dangers of an unstable slope. Of course, you won’t know what the slope looks like until you arrive at your site.
Time of Day Considerations
Time of day considerations are also important advantages of on-site planning. If you arrive early on a morning where the snow has frozen overnight, the skiing is going to be rough under foot. Hard, choppy snow will affect how you ski, readjust your center of mass accordingly. If you arrive on a warm, bluebird day, the sun could have already melted the top layer of snow before you can ski it, leading to slushy and uneven skiing conditions.
Slope direction is important too. North-facing slopes tend to hold on to snow later than others because the low winter sun angle doesn’t reach them until later in the spring. If skiing a north-facing slope early in the day, you may be dealing with hard snow. Conversely, southern and eastern facing slopes get more sun earlier. Make sure you’re at the top of your line, ready to ski before the sun melts the top layers and creates slushy, start/stop conditions.
All of these considerations are useful data points you can acquire during your ascent. Having a better idea of how the snow is skiing will go a long way to ensuring your ability to handle whatever surface conditions you encounter. Just like not all skis ski the same, not all snow handles the same.
Post-Planning
Analyze
The idea of planning doesn’t leave when your ski adventure concludes. Lessons are everywhere. If your trip was a success, remember what worked. If your trip was a failure, figure out what didn’t work and why. They say failure is the best teacher, but success is right up there with it. It’s important to catalog what went well and what you could improve upon for future trips.
Ease into the Harder Stuff
Going back to Colorado, let’s say you’ve completed a few backcountry day trips, and you want to get out and push the envelope on a multi-day. Before you go bonkers buying additional gear, consider paying to stay at a hut instead. The 10th Mountain was a US Army Division based in Colorado during World War II that trained for mountain warfare. Vets of the 10th eventually founded Vail Resort. They also built a series of overnight huts in the Colorado wild. You can rent them, from one bunk to the whole hut.
The 10th Mountain Huts are supremely well-maintained, well-loved, and an excellent winter destination to dip your toes into multi-day adventuring.
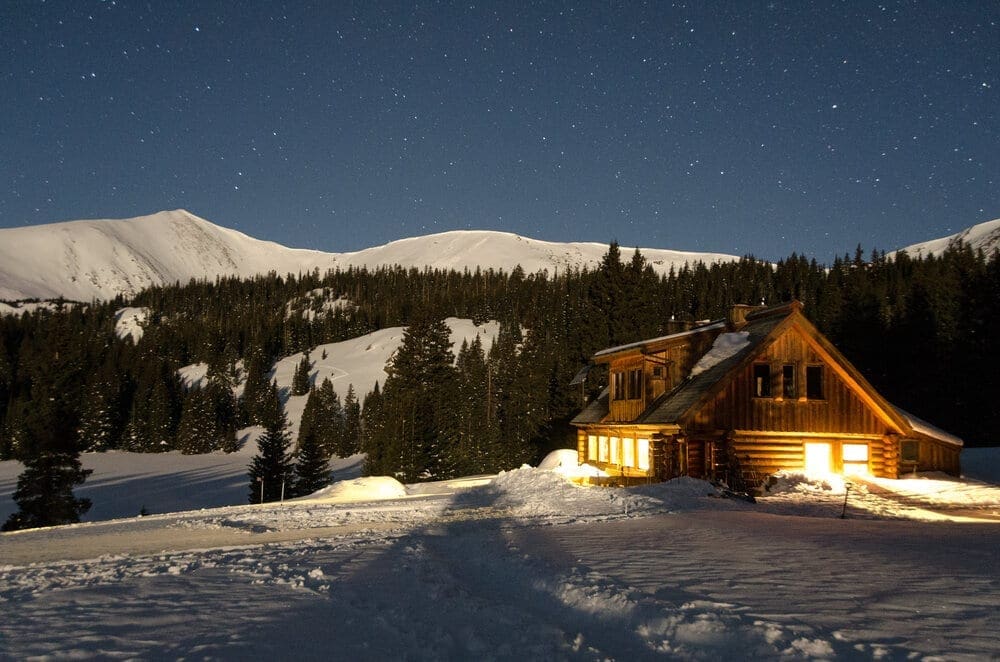
Moonlit night at one of the supremely well-maintained 10th Mountain Division Huts in the Colorado wild.
Outside the 10th Mountain, there are numerous yurts and huts spread around the backcountry. Check out what options your local area has before committing to an adventure that may still be above your ability level. Building up your skills slowly through the abundant use of planning can build confidence and create a cohesive set of practical backcountry skills. Always respect the mountains and what kind of conditions they give you. No outdoor adventure is worth dying over.
Fresh snow after an Upslope storm.
Conclusion
As is the case with many things in life, backcountry skiing emphasizes the importance of moderation. No one will know how much you shred if you die in an avalanche. Tip-toe into the unknown so the unknown doesn’t bite you back. If you are consistent and methodical with your planning, the only limit on what you can do is the time you have.
No one picks up backcountry skiing with zero chances for improvement. The learning curve can often be quite brutal, roll with the punches and think logically. What can I do to correct a consistent problem? Why was this trip so successful?
Analyze your strategy, adjust and work to keep your risk factor as low as you possibly can. It should be obvious that backcountry skiing does come with substantial risk, but if you take the scientific method to skiing, you’ll improve without damaging your ability to keep skiing.
Additional Resources
Avalanche Forecasts
Backcountry Planning
-
Buhay, Corey. (December 7, 2018). Ski Often, Ski Safe: How to Plan a Backcountry Ski Tour
-
Schoen, Eddie. (n.d.) Tour Planning 101: Backcountry Skiing
-
West, Chris. (August 14, 2020). The Eight Best Satellite Phones and Messengers
Backcountry Research and Online Map Tools
-
Backcountry Ski and Snowboard Routes: Colorado, by Frank & Brittany Konsella.
Terms of Use: As with each guide published on SKYBLUEOVERLAND.com, should you choose to go backcountry skiing, do so at your own risk. Prior to setting out check current local weather, conditions, and land/road closures. While taking a trail, obey all public and private land use restrictions and rules, carry proper safety and navigational equipment, and of course, follow the #leavenotrace guidelines. The information found herein is simply a planning resource to be used as a point of inspiration in conjunction with your own due-diligence. In spite of the fact that this guide was prepared under diligent research by the specified contributor and/or contributors, the accuracy of such and judgement of the author is not guaranteed. SKYBLUE OVERLAND LLC, its partners, associates, and contributors are in no way liable for personal injury, damage to personal property, or any other such situation that might happen to individuals following this guide.


