


|
Getting your Trinity Audio player ready...
|
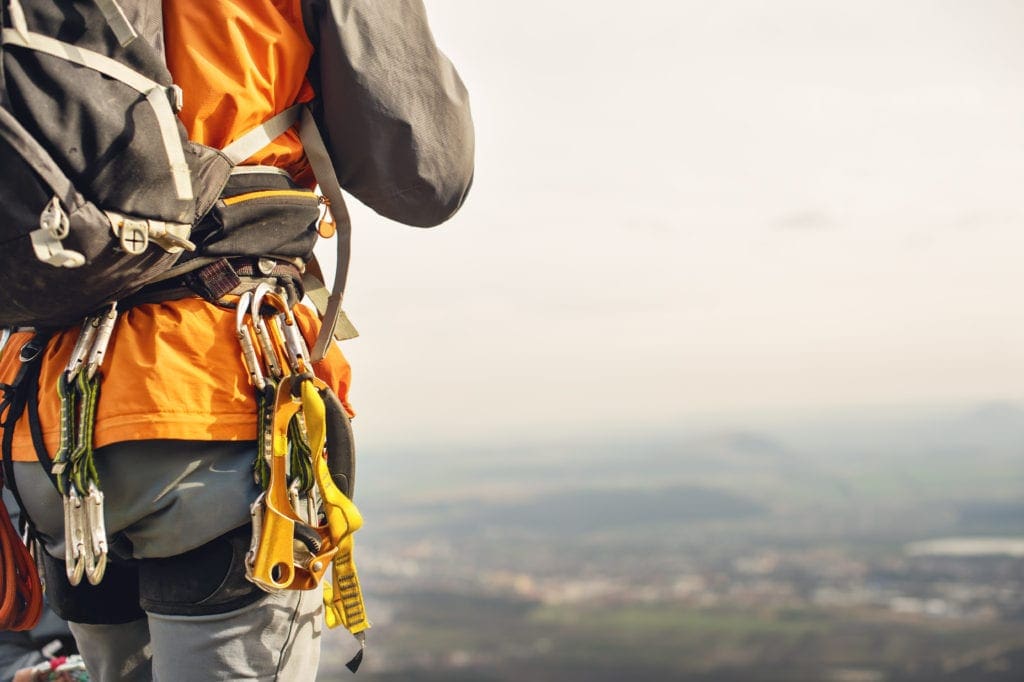
Close-up of a thigh climber with this equipment on a belt.
Introduction
What do you picture when you think of the word “adventure”? Maybe some kind of challenge, a trip from point A to point B, requiring a combination of physical strength, decision making skills, technical understanding, and (most importantly for our purposes) a whole lot of gear. Maybe it’s less material than that, more of a journey into the unknown in search of understanding, clarity, and oneness with nature. Or maybe that’s a little too flowery – maybe it’s a conquest, with real risks, a test of your mettle under pressure, a tour de force rite of passage. Climbing is all of these things at once.
It’s the ultimate in what we think of when we imagine a grand adventure. But it isn’t an inaccessible club for elites like it once was. Anyone with the know-how and gear can set out, rope up, and take part in it. Here we will cover the absolute basic requirements for going rock climbing outdoors. If you’re fairly new to the sport and want to become a more competent climber, familiarizing yourself with the options for gear is a good step. We hope to help you in that endeavor by providing a guide to introductory climbing gear – that is, what you need to get started, and maybe a little beyond that.
Disclaimer: For the sake of brevity, this article will be covering gear required for outdoor sport and traditional climbing ONLY. Indoor climbing, bouldering, aid climbing, ice climbing, mountaineering, canyoneering, and caving have their own unique requirements and will not be covered here. In addition, it is vitally important that you do adequate research and preparation before climbing outside. Climbing is a potentially DEADLY activity that should not be taken lightly and requires hands-on experience supervised by an instructor to be done correctly. Especially in the case of traditional climbing, you should NEVER attempt to place or climb on traditonal gear without extensive supervised practice. Do your homework, take lessons from professional instructors, and go out with experienced climbers before attempting to use ANY of the equipment covered here.
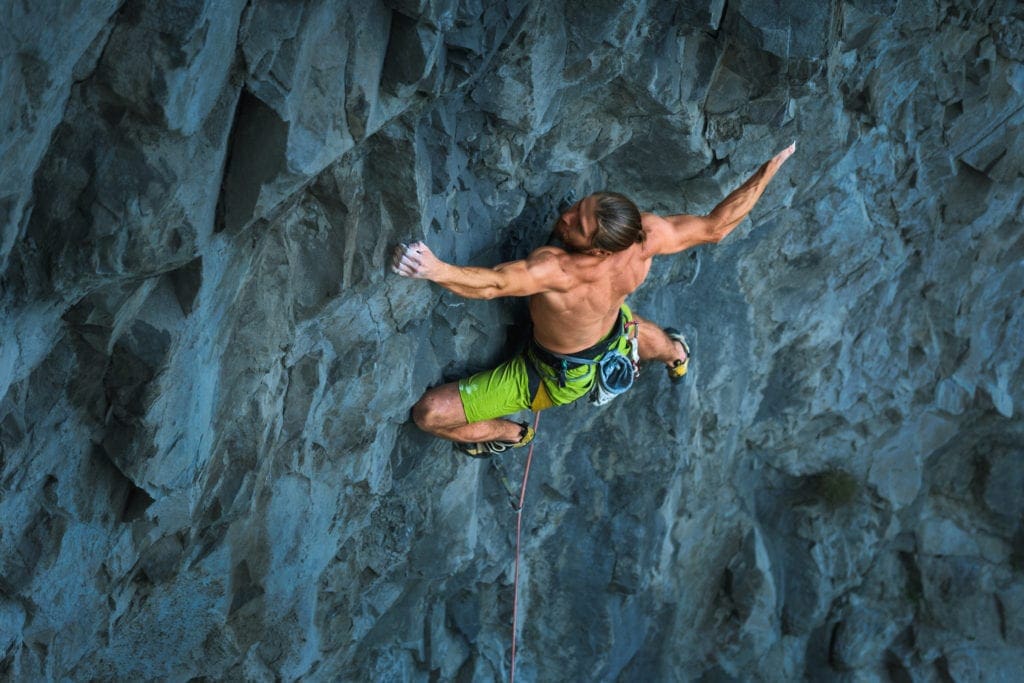
Powerful male rock climber climbing on a vertical rock face
Rock Climbing: What It Is And Why We Love It
Human kind’s fatal attraction to high places runs deep. Most everyone has heard George Mallory’s famous answer to the question of why he wanted to climb Mount Everest. Mallory’s simple reply has echoed through time:
“Because it’s there.”
Mallory would later die in 1924 during an attempt at the first ascent of Everest; and it would be another 29 years before Tenzing Norgay and Edmund Hillary would succeed. But in a way, the world’s tallest summit was only the beginning. In almost 70 years since then, advancements in technical gear and raw athleticism would lead to things George Mallory would have never even considered possible. Recent feats like Alex Honnold’s free solo ascent of El Capitan and Mingma Gyalje Sherpa’s team reaching the summit of K2 in the winter are some of mankind’s greatest athletic achievements. And they all have echoes of George Mallory’s famous quote in them. We are almost supernaturally drawn to mountains, cliffs, and spires. There’s a need to understand what it would be like to stand atop them. To more intimately grasp something about the world, about nature, and about ourselves.
Climbing sends you into the nitty-gritty of life. You’ll find yourself suspended hundreds of feet in the air, pushing with all your might to just get to the next bolt, or the next hold, with the wind roaring in your ears, your blood pounding, your hands tingling, exerting yourself entirely. In this moment, your brain is absolutely sure that you’re about to die. But in the next moment you’ll feel a rush of endorphins and a wave of triumph, of peace. Your hands are bleeding and the sweat is getting in your eyes but you don’t care. You survived; you overcame. And then you’ll repeat those steps over and over until you come to the top of whatever it is you’re climbing. It’s this constant tug of war between risk and reward that keeps us going ever upward.
So climbing is something we’re urged to do by some deep, dark part of our primate brains, and it gives us a killer head rush. But it’s also an engine for human-powered travel. So what are its limitations? Well, it mostly depends on your gear setup, and your experience level. There are tens of thousands of bolted climbing routes up both famous and obscure walls in just about every corner of the US. They can be climbed with relatively little equipment and provide a pretty good assurance that you’ll survive the attempt. But if you have access to traditional (or “trad”) gear, you could feasibly protect and climb just about anything, provided you feel confident you can do it safely. And ultimately, that’s the goal. Once you have the experience and the nuts and bolts in place, climbing can take you just about anywhere on earth. That’s the magic of it.
But that may be oversimplifying just a tad. Climbing the 31 pitches of The Nose on El Capitan isn’t as easy as buying a rope and some shoes. But with enough time, you could get there. The first step is to get the stuff you need and start taking baby steps. Learn how to use your equipment and start ticking off objectives near your home base. Like all great ventures, it’s best to start small. If you know people with a rope and protective gear, you can get started with just a few items. Chipping away the gear you need will give you more freedom, which in turn will make you a better climber. So let’s get the ball rolling.
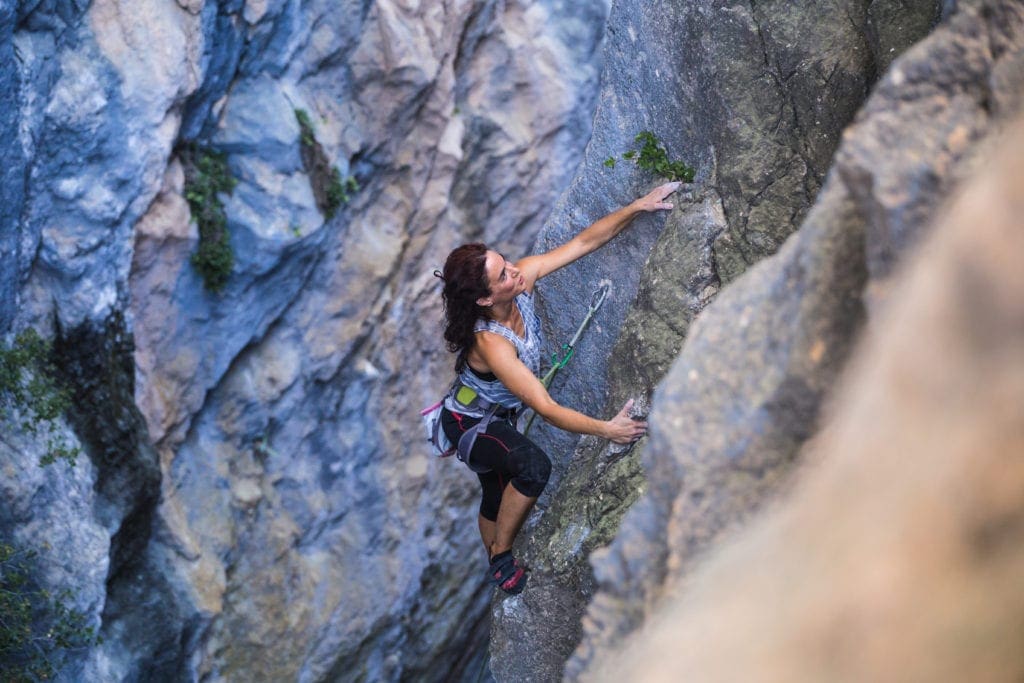
A woman is climbing a difficult climbing route
A Word on Technical Terms and Jargon
As you may already be aware, the sport of climbing is held together by a glue of technical jargon, slang, and science-y terms for principles in physics and geology. It can be difficult to suss out what’s pertinent and what isn’t. For the most part, you’ll pick it up as you go along. We’ll try to keep things in layman’s terms from here on out, but if you see anything else you don’t understand as we dive in, your best bet is running a quick search in one of these two resources:
- Rock and Ice Magazine’s Guide to Climbing Terminology
- And REI’s Rock Climbing Glossary of Terms
Gear Breakdown
Climbing is a deceptively simple discipline. On the surface, all you really have to have to climb on rocks is a pair of climbing shoes and a chalk bag. The catch is that the other 95% of the gear you will absolutely need exists only to stop you from dying in the event that you fall or things go sideways. And if you’re doing it right, you will fall from time to time. Climbing gear is put through rigorous testing and has to pass certain safety standards in order to be sold at all. “But wait, doesn’t that mean that it all works equally well?”, you’re conveniently wondering. The answer is, far from it. You’ll be shocked at how many minute variations to design can make a piece of protective equipment easier or quicker to use, and in a pinch that can make all the difference.
It’s also good to remember that the ceiling for cost with climbing gear can be enormous. What we’re going to try to do is find a nice balance between cost effective, easy to use, and beginner friendly. The products discussed here are, with few exceptions, not the best that money can buy. They’re the best options for people building their first rack of climbing gear, with respect to a reasonable entry-level budget, a good lifespan, and quality. Without further ado, let’s dig in.
Climbing Shoes and Chalk Bag
The shoes you’ll need to go climbing are a completely different animal to most anything else you’ve ever seen. They’re designed to fit tightly, making contact with the foot on all sides, and pressing against the tips of the toes. They’re encased in grippy rubber for sticking to rough surfaces, and the soles have a slight downward curvature, allowing you to stand on tiny footholds on the tips of your toes. If it’s unclear, they aren’t intended for walking and should only be used for actually climbing up vertical faces. You generally wear them without socks, and only for a few minutes at a time before taking them off.
Climbing shoes differ in a few ways. The thickness of the sole, materials of both the shoe and the sole, and closures make a big difference in terms of wear and tear, break-in period, and comfort. For beginners, a thicker-soled shoe will mean more durability and a longer lifespan. As you become more adept at climbing, you may opt for thinner soles which allow for more touch sensitivity. We’re also looking for a less aggressive curvature in the sole, which will allow you to get used to the feel of them and will improve the comfort of the shoe. We’ll also throw in some slightly more advanced options for people looking for a shoe they can grow into.
Whether you choose a synthetic or leather shoe, as well as laces or velcro closures, is a matter of opinion. There are benefits to all options. Leather shoes will break in, stretching to accommodate the foot over time. Some people prefer a shoe that conforms to their feet as they wear them more. Synthetic, on the other hand, won’t stretch, so if the fit is perfect as-is, it will stay that way. People also tend to form camps around which type of closures they prefer. Velcro is much easier to take on and off, which can be nice if you plan on spending a lot of time climbing. Laces can be better for tailoring your fit – if your feet are swollen and hot, you can loosen them easily. If you need better performance, you can crank them tighter. How you weigh these options will ultimately depend on your tastes and preferences.
Sportiva Tarantulace Climbing Shoes (mens and womens)
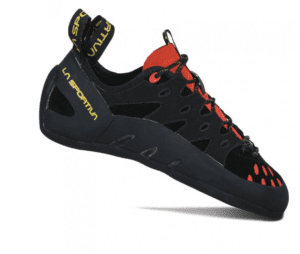
Photo by La Sportiva.
A classic for beginners, the Tarantulace combines high quality rubber, leather uppers, and laces for solid all-around performance.
- Pros: 5mm La Sportiva Frixion RS rubber is high quality, great value for high quality materials and construction, excellent comfort
- Cons: Thicker rubber sacrifices sensitivity for lifespan
- Price: MSRP $85 on REI
Black Diamond Momentum Climbing Shoes (mens and womens)
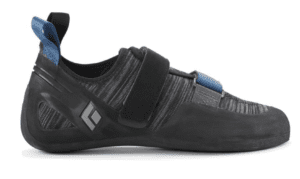
Photo by Black Diamond
Another great entry-level shoe, the Momentum features a slim profile, synthetic knit upper and velcro closures.
- Pros: Slightly thinner rubber will improve sensitivity, synthetic uppers are more breathable than leather
- Cons: Lower quality rubber in soles, not as durable
- Price: MSRP $94.95 on REI
Tenaya Tanta Climbing Shoes (unisex)
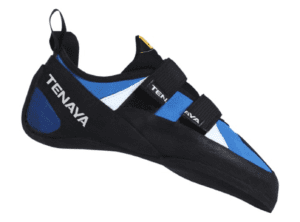
Photo by Tenaya
With a slightly more aggressive curvature, and thinner rubber, the Tenaya Tanta will continue performing well as you progress without sacrificing much in the way of cost.
- Construction: Synthetic upper/velcro closures
- Pros: comfortable, more aggressive profile will handle the demands of intermediate climbing
- Cons: Rubber is lacking quality, thinner soles will wear faster
- Price: MSRP $99.95 on REI
La Sportiva Finale Climbing Shoes (mens and womens)
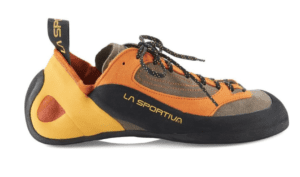
Photo by La Sportiva
Rated one of the highest-quality climbing shoes on the market currently, the Finale boasts a 5mm Vibram XS Edge sole and more aggressive design at an affordable price point.
- Construction: Leather upper/laces
- Pros: Top of the line Vibram sole, comfort, more aggressive design in the heels improves performance on edges
- Cons: More expensive
- Price: MSRP $109 on REI
Chalk Bag
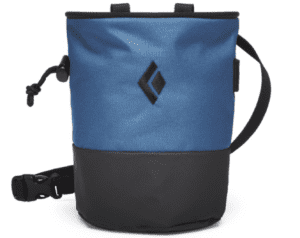
Photo by Black Diamond
The chalk bag is the simplest piece of gear we’ll talk about today. A simple drawstring bag like this Black Diamond Mojo Zip Chalk Bag will do perfectly fine to get you started. There are plenty of other options with more frills as well, if that’s your flavor.
Climbing Helmets
Helmets are universally important regardless of the sport. It’s not rocket science, really. You only get one brain, and it doesn’t grow back. Taking a fall while climbing can be a scary experience, doubtlessly, but it isn’t the only danger you’ll encounter at the crag. Rockfall injuries are common, not only for the climber, but for the belayer and anyone else on the ground. So it almost goes without saying that you should wear a helmet at all times while climbing or belaying.
A good climbing helmet offers protection to your head, is comfortable and adjustable, is well-ventilated, lightweight, and has a place to clip your headlamp. But a really good climbing helmet also uses MIPS Brain Protection System (BPS) technology for added protection. MIPS protects your head from rotational force, whereas a normal helmet only shields you from direct blows, which are surprisingly rare. If you can afford it, we always recommend buying a product with the added protection of MIPS. We’ve compiled a few solid options for beginners, depending on what you prioritize most.
Black Diamond Half Dome Climbing Helmet (mens and womens)
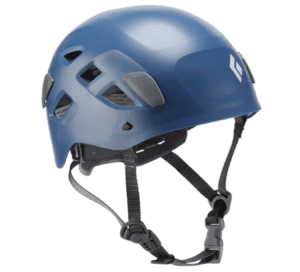
Photo by Black Diamond
The Half Dome is probably the best value on the market, and will do the job just fine to protect your whole dome (see what we did there).
- Pros: Cheap, durable, adjustable, headlamp clip
- Cons: Ventilation isn’t great, heavy, no MIPS
- Price: MSRP $64.95 on REI
Trango Sicuro Climbing Helmet (unisex)
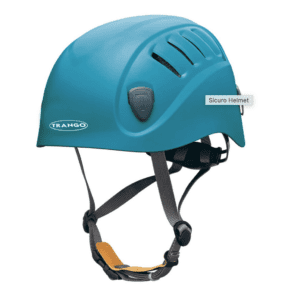
Photo by Trango
The Sicuro is another great starting point for climbing helmets. It features a padded chin strap and is slightly cheaper than the Half Dome.
- Pros: Cheap, good adjustment, comfort, headlamp clip
- Cons: Bad ventilation, no mips
- Price: MSRP $59.95 on Trango
Petzl Sirocco Climbing Helmet (unisex)
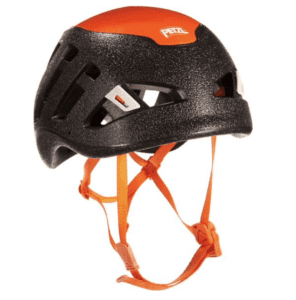
Photo by Petzl
If you’re looking to go lighter when possible, the Sirocco is a good choice. Its ultralight design favors ventilation and comfort.
- Pros: Ultralight, ventilation is great, comfort, headlamp clip
- Cons: Not as adjustable as others, lacks MIPS
- Price: MSRP $109.95 on REI
Black Diamond Vision MIPS Helmet (unisex)
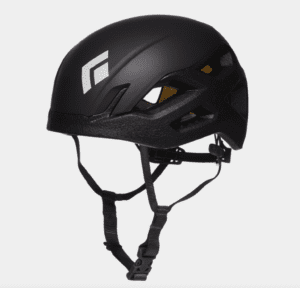
Photo by Black Diamond
The Vision MIPS is one of the best climbing helmets available right now. With top of the line price comes top of the line quality.
- Pros: Comfort, ventilation, durability, adjustability, lightweight, headlamp clip, MIPS
- Cons: Cost
- Price: MSRP $139.95 on Black Diamond Equipment
Harness, Belay Device, and Personal Anchor
Your harness is what keeps you attached to the rope. Your belay device allows you to belay another climber and rappel down a rope. And your personal anchor is what keeps you attached to the wall if you’re setting up a top rope, cleaning an anchor, or belaying while in between pitches of a multi pitch route. This sounds like a long list of things, but it’s really just a few. Most of the smaller pieces like webbing and locking carabiners do the same jobs with few differences, so don’t fuss too much over the particulars for now.
What you should focus on most here is your harness. You’ll need to wear it for long periods of time, so it needs to be comfortable and fit right. It’s also how you’ll carry your protective gear (on the D-shaped gear loops around the waist), so it needs to be good for holding and keeping things organized, without prohibiting your ability to grab something off your belt quickly. It’s also preferable to have a harness that packs light. Here are a few harnesses that keep those things in mind, along with cost.
Trango Liberty Harness
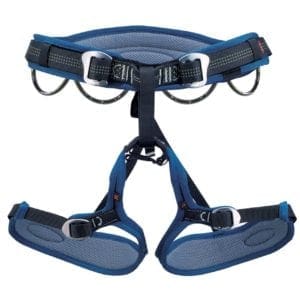
Photo by Trango
A good, cheap entry point for harnesses is the Trango Liberty. It features a wide, padded waist belt and leg loops, double-buckle waist, and roomy gear loops.
- Pros: Comfort, cost, gear storage, double-buckle waist straps ensure good fit
- Cons: The waist buckles double back manually, meaning you need to check them every time you climb
- Price: MSRP $69.95 at Trango
Petzl Sama Sport Harness (and female equivalent Luna Sport Harness)
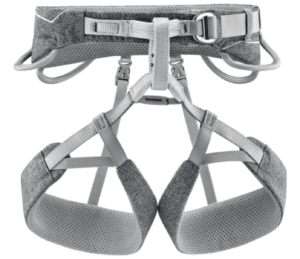
Photo by Petzl
The Petzl Sama (and female equivalent Luna) have received a facelift in the last few years, improving their comfort, gear holding, and reducing bulk.
- Pros: Very comfortable, cost, rigid and flexible gear loops, lightweight construction, EndoFrame design distributes weight when hanging
- Cons: Not as versatile for tasks like ice climbing and mountaineering (less important for our purposes)
- Price: MSRP $69.95 at REI
Black Diamond Solution Guide Harness (mens and womens)
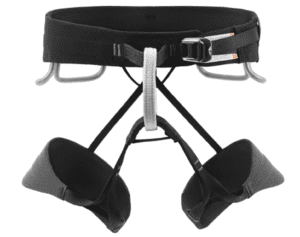
Photo by Black Diamond
The Solution Guide Harness is simple in design and effective in practice. It excels in trad and multi pitch climbing, providing all day comfort with roomy gear loops.
- Pros: Versatile, comfortable, durable, roomy gear loops, well-constructed
- Cons: More expensive, though not terribly so
- Price: MSRP $99.95 at REI
Black Diamond ATC + ATC Guide
The ATC, or Air Traffic Controller, is the go-to simple belay device. It gets the job done well and can accommodate ropes up to 11mm in diameter. The ATC Guide includes an extra loop for top belaying, an important feature for trad and multi pitch climbing. It’s a no-brainer for beginner climbers, with an affordable pricetag.
- Pros: cheap, effective, easy to use, allows for top belaying, can belay one or two climbers, large range of rope sizes compatible
- Cons: lacks more advanced features like rope camming
Black Diamond ATC – Big Air XP Belay Device Package (comes with a locking carabiner)
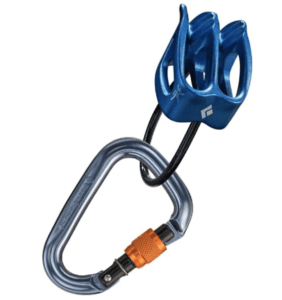
Photo by Black Diamond
- Price: MSRP $31.95 at REI
Option without a locking carabiner
Black Diamond ATC Guide Belay Device
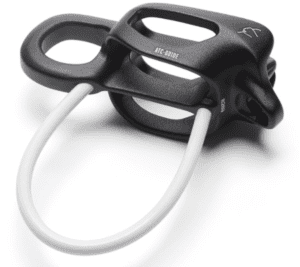
Photo by Black Diamond
- Price: MSRP $21.95 at REI
Personal Anchors
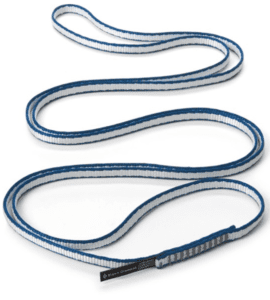
Indispensable for building anchors, slinging natural features or extending placements to reduce rope drag, these Black Diamond Dynex Runners are an essential part of any alpine climber’s rack. Photo by Black Diamond
A personal anchor setup can be as simple as a runner (or sling) made of nylon webbing and a locking carabiner. There are lots of personal anchor systems on the market that can do more (and also cost more) but for your first setup this will be sufficient. It’s a good idea to have two locking carabiners, one for your belay device and another for your personal anchor. Something like this Dynex Runner from Black Diamond paired with this simple screwgate locking carabiner from Trango will get the job done. Total cost: about $22. There are lots of types of locking carabiners to consider as well, but the one most people are familiar with is the screwgate. Because it’s straightforward and easy to use, we recommend starting there.
If you want to jump straight into something that is more adjustable and can do more, a personal anchor system (or PAS) like this one from Metolius will allow you to easily control how far you’re hanging from the anchor, as well as clipping onto multiple points at once. This is useful if you’re preparing to rappel down from an anchor. Using this instead of the sling mentioned above with the locking carabiner mentioned above would bring your total cost to around $46.
Rope
The climbing rope is what makes outdoor climbing possible. It’s the main piece of safety gear you use, and could save your life more than a few times during its tour of duty. But don’t be fooled, we’re not talking about your average cotton rope from the hardware store here. Climbing ropes take boatloads of design, engineering, and testing to work how they should. So what makes them so different? Let’s talk construction for starters.
Climbing ropes have two essential parts: the sheath and the core. The core gives the rope its elasticity, tension, and durability. The sheath is there to protect the core from wear and tear. What this amounts to is a rope that can bear tremendous amounts of weight, and do a few other cool things too. One of these is what we call “catch”. Climbing ropes are designed to stretch if shock loaded. This means that if you fall while attached to one end, the rope will let you down gently, “catching” you.
So what should you look for in a rope as a beginner? First of all, we’re looking at dynamic (stretchy) single ropes only. These will serve our purposes best for outdoor sport and trad climbing. We need something that can take a beating without weighing as much as something you might use in the climbing gym. You’re probably going to use it to climb a lot of single pitches at first, and you’re probably going to fall a fair amount. Something in the 9-10mm diameter range, that can take a lot of falls, and either 60 or 70 meters in length. A 70m rope will handle long climbs and multi pitch climbing better, but will be much heavier. What length you get will depend mostly on how you want to use it, so research climbing areas near you before making a decision.
Mammut Crag Classic 9.8
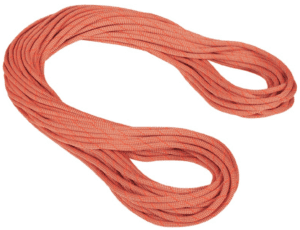
Photo by Mammut
The Crag Classic is a great example of a rope that can take a beating, and it’s a bargain compared to others on the market.
- Pros: can take seven to eight UIAA falls, cheap, has a middle mark
- Cons: Heaviest of the ropes listed here
- Price: MSRP $159.95 for 60m, $199.95 for 70m on REI
Black Diamond 9.4 Dry

Photo by Black Diamond
The Black Diamond 9.4 Dry is the whole package. It’s lightweight, will catch seven UIAA falls, has a long lifespan, and is dry treated to protect it from moisture.
- Pros: Lightweight, durable, will catch 7 falls, dry treated, has a middle mark
- Cons: Middle mark has been noted to wear off, cost
- Price: MSRP $264.95 at REI
Trango lotus 9.9

Photo by Trango
The Trango Lotus was designed to put up with extended heavy use, with a slightly larger diameter and dry treatment.
- Pros: Durable, long lasting, will catch 7 UIAA falls, good catch, has a middle mark
- Cons: Heavy, cost
- Price: MSRP $199.99 a Trango
Protection
“Protection” is a blanket term meaning anything on the wall you can clip your rope into. As you climb, you’ll continue clipping the rope onto higher and higher points, so that if you fall, the rope will catch you near where you’re climbing. Protection is what creates the biggest distinction between trad and sport climbing. In sport climbing, the main form of protection is a string of permanently-affixed bolts, each of which is connected to a sturdy metal ring. These bolts mark the route as you ascend. As you climb, you’ll take a quickdraw (two carabiners linked by a piece of webbing) and clip one end onto the bolt. The other end clips to the rope. Sport climbing is where most climbers start as it’s much easier conceptually, and in general, safer.
Trad climbing, on the other hand, allows you to take this concept and apply to just about any face of rock, no bolts required. Trad protection falls into two categories: active and passive. Active protection refers to pieces which contain moving parts, primarily the SLCD (spring-loaded camming device) or “cam”. Passive protection refers to pieces without moving parts. There are several types, including nuts, hexes, and chocks , but they all function in essentially the same way. Before the days of the cam, technical climbers would rely entirely on tiny pieces of metal wedged into cracks in the rock to arrest a fall. And surprisingly, it worked. Well enough, in fact, that passive protection is still very much in use today.
So how do these pieces of equipment actually work? To put it as simply as possible, both cams and passive pieces can be slipped into a crack or fissure in the rock and when weighted, will expand (or twist in the case of passive pieces) inside the crack, sticking in place. But remember that this is an extreme oversimplification of how trad gear placements actually work. Learning to place trad gear takes lots of time and skill, and depends on lots of variables relating to the type and shape of the rock. But, supposing you’ve done it correctly, once your cam or nut is securely embedded in the rock, you can clip an alpine quickdraw to it, and the rope to that, just like with a bolt.
Needless to say, equipment this complex has tons of minute differences and qualities. So if you’re looking to buy your first rack of gear, what should you look for? Something cheap, for starters. Secondly, we need a rack that’s versatile. Having cams with a large camming range will help us protect a larger spread of different scenarios. We’re also looking for passive pieces that work in two orientations (straight on or sideways) and do well in places cams don’t. Durable is always a plus, as is lightweight. We’re also going to stick to cams and passive pieces in the most common range of sizes for now. As you progress, you’ll probably want to add some micro cams and micro nuts to your rack, but for now sizes for cracks from .4” to 3” for cams should be good for beginners. You’ll also need a carabiner per piece of protection, and a quickdraw. For sport climbing, this will be much easier – 10-12 quickdraws will be all you’ll need.
Quickdraws
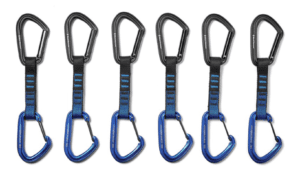
For the snag-free clipability of a HotForge carabiner combined with the wiregate functionality of a HotWire, build your rack with the Black Diamond HotForge Hybrid Quickpack set of 6 quickdraws. Photo by Black Diamond.
Quickdraws are universally useful. Sport climbers will use standard quickdraws, trad climbers will use alpine quickdraws. The quickdraw connects the rope to the wall while also keeping it at a distance to prevent it from dragging on the rock. This is especially true of alpine draws, which are longer to keep the rope from getting caught in cracks.
Standard Quickdraws
Standard quickdraws are fairly simple, though there are a few small details to keep in mind. Different gates on the carabiners can affect the weight and how easy they are to clip, but these are mostly minor differences. It’s most important to make sure the carabiner that clips to the wall has something to keep it from rotating on the wall, which can cause it to come unclipped while climbing. For beginners a hybrid quickdraw like the Black Diamond Hotforge Hybrid will do the job just fine without breaking the bank.
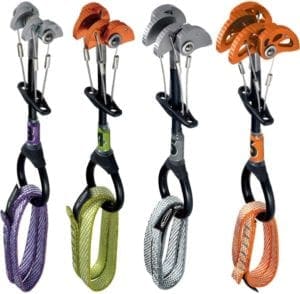
Alpine Draws
Alpine draws can be purchased or made at home with a couple pieces of gear. They’re essentially just a sling with carabiners clipped to either end. You can double up the sling to use it at half the length or use the whole length as the situation dictates. If you want to purchase some, the Trango Phase Alpine Draw is a cost effective option.
Active Protection
As stated above, you’ll want cams covering sizes from .4” to 3” to start. It’s a good idea to double up in the mid range and stick with cams that have a lot of overlap in how much they can expand. There are a million options available, but with these few you could build a competent first rack of cams.
Black Diamond C4 and Ultralight C4

Photo by Black Diamond
The Black Diamond C4 is probably the best value currently available for cams. They’re very durable, and have a double axle design which boosts their range by a lot.
Pros: Durable, great range, cheap
Cons: Heavy, rigid stems suboptimal for horizontal placements
Price: MSRP starting at $64.95 on REI
Black Diamond also makes an ultralight version of the C4, which solves many of the issues with the standard C4. They’re among the lightest cams on the market and are more ergonomic than the standard C4.
Pros: Great all-around performance, range, durability, lightweight
Cons: Expensive
Price: MSRP starting at $99.95 on REI
Trango Flex Cam
The Trango Flex Cam is a cheap, lightweight option that works well for doubling up in the mid range of sizes. They’re sold in a pack of four, covering the middling sizes you’ll need.
Pros: Cheap, good for doubling up, lightweight per unit
Cons: Trigger action isn’t as good, not as durable
Price: MSRP $194 on REI for four cams
Passive Protection
For starters, a rack of nuts will do you just fine. For simplicity’s sake, we’ll spare you the wide range of passive pieces available and stick to nuts, which are tried and true. Remember: our main goal in building our first rack is being as versatile as possible without breaking the bank. This will be helped by finding nuts that work well in their alternate positions (sideways when placed in the crack), and do well in places cams don’t like flares and pin scars.
DMM Alloy Offset

Photo by DMM
The overall winner for nuts is the DMM Alloy Offset. They work well used along either axis, making them versatile, and excel in places like pin scars where cams don’t.
Pros: Highly versatile, good compliment to cams, great in either orientation
Cons: Cables not very durable, not as many sizes
Price: MSRP $15.95 on REI
Black Diamond Stoppers
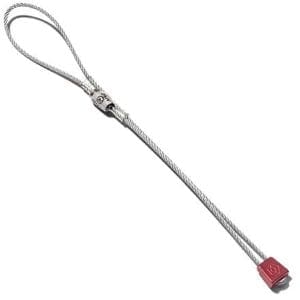
Photo by Black Diamond
The Black Diamond Stopper is so ubiquitous that some people refer to nuts as “stoppers”. They’re durable, easy to remove from cracks, have a good size range, and work well in their secondary position.
Pros: Durability, easy to clean, versatile, good size range, cheap
Cons: Not as good in pin scars, can slip or “walk” in cracks
Price: MSRP starting at $9.95 on REI
Metolius Ultralight Curve Nuts
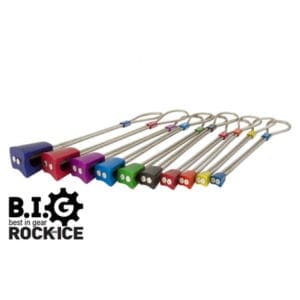
Photo by Metolius Climbing
The Metolius Ultralight Curve Nut does well where the BD Stopper does poorly. They do well in irregular cracks and don’t walk as much. They’re also a winner for versatility.
Pros: Great in either orientation, work well in irregular cracks, less walking
Cons: Harder to clean, cables can get kinked
Price: MSRP starting at $14.95 on Metoliusclimbing.com
Go Forth and Conquer
Feeling overwhelmed yet? It’s a natural side effect of going on a gear binge. And we’re really only looking at the tip of the iceberg here. You’ve got a lot to learn and a lot of time to learn it. But now you have a better idea of what you’ll need to get started. From here, it’s a matter of studying, practicing, and learning from others. Just keep making baby steps, and soon you’ll be on top of the world. Take that as literally as you’d like.


